SEARCH FINESCALE.COM

Enter keywords or a search phrase below:

T-55A Tamiya 1:35 Polish mid 60's

4164 views
26 replies
1 rating 2 rating 3 rating 4 rating 5 rating
  • Member since
    December 2017
T-55A Tamiya 1:35 Polish mid 60's
Posted by AdamKozlowski on Monday, December 18, 2017 6:05 AM

Hello!


My latest build, Tamiya T-55, RB Model barell, PE set from Eduard, Friul tracks and Eureka XXL metal ropes.

It's comission work for my friend's father, who served in Polish People's Army in mid 60's. They were receiving brand new T-55A's from polish factory in Labedy, and that type of tank I am trying to model. 

Fuel lines connecting fuel tanks, marker mount on the back, different pipe for crossing water obstacles are some of the features typical for polish T-55.

The build took me long time, I will start from the beginning.

 _DSC3638 by Adam Kozłowski, on Flickr

 _DSC3642 by Adam Kozłowski, on Flickr

 _DSC3645 by Adam Kozłowski, on Flickr

 _DSC3629 by Adam Kozłowski, on Flickr


  • Member since
    December 2002
  • From: Bury St Edmunds, Suffolk, England
Posted by Bish on Monday, December 18, 2017 8:23 AM

Some nice work on that, look forwardto seeing the paint on. Will have to check out those metal ropes.

I am a Norfolk man and i glory in being so


On the bench: Airfix 1/72nd Harrier GR.3/Fujimi 1/72nd Ju 87D-3

  • Member since
    December 2017
Posted by AdamKozlowski on Monday, December 18, 2017 5:13 PM

Eureka ropes are great, with nice resin ends.

Here is my first Black and White technique attempt:

 _DSC3662 by Adam Kozłowski, on Flickr

 _DSC3661 by Adam Kozłowski, on Flickr

And burnishing of Friuls (dont do it in steel container lol, it will eat all the reaction)

 _DSC3670 by Adam Kozłowski, on Flickr

The tank needs a base, so I've decided to make one. Never did a diorama, but I came to an idea to replicate polish concrete slabs - MON type. I made vector drawing in scale and ordered laser cut frame from plexiglas. Then I've filled it with plaster mixed with some sand. Plaster was of casting  (dentist) type, III grade, quite hard and quick drying.

 _DSC3748 by Adam Kozłowski, on Flickr

 _DSC3750 by Adam Kozłowski, on Flickr

  • Member since
    December 2002
  • From: Bury St Edmunds, Suffolk, England
Posted by Bish on Tuesday, December 19, 2017 2:02 AM

Interesting approach, not seen that black and white done before, but i am guessing its similar to black baseing. The inside of those tracks, have they been painted with rust or is that the burnishing liquid does that.

I am a Norfolk man and i glory in being so


On the bench: Airfix 1/72nd Harrier GR.3/Fujimi 1/72nd Ju 87D-3

  • Member since
    December 2017
Posted by AdamKozlowski on Tuesday, December 19, 2017 2:58 AM

Burnishing fluid did that. But I've messed using steel container to burnish, so I had some spots of clear metal, drybrushing with acrylic rust colours here and there did the job.

  • Member since
    December 2002
  • From: Bury St Edmunds, Suffolk, England
Posted by Bish on Tuesday, December 19, 2017 4:12 AM

Thanks, i didn't realise the liquid did that. I'm not a fan of rust on tracks myself, its a lot to cover over.

I am a Norfolk man and i glory in being so


On the bench: Airfix 1/72nd Harrier GR.3/Fujimi 1/72nd Ju 87D-3

  • Member since
    January 2015
  • From: Tumwater, WA.
Posted by M. Brindos on Tuesday, December 19, 2017 10:55 AM

I really like your chromatic approach to the b/w technique. It already appears to have a natural look to it. VERY well done.

- Mike Brindos "Lost Boy"

  • Member since
    November 2009
  • From: SW Virginia
Posted by Gamera on Tuesday, December 19, 2017 11:45 AM

Cool, I've only tried the dark green, medium green, and light green modulation. Looking forward to following along here. 

"I dream in fire but work in clay." -Arthur Machen


  • Member since
    August 2012
  • From: Parker City, IN.
Posted by Rambo on Tuesday, December 19, 2017 12:02 PM
wow really cool I just read a build log on a AT-AT walker that the builder used the black and white base coating on it and was planing on doing it on a AT-ST in my stash can't wait to see what it does on something besides gray like this.

Clint

  • Member since
    December 2017
Posted by AdamKozlowski on Wednesday, December 20, 2017 8:29 AM

I've painted it and added some more scratches after photos :)

Greens are a bit modulated to add some variation.

Numbers are hand painted.

And that's how it looks:

 _DSC3675 by Adam Kozłowski, on Flickr

 _DSC3676 by Adam Kozłowski, on Flickr

 _DSC3684 by Adam Kozłowski, on Flickr

 _DSC3686 by Adam Kozłowski, on Flickr

 _DSC3689 by Adam Kozłowski, on Flickr

  • Member since
    November 2009
  • From: SW Virginia
Posted by Gamera on Wednesday, December 20, 2017 8:39 AM

Nice! Love how the shading and modulation turned out. Looking forward to more.


PS: When you said the numbers are hand painted you mean you painted them with a brush instead of using a mask and spraying them? I'm again impressed, mine would have looked horrible. 

"I dream in fire but work in clay." -Arthur Machen


  • Member since
    December 2017
Posted by AdamKozlowski on Wednesday, December 20, 2017 8:41 AM

Gamera
Nice! Love how the shading and modulation turned out. Looking forward to more.   PS: When you said the numbers are hand painted you mean you painted them with a brush instead of using a mask and spraying them? I'm again impressed, mine would have looked horrible. 


Thanks!

Yes, brush painted but with mask I've cut.

  • Member since
    December 2002
  • From: Bury St Edmunds, Suffolk, England
Posted by Bish on Wednesday, December 20, 2017 9:11 AM

I do like that. After seeing the previous pics, i thought it would be more heavily modulated, i am really glad it isn't. Nice job on the numbers as well.

I am a Norfolk man and i glory in being so


On the bench: Airfix 1/72nd Harrier GR.3/Fujimi 1/72nd Ju 87D-3

  • Member since
    December 2017
Posted by AdamKozlowski on Wednesday, December 20, 2017 2:31 PM

I am not a bit fan of heavy modulation. For me, it is too dramatic, and unrealistic, but I know the purpose of that.

And here is first weathering stage:

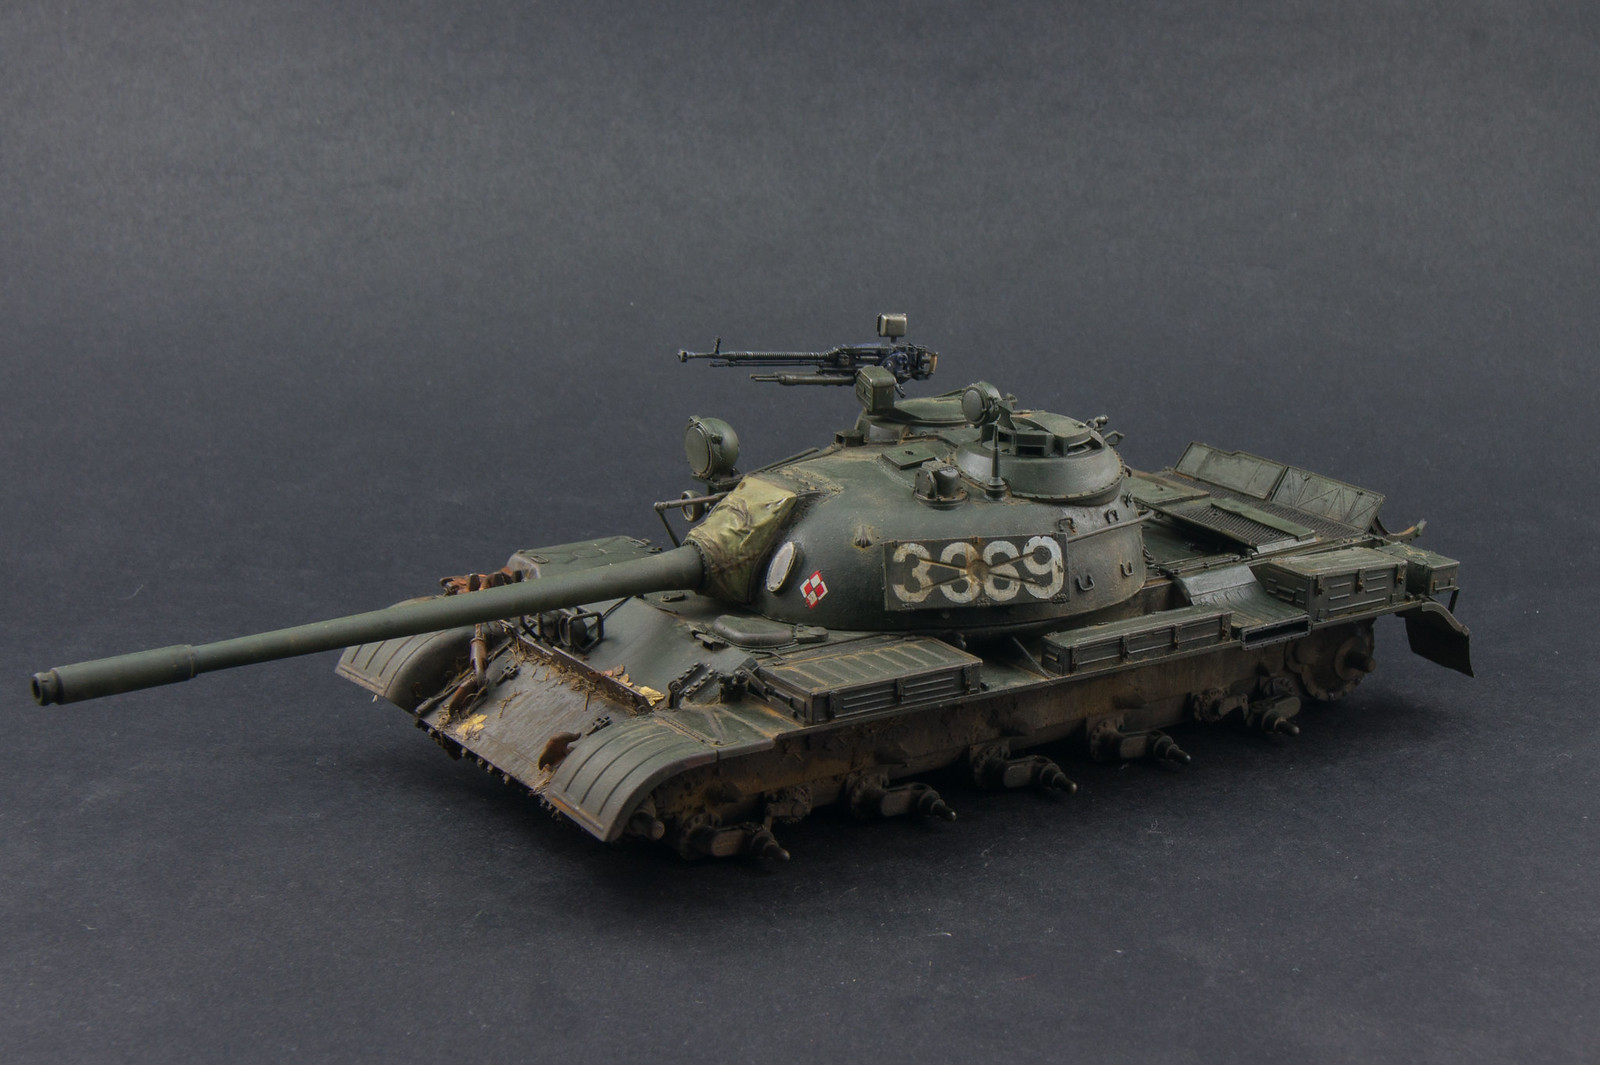
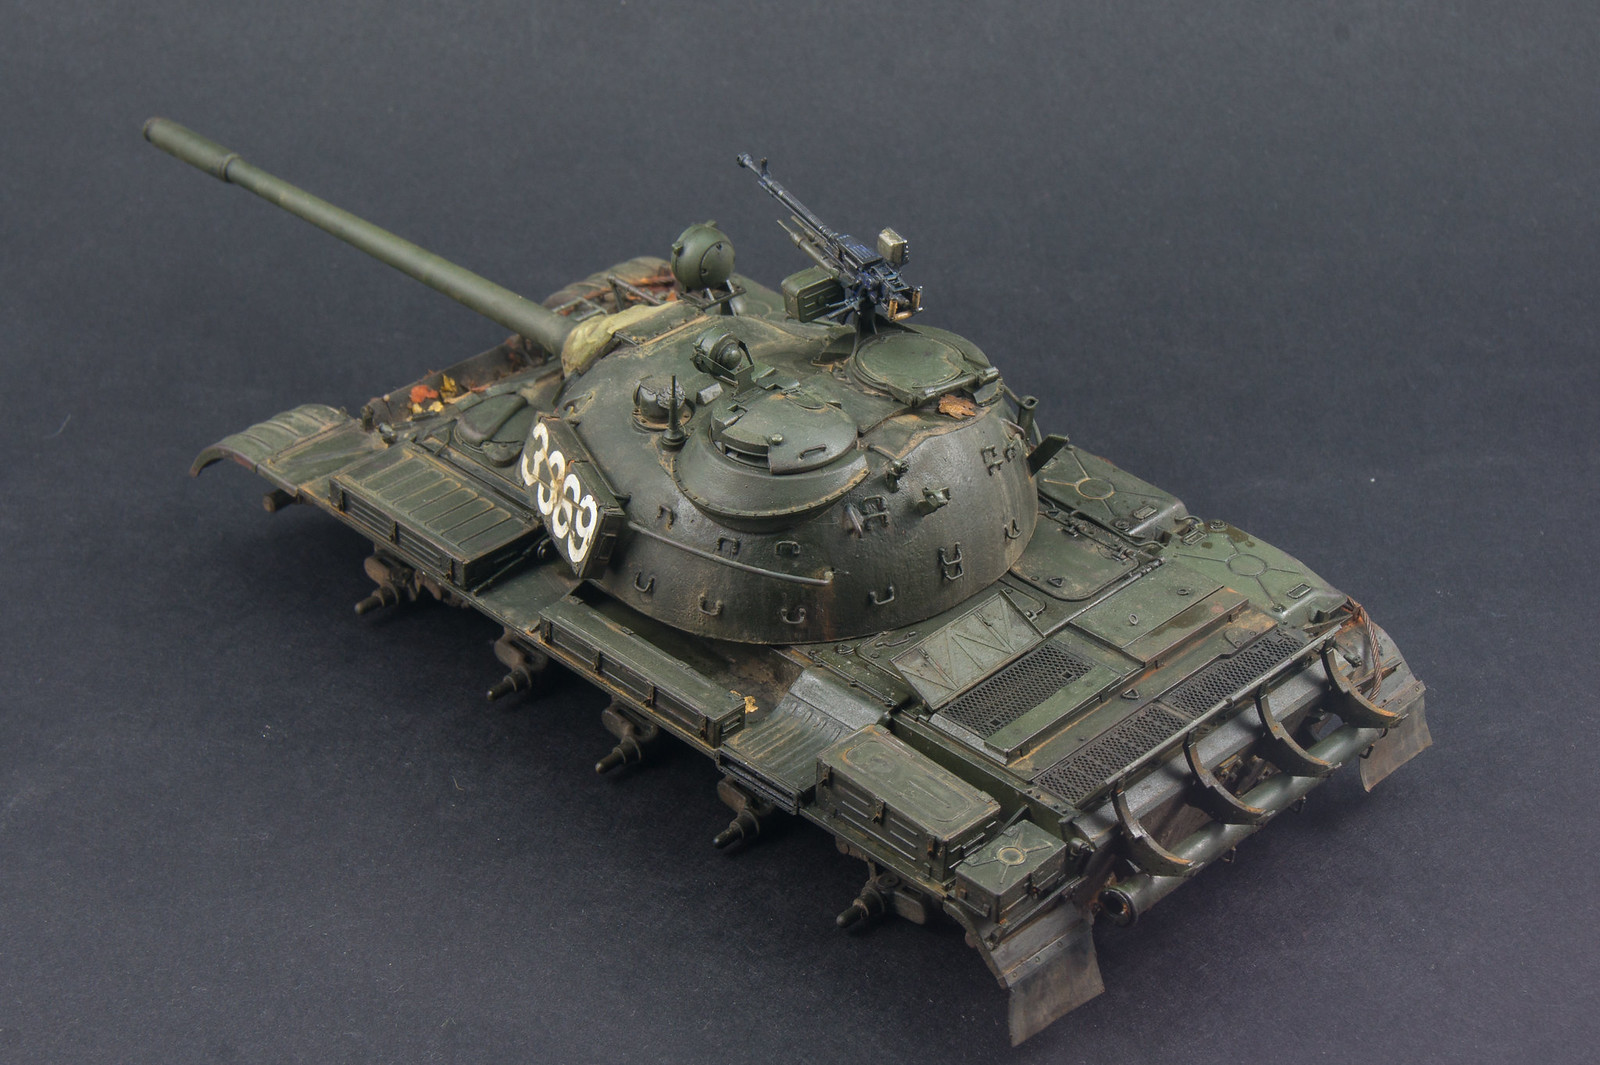
 _DSC3716 by Adam Kozłowski, on Flickr

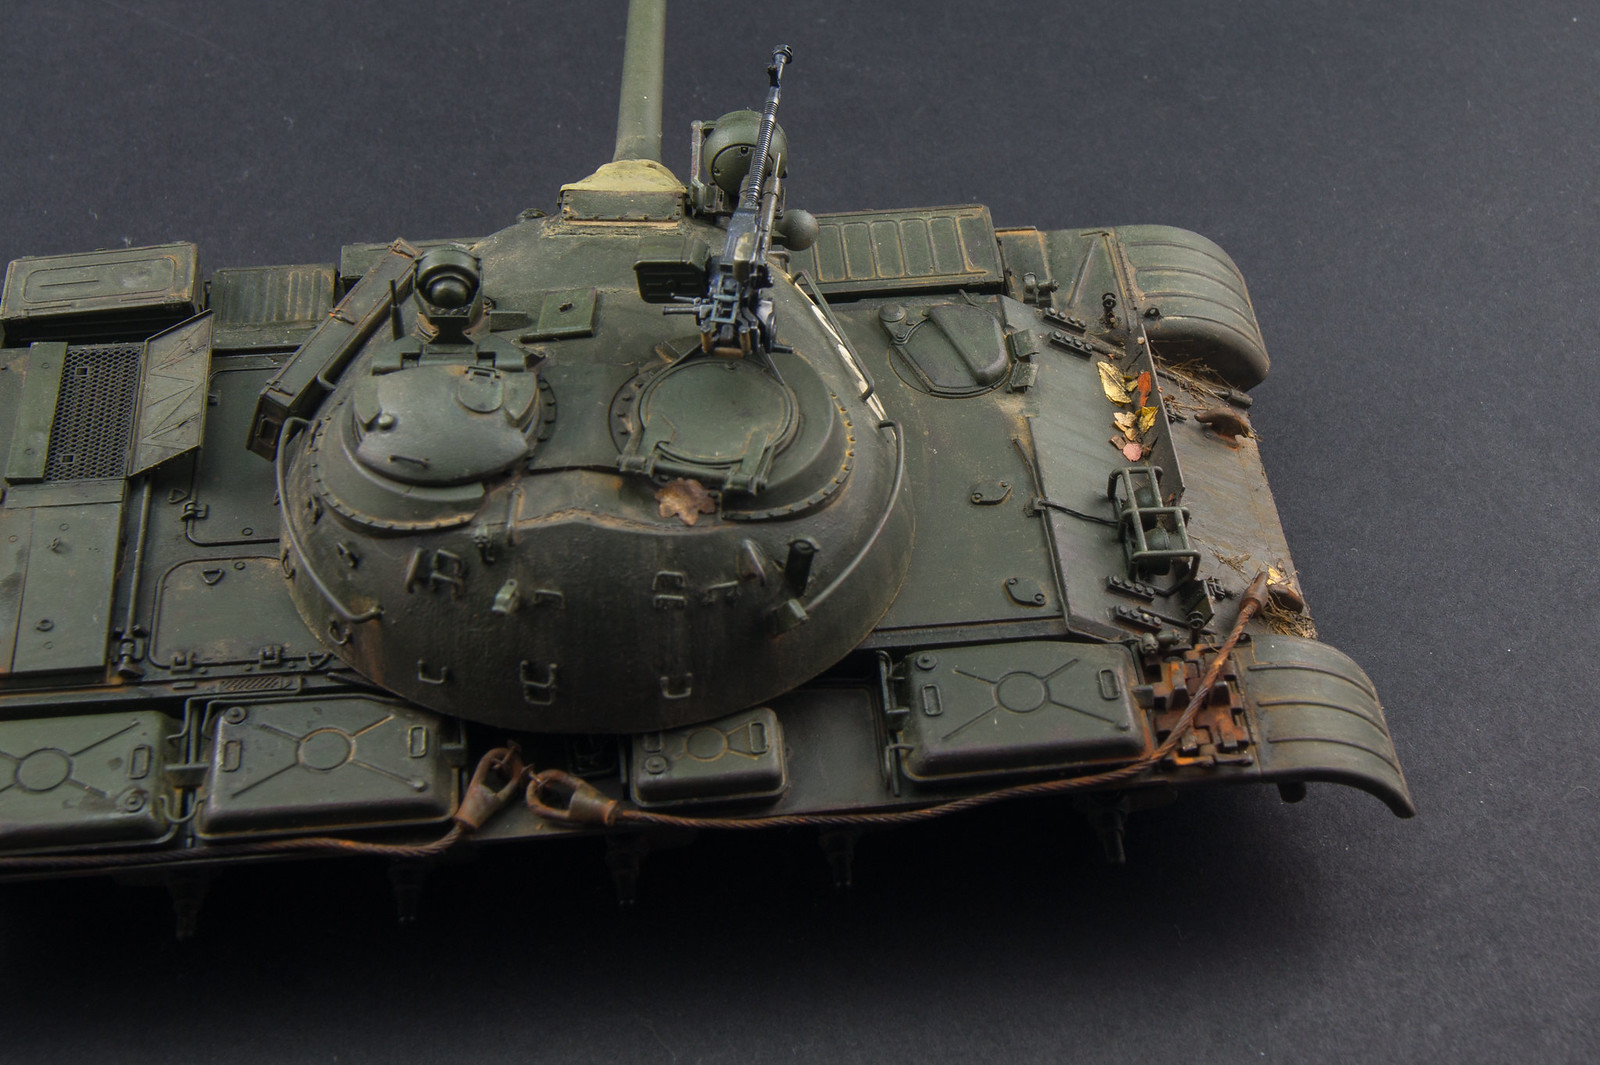
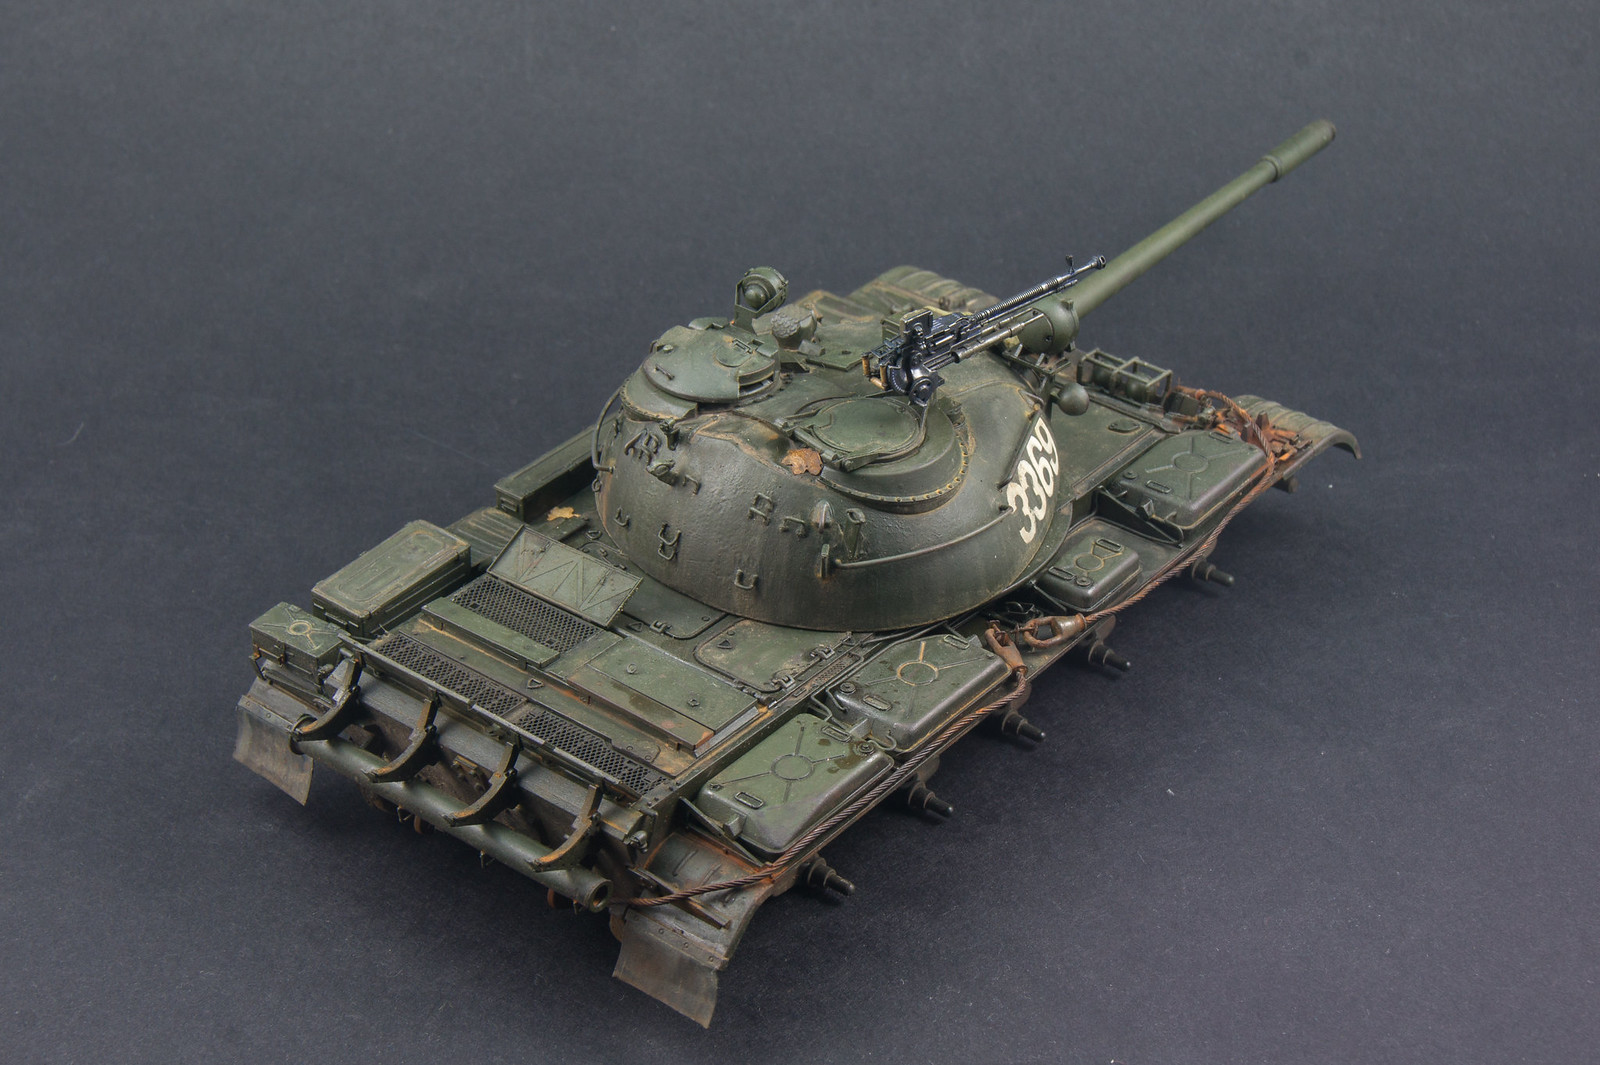
 _DSC3717 by Adam Kozłowski, on Flickr

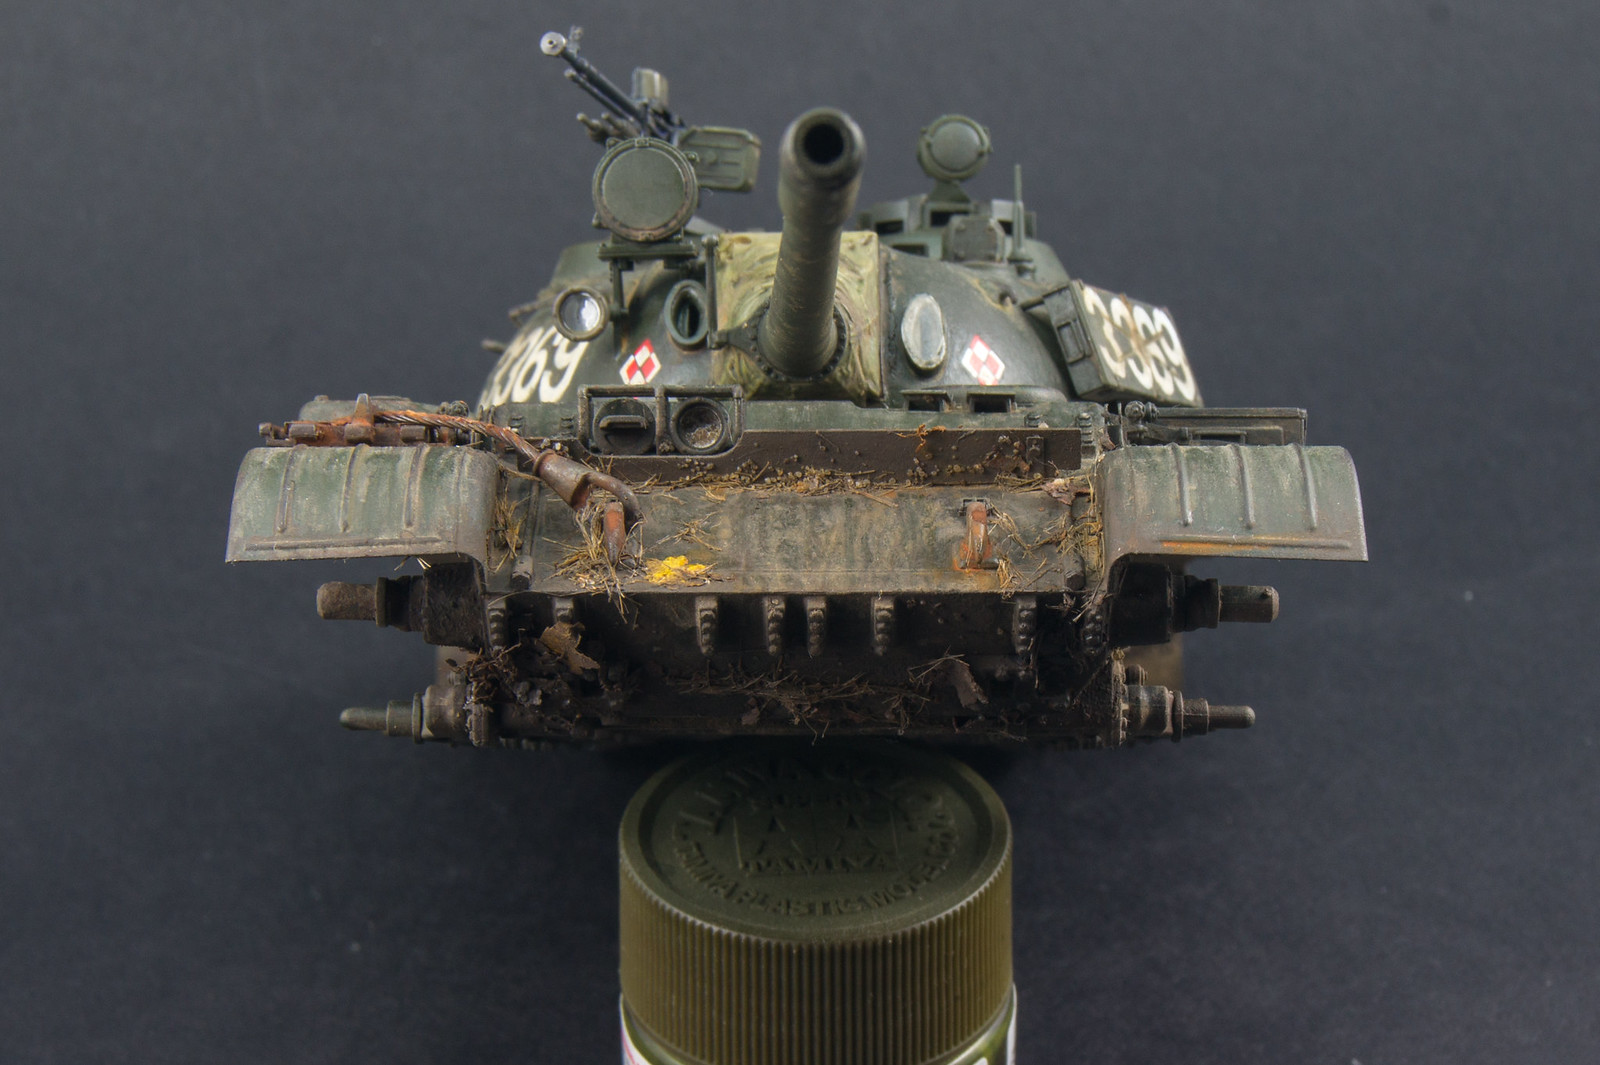
 _DSC3719 by Adam Kozłowski, on Flickr

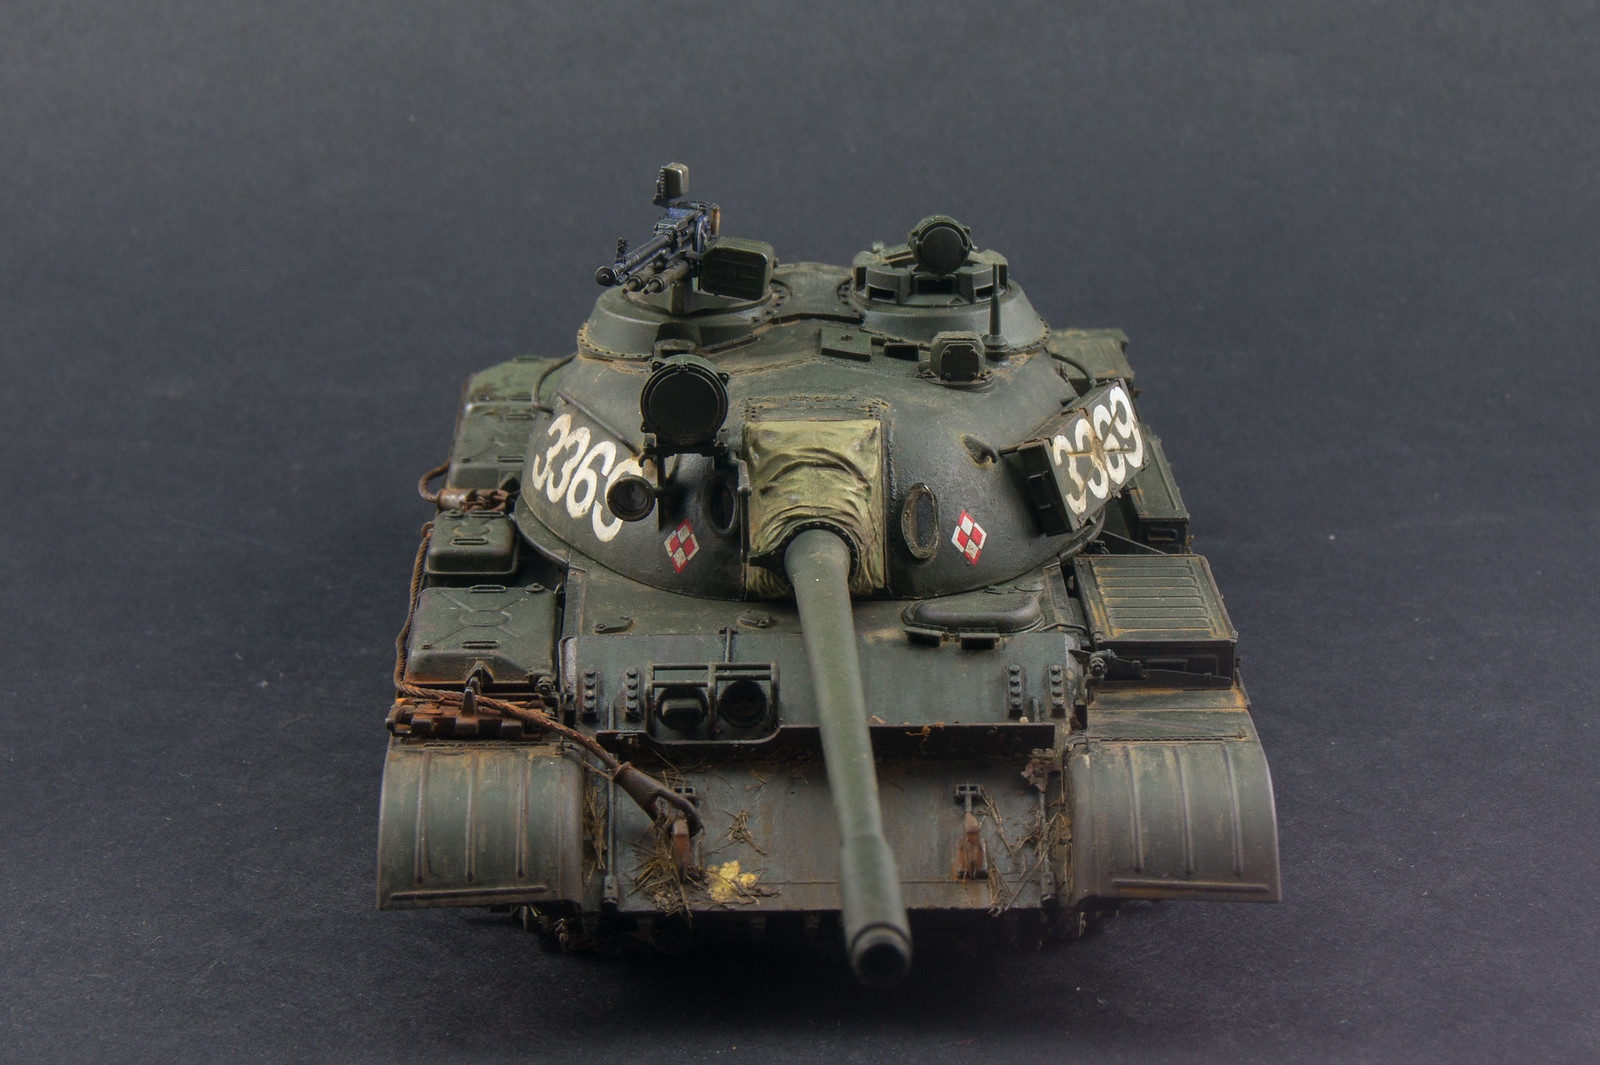
 _DSC3729 by Adam Kozłowski, on Flickr

 _DSC3730 by Adam Kozłowski, on Flickr

 _DSC3734 by Adam Kozłowski, on Flickr

Wheels:

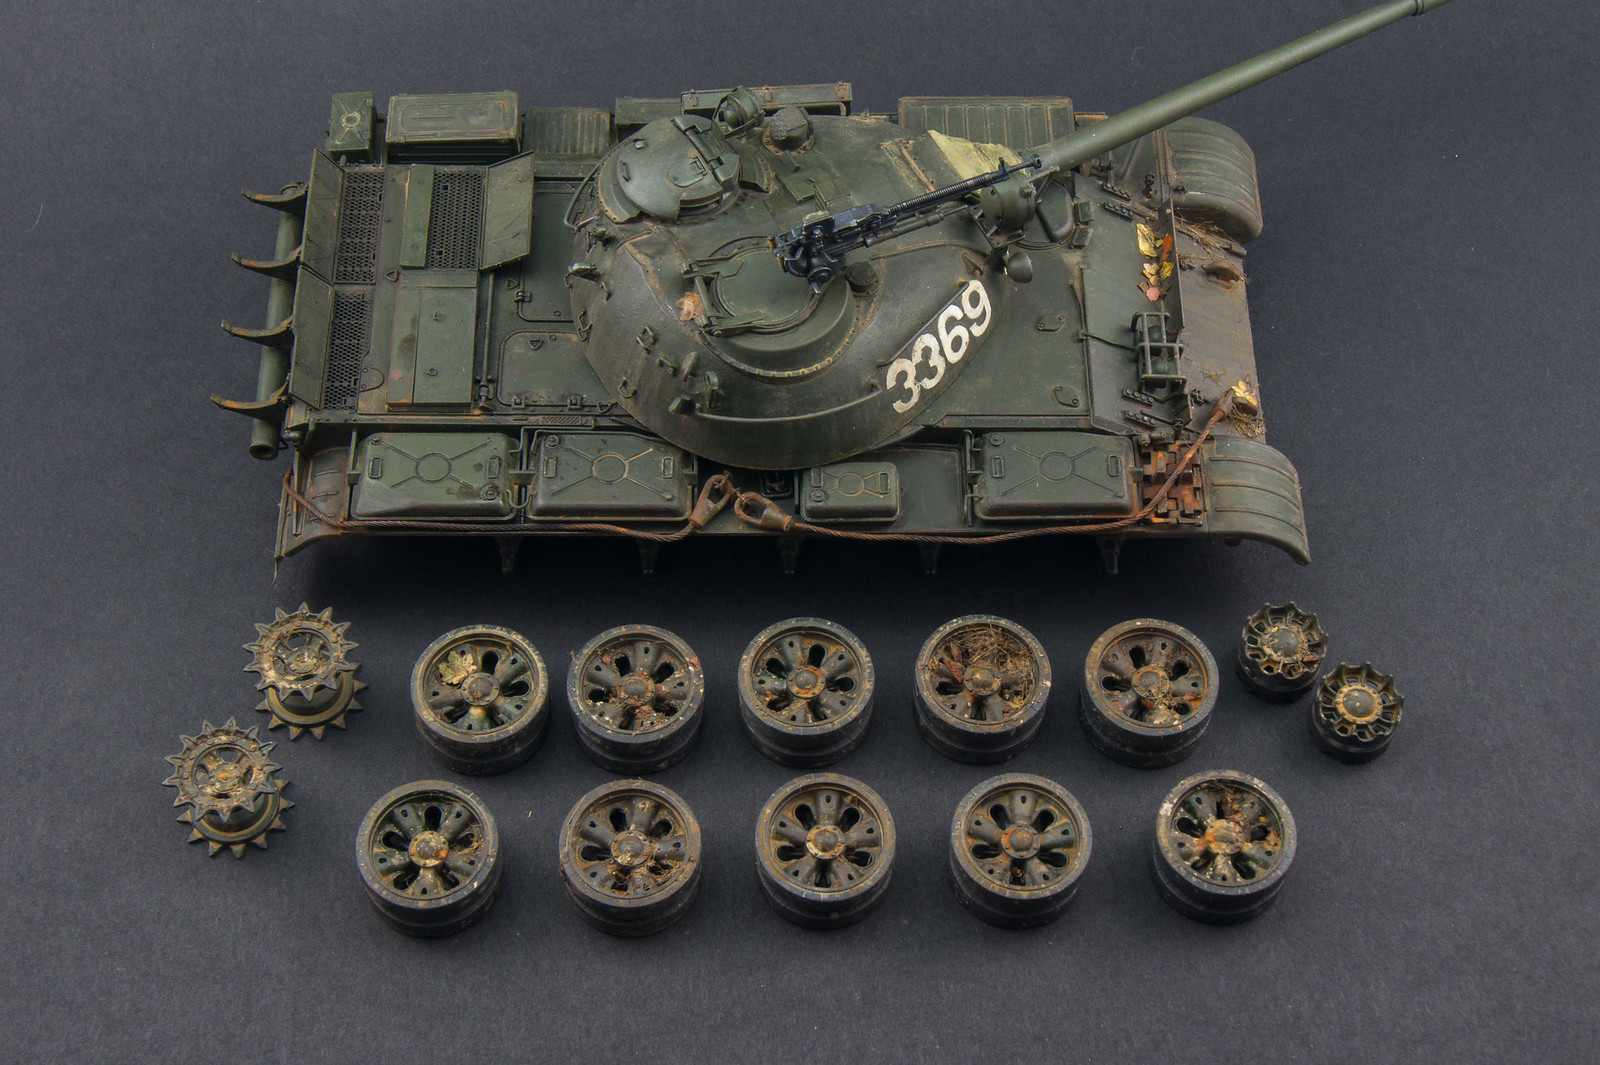
 _DSC3737 by Adam Kozłowski, on Flickr

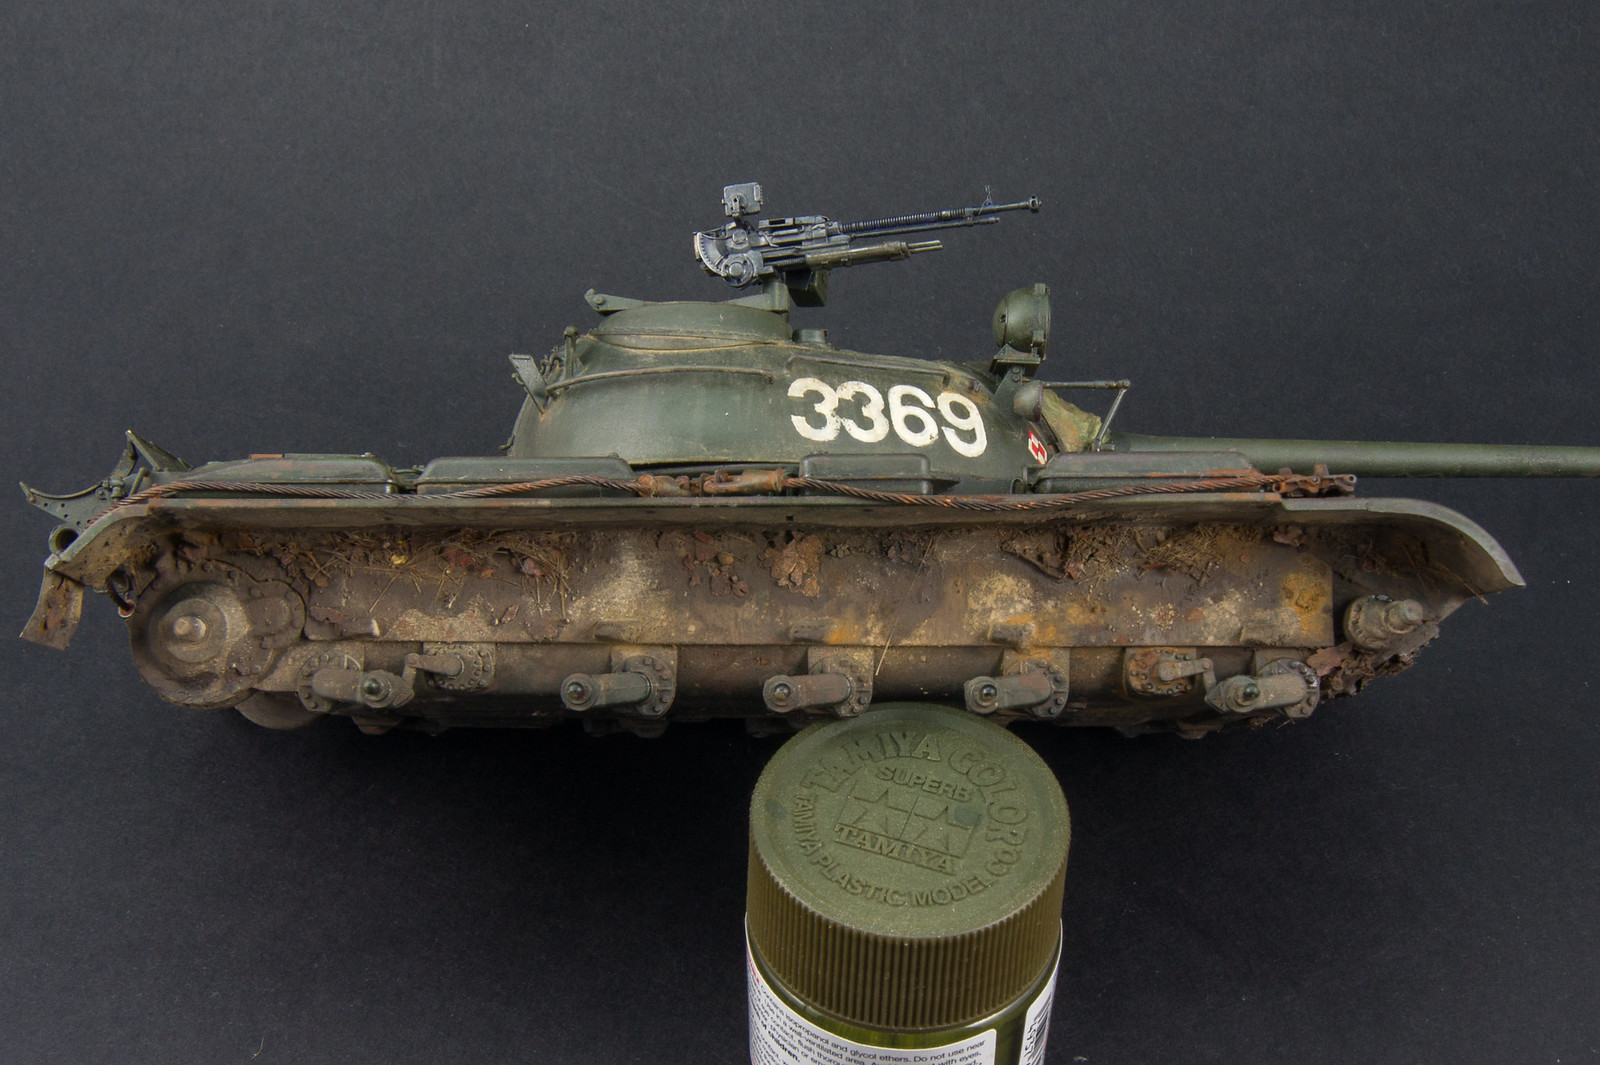
And what will not be visible, but I will know there is some action behind the tracks ;)

 _DSC3709 by Adam Kozłowski, on Flickr

 _DSC3711 by Adam Kozłowski, on Flickr

Concrete took a lot of splatted Tamiya paints, some airbrushing, washes, oils, everything in random order - plaster is great because it soaks it all in minutes so work is fast and easy.

 _DSC3753 by Adam Kozłowski, on Flickr

  • Member since
    December 2002
  • From: Bury St Edmunds, Suffolk, England
Posted by Bish on Wednesday, December 20, 2017 3:20 PM

Same here, i much prefer realistic builds. And that is coming on very nice. Some really nice effects around the small raised pieces and really like what you have done on the lwer hull.

Thos concrete slabs are really nice as well. I do like that broken section with the reinforcing rods showing.

I am a Norfolk man and i glory in being so


On the bench: Airfix 1/72nd Harrier GR.3/Fujimi 1/72nd Ju 87D-3

  • Member since
    January 2015
  • From: Tumwater, WA.
Posted by M. Brindos on Wednesday, December 20, 2017 9:22 PM

That is just gorgeous work you've done. That chromatic underlayer with that subtle modulation is perfection.

It just looks natural! That's the best finish for realism.

That is a process I have not perfected yet and your weathering is spot on too.

Its a pleasure to watch your progress, Adam.

- Mike Brindos "Lost Boy"

  • Member since
    December 2017
Posted by AdamKozlowski on Thursday, December 21, 2017 4:06 AM

Thank You guys! I am happy you like it.

And here is completed tank:

 _DSC3823 by Adam Kozłowski, on Flickr

 _DSC3824 by Adam Kozłowski, on Flickr

 _DSC3826 by Adam Kozłowski, on Flickr

 _DSC3818 by Adam Kozłowski, on Flickr

 _DSC3827 by Adam Kozłowski, on Flickr

And the base:

 _DSC3814 by Adam Kozłowski, on Flickr

Some details:

 _DSC3812 by Adam Kozłowski, on Flickr

 _DSC3810 by Adam Kozłowski, on Flickr

Tank on base:

 _DSC3804 by Adam Kozłowski, on Flickr

 _DSC3799 by Adam Kozłowski, on Flickr

 _DSC3809 by Adam Kozłowski, on Flickr

Project took me almost 4 months, but it was done from time to time, I am happy with the result, and see place for improvement, it also important that I've managed to finish it in 2017 :)

  • Member since
    November 2009
  • From: SW Virginia
Posted by Gamera on Thursday, December 21, 2017 7:49 AM

Oh wow, now that's an amazing job on both the tank and base! Great job sir! Yes

"I dream in fire but work in clay." -Arthur Machen


  • Member since
    December 2002
  • From: Bury St Edmunds, Suffolk, England
Posted by Bish on Thursday, December 21, 2017 9:05 AM

I love it. The tank is really well done, very realistic, and the base is superb.

Stunning build.

I am a Norfolk man and i glory in being so


On the bench: Airfix 1/72nd Harrier GR.3/Fujimi 1/72nd Ju 87D-3

  • Member since
    May 2009
  • From: Poland
Posted by Pawel on Thursday, December 21, 2017 11:55 AM

Hello Adam!

It's a beauty! I like it a lot and I'm sure the customer will love it.

Can you tell us some more what did you use for the vegetation - grass, leaves and mushrooms and so on?

Thanks for sharing and have a nice day

Paweł

All comments and critique welcomed. Thanks for your honest opinions!

www.vietnam.net.pl

  • Member since
    December 2017
Posted by AdamKozlowski on Thursday, December 21, 2017 12:24 PM

It is for my friends father :)

Vegetations are Paint Forge grasses, few types, leaves are from natural leaves cut with RP Toolz cutter. Great tool, for price of 1 or 2 boxes of ready leaves you got infinite amount. I have used also hemps for hydraulic repairs. They can be cut and plant using white glue. Good way to add some variation. They can be painted later with any colour to fade in the rest.

For glueing the leaves I used white glue and CA in some spots. The first layer of leaves was rough, mixed and crushed together in fingers to give the base. Then I have sprayed over Tamiya smoke with some clear red and yellow for contrast ans damp effect from glossy paints. Then overlayer of leaves was glued with CA one by one to fine detail. Here and there I have added some shadow with oil wash of dark colour.

For moss between concrete I've used fine sponges, I have tried to do moss with velvet, but it was bad idea. Small sponge of dark colour painted with green oils did the job.

Mushrooms are from putty, painted with oils even without primer. Just 5 minute job.

I have put a lot of oil washes over the base. Some green to simulate mossy ground, some brown, some blacks. Work till effect is satisfactory and stop then :)

  • Member since
    May 2009
  • From: Poland
Posted by Pawel on Thursday, December 21, 2017 3:02 PM

Hello!

Thanks for the info! I suspected you might have used that leaf tool, it sure is a funky little device! You sure got the right effect here. Thanks again and have a nice day

Paweł

All comments and critique welcomed. Thanks for your honest opinions!

www.vietnam.net.pl

  • Member since
    May 2015
Posted by Griffin25 on Thursday, December 21, 2017 3:06 PM

Wow that looks awesome. Great job bud! Love the ground work. 


Griffin

  • Member since
    December 2010
  • From: Salem, Oregon
Posted by 1943Mike on Thursday, December 21, 2017 11:51 PM

This is really inspiring! Just the kind of work that motivates me to do better!

Adam, you've done brilliant work! I'm very, very impressed.

P.S I've ordered the Oak leaf maker you referenced above ... I imagine I'll be able to use it in almost any north American or European diorama.

Mike

"Le temps est un grand maître, mais malheureusement, il tue tous ses élèves."

Hector Berlioz

  • Member since
    January 2006
  • From: California
Posted by SprueOne on Friday, December 22, 2017 11:23 AM

Very nice finish. Thanks for sharing all the WIP pictures. The tank looks great and I especially like how the base came out.

Anyone with a good car don't need to be justified - Hazel Motes


Iron Rails 2015 by Wayne Cassell Weekend Madness sprueone

  • Member since
    December 2017
Posted by AdamKozlowski on Wednesday, December 27, 2017 8:42 AM

Thank You for good words! :)

  • Member since
    September 2005
  • From: Groton, CT
Posted by warshipguy on Wednesday, December 27, 2017 3:17 PM

Stunning work!  I love the base!  But, I have to admit, I am not familiar with color modulation.

Bill Morrison

JOIN OUR COMMUNITY!

Our community is FREE to join. To participate you must either login or register for an account.

SEARCH FORUMS
FREE NEWSLETTER
By signing up you may also receive reader surveys and occasional special offers. We do not sell, rent or trade our email lists. View our Privacy Policy.