SEARCH FINESCALE.COM

Enter keywords or a search phrase below:

Italian Army Fiat Van-Finito!

4144 views
40 replies
1 rating 2 rating 3 rating 4 rating 5 rating
  • Member since
    June 2008
Italian Army Fiat Van-Finito!
Posted by lewbud on Tuesday, July 2, 2019 4:50 AM

I think this is first time I've ever posted a build here, so here goes. I was asked to build this for our local chapter entry for this year's IPMS Nats in Chatanooga. Normally I don't build armor, but my friend who is ramrodding the thing knows that if it's weird enough I'm in. This year's theme is the DAK and first he hooked me with the idea of a kettenkrad towing a field kitchen (he says he has a picture of one, but I have yet to see it), then at Christmas he showed me online pics of the new Bronco Italian van (based on the Fiat Topolino sedan). I told him that once I got the kettenkrad done, if there was time, I'd do this one. About a month ago, he showed up at our weekly get together with the kit in hand.  My first reaction was I"ve got 1/43 scale cars bigger than this and the second was that it was too cute not to build. So I took it home. I started on it a couple of weeks ago, but started gluing stuff together yesterday.  I started with the body. The body comes in it's own sturdy box, which is great because that's what it'll ride in to the Nats.  Inside the cargo areas are three ribs which were used to mount things on and provide some rigidity. Unfortunately, they produced visible depressions which must be sanded out before you paint. Here is a pic of the body with them already sanded out.

The first parts I glued together (not pictured) were the rear doors and their inner framework. Unfortunately, the only tangible mounting points are the hinges. I say unfortunately because as I was removing the little pour nibs, I wasn't paying attention and accidentaly cut them off of one door (strategic use of strip styrene will be needed for both). The next were some wooden slats that mount to the aforementioned ribs. I don't have a good picture of them, but they are visible here (along with some nasty mold release marks). If you build this, be very careful as they are fragile and can be easily broken. Fortunately, this didn't happen to me.

I'm only going to worry about the four in the cab and the two under the fenders. I thought I had some pics of the bonnet vents (the trapezoidal shapes before the hood opening), but I guess they'll have to wait until next time.  I can't even stiffen the body by installing the firewall until I build the chassis so I can locate it properly. I forgot how much fun Bronco kits are. More pics tomorrow.

Buddy- Those who say there are no stupid questions have never worked in customer service.

  • Member since
    November 2009
  • From: SW Virginia
Posted by Gamera on Tuesday, July 2, 2019 7:39 AM

That is really cool! As I've said before I love seeing different stuff here! And looks like a nice kit! 

"I dream in fire but work in clay." -Arthur Machen


  • Member since
    November 2008
  • From: Far Northern CA
Posted by mrmike on Tuesday, July 2, 2019 1:39 PM

"Too cute not to build" is the right description! Looking forward to your next installment....

  • Member since
    June 2008
Posted by lewbud on Wednesday, July 3, 2019 2:05 AM

Part 2

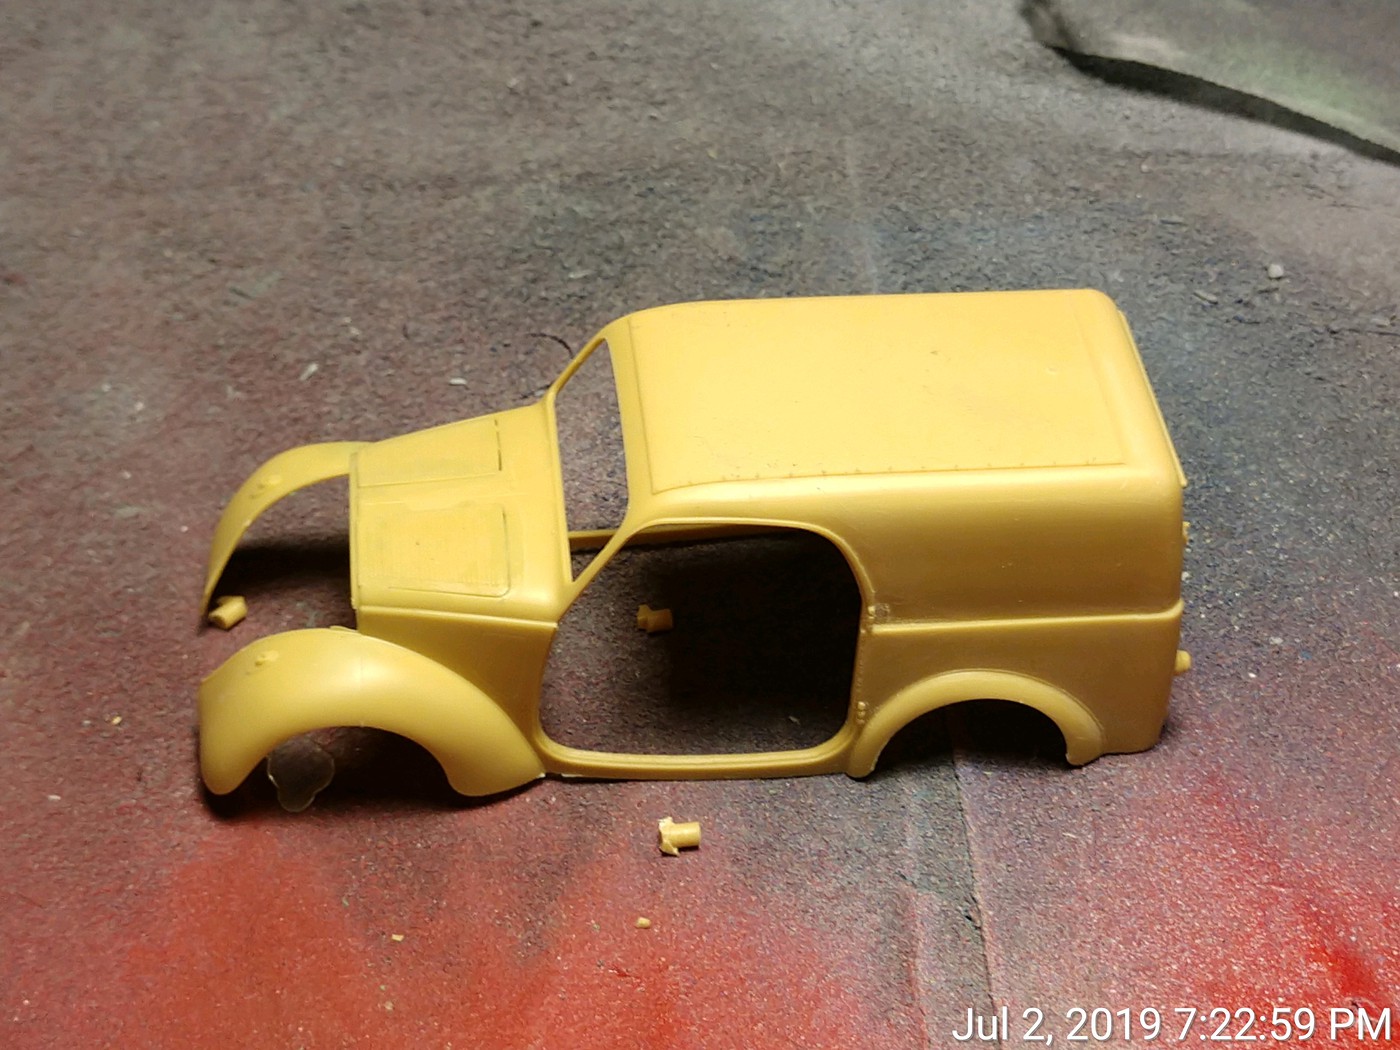
I got the bonnet vents glued in. They can be displayed in the open or closed position. However, there is no way to mount them! They have no pins nor is there a lip to provide a gluable surface. I guess you could do a friction fit with tube glue, but that's just a recipe for disaster. Strip styrene to the rescue!

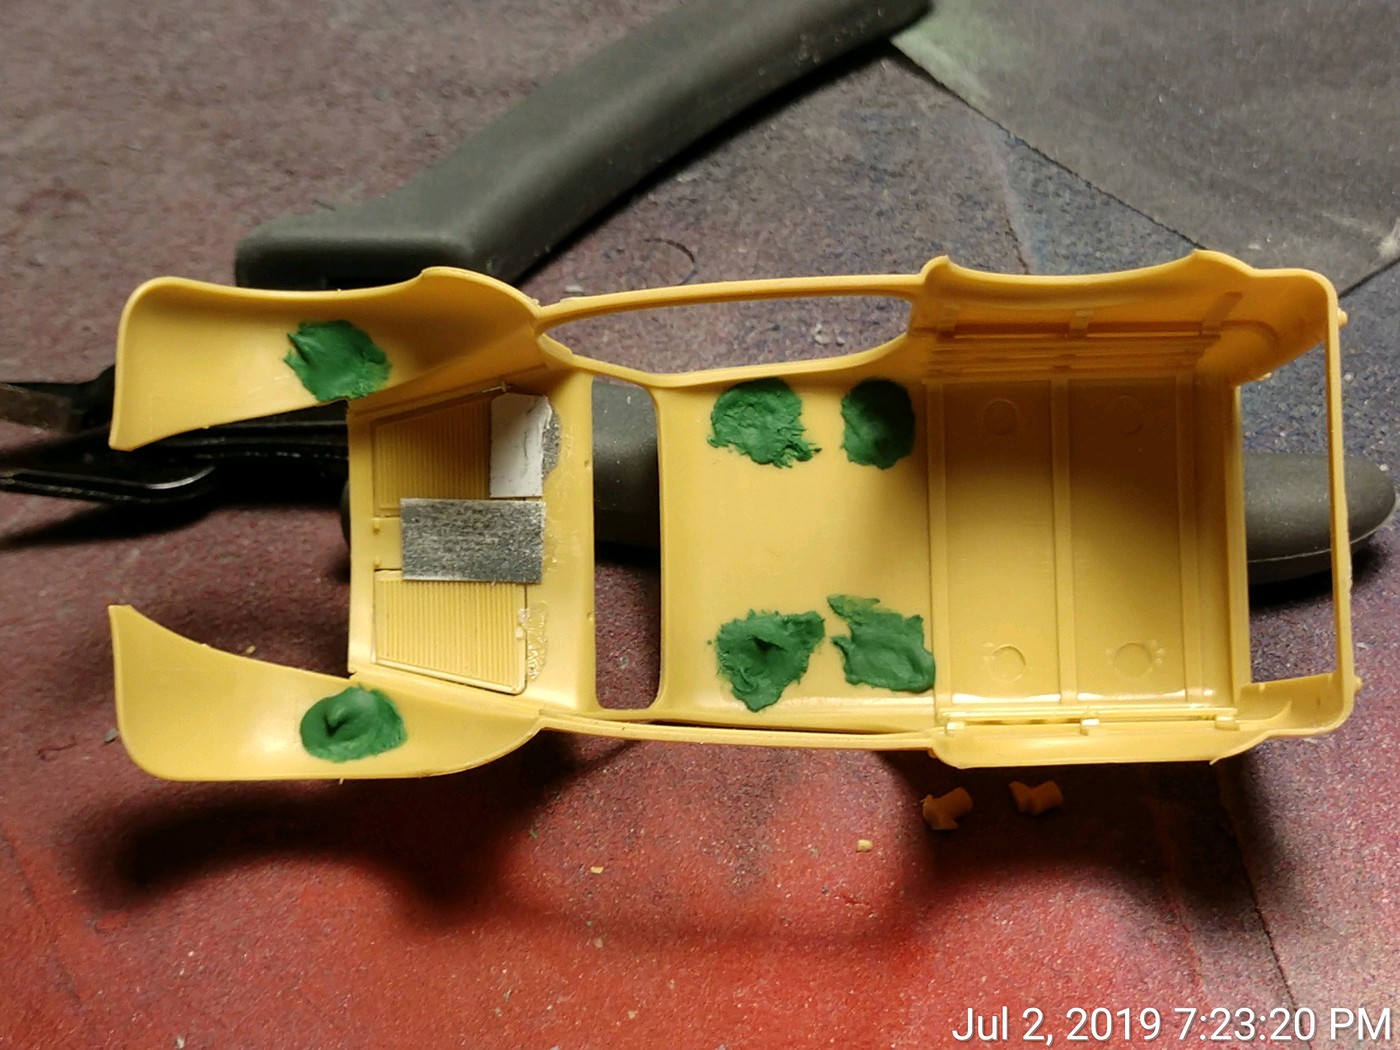
Went a littl heavy on the green stuff, but most of it will go away. Here's what they look like installed.

I'll probably have to remove some of the support material to fit the firewall, but I won't know where to locate it until the frame is completed. This is not your everyday car build.  I've still got the ejector pin marks to sand, along with a couple of mold lines on the fenders and some flash, then I'm done with the body for a while.

In looking at the instructions, something tells me Bronco found some film from the Fiat factory showing how these vans were built and that's how they designed the kit. So, in a very unmodeler like way, I decided to follow the instructions. I will say this for Bronco, the instructions for this kit are waaaay better than the instructions for my first attempt at a Bronco kit, the Staghound.  Step one is the engine. Fairly straight forward, except there are few positive parts locating pins and holes for things such as the intake and exhaust manifolds, air cleaner, upper and lower radiator tubes/hoses. Also, they subscribed to the mantra where if one piece is good, two or three would be better. 
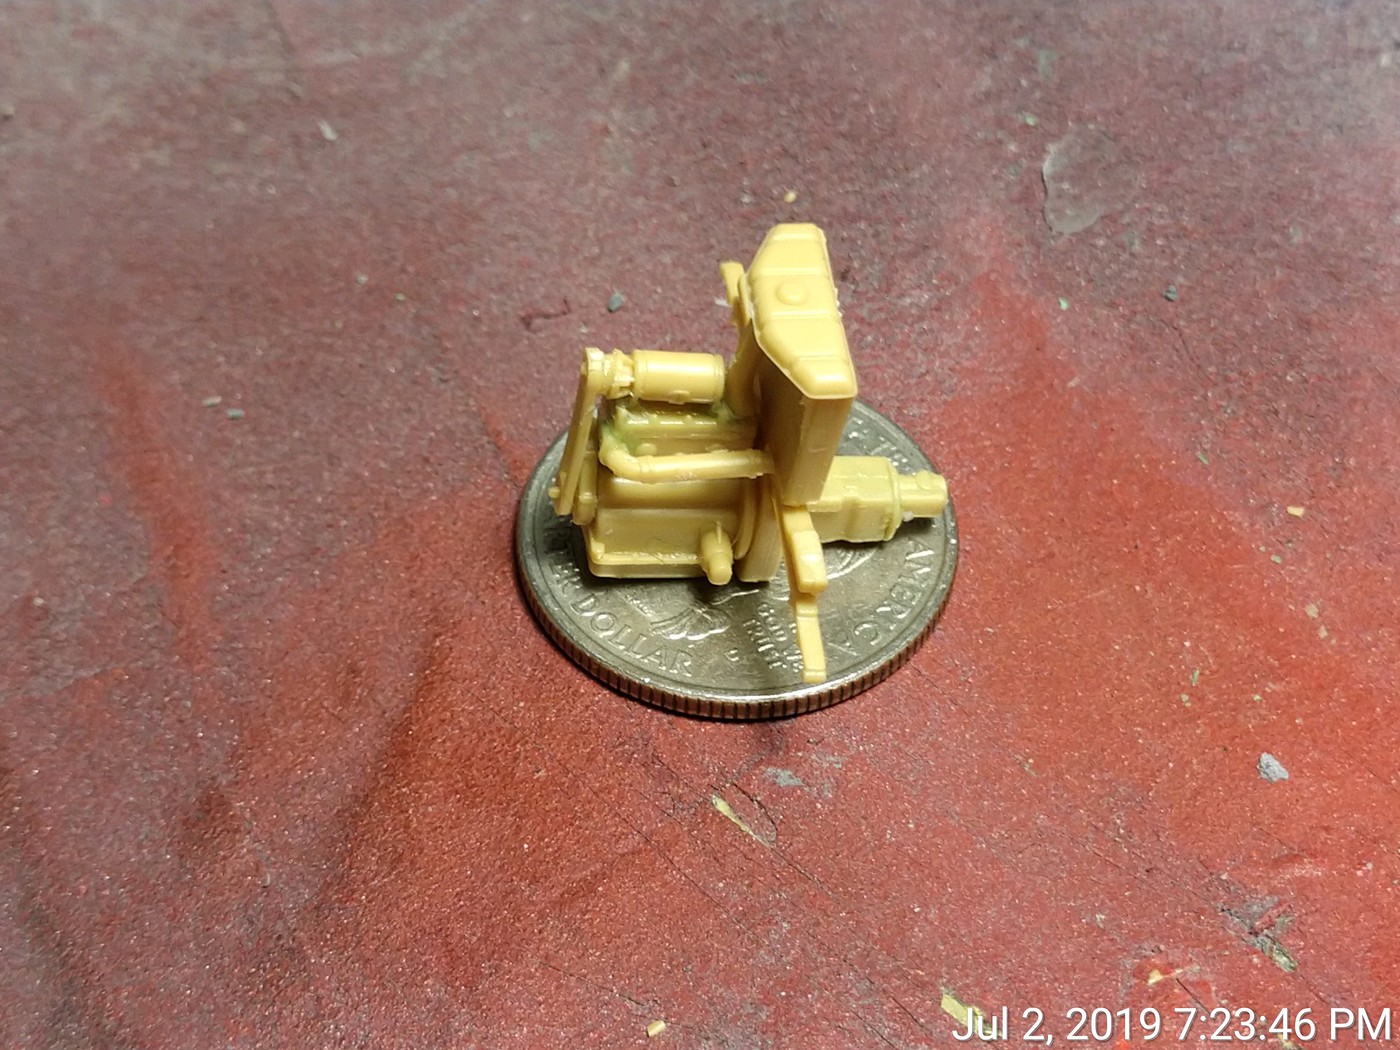
The radiator is two pieces, not bad because they are both large enough to find when dropped. The generator on top of the engine is three TINY pieces, one that mounts to the fan belt pulley, a center section, and then the nose which has the shaft to mount the fan. Which piece did the carpet monster eat? The nose, didn't even bother to look for it (the engine won't be seen anyways). So I got everything together and called it a day as it was time to get ready for work. Did I mention this thing is small? Here's the finished engine.

Had I done a little more research, I would have found that the radiator mounts to the firewall and not the suspension as shown in the instructions. Also, the pulley system is a three pulley system with the third driving a water pump mounted where the lower radiator hose is. Part of me thinks I should fix the radiator, part of me says don't worry about it as it won't be seen. I think I'll have to fix it to get everything to fit properly. Time will tell. Tomorrow I begin work on the suspension.

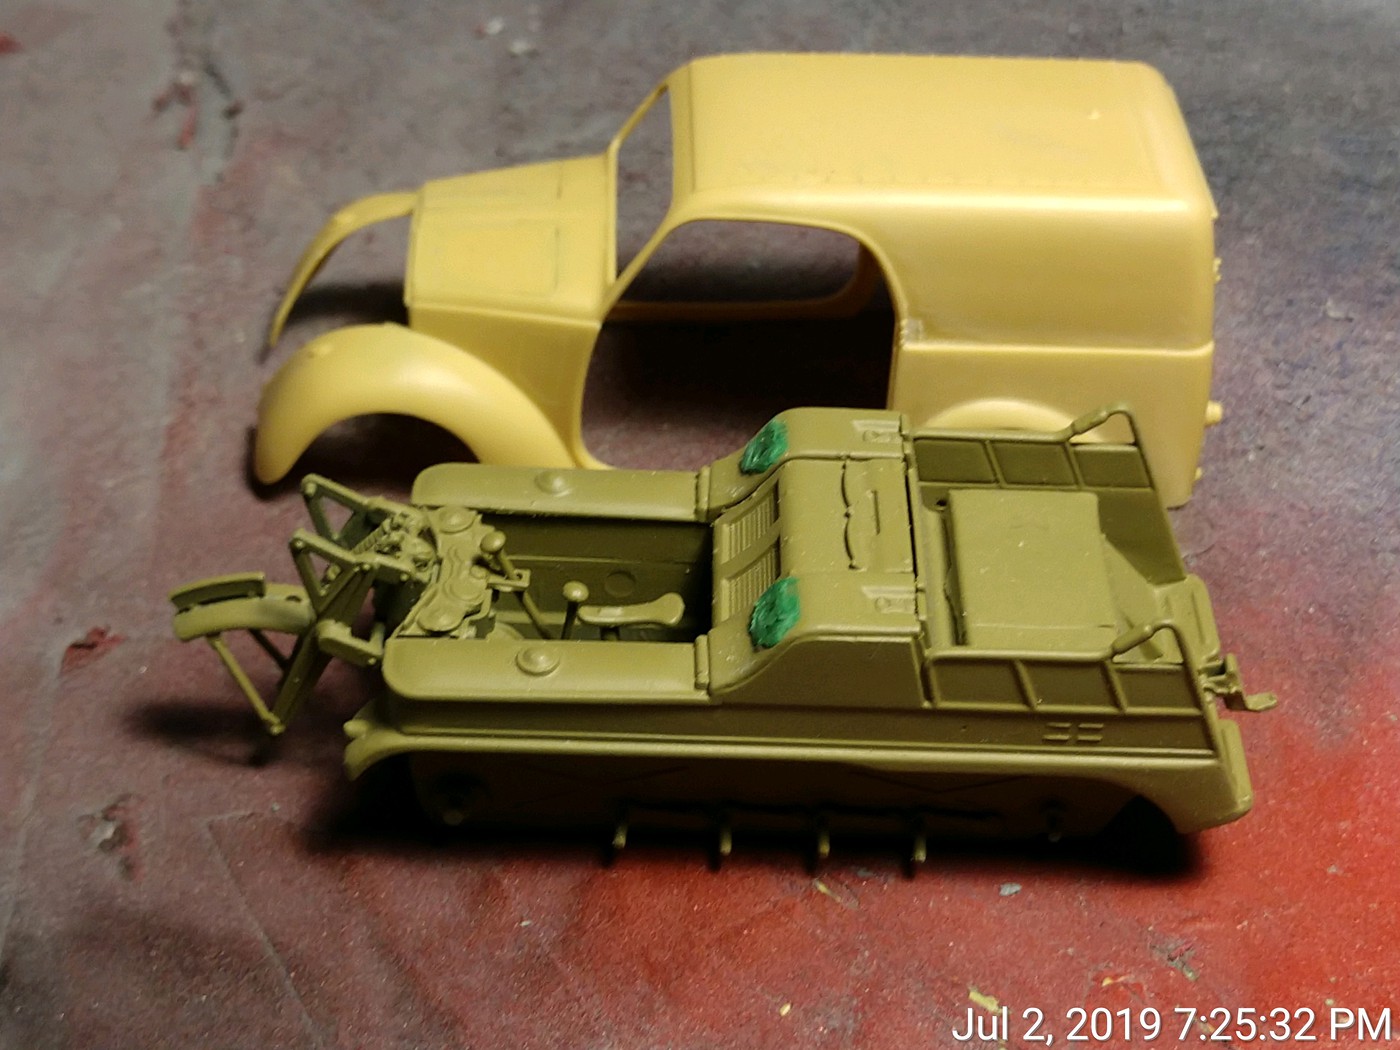
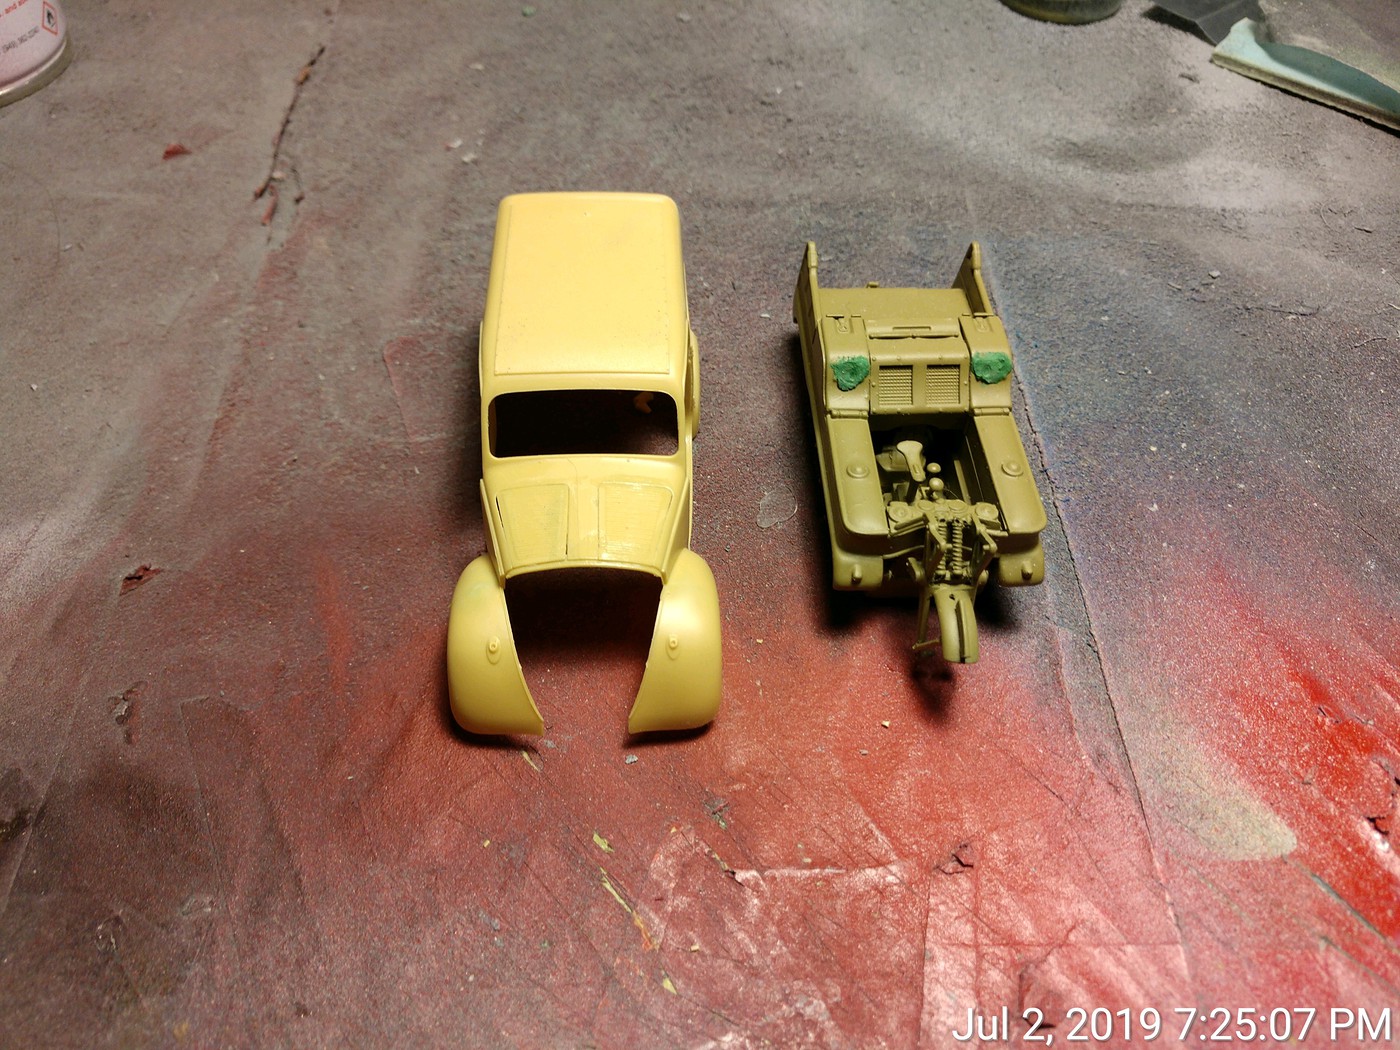
A size comparison between the two builds.

Buddy- Those who say there are no stupid questions have never worked in customer service.

  • Member since
    June 2008
Posted by lewbud on Wednesday, July 3, 2019 2:12 AM

Gamera,

It is well molded. However, it's going to be fiddly as heck to build.

Mrmike,

I'll do my best. Might be a day or two before the next installment.

Buddy- Those who say there are no stupid questions have never worked in customer service.

  • Member since
    November 2009
  • From: SW Virginia
Posted by Gamera on Thursday, July 4, 2019 7:40 AM

Oh wow, amazing how many small errors are in the kit along with oversights like nothing to cement the bonnet vents to! 

I've got a few Bronco kits and haven't finished any of them. The M26 Chaffee makes my head hurt just to look at the instructions. 

Good luck and looking forward to seeing how you overcome the next challenge there! 

"I dream in fire but work in clay." -Arthur Machen


  • Member since
    June 2008
Posted by lewbud on Thursday, July 4, 2019 6:32 PM

Gamera,

That is what is so frustrating about this kit, it's the little things that make it more difficult than it should be. It's not just the bonnet vents that didn't have a lip to glue them to, it's the doors whose only mounting points are the hinges and the glass that is a flush fit with nothing other than the builder's Mark 1 Mod 0 eyeball to make sure it's mounted properly. It's the suspension without positive locating points to help make sure everything is square. I understand what Bronco is trying to do (okay, I don't understand the three piece generator, or the mistakes with the pulleys and radiator mounting, I found that in a 30 sec Google search) with regards to the doors and glass, but there has to be a cost effective way to do it and still make it an easier, more buildable kit. I realize every kit can't be a Tamiya kit with regards to fit, but if you make it hard to build, no one will want to.  As illogical as it sounds, part of me wants to build another as a civilian vehicle. I'm thinking a plumbing van driven by a couple of brothers named Mario and Luigi.

Installment 3

I didn't do anything pic worthy yesterday, just sanded where I'd filled the ejection marks in the fenders and roof, then primered it to see if more filling and sanding were necessary. Some sanding is still needed on the right rear mark. I probably don't need to as it won't be seen easily, but I'll fix it anyways. One positive thing to add, because the plastic has the flexibility of an Olympic gymnast, it does make sanding the ejector pin marks a little easier. I was worried I was going to break something, but it tends to flex out of the way and let me sand. 

Buddy- Those who say there are no stupid questions have never worked in customer service.

  • Member since
    July 2014
  • From: Rifle, CO. USA
Posted by M1GarandFan on Thursday, July 4, 2019 9:31 PM

Yes. That's one thing I've noticed about the kits from Asian manufacturers. With the exception of Tamiya, most of them design their kits as if you are building the actual vehicle. If the real thing had 5 component parts, they make the kit with 5 component parts. It's absolutely not necessary and adds unnecessary complexity to the kit.

 My Bronco M26 Chafee was a nightmare for me after all the other Tamiya kits I've done. It turned out OK, but it was time consuming. 

I think you're doing well with that little kit. I sure recognize the yellow plastic as being from Bronco.

  • Member since
    November 2009
  • From: SW Virginia
Posted by Gamera on Friday, July 5, 2019 11:23 AM

I've gotten to the point I hate sanding ejection marks out of fenders to the point that I just stick some spackle in there and paint it like dried mud... 


I'd love to see a Mario & Luigi Plumbing Company van!   

"I dream in fire but work in clay." -Arthur Machen


  • Member since
    June 2008
Posted by lewbud on Monday, July 8, 2019 8:22 PM

Thanks M1. Maybe I'll finish my Bronco Staghound after this.

Unfortunately, there's not much mud in the desert Gamera.


Buddy- Those who say there are no stupid questions have never worked in customer service.

  • Member since
    June 2008
Posted by lewbud on Saturday, July 20, 2019 4:39 PM

After dealing with work and a couple of weeks of I don't feel like doing anything at the workbench even though this has to be ready a week before Nationals, I got back to the bench Thursday. After completing the engine and transmission, the next step is the building the rear suspension and frame. The rear suspension consists of seven parts, the rear axle housing, differential cover, springs for either side, driveshaft and some round thing that goes between the driveshaft and diff cover. There were two extremely small parts that mount on the inside of the springs, but since they won't be seen and weren't necessary for construction I didn't put them on. Here is a pic of the rear suspension.

When I line up the rear axle housing with one of the lines on the graph paper, everything is square (at least to my Mk. 1 Mod 0 eyeballs).

Here is a picture of the frame.

I thought I had a picture of the two assembled, but I don't (will take one tonight when I get home). It's a simple butt joint that holds the two together. I'm trying to think of a way to strengthen the joint. I have some thin brass rod (.5mm?) that I use on my Badger 250 spray gun to clean the nozzle. I might be able to drill a hole and superglue some brass rod in place. I'm also thinking about heating up a straight pin and pressing it into the plastic and then letting it cool in place then cutting to size and cleaning up. Hopefully (if I don't go nuts) I'll get the front suspension done tonight after I get off work. More pics soon.

Buddy- Those who say there are no stupid questions have never worked in customer service.

  • Member since
    January 2015
  • From: Tumwater, WA.
Posted by M. Brindos on Saturday, July 20, 2019 6:23 PM

That's a neat little kit so far.

- Mike Brindos "Lost Boy"

  • Member since
    November 2009
  • From: SW Virginia
Posted by Gamera on Monday, July 22, 2019 9:48 AM

Nice work! Yes

"I dream in fire but work in clay." -Arthur Machen


  • Member since
    February 2011
Posted by GreySnake on Tuesday, July 23, 2019 9:23 PM
It’s looking good for all the trouble it is giving you.
  • Member since
    September 2006
  • From: Dripping Springs, TX, USA
Posted by RBaer on Wednesday, July 24, 2019 9:01 AM

Oike, teenie parts, but then the real thing was pretty dinky too....   I like the idea of drilling a joint you've already made and inserting a brass or steel pin better than using heat to make the hole. I think something that small might deform from the heat before the hole is made.

Apprentice rivet counter.

  • Member since
    June 2008
Posted by lewbud on Thursday, July 25, 2019 3:57 AM

Thanks Mike, Gamera, and GreySnake.

RBaer,

Dinky is an overstatement.

On to my latest adventures with the "little mouse".

Here is a pic of the assembled frame. Everything lines up according to the graph paper. 

Got the rear brake drums mounted and the engine installed. Rear brakes, piece of cake. The engine, not so much. The only positive mounting points for the engine are two little ears in front of the transmission. I don't know if there's one on the real van, but on the kit there is no transmission mount to help support things.  While I was trying to install the engine, I inadvertantly broke off part of the right lower control arm. Fortunately, it didn't go sproinging off into the carpet monster and it is on the graph paper waiting to be glued back on.

Remember back in the first installment when I mentioned there was no way to properly locate the front crossmember? (If you don't then scroll back up, I'll wait) Well that came back to bite me in the tuckus. While I thought I got it on fairly level, apparantly I thought wrong. On the left side, I'm going to have to cut the spindle and file it until I get the proper length. On the right side, I'm going to have to add shims until I get the proper length (and then glue the broken piece of lca back on).  Hopefully the infernal thing will sit level. Here's a pic of the left side.

It looks like I may need to break it free and move it back a millimeter or two to get everything to line up suspension wise. I now have a definite deadline for all three builds (this contraption, and a Dragon Kettenkrad towing a Tamiya field kitchen) which is 4 August as my friend leaves for the Nationals on the 6th. More adventures soon.

Buddy- Those who say there are no stupid questions have never worked in customer service.

  • Member since
    November 2009
  • From: SW Virginia
Posted by Gamera on Thursday, July 25, 2019 11:13 AM

Oh gee, that's the sorta thing I pull out for a quick, cheap, and dirty build and it bites you on the Censored everytime... 

Please hang in there, you're making solid progress. I just hate it when these simple appearing kits turn out to be major projects. 

"I dream in fire but work in clay." -Arthur Machen


  • Member since
    June 2008
Posted by lewbud on Thursday, August 1, 2019 11:19 PM

Episode VI- Return of the Fiat

Okay, it never really went anywhere but I needed a title for this installment and was in a Star Wars frame of mind (I was also thinking Star Trek, but couldn't come up with anything for The Undiscovered Country). On to the workbench of doom. If you'll remember from the last installment, I didn't get the top front crossmember level so it was too low on the left side and too high on the right. Plus I had mounted the engine too far forward and needed to reposition it. I cut a shim from some sheet stock (.005 I think) and this got everything close enough. I repositioned the engine about a millimeter or two back, but when I glued it in place I neglected to make sure it was square in the frame. This was the result when I glued the spindle in place. Fortunately it won't be seen and SHOULDN'T affect the ride heighth on the right side (if it does, I have a few tricks I can try).

I was able to glue the broken control arm piece back on as well.  After everything had set, I glued the floorpan to the frame.  Did I mention that this kit shares a majority of it's pieces with the Topolino sedan? Did I remember that I had placed the van floorpan in the heavy cardboard box that the body came in? Nope. Did I glue the sedan floorpan in place and they wonder why it was fitting properly? Yep. Did I momentarily panic, call Bronco all kinds of names for not including the correct part and frantically search the kit box for the "missing" piece? Maybe. Pried off the sedan floor and glued the van floor in place. Also added the front brake drums and the firewall with the gas tank.

Added the radiator mount to the body. It will mount on the shelf in front of the gas tank. There are two pieces that form the fender wells that mount to the firewall and are joined by a bracket that the hood mounts to. That will be attempted tomorrow after I get off work and get some sleep. Here are a couple of pics of the body mocked up on the frame. 

If everything goes right after I wake up, she should be in primer tomorrow evening.

Buddy- Those who say there are no stupid questions have never worked in customer service.

  • Member since
    November 2009
  • From: SW Virginia
Posted by Gamera on Friday, August 2, 2019 7:41 AM

Gosh, I'd be so tempted to slap on some rust coloured paint and build this as a wreck... 


Still my hat's off to you for sticking with this... ahem wonderful piece of kit engineering... Bang Head

"I dream in fire but work in clay." -Arthur Machen


  • Member since
    June 2008
Posted by lewbud on Saturday, August 3, 2019 12:46 AM

Gamera,

I've never done a rusted wreck before, don't have the inclination to do one either.  As for sticking with it I kind of have to. I've never missed a build for my friend and I'm not going to let this one beat me. Besides, I have three kits sitting on my table that I started for the Weekend GB that I haven't finished yet. On to today's excitement.

Here is a pic of the three piece hood mount/fender splash guard assembly. The instructions would have you glue this to the firewall first, then glue the entire assembly in place. When I tried this yesterday, my sugar and caffiene amped brain couldn't figure out how to do this and when I tried to assemble it, my fingers couldn't make it work. After some sleep and lunch (no sugar or caffeine this time) I took a good look at the instructions and figured that if glued the splash guards to the hood mount one at a time, everything might just line up. So I did just that and everything lined up like it was supposed to (clearer instructions would have helped). Here is a pic of it installed.

While the glue on the frame was drying I decided that I would finish sanding the body to get it ready for primer. When I got started on the right side, I noticed that the plastic had dimpled from the putty that I used to fill the ejector pin mark directly underneath it (I use MEK to thin my putty so it is possible that the MEK and the solvents in the Green Stuff may have caused this, but it didn't happen anywhere else on this model and it has never happened to me before).

So I filled it with putty and will sand it tomorrow.  Here is a pic of the front end with the body on.  To be honest, the fit isn't that bad.

I see a mold release line on the left fender that needs to be taken care of, but after that the body will be ready for primer and paint. I did start painting the chassis, but didn't take any pics of it. I would say more tomorrow, but I'm off for the next couple of days and the only place I can post pics is at work. By the time I get back, she should be done!

Buddy- Those who say there are no stupid questions have never worked in customer service.

  • Member since
    January 2015
  • From: Tumwater, WA.
Posted by M. Brindos on Saturday, August 3, 2019 8:17 PM

Seems so very odd to see the radiator placed above and behind the engine. That doesn't look right at all.

Interesting engineering going on with this kit. Very interesting indeed. I can see how it should add more detail, but this doesn't look like a kit for beginners either.

Looks like a challenge I would like. :)

- Mike Brindos "Lost Boy"

  • Member since
    June 2008
Posted by lewbud on Saturday, August 3, 2019 8:47 PM

Mike,

If you think the radiator placement is weird, did you see where they put the gas tank? It's on the firewall that goes into the passenger compartment. I know that I have complained about the kit's overengineering, the fit has been pretty good. As I'm coming to the end of this build, I can see myself building another now that I have a better idea of how things go together.

Buddy- Those who say there are no stupid questions have never worked in customer service.

  • Member since
    November 2009
  • From: SW Virginia
Posted by Gamera on Monday, August 5, 2019 11:20 AM

You're making good progress even if the kit is fighting you. Please keep going, I'm looking forward to seeing her done. 

"I dream in fire but work in clay." -Arthur Machen


  • Member since
    May 2009
  • From: Poland
Posted by Pawel on Monday, August 5, 2019 1:48 PM

Hello!

Boys, you are spoiled by the nice American cars! Before WWII in Europe having ANY car was a sign of luxury, so many companies and countries (think VW - a state owned company!) tried to make a car for the masses and that called for some extraordinary engineering. Historically, the radiator behind the engine is a very traditional solution, many pioneer cars had it done this way. Think Mack AC Bulldog - it also had it done this way. Of course that doesn't really work for fast machines with big, strong engines.

That FIAT is coming along great, thanks for sharing and good luck with it

Paweł

All comments and critique welcomed. Thanks for your honest opinions!

www.vietnam.net.pl

  • Member since
    June 2008
Posted by lewbud on Friday, August 9, 2019 2:00 AM

Thanks Pawel! 

Gamera, your wish is my command.

Ladies and gentlemen, boys and girls, step right up and see one of the rarest sights known to man! What's this rarity you asked, well I'm glad you asked. This rarity is not only a finished model known by the modeler known as lewbud (a rarity in and of itself), but it's a model from the losing side of WWII! (Axis power models just ain't my thing).  I sanded the right front fender and the mold line on the left fender and attached the hood.

Fit wasn't too bad and with a little finesse, was able to get a suitable fit for it.  While I was waiting for the glue on the hood to set, I painted and decalled the dash board.

And attached the barn doors in the rear. If you recall, one of my earlier fears was that there was nothing to hold the doors in place other than the hinges (and in my exuberance cut the hinges off the left door). Once the body was mounted to the frame, there was enough support to glue the doors securely to the body.

Here she is with the body painted and front windshield installed. I used Life Colors Acrylics Giallo something (I'll look it up when get home and post it). It was the first time I had used this paint and found it quite easy to spray. One thing I noticed is that it was very thick coming out of the bottle and had to be thinned considerably before being sprayed. I almost had enough to paint in the first mixing to paint the entire model.  Here she is all buttoned up.  The gaps are much smaller when viewing in person. The real vehicle had sliding glass windows and the kit gives you a choice of fully closed or open. For something different, I left the driver's window open. While I don't have a pic of the doors unpainted, instead of molding the door release lever with the door Bronco made it a photoetch piece with no plastic back up in case it went pinging off to the Land of Lost Parts. I also had an unforseen problem with wheel alignment. I thought I had everything square, but apparently I had the rear glued in at a slight angle and the right rear tire was covered by the leading edge of the wheelwell by a couple of millimeters. At the last minute, I decided the rear needed something, since I didn't have any Italian Army markings, I used one of the civilian license plates to add some color. (I don't have a pic of it and won't until it gets back from Chatanooga) I got her to my friend's Jame's house Monday afternoon and he was happy to see it, kind of bummed that I didn't get the kettenkrad towing the field kitchen done, but happy nonetheless. James told me about one of the members not finishing his Tamiya Simca5. I now have an itch to find one of those and build it, civillian of course.


Buddy- Those who say there are no stupid questions have never worked in customer service.

  • Member since
    November 2009
  • From: SW Virginia
Posted by Gamera on Friday, August 9, 2019 8:01 AM

Very cool! 

I like the fact that as a civilian vehicle it has possibilities beyond the Second World War. I assume they were used as private and company vehicles up though the '50s and maybe '60s. I can see it with a bakery or farm logo on the side.

I've got a Kubelwagen I want to build as a '50s German farm vehicle. I'm thinking of having it red with the paint flaking and Wehrmacht mustard yellow underneath. Maybe have a platform over the back with a chicken cage mounted there. 

"I dream in fire but work in clay." -Arthur Machen


  • Member since
    June 2014
  • From: New Braunfels , Texas
Posted by Tanker - Builder on Friday, August 9, 2019 4:35 PM

Hmmm;

         I never thought I would say this about a wartime vehicle besides the " Bug ". " Aw, that's cute".Oh, the things you could make out of it. A Dragster. An Italian market Delivery Van or a Winery delivery van.There was a companty that just barely made it through the war.Their name "Medaglia de Oro" ( Gold Medal in english ).Their Olive Oil,Coffee and Pasta is still available today!

      Oh, and you did a decent build too.Congrats ! 

  • Member since
    November 2008
  • From: Far Northern CA
Posted by mrmike on Friday, August 9, 2019 8:41 PM

You won...it fought you, you fought back and got the upper hand! Very interesting subject and build, thanks for taking the time to do a WIP.

  • Member since
    June 2008
Posted by lewbud on Saturday, August 10, 2019 1:52 AM

Thanks Gamera, Tanker Builder, and MrMike!

Gamera, 

That Kubel build sounds pretty cool. I'd like to see it.

Tanker Builder,

I found a picture of one of these vans with what I'm guessing is a race prepped small block Chevy in it. I texted it to my friend James who was in charge of the club build and asked if I could do it as a drag racer.  While he liked the picture, the answer was no. While it would make a really cool build, I don't know of any street rod or drag racing equipment in 1/35 (Monogram made some 1/32 Top Fuel Funny Car and Dragster kits back in the 70's and 80's, but I think they might be a little pricey now as they haven't been repopped in decades).  That's a lot of scratchbuilding and I'm not really up to that yet.

MrMike,

Thanks. It seemed to get easier the further I got into it. It was still fiddly as heck, but I got it finished. I'm glad you enjoyed the build.


Buddy- Those who say there are no stupid questions have never worked in customer service.

  • Member since
    June 2014
  • From: New Braunfels , Texas
Posted by Tanker - Builder on Saturday, August 10, 2019 11:17 AM

Lewbud;

     I am sorry. I forgot it was a Military Model and of course they are 1/35. I started getting a few of the cars. I just had a blast building and civilianizing them. With two of the Mercedes that wasn't hard either.

   They had kinda weird five ply hard plastic, tire sets .This certainly made sure of a tread pattern! Just think Another one with Medaglia de Oro or " Pizza,Pizza"(Little Ceasers) on the sides !LOL.LOL.

JOIN OUR COMMUNITY!

Our community is FREE to join. To participate you must either login or register for an account.

SEARCH FORUMS
FREE NEWSLETTER
By signing up you may also receive reader surveys and occasional special offers. We do not sell, rent or trade our email lists. View our Privacy Policy.