SEARCH FINESCALE.COM

Enter keywords or a search phrase below:

Academy 1/35 Magach 7

3161 views
40 replies
1 rating 2 rating 3 rating 4 rating 5 rating
  • Member since
    April 2010
Academy 1/35 Magach 7
Posted by Theuns on Sunday, September 1, 2019 11:33 PM

I do armour very rarely and started this kit. The reviews look good and sofar the buiuld is easy.


In top of the turret between the tow hatches there is a # 0870600 and what looks like 0235. 


Are these supose to represent the "welded on" tank serial # or is is a kit # I need to remove?


Theuns

  • Member since
    September 2006
  • From: Dripping Springs, TX, USA
Posted by RBaer on Monday, September 2, 2019 5:49 PM

Those are supposed to be there, they represent foundry markings.

Apprentice rivet counter.

  • Member since
    April 2010
Posted by Theuns on Monday, September 2, 2019 11:24 PM

Great ,it confirns what I was thinking, Thanx :-)


Theuns

  • Member since
    April 2010
Posted by Theuns on Friday, September 6, 2019 9:07 AM

I made some progress on the model, loads of little bits to glue on but is starting to look almost like a modern MBT

I just need to find the correct sand grey of the IDF in acrilic so I can weather with oil paints

 IMG_20190904_063114 by Theunis van Vuuren, on Flickr

It looks like the tracks are a few mm to short though :-(

even with the wheels installed as per instructions.

 IMG_20190906_130840 by Theunis van Vuuren, on Flickr

 IMG_20190906_130805 by Theunis van Vuuren, on Flickr


Theuns

  • Member since
    November 2009
  • From: SW Virginia
Posted by Gamera on Friday, September 6, 2019 11:15 AM

She looks sharp!!! 

Guess there's no way to adjust the wheels to fit the short tracks?  

"I dream in fire but work in clay." -Arthur Machen


  • Member since
    December 2002
  • From: Valrico, FL
Posted by HeavyArty on Friday, September 6, 2019 11:17 AM

Looks like it is coming along well.

One correction though.  It is a Magach 7, spelled M-A-G-A-C-H, which means "ramming hit" in Hebrew.

Gino P. Quintiliani - Field Artillery - The KING of BATTLE!!!

Check out my Gallery: https://app.photobucket.com/u/HeavyArty

"People sleep peaceably in their beds at night only because rough men stand ready to do violence on their behalf." -- George Orwell

  • Member since
    January 2015
  • From: Tumwater, WA.
Posted by M. Brindos on Friday, September 6, 2019 12:01 PM

Looking Sharp, indeed, Theuns!

- Mike Brindos "Lost Boy"

  • Member since
    April 2010
Posted by Theuns on Friday, September 6, 2019 11:21 PM

Right you are about the spelling, I should have checked before posting LOL

As for the tracks, The drive wheel axle has a slider that fits into the hull, but even at full forward the problem is still there. During a moment of insomnea this morning early I thought of cutting off the axle and then drill a hole slightly forward to install a new axle for the drive wheel, I am worried that the tracs under tension might cause deformation of something over time.


I have rad some articles of people painting the sides and bottom of a monotone tank with a very slightly darker shade of the base colour for a modulated effect.

What do you guys think of this? Being newish to armour I have loads to learn.

I think it may simulate the way the paint will fade ontop of the tank more than on the sides, bit then dirt and dust will collect on the flat top sides more than on the sides negating this effect?


Theuns

  • Member since
    January 2015
  • From: Tumwater, WA.
Posted by M. Brindos on Friday, September 6, 2019 11:45 PM

You are talking about the front idler wheel, right? Not the drive sprockets in back? The drive sprockets is not suppose to be adjustable, so I'm going to assume you mean the front idler because that is adjustable.

As to your theory about modulating the paint, with the darker on the bottom, yes. That is how I do a lot of mine. A darker shade of the base color on the bottom of the hull, fenders, and rear turret. It does help trick the eye into shadows and depth that would otherwise go more unnoticed.

- Mike Brindos "Lost Boy"

  • Member since
    April 2010
Posted by Theuns on Saturday, September 7, 2019 2:28 AM

Mike, no the rear drive sprocket axle has a slider mound that can move forwards or  back  by mayb 2mm or so, the front idler wheel has a "one position only" mound onto the hull.

I am sure that this is not as on the real one but the model is like this for some odd reason.


Thanx for the info on the modulation, do you guys use "filters" to help make the paint pop? I have seen vids and it looks interesting but I cant find any at y local shop and was wondering if there is a way to make my wn maybe??


Theuns

  • Member since
    January 2015
  • From: Tumwater, WA.
Posted by M. Brindos on Saturday, September 7, 2019 12:12 PM

Oh okay. No, the drive sprockets are not supposed to be adjustable. You're going to have to make it work as best you can.

Filters for what, exactly? Filters are generally used to modify a tone or shade and you can use any medium to do it. 

However, I did use a red watercolor filter to make a green tank, brown. It worked far better than repainting the model.

So filter... Yes. But what are you filtering?

- Mike Brindos "Lost Boy"

  • Member since
    April 2010
Posted by Theuns on Saturday, September 7, 2019 11:27 PM

Yes, the filters I am refering to is the commercial stuff one can buy to make the tone and look of the basecoat paint alter and pop.


I just wonder if it would work on the IDF beigh/grey. Maybe for this model I should leave it off and just do some shadingdust and streaks here and there to weather it.


Could watercolours be used for streaking? Lets say it was dusty (a tad more brown then the IDF grey) and is has a little rain or dew to make the dust run off the side.Or would oil paint with thinners brushed over it to blend it in be a beter bet?


Theuns

  • Member since
    January 2015
  • From: Tumwater, WA.
Posted by M. Brindos on Sunday, September 8, 2019 12:08 AM

I'd stick with oils for streaking. Watercolors are good for staining and tonal changes. Say you have a green that is in the yellow spectrum, but you wanted it more in the blue spectrum. Then a light wash with blue watercolor would change that tone.

Fuel stains? No problem. Brown watercolor for a nice brownish stain spot.

I highly recommend playing with other mediums lol. Especially ones you don't see people use a lot.

Watercolors don't usually help too much over gloss surfaces either. They rub off onto your fingers. But they will stick like mad to a matte finish so be sure you want to use watercolor for an application. 

- Mike Brindos "Lost Boy"

  • Member since
    April 2010
Posted by Theuns on Sunday, September 8, 2019 4:28 AM

I use water color for my pin washes but will geive the oils a try thanx.

I made some progress with the "stuff" that goes onto the hull, the sideskirts and extra armour plating. There is a vague indication of where the sideskirt mound brackets go onto the hull but I had to play around with them to get it in correct place. 


Theuns

  • Member since
    November 2009
  • From: SW Virginia
Posted by Gamera on Monday, September 9, 2019 8:51 AM

I normally use colour modulation in starting with dark shades at the bottom and adding a little few drops of white or tan as I move up the model. Other than that I just use a pin wash to bring out the details. 

I've tried dot filtering a few times but never got the results I wanted. Bish would be the guy to talk to about that. 

"I dream in fire but work in clay." -Arthur Machen


  • Member since
    April 2010
Posted by Theuns on Monday, September 9, 2019 10:13 AM

I did see the dot filtering "spanish school" idea but also dont quite like the look of it. 

Maybe just same shading and dust on the correct places will be OK. Some light rusting on a few spots should do.

What do you guys use as a fixer for the weathering powders on the tracks ect?

I am planning on using ground up chalk pastels as my "dust"


Theuns

  • Member since
    November 2009
  • From: SW Virginia
Posted by Gamera on Tuesday, September 10, 2019 8:27 AM

Hopefully someone else will comment here. I've used pastels but they never seem to work out the way I want so I switched to using mud coloured paint instead. I coat the running gear with hair spray and then add a layer of mud paint. Then I can wipe off the excess with a moist paintbrush. 

"I dream in fire but work in clay." -Arthur Machen


  • Member since
    April 2010
Posted by Theuns on Wednesday, September 11, 2019 11:21 PM

This tank will be a "desert dweller" so not muck mud on it ,just loads of dust LOL


Theuns

  • Member since
    April 2010
Posted by Theuns on Thursday, September 12, 2019 11:05 AM

I got primer on and then a black basecoat over all , this will be lightened in some areas to give "shade" effect when the colour goes on.

 IMG_20190912_161148 by Theunis van Vuuren, on Flickr

 IMG_20190912_173806 by Theunis van Vuuren, on Flickr


This is my "day job" since I cant build models for a living LOL

 IMG_20190911_090523 by Theunis van Vuuren, on Flickr

 IMG_20190910_113952 by Theunis van Vuuren, on Flickr


Theuns


  • Member since
    July 2014
  • From: Rifle, CO. USA
Posted by M1GarandFan on Thursday, September 12, 2019 11:10 AM

That looks like a pretty cool day job!

  • Member since
    November 2009
  • From: SW Virginia
Posted by Gamera on Thursday, September 12, 2019 11:24 AM

Great job there- on both the 1/35th and 1/1th scale models! 

Yeah, for an Israeli desert subject you might just try what you're doing and add a little sun bleaching to the upper surfaces. You can go with a filter- I forget the term by mixing a little sand/dust coloured paint and mixing it 50/50 with matte finish and then overspraying the whole model when done. It's supposed to tie everything together. 

"I dream in fire but work in clay." -Arthur Machen


  • Member since
    April 2010
Posted by Theuns on Thursday, September 12, 2019 11:31 AM

Indeed I plan to do a slightly faded not to badly weatherd tank. I will highlight faded areas with white over the black and then slowly build up the color till Im happy with it. 


That "day job" is cool but can be a PITA sometimes belive me :-)


Theuns

  • Member since
    July 2014
  • From: Rifle, CO. USA
Posted by M1GarandFan on Thursday, September 12, 2019 3:15 PM

Yeah, they can all be that way from time to time.

Good looking build going on!

  • Member since
    September 2006
  • From: Dripping Springs, TX, USA
Posted by RBaer on Friday, September 13, 2019 8:35 AM

IDF sand gray is an odd color, hard to nail down. I've used a variety of different colors, and since I'm limited to using rattle cans, I depend on washes and pigments to get the "right" end result. It's really difficult to call any out of the can color wrong, but the reference above is a good start. MIG has a few IDF colors that I think are really close, and Humbrol does an enamel that's good for the later color, almost a brown/gray/tan. For your Magach7, there's a couple of good videos on Youtube, one in particular that features track maintenance, that not only is a good color example, it's also got some weathering tidbits.

Link: https://www.youtube.com/watch?v=Wt-V77hmym4

Apprentice rivet counter.

  • Member since
    April 2010
Posted by Theuns on Friday, September 13, 2019 11:05 AM

Thanx for the info, I will go check it out.

As an experiment I looked at Humbrol yellow sand but was to "yellow to me" so I tried Tamiya 74 enamels. 

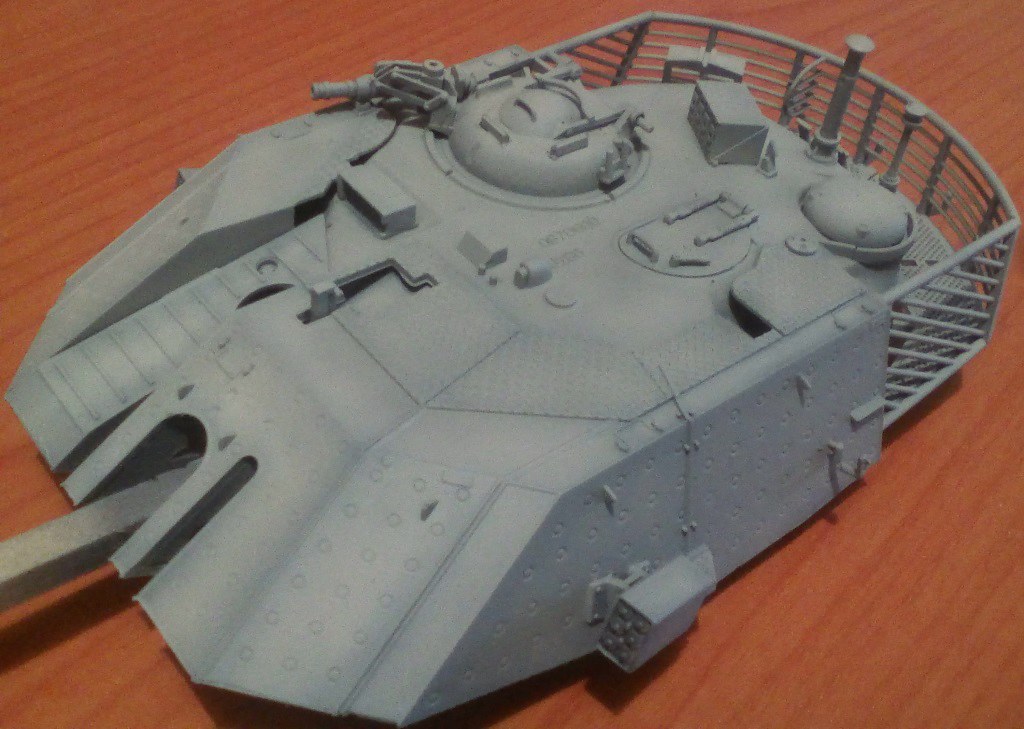
Here is the base with the highlights on it

 IMG_20190913_141724 by Theunis van Vuuren, on Flickr

Then I sht the tamiya over it in thin coats till I got an even look with shadows just showing through, the sides and bottom O added a drop of black to look like it is bleached a little less. 

This is an interesting colour indeed, in bright sun it looks very grey

 IMG_20190913_144230 by Theunis van Vuuren, on Flickr

But indoors where it will be viewed mostly the clopor changes to a more tan.

 IMG_20190913_171529 by Theunis van Vuuren, on Flickr

 IMG_20190913_171553 by Theunis van Vuuren, on Flickr


Now I need to weather it a little and complete the hull.


Theuns

  • Member since
    November 2009
  • From: SW Virginia
Posted by Gamera on Friday, September 13, 2019 12:33 PM

That looks really good! Yes

"I dream in fire but work in clay." -Arthur Machen


  • Member since
    April 2010
Posted by Theuns on Friday, September 13, 2019 11:12 PM

Thanx, however I need to re spray the turet, I meesed up the whole look by trying to weather it with paint chipping it to look like a used tank :-(

  • Member since
    April 2010
Posted by Theuns on Saturday, September 14, 2019 5:42 AM

This time Im hapy with the colour. I ysed my Tamiya buff and added about 25% humbrol green 155. Ths gave a nice sand with a subttle green heu to it in shade and a grey /sand in sunlight.

 IMG_20190914_122247 by Theunis van Vuuren, on Flickr

 IMG_20190914_122307 by Theunis van Vuuren, on Flickr

 IMG_20190914_120702 by Theunis van Vuuren, on Flickr


Theuns

  • Member since
    January 2015
  • From: Tumwater, WA.
Posted by M. Brindos on Saturday, September 14, 2019 11:00 PM

Now that's a beautiful paint job. Good tonal shift in the proper lighting.

- Mike Brindos "Lost Boy"

  • Member since
    April 2010
Posted by Theuns on Sunday, September 15, 2019 12:07 AM

Thanx, i must admit it came out better than I hoped, my cellphone does not take the best pix though and in real life it is a tad more green.


I now just need to be carefull not to overdo the weathering, I think only a pinwash in some areas and dust will work for what I want to do.


Theuns

JOIN OUR COMMUNITY!

Our community is FREE to join. To participate you must either login or register for an account.

SEARCH FORUMS
FREE NEWSLETTER
By signing up you may also receive reader surveys and occasional special offers. We do not sell, rent or trade our email lists. View our Privacy Policy.