SEARCH FINESCALE.COM

Enter keywords or a search phrase below:

Bobkit Renault R5 Turbo - with mods

3332 views
6 replies
1 rating 2 rating 3 rating 4 rating 5 rating
  • Member since
    January 2010
Bobkit Renault R5 Turbo - with mods
Posted by CrashTestDummy on Tuesday, July 29, 2014 1:50 PM

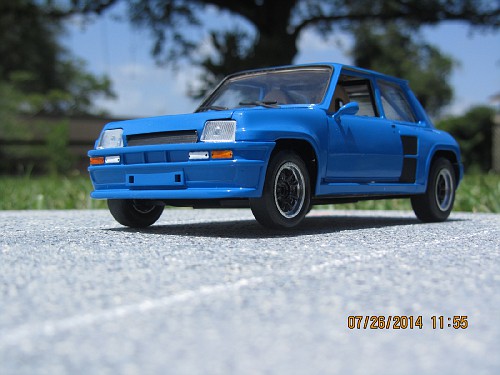
I'm calling this one done.  I've been working on it as time allows, which means it's probably been over a year in the making. 

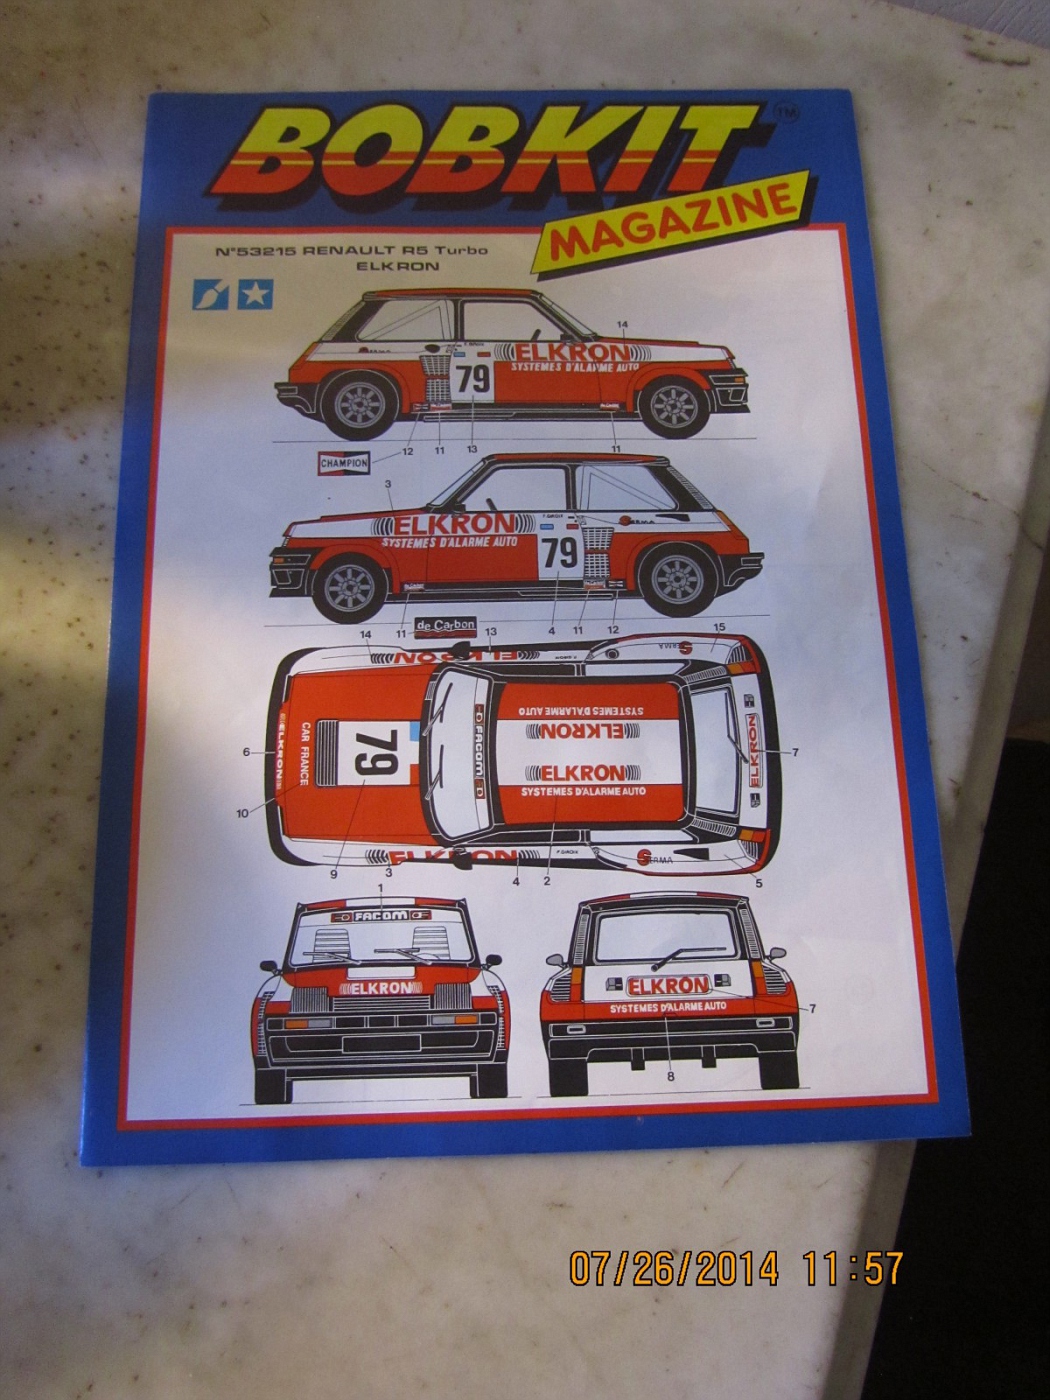
I've always been a fan of the Renault R5 Turbo.  Really cool little pocket-rocket that always responded well to modifications.  They still seem to have a great following, as online pictures would indicate.  I found this old Humbrol/Heller 'Bobkit' R5 Turbo online, and snapped it up in a minute. 

The kit is more of a toy; the doors open as does the hood and hatch, and the wheels roll.  The kit even comes with some tubs of paint and glue, although they had long ago become tubs of little hockey pucks, and quite useless.  The directions are about 4 pages of cartoon-like but fairly-clear illustrations.  The painting notes are almost non-existant, though. The tires are vinyl, and were a bit deformed, especially around the sprue.  They came out okay in the finished product, as long as you don't look too close. 

Page 1 of the instruction sheet:

There were few parts with the kit, and outside of a pretty nice, albeit a little soft, details on the body.  I figured, of course, I could improve things a bit with some scratchbuilding.  So, to this kit, I added:

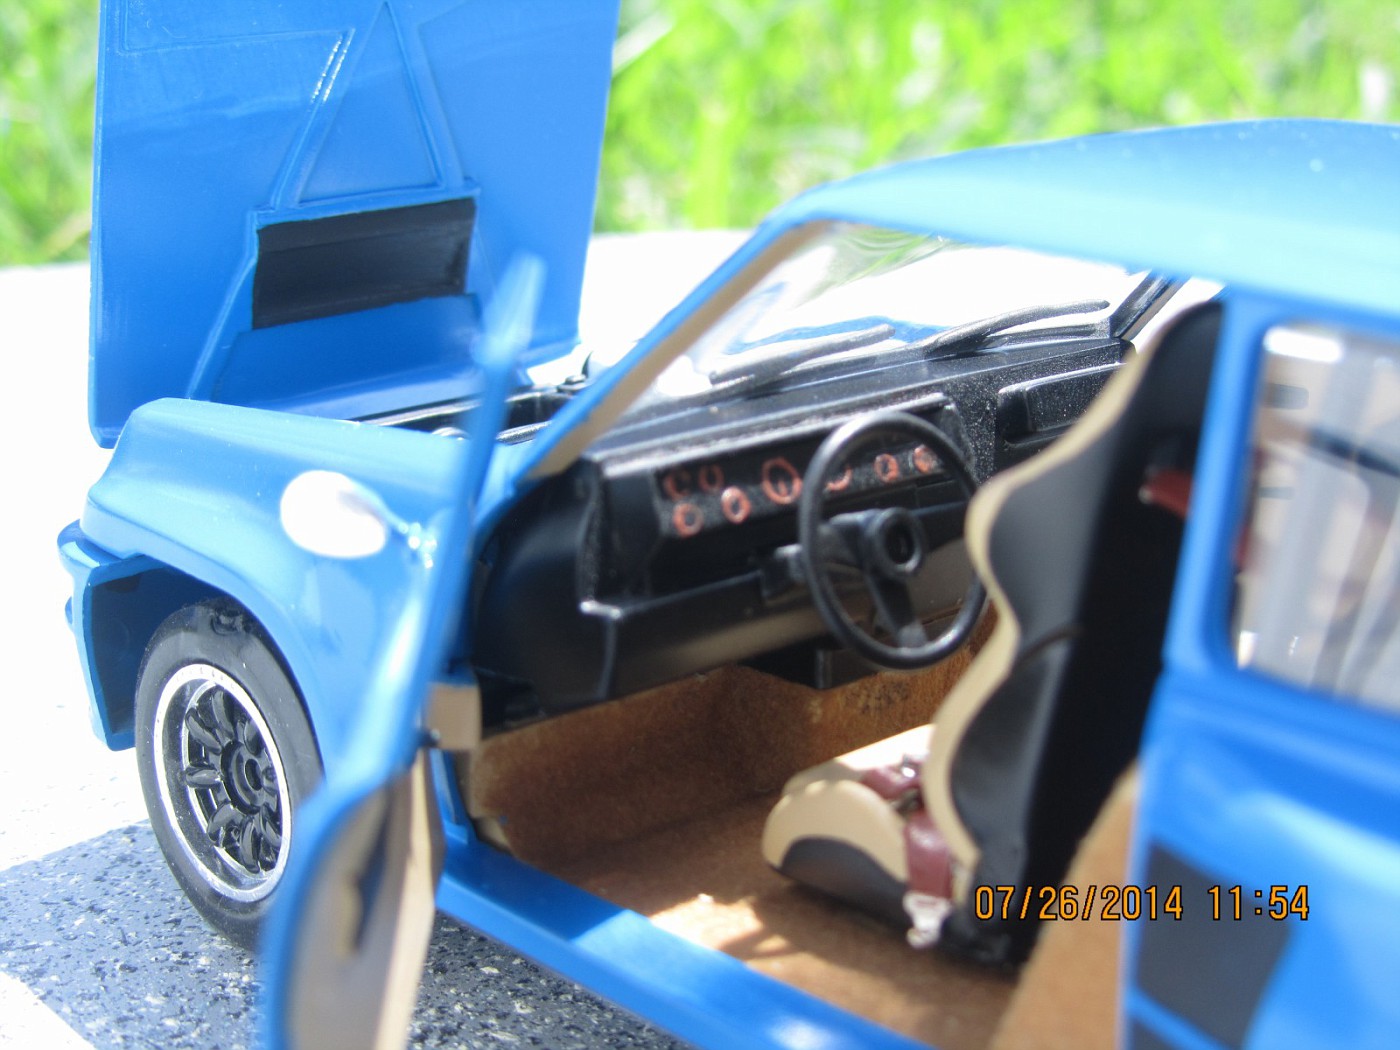
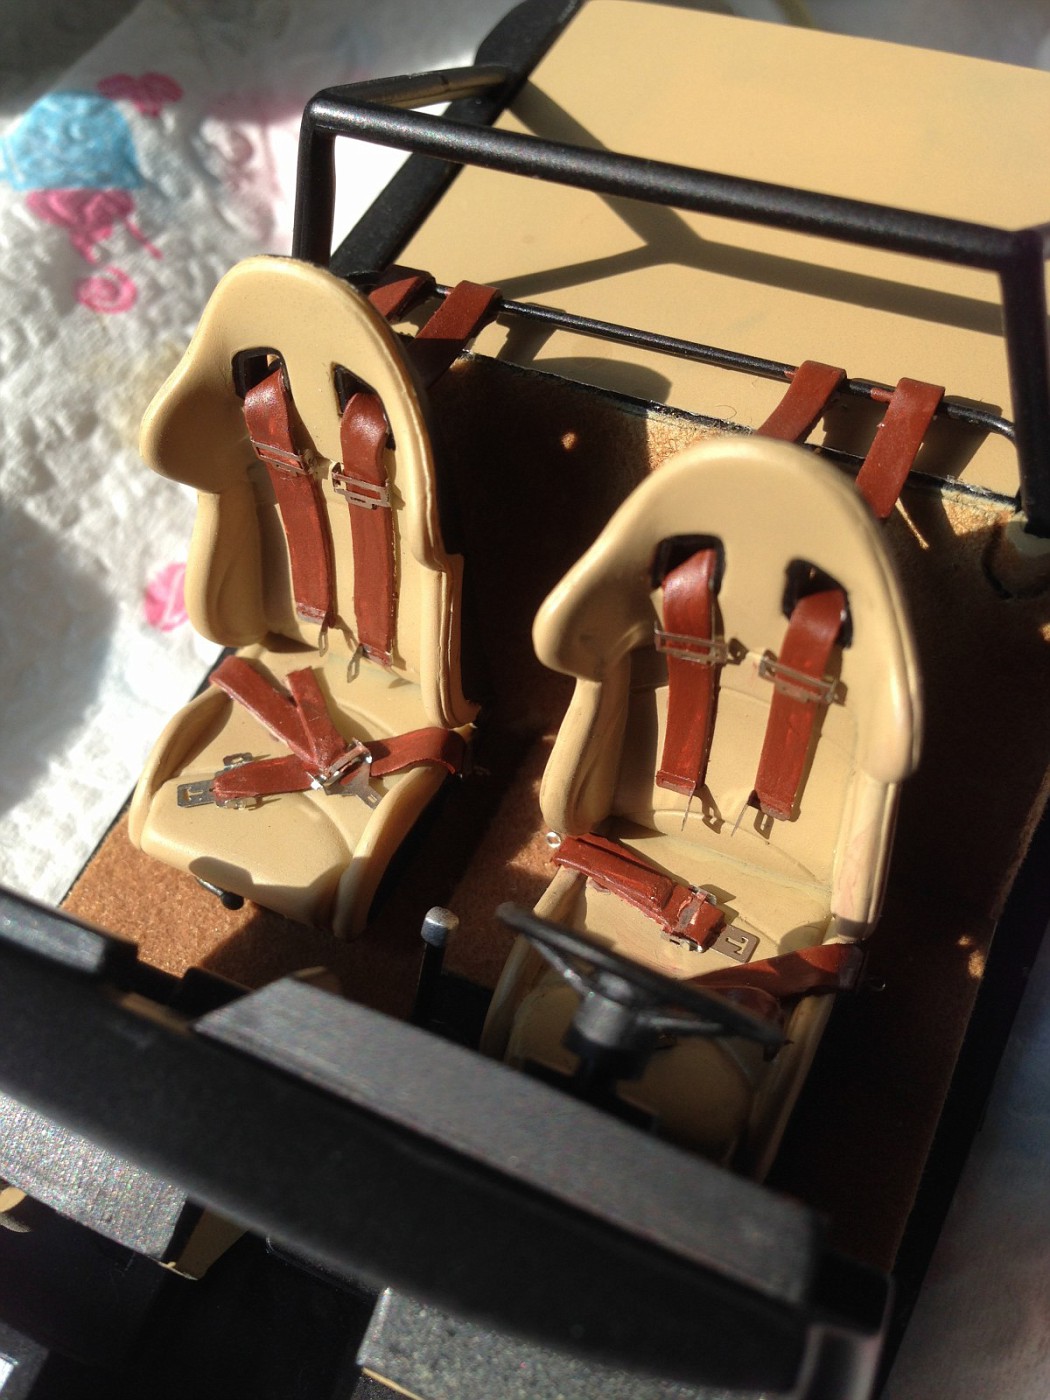
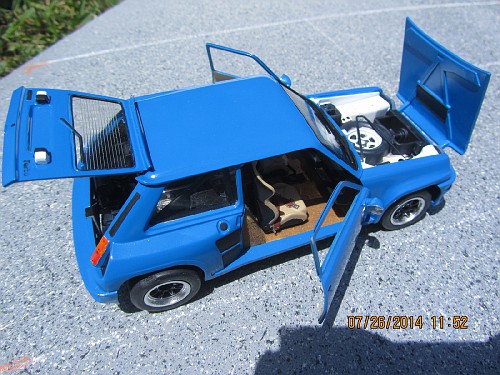
Seats from the Fast and Furious Mustang
Disc brakes from the same Mustang kit.  BMF added to the discs.
interior flocking
harness bar for the roll bar that came in the kit.
4-point harnesses from Milliput, using PE harness ends.
Seat adjuster lever on both seats fabbed up, along with the seat adjuster rack (since these seats were out of another vehicle)
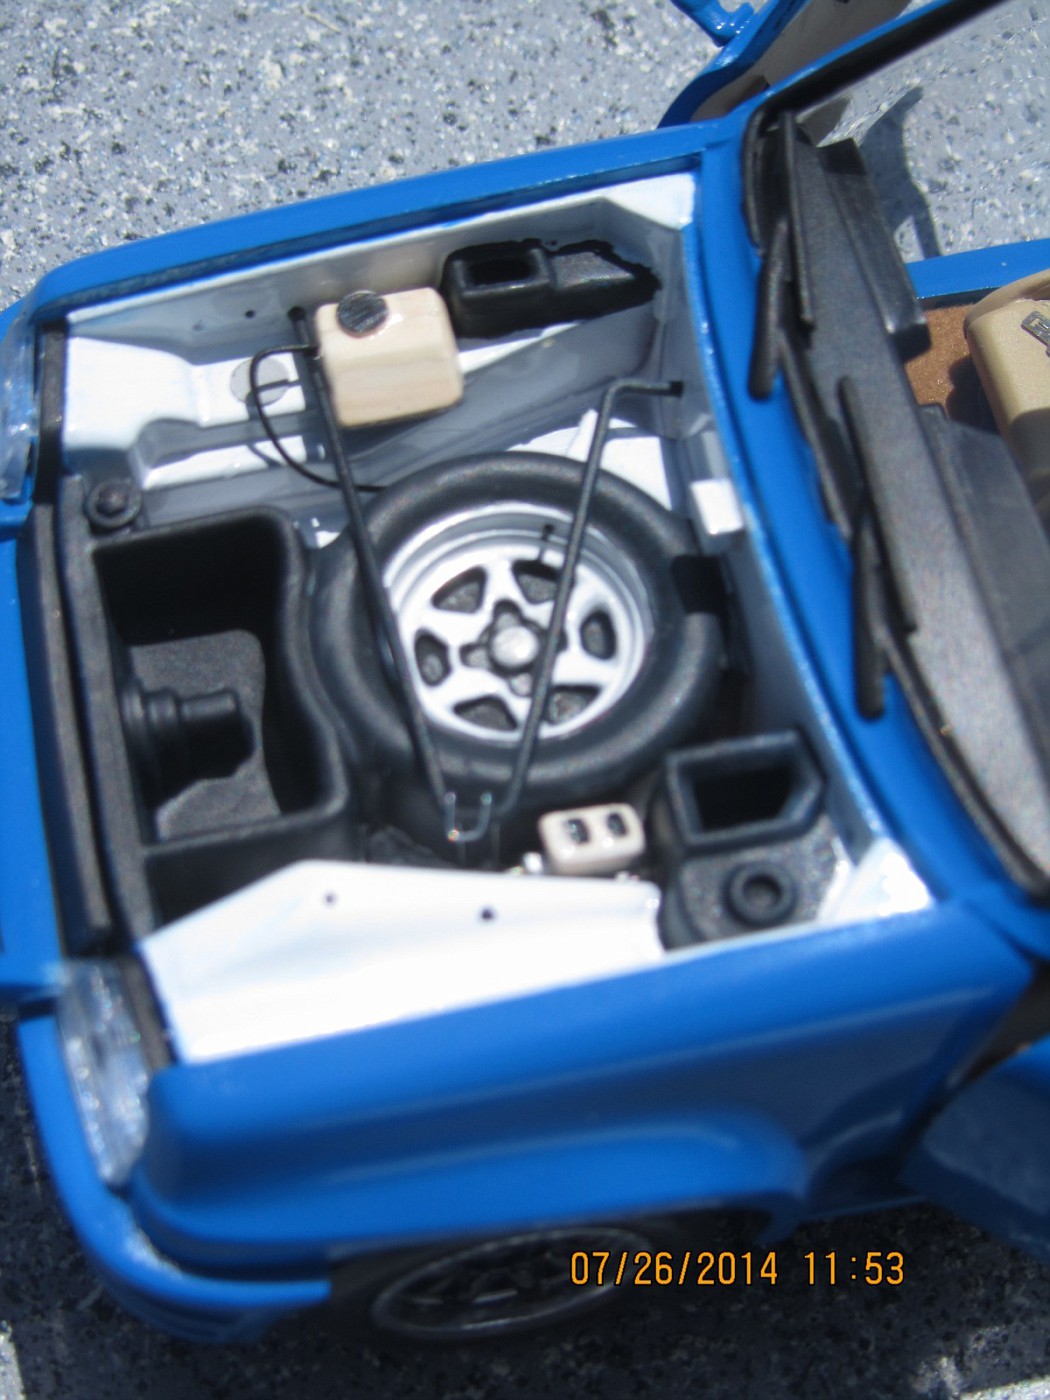
Hold down for the spare tire and it's locking wire fabbed up from wire
Added a valve stem to the spare.
Added brake lines to the master cylinder
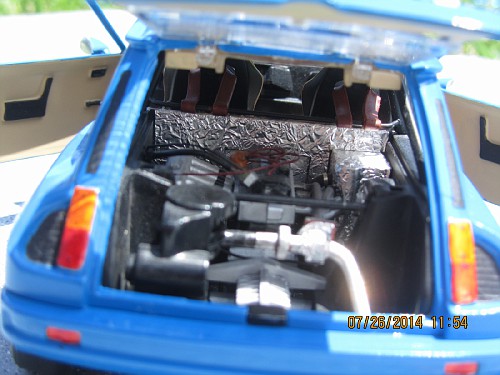
Added some under hood details with punched out styrene sheet and pieces of square styrene tubing (hood latch, for example)
Added windshield washer reservoir (this was a piece of scrap sprue from the kit filed and painted with wire added for the washer line.
Scratch built coil-overs for the rear suspension (these are mostly hidden).
Scratch built distributor (which is a typical French distributor with side posts and is that odd Bakalite brown in color) and wires.
Scratch built engine controller and wiring
Added aluminum foil 'insulation' to the walls of the engine compartment.
Added aluminum foil heat shield to the turbo to cover it's lack of detail.
Bent aluminum tube for the exhaust pipe.
Scratch built shifter actuator rod and rear frame brace.
BMF added to the side view mirrors.

I'm sure there are things I'm forgetting, it's been a long build.

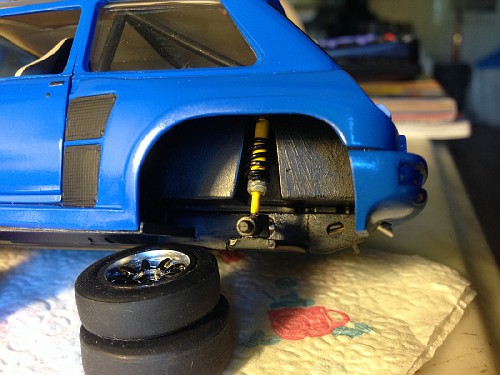
I also took the stock Minilite wheels, painted them gloss black, and hand brushed some Alclad around the rim to simulate a polished rim. 

Driver's seat view (still having problems getting decent macro pictures, sorry):

Under hood area, again, kind of fuzzy image:

Front seats with Milliput harnesses and PE hardware:

Engine compartment:

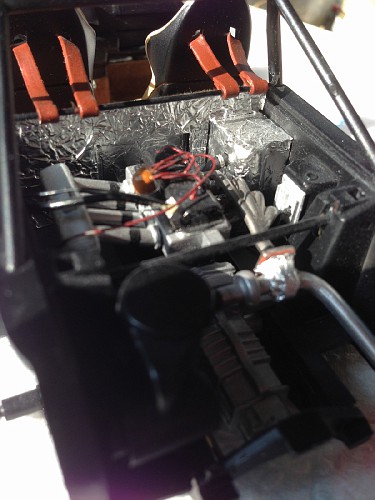
Another view of the engine compartment:

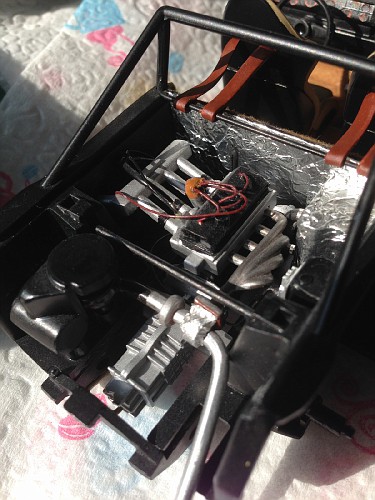
Scratch-built coil-overs:

Engine compartment with body attached, hatch open:

View with everything open:

And finally, front end view:

G. Beaird,

Pearland, Texas

  • Member since
    January 2010
Posted by CrashTestDummy on Tuesday, July 29, 2014 2:01 PM

The body didn't fit well down over the chassis when I was finishing up the assembly.  A couple of attempts to get the body secured to the lower portion of the floor pan failed quickly, no matter how much glue and clamping I used.  I think it's due to interference between the windshield and the dash, probably complicated by the additional paint, and some warpage over the years.  You have to bow out the sides of the rocker panels to get the body to go on over the chassis, and after a couple of attempts of this, I just knew I was going to break something which I didn't want to do.  So I just glued things down as best I could and called it complete.  

The painting details were aided by a cool little fine masking 'pen' my wife got me from one of her crafting sites called 'Fineline' Masking Pen.  The pen uses what looks like a hypodermic needle tube for the applicator.  The cap has a wire you insert into the tube to help keep it clear.  It seems to be a bit more controllable than liquid mask and pen I've used in the past.  The really nice thing is it comes off the surface of your work quite easily.  I was able to mask and paint the turn signal/brake lights and rear quarter 'vents with ease.  

Now, on to the next project!

Gene Beaird,

Pearland, Texas

G. Beaird,

Pearland, Texas

  • Member since
    May 2009
  • From: Poland
Posted by Pawel on Tuesday, July 29, 2014 3:58 PM

Howdy!

A very nice model, I like it a lot! This car was a legend when I was going to the primary school, in the end of the eighties! Masking pen - that sounds good, have to look around for one of them. Good luck with your next projects and have a nice day

Paweł

All comments and critique welcomed. Thanks for your honest opinions!

www.vietnam.net.pl

  • Member since
    October 2007
  • From: Scotland
Posted by Milairjunkie on Tuesday, July 29, 2014 4:34 PM

Great model of a legendary "pocket rocket"!

Was lucky enough to see one of these in the Renault "Café" on the Champs-Élysées on Sunday, on it's own little podium, gleaming like new.

The Tour de France finish wasn't bad either Yes

  • Member since
    January 2010
Posted by CrashTestDummy on Wednesday, July 30, 2014 12:13 PM

Thanks Pawel and Milair!  The scratch building was fun, it's a shame it didn't fit together any better.    

G. Beaird,

Pearland, Texas

  • Member since
    January 2014
Posted by JayF on Thursday, July 31, 2014 11:49 AM

Nice Renault 5 ! Excellent work !

I thought Heller only did cars in the very weird 1/43 scale, not in 1/24.

By the way, is it true that in those kits there are very little to no interior details, and you have to build it all by yourself ?

  • Member since
    January 2010
Posted by CrashTestDummy on Friday, August 1, 2014 3:12 PM

There's not much to the factory interior on the 1:1 car to begin with, but yeah, the interior was fairly simple.  It came with a pair of seats, which I replaced, a shifter, which I used, and the dash was one piece with some pedals hanging down from it.  The steering wheel was a separate piece.  I dry-brushed the instrument panel with some dark orange (the IP lettering is orange, like a lot of 'sporty' cars were back then), but that's about it.  It also had a 4-point roll bar, to which I added the harness bar so I could attach my scratch-built harnesses, and an engine cover, which I replaced with some thinner styrene.  I was hoping to be able to prop the replacement cover up when the hatch was open, but that's a no-go.  I just have to remove it to display the engine compartment, which is fairly easy once you flex the plastic a bit.  

The doors are one piece, too.  The inside panels have armrests, a door latch housing and window cranks molded in.  I guess I could have cut these pieces off and fabbed up some, but they won't be seen that much.  I highlighted them with some flat black paint, which helped a bit.

Under the hood (boot), the spare tire compartment is a one-piece molding with the exception of the master cylinder.  I used a fair amount of bent wire up there.  

G. Beaird,

Pearland, Texas

JOIN OUR COMMUNITY!

Our community is FREE to join. To participate you must either login or register for an account.

SEARCH FORUMS
FREE NEWSLETTER
By signing up you may also receive reader surveys and occasional special offers. We do not sell, rent or trade our email lists. View our Privacy Policy.