SEARCH FINESCALE.COM

Enter keywords or a search phrase below:

Tamiya Porsche 959

2025 views
13 replies
1 rating 2 rating 3 rating 4 rating 5 rating
  • Member since
    January 2022
  • From: Canada, ON
Posted by q20v on Monday, January 16, 2023 7:16 AM

Thank you everyone!

I used Tamiya Weathering Master Drybrush on the transmission parts.

  • Member since
    October 2019
  • From: New Braunfels, Texas
Posted by Tanker-Builder on Saturday, January 14, 2023 8:34 AM

Oho!

     Now, that's one pretty Porsche!

  • Member since
    May 2022
Posted by Eugene Rowe on Saturday, January 14, 2023 7:51 AM

Very well done,!I like the transaxle detail!

  • Member since
    January 2022
  • From: Canada, ON
Posted by q20v on Saturday, January 14, 2023 7:42 AM

 IMG_6420 by barry.goss, on Flickr


 IMG_6417 by barry.goss, on Flickr

  • Member since
    January 2022
  • From: Canada, ON
Posted by q20v on Saturday, January 14, 2023 7:41 AM

Finally finished this kit this morning. I was intimidated by the tail light painting but it came out well.

Of all the new stuff I tried, I liked:

- Body paint/sand/polish process. Huge improvement from any other model I've made.

- Tamiya panel line for weathering the engine details. I debated using this product for the actual panel lines but decided not to. I've never done this and don't want to mess up the paint job!

- I polished the windows inside and out using Tamiya sponge with Fine polish, then waxed them using Tamiya wax. They were kinda dull before but now they are very clear.

Areas for improvement:

- I want to add a bit of detail to the engine bay on the sides (where it's all silver). Maybe some small decals and paint accents.

One thing that blew me away was the fact I didn't put a big CA-glue finger print on the roof, windshield, or hood at the very end, which I normally do. 

The kit itself was so-so for part fittment, I struggled with a few pieces (body to chassis, engine in the chassis, side windows were 'okay', wheels feel very loose and rear wheels sit very forward in the wheel wells (could be a characteristic of this car).

On to the next one!

 IMG_6413 by barry.goss, on Flickr


 IMG_6414 by barry.goss, on Flickr


 IMG_6415 by barry.goss, on Flickr


 IMG_6419 by barry.goss, on Flickr


 IMG_6416 by barry.goss, on Flickr


  • Member since
    April 2003
  • From: USA
Posted by keavdog on Tuesday, January 10, 2023 8:29 AM

Very nice build so far.  Really cool that your daughter wants to be involved.  Could never get mine interested in models, though she did do a Zulu diorama once.

Thanks,

John

  • Member since
    August 2021
Posted by lurch on Tuesday, January 10, 2023 8:00 AM

Thats looking preety good. Glad your daughter enjoys it also. I get those moments with my grandkids. 

  • Member since
    January 2022
  • From: Canada, ON
Posted by q20v on Tuesday, January 10, 2023 6:42 AM

Thanks for the comments guys. So far I'm quite happy with the outcome and it's encouraging to see some of the new techniques working out.

Last night my daughter and I finished polishing the body. She was curious about the procedure and helped with the rear spoiler. She's 9, after I put her to bed and I went into the basement a few minutes later she came down and asked to watch me build. She has a Plymouth Cuda in the works so after watching me / helping for a few minutes she continued with her model for a bit. I love that she's intrigued with the hobby and cherish moments like that.

For polishing (after all wet sanding) I used Tamiya Coarse then Fine polish with a Tamiya sponge. I haven't applied the Tamiya Wax yet but will once the model is complete.

Next step is painting the trim and installing the windows and body details.

 IMG_6387 by barry.goss, on Flickr


 IMG_6390 by barry.goss, on Flickr


 IMG_6389 by barry.goss, on Flickr


 IMG_6388 by barry.goss, on Flickr

  • Member since
    May 2022
Posted by Eugene Rowe on Monday, January 9, 2023 4:49 PM

Really clean build !

  • Member since
    December 2008
  • From: UK
Posted by PatW on Monday, January 9, 2023 4:22 PM

Looking good! I saw one on the Eurosport TV programme of recent Dakar Rallies where they used the 959.

Remember , common sense is not common.

  • Member since
    October 2019
  • From: New Braunfels, Texas
Posted by Tanker-Builder on Monday, January 9, 2023 10:12 AM

Well:

      I dunno, It looks pretty good ta me! I gotta say, that's a clean looking  interior! The engine work ain't no slouch either!

  • Member since
    January 2022
  • From: Canada, ON
Posted by q20v on Monday, January 9, 2023 10:09 AM

For the body, I used Vallejo primer but found it challenging to use. Next time I'll use Tamiya spray primer. 

I then put on 3 coats of colour (mixed Tamiya Titanium Silver with Flat Aluminum, random ratio, worked out well). 

Then tried Pledge (Future) clear coat but it ran on the hood and messed up the metallic finish. I didn't like the Pledge because I had to put on terribly light coats, otherwise it would run, and I didn't find the gloss was building up like I wanted it to. I ended up respraying the colour and using Revell Spray Can Clear. Four coats within an hour and the finish was much better.

Wet sanded using 3 / 4 / 6 / 12k, then Tamiya Coarse then Fine Polish with their little sponges. Then a coat of Tamiya Wax.

I initially tried 3k wet sand followed by my real automotive compound / polish but found it was making the clear coat tacky, so it wasn't reacting well.

I think the finish could definitely be deeper, more glossy. I'll have to experiement with wet sanding the base colour, maybe more clear coat (5 coats?), and more time with the finer wet sanding (6 and 12k).

It's my first attempt so I'm sure the above procedure will change as I learn more!

  • Member since
    January 2022
  • From: Canada, ON
Posted by q20v on Monday, January 9, 2023 9:56 AM

Here's how I made the drain lines:


Started with a piece of sprue:

 IMG_6121 by barry.goss, on Flickr


Heated it with a lighter, gently, stretched it and held until it cooled. Then bent it using my fingers into shape (not heated up).

 IMG_6122 by barry.goss, on Flickr


Melted one end to try and simulate a flange of some sort and painted. The black section is the flexible rubber portion of the line.

 IMG_6124 by barry.goss, on Flickr


Installed:

 IMG_6125 by barry.goss, on Flickr

  • Member since
    January 2022
  • From: Canada, ON
Tamiya Porsche 959
Posted by q20v on Monday, January 9, 2023 8:40 AM

Hey guys,


Been working on this kit for a couple months on and off, getting close to completion. I was big into plastic modelling decads ago and recently got back into it. I quickly assembled a Subaru Impreza Rally car a year ago but paused over the summer. I did a lot of research on tips / techniques over the past year to help hone the craft and take the detail to the next level (vs simple brush paint / rattle can and assemble iaw the kit instructions).

On this build I used

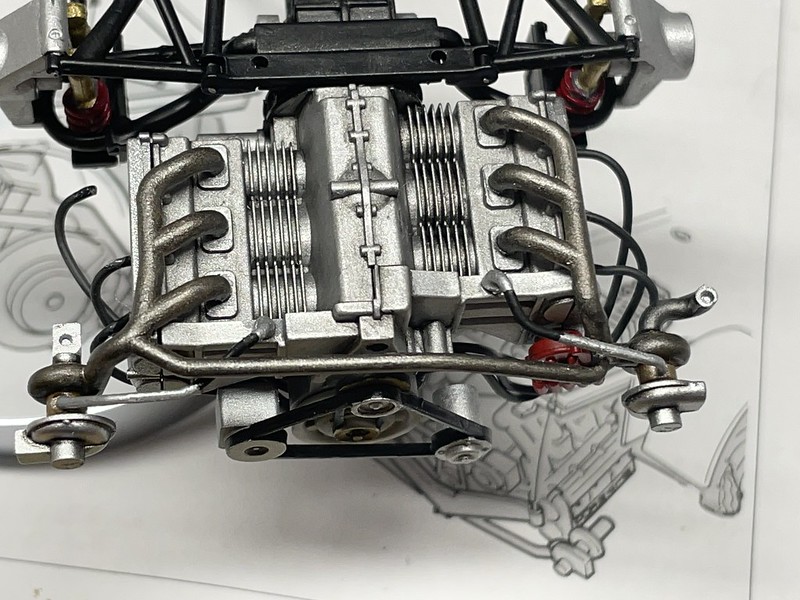
- Tamiya Panel Line on some engine details

- spark plug wires

- mixed some custom colours

- used adhesive backed foil for hose clamps

- used different finishes on various details of the same part (never did this before!)

- tried flocking in the interior

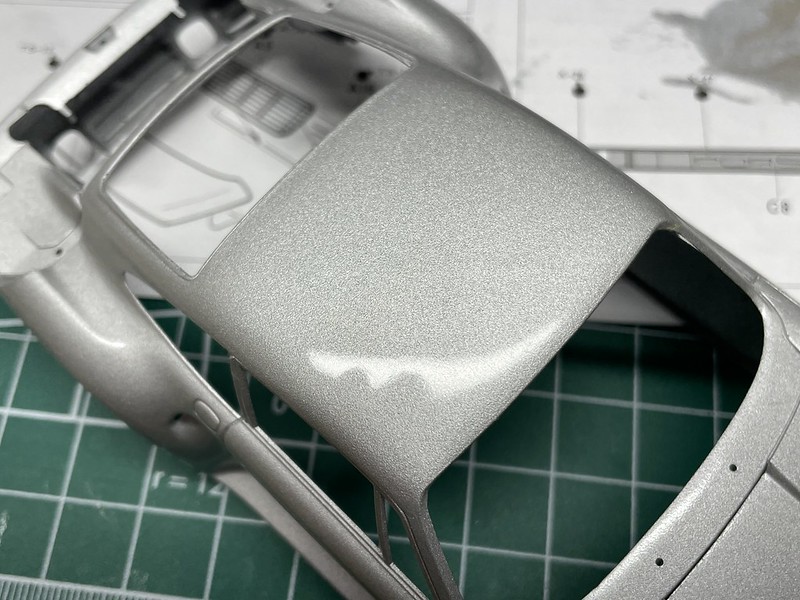
- finally tried my hand at prime/paint/clear/POLISH of the body. I've always just used paint and that's it.

- Made some custom turbo oil drain lines using heated/stretched old sprue.

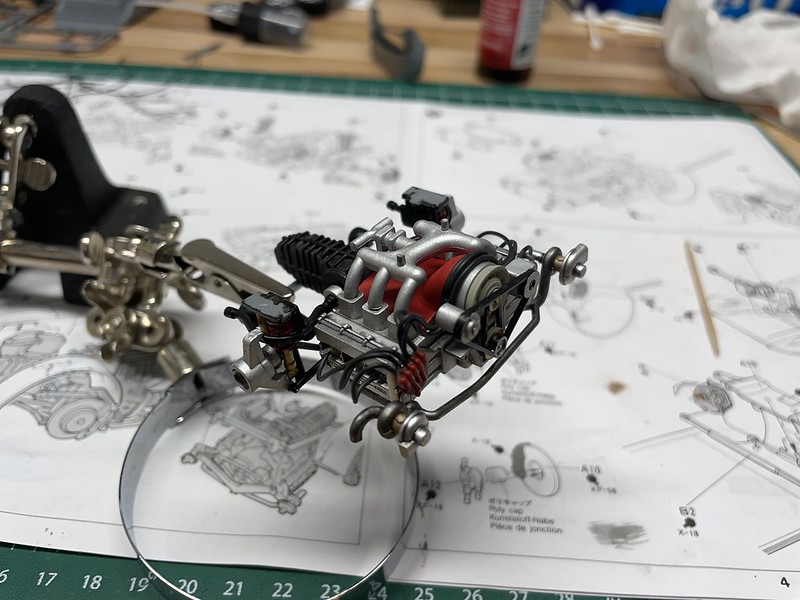
Anyway, here are some progress shots. I'll update with the finished build soon.

I'm using this kit as a learning and development step, to see what works and doesn't. So lots of room for improvement but that's the nature of this hobby :)


 IMG_6107 by barry.goss, on Flickr


 IMG_6126 by barry.goss, on Flickr


 IMG_6132 by barry.goss, on Flickr


 IMG_6359 by barry.goss, on Flickr


 IMG_6358 by barry.goss, on Flickr


 IMG_6360 by barry.goss, on Flickr


Before:

 IMG_6376 by barry.goss, on Flickr


After:

 IMG_6379 by barry.goss, on Flickr

JOIN OUR COMMUNITY!

Our community is FREE to join. To participate you must either login or register for an account.

SEARCH FORUMS
FREE NEWSLETTER
By signing up you may also receive reader surveys and occasional special offers. We do not sell, rent or trade our email lists. View our Privacy Policy.