SEARCH FINESCALE.COM

Enter keywords or a search phrase below:

Atlantis Blackbeard Pirate Figure (WIP)

8526 views
51 replies
1 rating 2 rating 3 rating 4 rating 5 rating
  • Member since
    March 2012
  • From: Marysville, WA
Atlantis Blackbeard Pirate Figure (WIP)
Posted by David_K on Monday, September 11, 2017 7:29 PM

Hi All-

I'm kind of a newb to figures, I've built a few back in the day (these days I mostly build sailing ship models)...

But I recently bought an Atlantis Blackbeard Pirate figure and I had a couple of questions about basic painting/assembly.  Any advice would be appreciated so I can get off on the right foot.

How do most people go about building plastic model figure kits?  Airbrush, brushes?

Partial assembly before painting, or complete assembly first?

I wonder if anyone here has built the kit?  I typed it in the *search forums* bar and got zero matches.

I'm likely to turn this into a WIP once I get started.

Anyway, thanks!

Dave

        _~
     _~ )_)_~
     )_))_))_)
     _!__!__!_         
     (_D_P_K_)
   ~~~~~~~~~~~~~
    ~~~~~~~~~~~

Current Project:  Imai/ERTL Spanish Galleon #2

Recently Finished: Revell 1/96 Cutty Sark

Next Up:  ???


  • Member since
    November 2009
  • From: SW Virginia
Posted by Gamera on Tuesday, September 12, 2017 7:38 AM

Personally I'd assemble the entire figure, prime him, and then paint. The few I've done I've used an airbrush for the big areas like the his coat etc and then brush in paint details.

Highlander242 has posted some how-tos here on the figure forum and in the magazine. You might check YouTube as well. There's loads of useful videos there, I entered 'painting 1/6th figures' and got a boatload of stuff.  

"I dream in fire but work in clay." -Arthur Machen


  • Member since
    March 2012
  • From: Marysville, WA
Posted by David_K on Tuesday, September 12, 2017 4:52 PM

Thanks, Gamera!

I'll take a closer look among the forum, and also check out some youtube videos!


        _~
     _~ )_)_~
     )_))_))_)
     _!__!__!_         
     (_D_P_K_)
   ~~~~~~~~~~~~~
    ~~~~~~~~~~~

Current Project:  Imai/ERTL Spanish Galleon #2

Recently Finished: Revell 1/96 Cutty Sark

Next Up:  ???


  • Member since
    September 2006
  • From: Bethlehem PA
Posted by the Baron on Wednesday, September 13, 2017 1:29 PM

I've never heard of this kit-is it a styrene kit?  What scale is it?

To add to Gamera's tips-assemble the kit, taking care to clean up seams and any flaws.

If it's a styrene kit, there are likely to be seams where parts join together.  You can putty seams, but if it's a styrene kit, I like to use liquid styrene cement for assembly, and when I attach two parts, I'll apply pressure to force a bead of melted styrene to rise along the seam.  When the parts cure, I can scrape this bead away with a hobby knife, and it reduces or eliminates the seam.  I'll also use stretched sprue, in this case, and liquid cement.  Lay the sprue into the seam and run the liquid glue over it.  Again, you get a welded fill to the seam, and I like this, it's all the same material.

For putty, I use Squadron white thinned with acetone.  I will apply putty to the seams, then run a cotton swab soaked in acetone across the seam to remove the excess.  Or I will dissolve putty in some acetone in a glass jar, and then apply this to the seam with an old brush.  I call that my homemade Mr Surfacer.  You can use Mr Surfacer, too, a liquid filler that comes in three thicknesses, but it's usually not thick enough for my liking.

Besides seams where parts join, you'll want to remove any mold seams, seams that show where the two halves of the mold met.  There is usually a little bit of a line around the part, where the mold halves met.  You can clean these up by scraping with a knife, and with fine sandpaper.  I also like to use a Flex-i-file for this work, because it lets me get the abrasive right where I want it.  For example, I find it much better for seams on the legs of figures in larger scales, than if I used a piece of sandpaper to sand it free-hand.  It's more consistent.

If it's a resin kit, you'll have seams, and you may also have bubble holes or other molding flaws to correct.  Use the putty and surfacers for these as necessary, and sand them as necessary.

At this point, prime the figure.  Priming doesn't just provide "tooth" for your finish coats of paint, but it can show any other flaws that you didn't see the first time.  It's not unusual to cycle through this process more than once, before you get to applying your finish coats.

Hope that helps!

Best regards,

Brad

The bigger the government, the smaller the citizen.


  • Member since
    March 2012
  • From: Marysville, WA
Posted by David_K on Wednesday, September 13, 2017 4:37 PM

Very good advice, thanks!

Yes, it's a styrene kit, 1/10 scale...

Here's a link to it.

https://www.amazon.com/Blackbeard-Pirate-Figure-Model-Atlantis/dp/B009LM669W

I'll probably start some preliminary assembly and seam *fixing* very soon.

Dave

        _~
     _~ )_)_~
     )_))_))_)
     _!__!__!_         
     (_D_P_K_)
   ~~~~~~~~~~~~~
    ~~~~~~~~~~~

Current Project:  Imai/ERTL Spanish Galleon #2

Recently Finished: Revell 1/96 Cutty Sark

Next Up:  ???


  • Member since
    November 2009
  • From: SW Virginia
Posted by Gamera on Wednesday, September 13, 2017 7:02 PM

Brad: Lol, I'm so used to puttying and sanding seams by now I didn't even think about that most important part! Thanks for covering for me there.

Dave: Very cool figure. I don't live that far from Blackbeard's old stomping grounds in the Carolina's and am hopefully headed out that way on vacation in two months. Thanks for the link, I might have to pick up one for myself!

"I dream in fire but work in clay." -Arthur Machen


  • Member since
    March 2012
  • From: Marysville, WA
Posted by David_K on Wednesday, September 13, 2017 7:09 PM

im hoping I can do a good job with it.  It is a neat kit.

Back in the day, Aurora made a Captain Kidd figure kit, sort of a companion to the Blackbeard...but it's only available on the secondary market (like eBay) and it's super expensive....

Anyway, thanks again for all your advice, I got some putty today...it just got real!

Dave

        _~
     _~ )_)_~
     )_))_))_)
     _!__!__!_         
     (_D_P_K_)
   ~~~~~~~~~~~~~
    ~~~~~~~~~~~

Current Project:  Imai/ERTL Spanish Galleon #2

Recently Finished: Revell 1/96 Cutty Sark

Next Up:  ???


  • Member since
    September 2006
  • From: Bethlehem PA
Posted by the Baron on Friday, September 15, 2017 1:03 PM

Ah, OK, thanks for the link!  Yeah, it's what I pictured, a re-release (and rework?) of Aurora's Blackbeard.  Yes, there will probably be some seamage to deal with, but you can turn it into a very nice figure.

Heh, Gamera, no sweat!  I read your post and thought I could help with some detail Wink

The bigger the government, the smaller the citizen.


  • Member since
    September 2006
  • From: Bethlehem PA
Posted by the Baron on Friday, September 15, 2017 1:04 PM

Also, with a kit in this scale, of this size, you can probably use the airbrush to lay down your base colors, and maybe even to do some shading.

I look forward to seeing a build blog!

The bigger the government, the smaller the citizen.


  • Member since
    June 2017
Posted by UnwaryPaladin on Thursday, September 21, 2017 6:25 AM

That is an interesting kit, looking forward to your build. Blackbeard is an interesting character. I've read he would put smoldering wood or something in his beard to intimidate his victims. You could drill holes in his beard and make him an incense burner! Tongue Tied

  • Member since
    November 2009
  • From: SW Virginia
Posted by Gamera on Thursday, September 21, 2017 8:00 AM

LOL I love the idea of the incense burner!


But Blackbeard only emits the smell of fear and terror!!! Pirate 

"I dream in fire but work in clay." -Arthur Machen


  • Member since
    March 2012
  • From: Marysville, WA
Posted by David_K on Thursday, September 21, 2017 5:12 PM

Well, I've gotten some body assembly done, it won't be long before I start doing some painting. 

I figure I might as well document my progress here, but I know at some point Photobucket started charging (quite a bit) to be able to share photos to websites....does anyone have recommendations for a free site to store photos that I can link here to the forum?  What do people do these days to post photos?

Thanks!

Dave

        _~
     _~ )_)_~
     )_))_))_)
     _!__!__!_         
     (_D_P_K_)
   ~~~~~~~~~~~~~
    ~~~~~~~~~~~

Current Project:  Imai/ERTL Spanish Galleon #2

Recently Finished: Revell 1/96 Cutty Sark

Next Up:  ???


  • Member since
    November 2009
  • From: SW Virginia
Posted by Gamera on Thursday, September 21, 2017 8:04 PM

Sounds cool!!!

Personally I switched over the Image Shack. I think it's about forty or so a year and it's worth that to be rid of PB's constant pop-up ads. I switched back when PB started screwing around with their service. IS was running a half-price sale I'm guessing to clean up the disgusted PH customers.

I've heard good stuff about Imgur, Flickr, and several others. You might want to shop around.  


Edit: Ok, it's Flickr not Flicker! My mistake.

"I dream in fire but work in clay." -Arthur Machen


  • Member since
    January 2006
  • From: California
Posted by SprueOne on Sunday, September 24, 2017 1:23 PM

I'll follow progress here. I'm going to start my Michael Myers build in October so I'll need learn some techniques on my first large figure build.

Graet advice and tips from Gamera and Brad!


Anyone with a good car don't need to be justified - Hazel Motes


Iron Rails 2015 by Wayne Cassell Weekend Madness sprueone

  • Member since
    November 2008
  • From: Hatboro, PA
Posted by Justinryan215 on Sunday, September 24, 2017 4:32 PM

Flickr is fantastic....they offer 1Tb free storage.  


Now get some photos up here!

"...failure to do anything because someone else can do better makes us rather dull and lazy..."

Mortal as I am,I know that I am born for a day.  But when I follow at my pleasure the serried multitude of the stars in their circular course, my feet no longer touch the Earth...


  • Member since
    March 2012
  • From: Marysville, WA
Posted by David_K on Monday, September 25, 2017 5:15 PM

Hi guys-

Not much progress to report.

I've made some prelim assembly of the body, and went with some Tamiya putty to help fill up the seams....boy, was that a mistake!  I put way too much putty, and when it was dry, I kept trying to sand it down to get it smoothly blended, but no go.  After looking online, I was able to find a solution to remove it: Soaked it in Brake Fluid for a few hours, and it basically wiped right off!  There's still a bit in the seams (where I wanted it anyway!)....I think I'm going to get some Perfect Putty (anyone use that stuff?)...it seems like it might be easier to work with, since it's water-based and excess can be pretty much removed with a wet q-tip on the fly....anyway, I might give that a whirl before I lay down the primer.

On the Ship Forums, I used to use Photobucket for posting pics, but I'm avoiding photobucket now (400 bucks a year?!?)....I've just uploaded a few pics of Blackbeard on Flickr, let me see if I can get them posted here....

 20170923_094626 by Dave Kump, on Flickr

Ah, there it goes!  I must use the BBC code to get the pics on here!

These first few are pics of the assembled main body parts (body, arms, feet) with Tamiya Putty slathered all over 'em!  More experienced figure modelers might instantly realize I went too far with the application!  lol

 20170923_094619 by Dave Kump, on Flickr

 20170923_094638 by Dave Kump, on Flickr

 20170923_094646 by Dave Kump, on Flickr

I tried to sand it back down to match the countours of the figure, but it was a serious pain...and it eventually became obvious that I was beginning to sand down the plastic surrounding the putty, obviously not an ideal result!

So, after accepting the fact that I needed to get that putty cleaned off, I soaked the parts in brake fluid and after a few hours, I was able to get it pretty clean with a paper towel!

Here's how the parts look now:

 20170925_150041 by Dave Kump, on Flickr

 20170925_150048 by Dave Kump, on Flickr

So I think I'm going to order some of the Perfect Putty, or Perfect Plastic or whatever it's called and see if I can get a better result with water-based stuff that I can remove more easily as I work with it?  Once I get those seams dealt with, I'll put down the primer and see how it all looks before starting painting.

BTW, if you notice that part of the body is white while all the other parts are a pale yellow, it's because my kit came with duplicates of one body piece, and missing another.  I contacted Atlantis and they were very responsive and friendly, and immediately shipped me out the replacement piece (the white piece, must have been from a different run of parts)...anyway, good customer service!

Thanks for watching, I'll post some more progress whenever I get some more work done...busy at work this week, and then I'm leaving town next week, so it might be a bit before I get back to the workbench.

Dave


I'll post his to test it, and if it works, I'll add the other pics.

Dave

        _~
     _~ )_)_~
     )_))_))_)
     _!__!__!_         
     (_D_P_K_)
   ~~~~~~~~~~~~~
    ~~~~~~~~~~~

Current Project:  Imai/ERTL Spanish Galleon #2

Recently Finished: Revell 1/96 Cutty Sark

Next Up:  ???


  • Member since
    November 2009
  • From: SW Virginia
Posted by Gamera on Tuesday, September 26, 2017 7:44 AM

Gosh I hate it when they mold the seam lines over details like that.

The Perfect Plastic Putty is good stuff, you can let it dry for ten mins or so and then scrub it with a moist cotton swab to take off the excess leaving putty in the seam. You can do the same thing with Squadron putty using rubbing alcohol instead of water. And I'm guessing most putties have some sort of solvent that works the same way. 

You'll probably still need to put a little putty on top of the seams and sand. I like using rolled up tubes of sand paper. Just go across the seam at a 90 degree angle the same way you'd do on an aircraft fusilage. You can roll the paper smaller as well to get into the folds of the coat and pants. 

I'm not sure what else to tell you, maybe Brad has some better advice. The best I can tell you is to go slow, sand a little, give it the eyeball, sand a little more if it needs it, etc. 

"I dream in fire but work in clay." -Arthur Machen


  • Member since
    June 2014
  • From: New Braunfels , Texas
Posted by Tanker - Builder on Thursday, September 28, 2017 8:37 AM

Hi;

 The rare times I do figures .( for a step away from everything else ) . I prime after assembling . Then I worry about tones and shadows and glazing . Priming seems to hide those pesky spots you can't put filler in .  T.B.

  • Member since
    June 2014
  • From: New Braunfels , Texas
Posted by Tanker - Builder on Thursday, September 28, 2017 8:40 AM

Hi ;

 If you've over sanded . Which at this point is negligible . You should use Mr Color Thick primer applied with a brush .Then gently go over it . T.B.

  • Member since
    September 2006
  • From: Bethlehem PA
Posted by the Baron on Thursday, September 28, 2017 2:41 PM

Tanker - Builder

...I prime after assembling...Priming seems to hide those pesky spots you can't put filler in.

I prime after assembly, too, but I don't find that priming hides spots that needs filling.  Instead, it makes them easier to spot.  I can go through a couple of passes of cleanup-prime-cleanup-prime, before I'm happy with the result and move on to applying my basic colors.  That's true for me of ordnance, ships and airplanes, too, as well as it is of figures, though the other subjects don't usually require as much fine correction, as a figure can.

Best regards,

Brad

The bigger the government, the smaller the citizen.


  • Member since
    September 2006
  • From: Bethlehem PA
Posted by the Baron on Thursday, September 28, 2017 2:49 PM

David_K

...I put way too much putty, and when it was dry, I kept trying to sand it down to get it smoothly blended, but no go...

I think that's your problem, rather than the specific putty you're using.  If there's a way to thin the putty before applying it, then you can apply it more precisely, and you won't have to worry about removing excess afterward.  That's how I hit on thinning Squadron putty, for example.  It occurred to me that even when applying the putty as precisely as I could, with a little dental spatula or even a toothpick, once it cured, I had a lot to sand away.  Using Mr. Surfacer also led me to realize that if I thinned my putty to a liquid, I could apply less of it, but get it right where I needed it, and reduce the amount of sanding that I'd have to do after the putty cured.  And less sanding mean less loss of detail to the surrounding areas.  Even if I use Milliput for filling, once I've applied the putty to the surface, I'll use water to remove it as much as possible from the areas I don't want to have putty.  And once it cures, there's much less cleanup for that spot.

But having said that, it looks like you've got it pretty much in hand, and it's coming together nicely.  I look forward to your next update!

Best regards,

Brad


The bigger the government, the smaller the citizen.


  • Member since
    March 2012
  • From: Marysville, WA
Posted by David_K on Saturday, December 16, 2017 10:13 AM

Hi All-

I've been making some good progress on Blackbeard lately.  In fact, I'm pretty much down to final assembly.  I painted all the parts, washed with some oil paint to give a weathered, dirty look, and in a few more days I should be assembling the little bits.

I will say that the fit of many of the parts so far has not been great, and it required a lot of inventive jigs, clips, rubber bands, clamps, etc. to keep things lined up while the cement dried.

Anyway, here's some pictures.  I figure (no pun intended) it'll be finished within week or two.

 20171106_161407 by Dave Kump, on Flickr

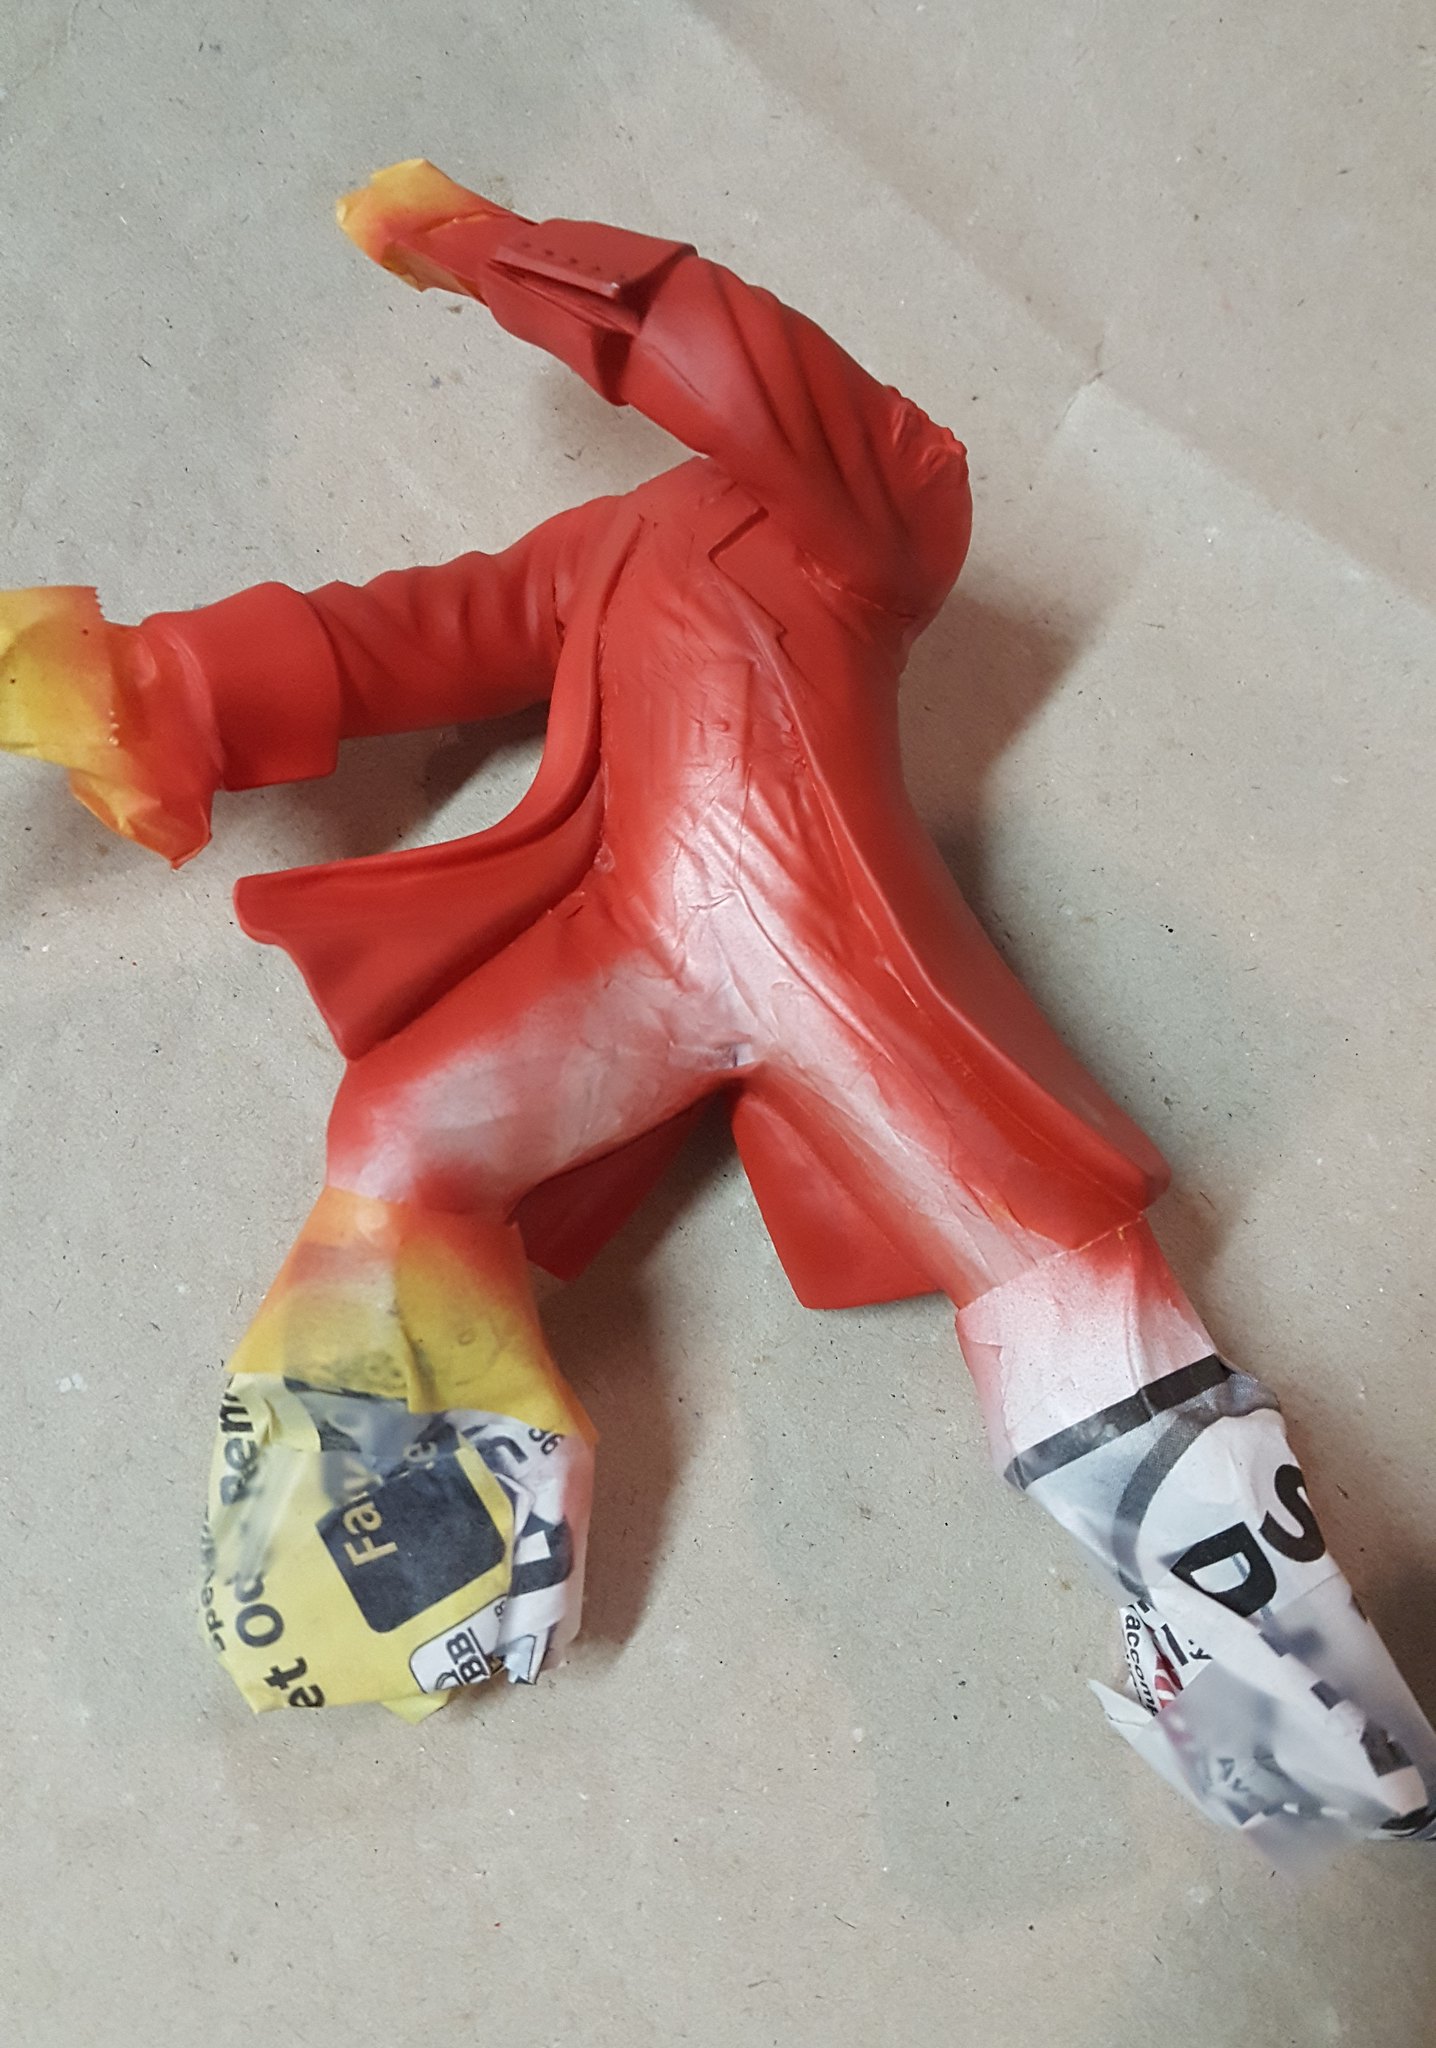
Here I wanted to use the airbrush for the red of his jacket, but I didn't want red on the hands, feet, tunic, etc., so I masked them off with Parafilm and then used some paper and masking tape to make it sturdy enough for handling during airbrushing.  For anyone who doesn't know, Parafilm is a GREAT material for masking uneven lines and other areas where compound angle are found...it's like a stretchy, slightly tacky wax paper...you lay it down over the parts, trace the lines with a shapr exacto, remove the excess and paint away!

 20171106_172154 by Dave Kump, on Flickr

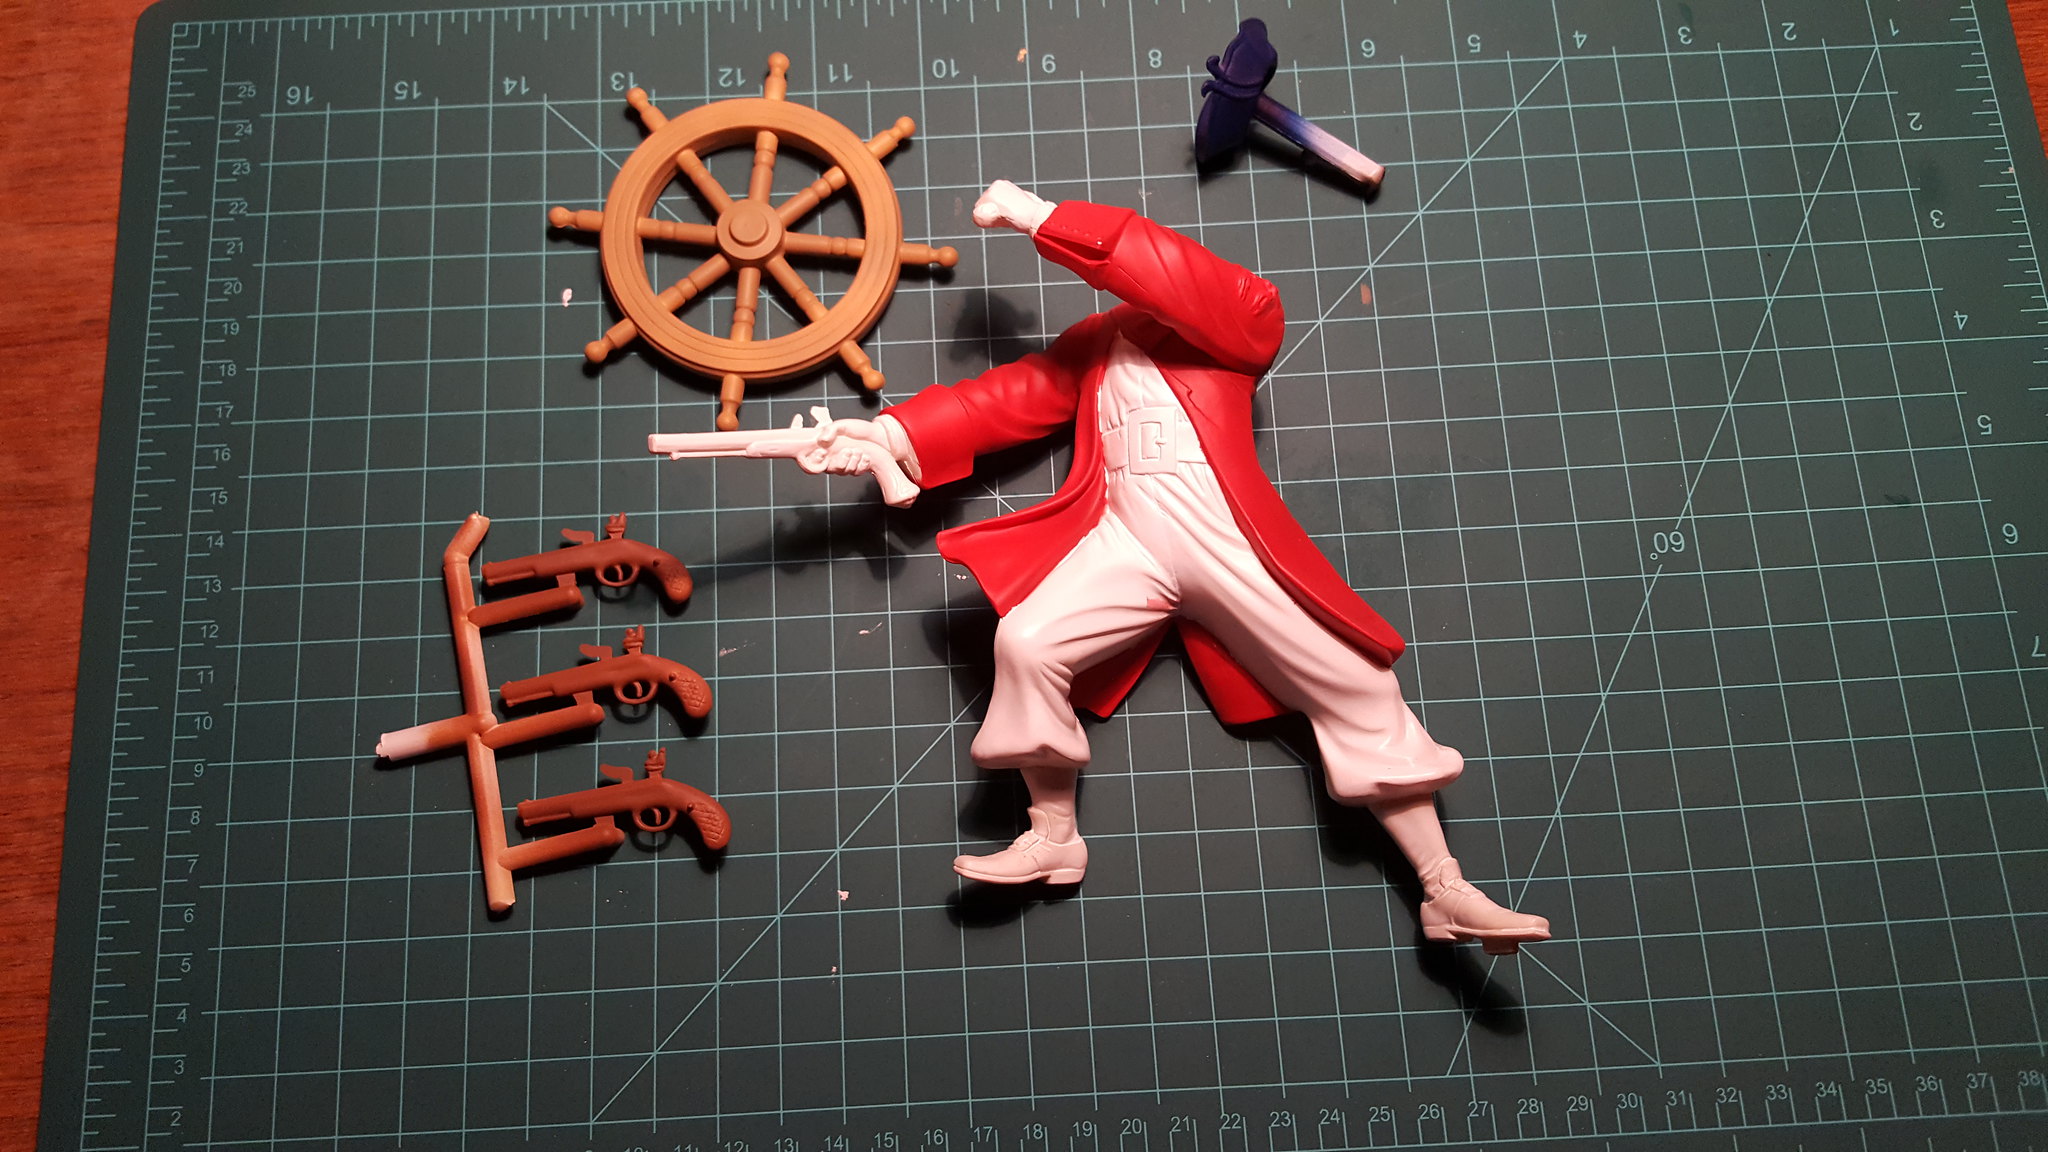
Here's the body after removing the maskant, and a few other parts after airbrushing the base coats

 20171208_155214 by Dave Kump, on Flickr

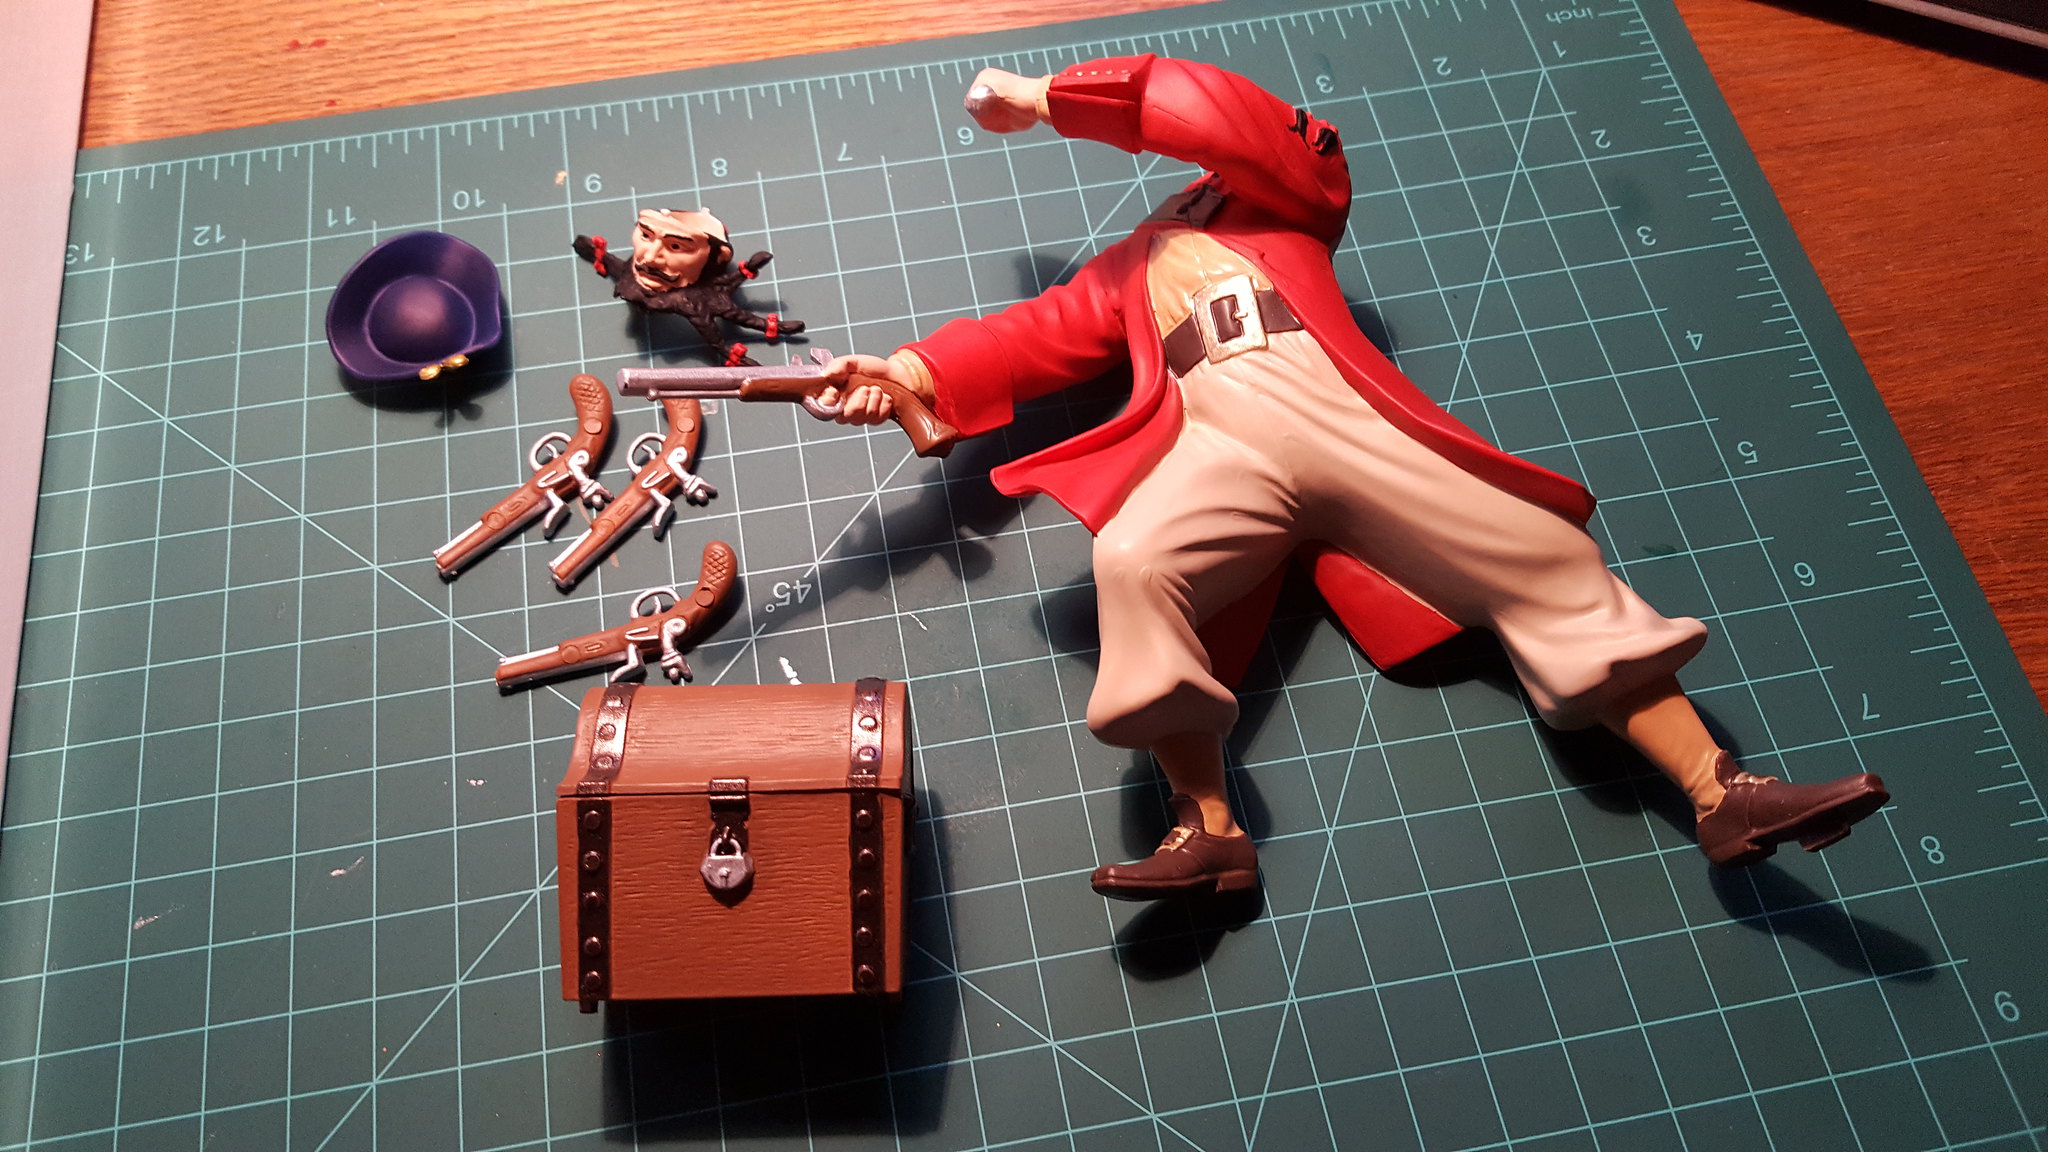
Some more parts after mroe detailed brush painting

 20171208_161636 by Dave Kump, on Flickr
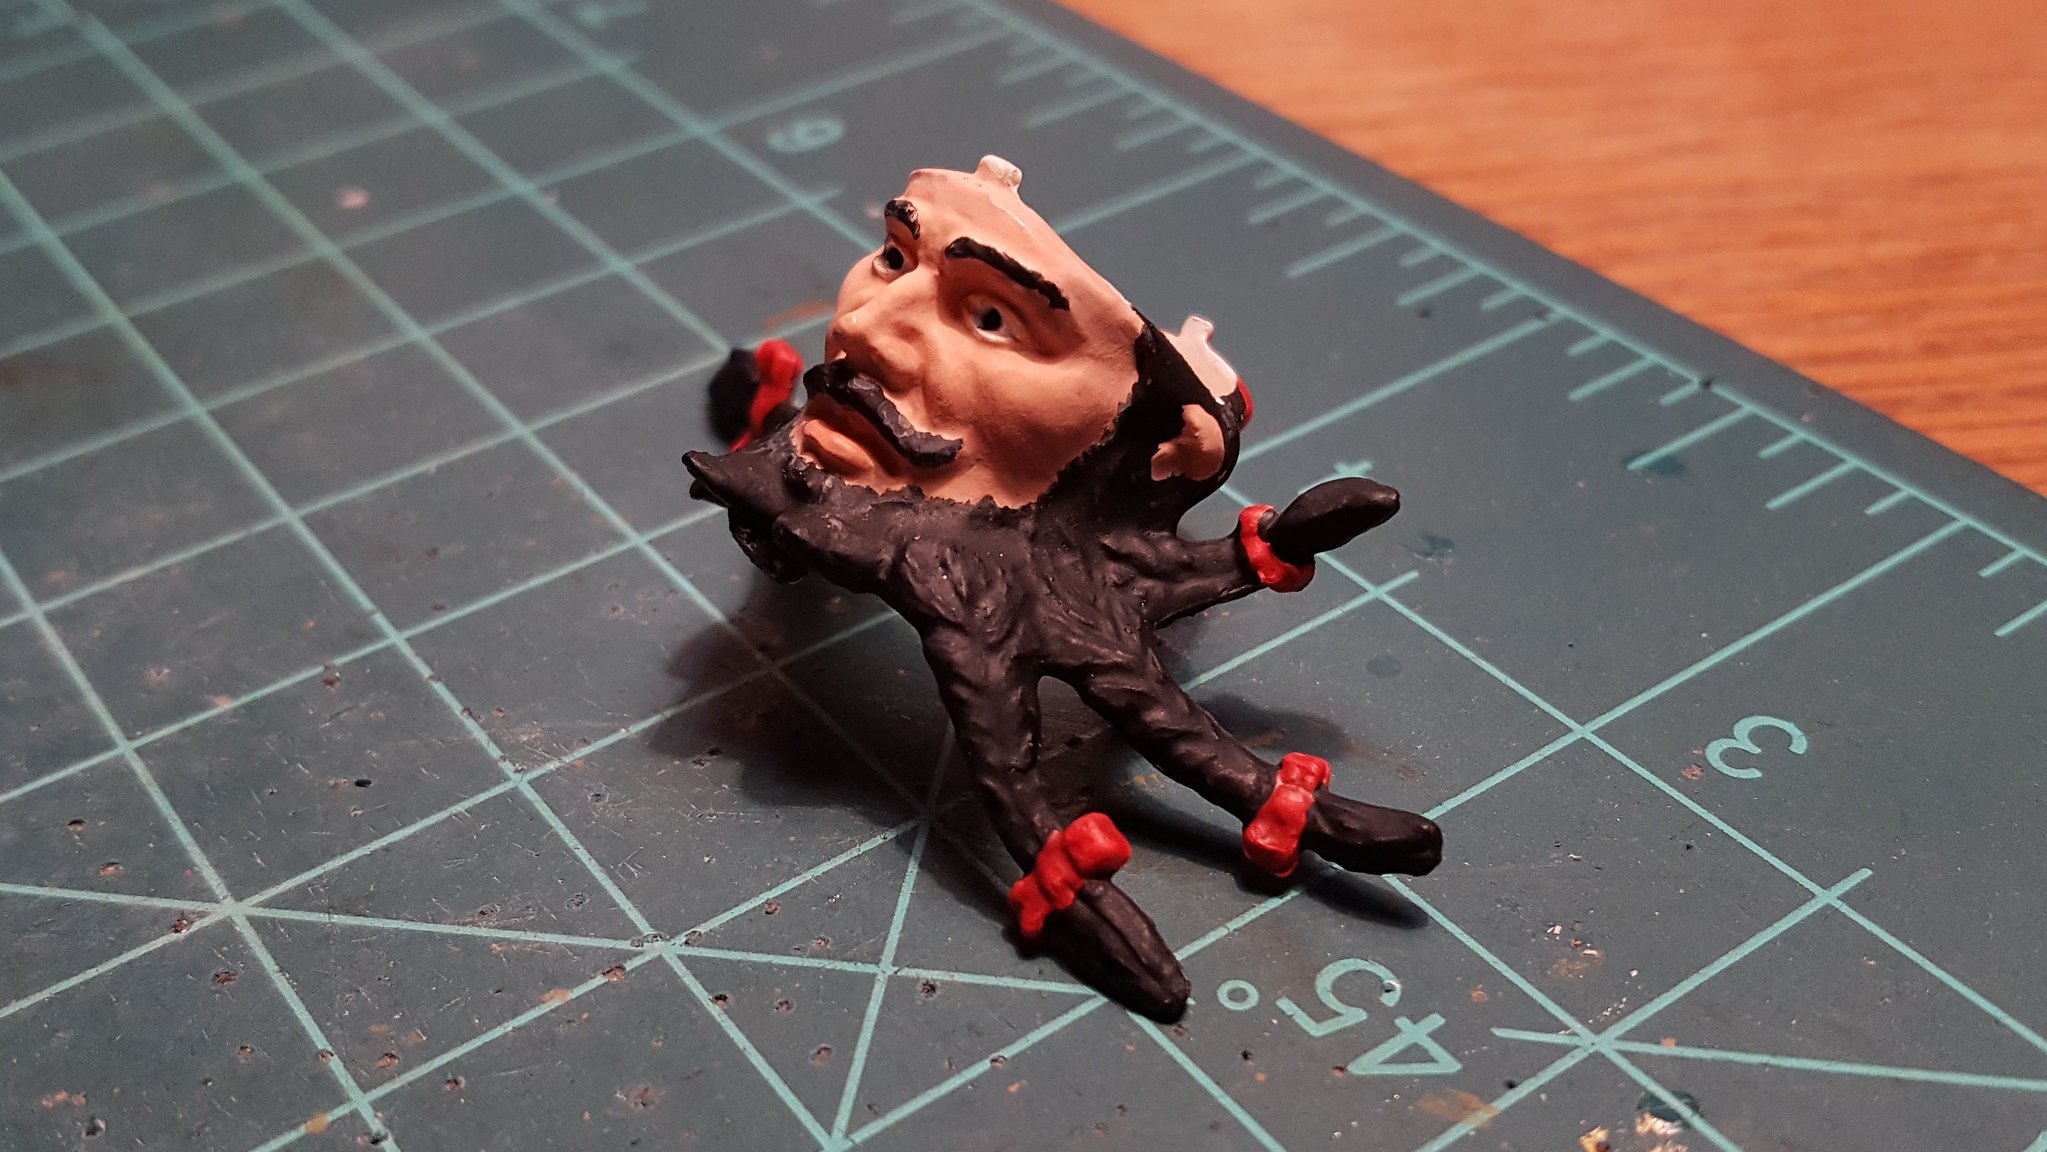
Closeup of the face

 20171209_150532 by Dave Kump, on Flickr

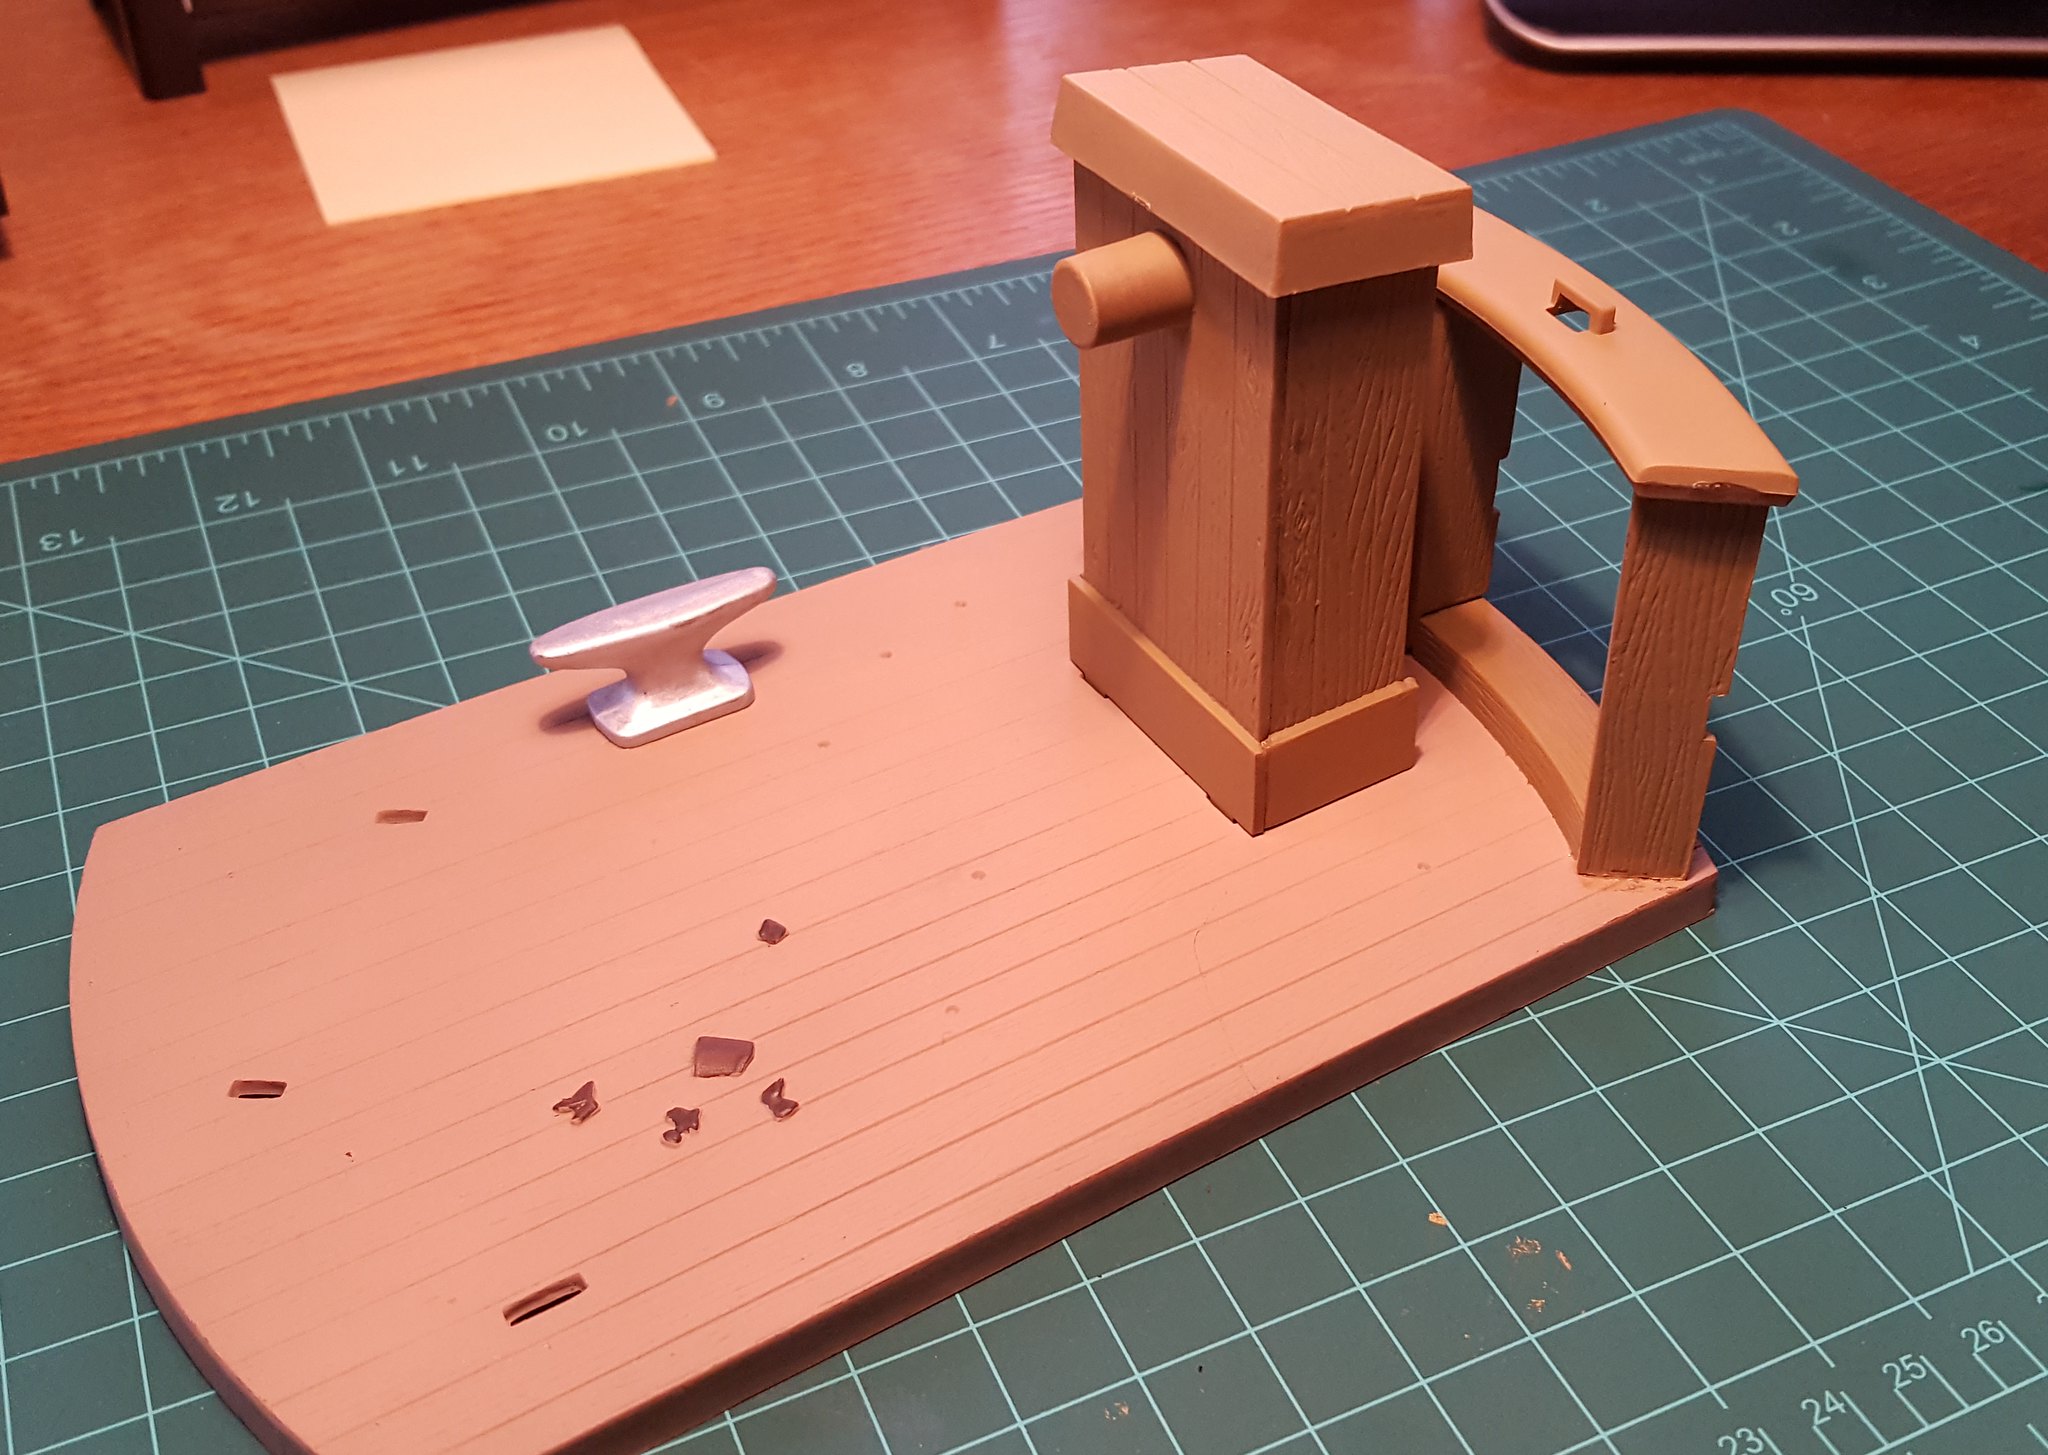
Display base before washing...this was painted Tamiya Wooden Deck Tan for the deck, and I used MM Wood for the railing and the wheel box

 20171212_142713 by Dave Kump, on Flickr

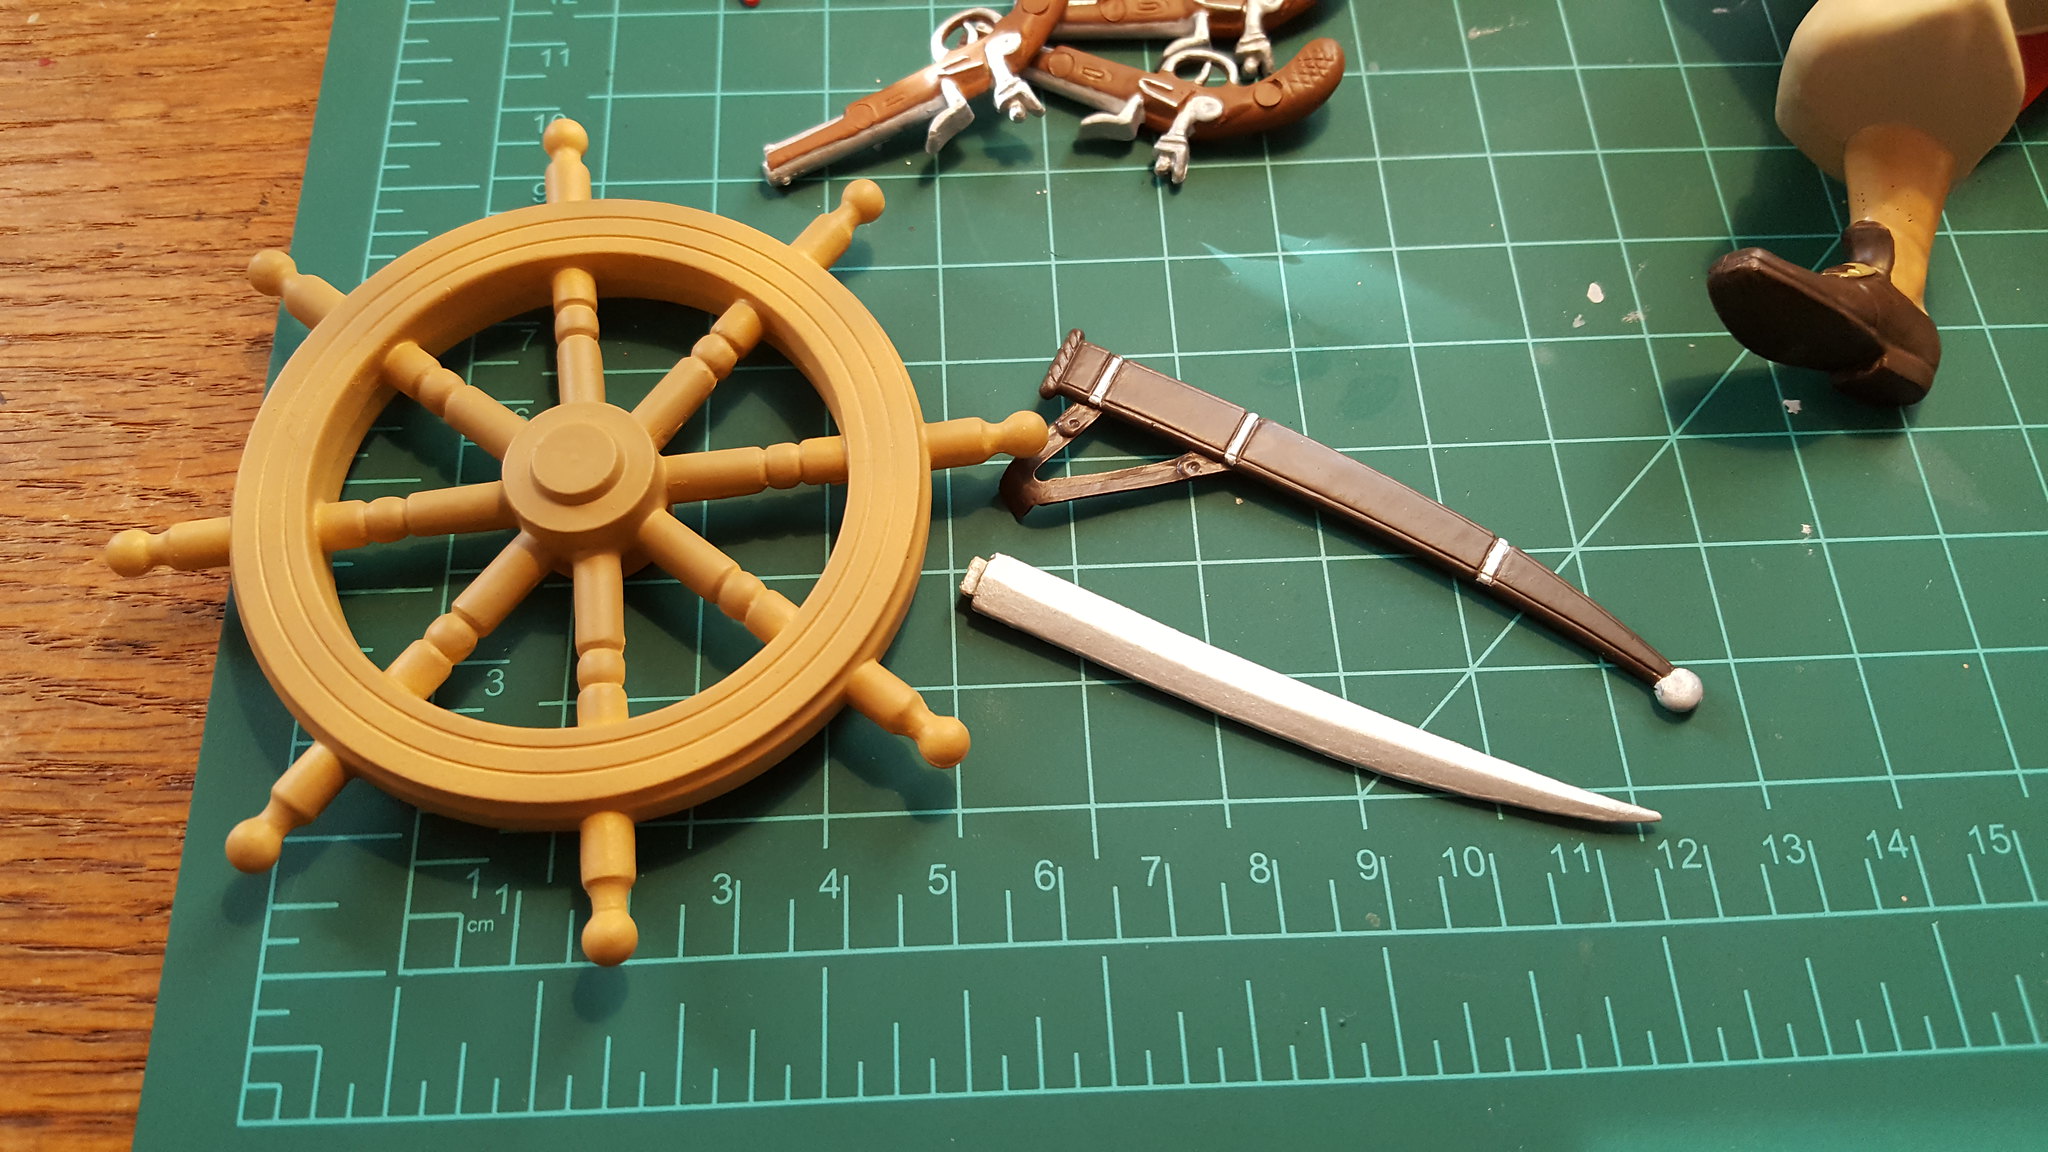
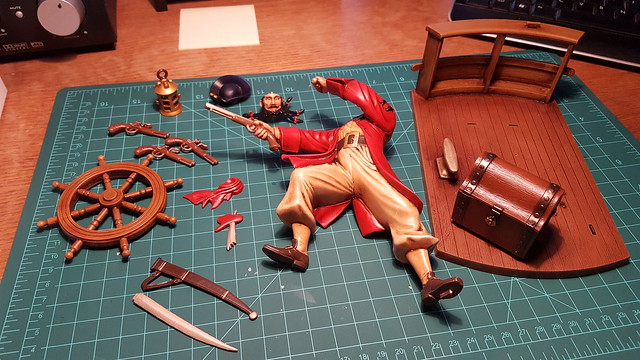
Another pic of *most* of the parts, detailed and ready for oil paint wash...

 20171212_142724 by Dave Kump, on Flickr

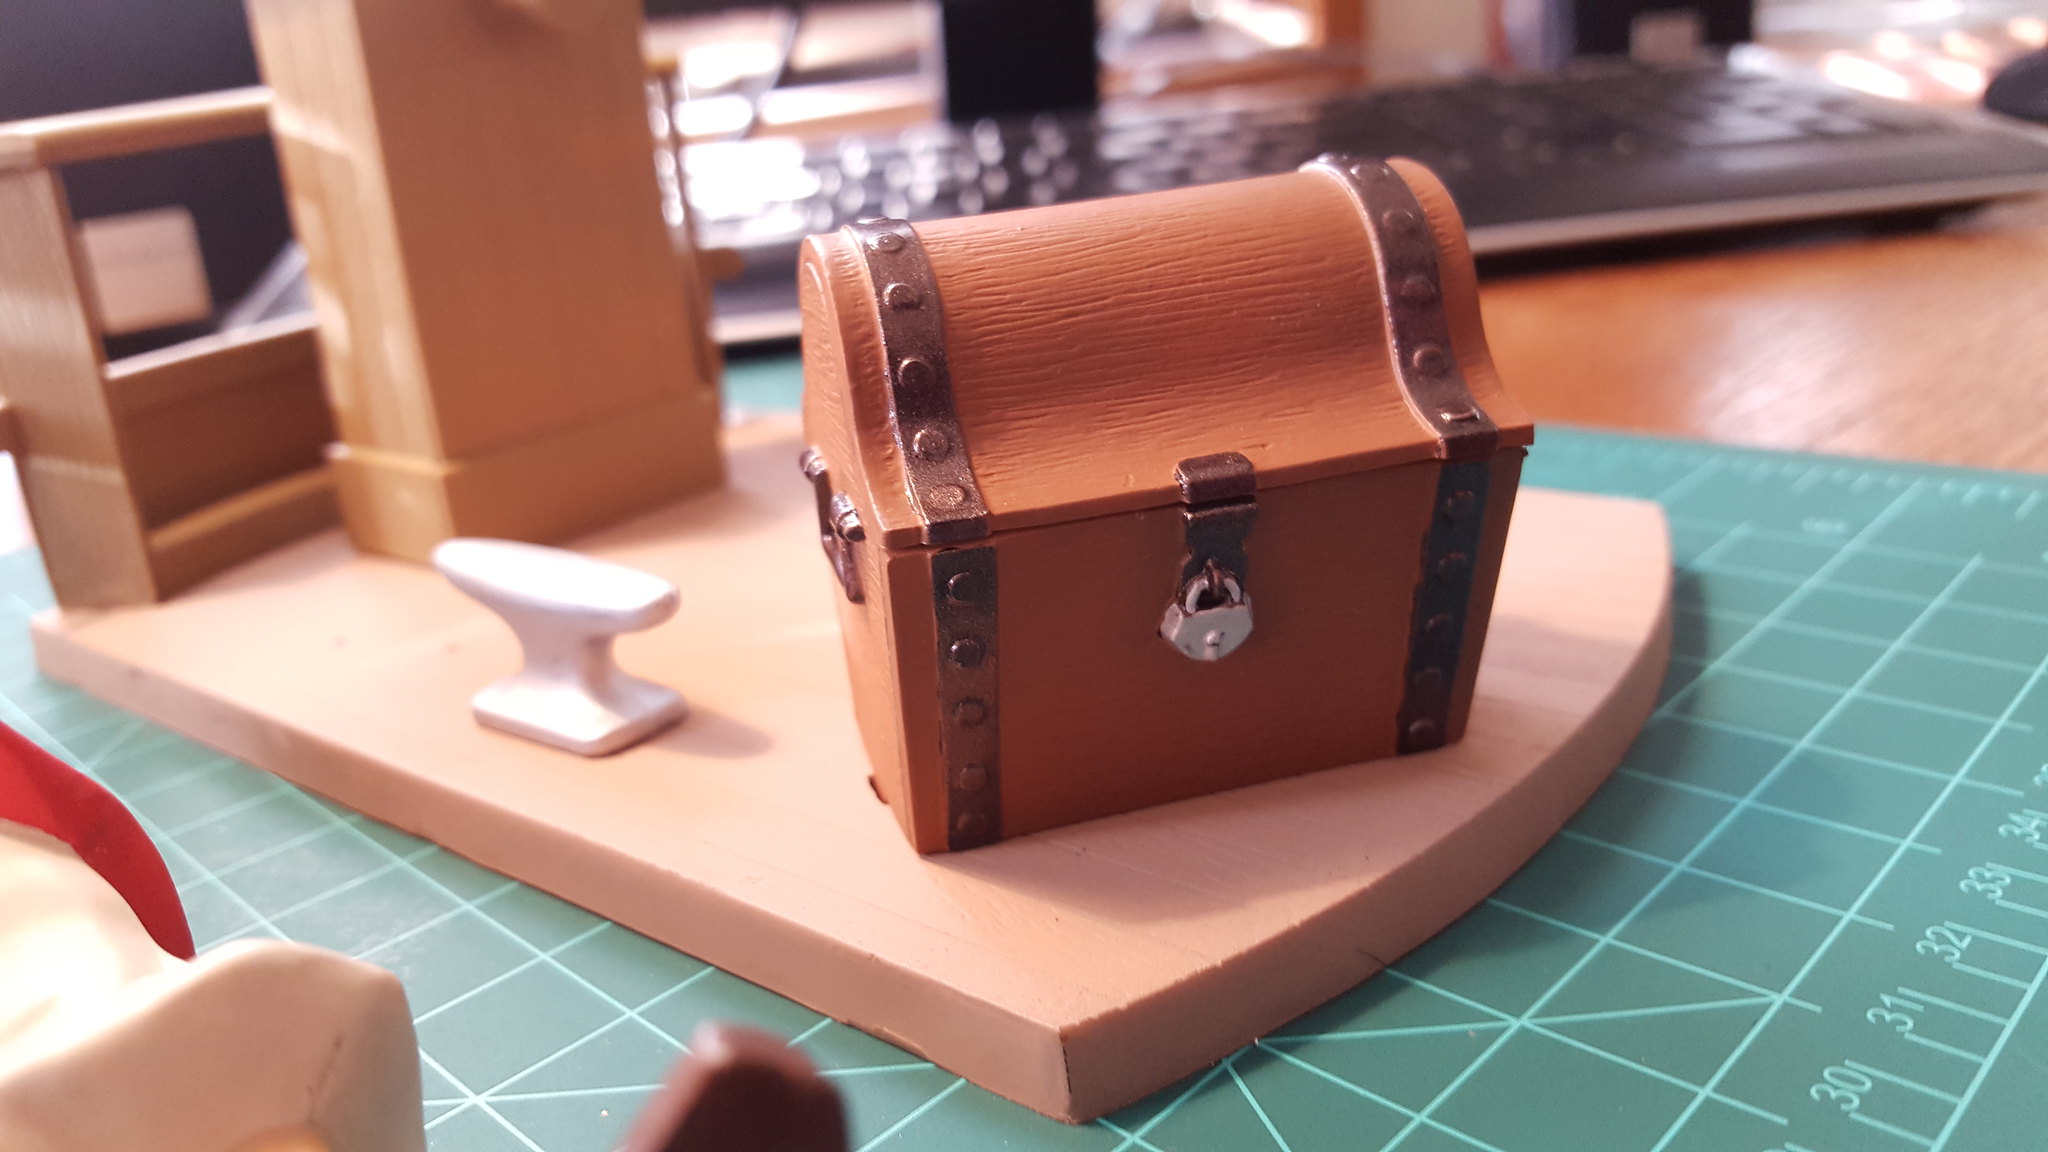
Shot of the chest....even though it was a simple 5-piece assembly, trying to get everything to line up and stay square was a bit of a chore...like builing one of those gingerbread houses you get at the store during the holidays!  lol

 20171212_142730 by Dave Kump, on Flickr

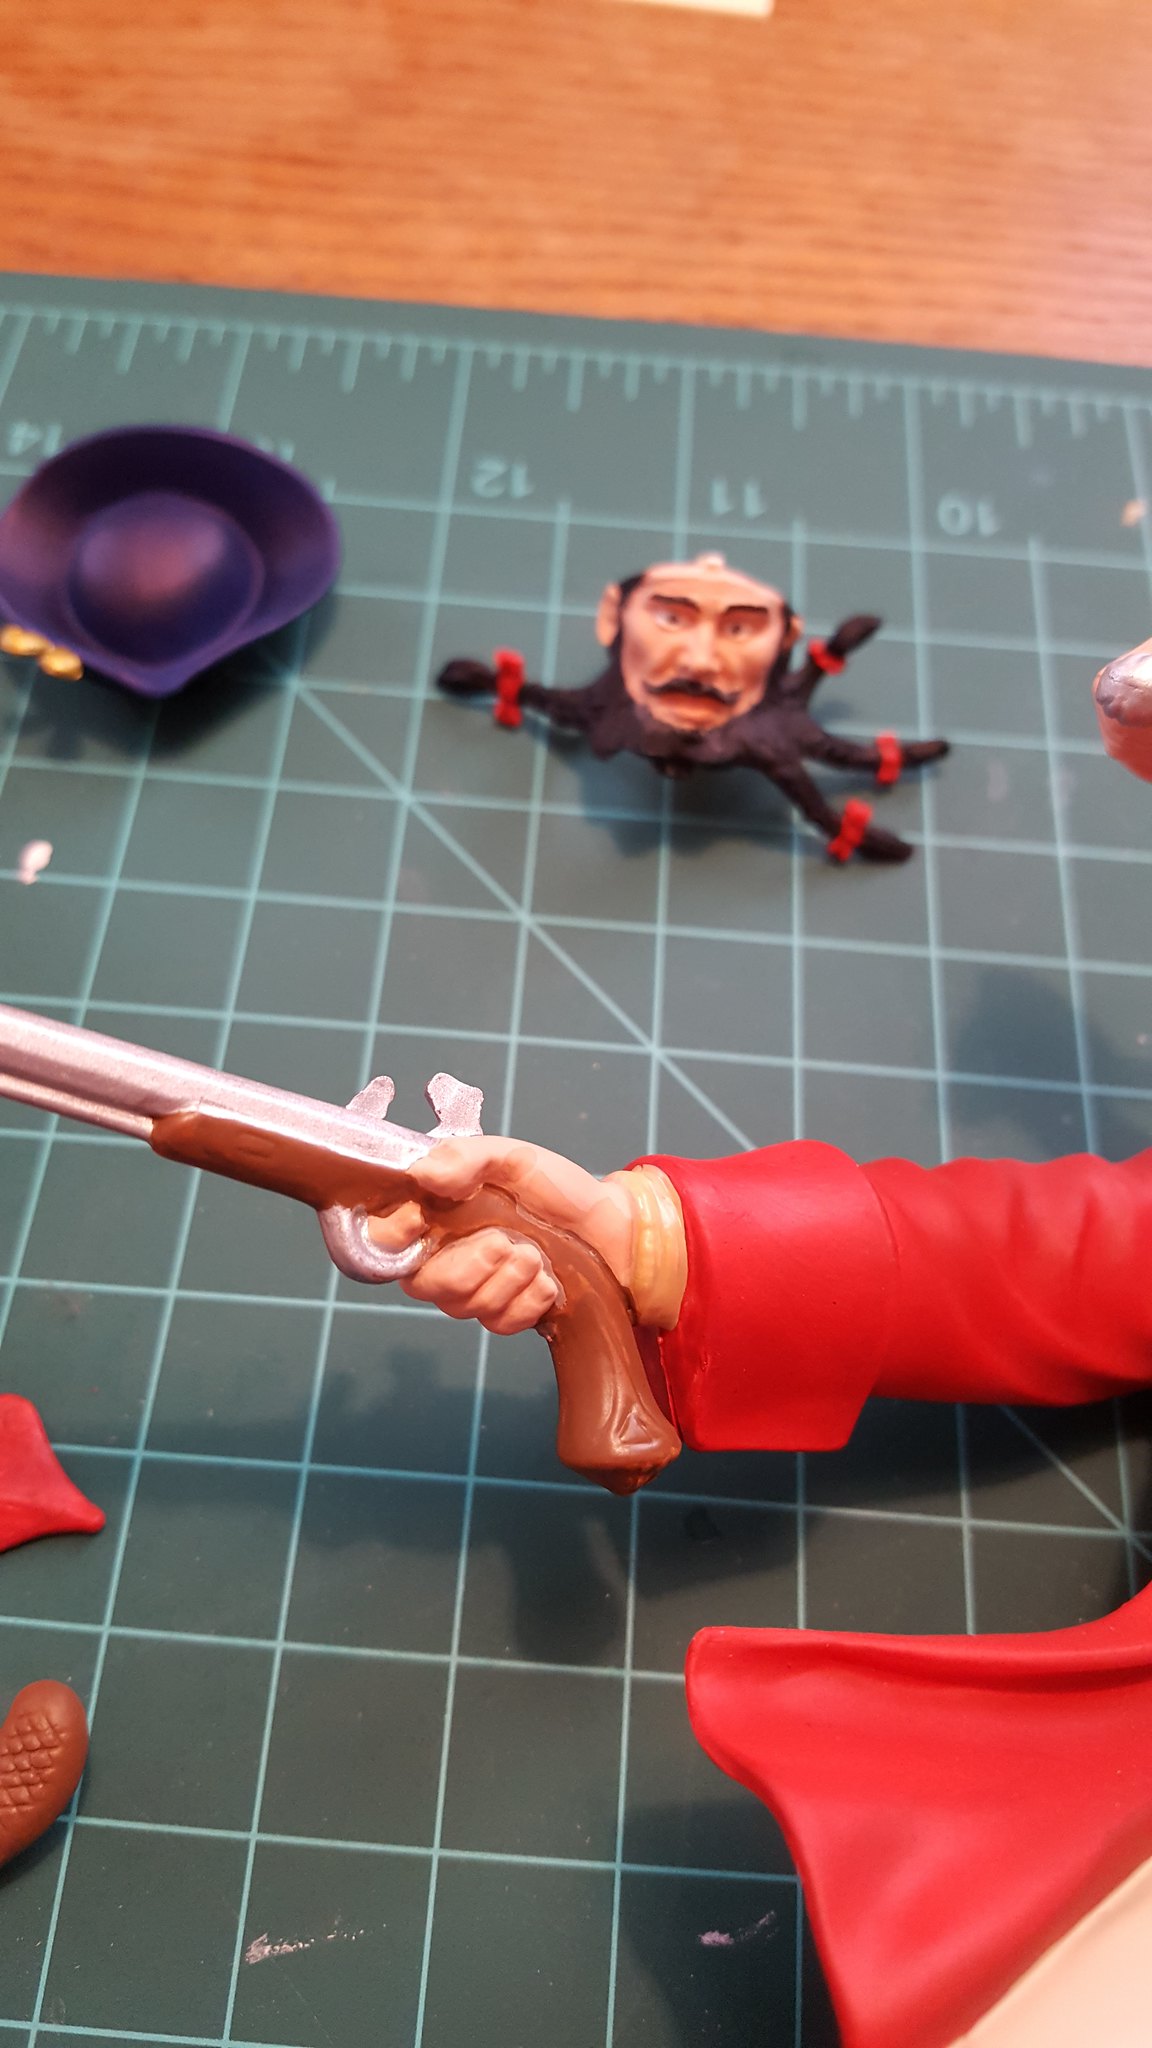
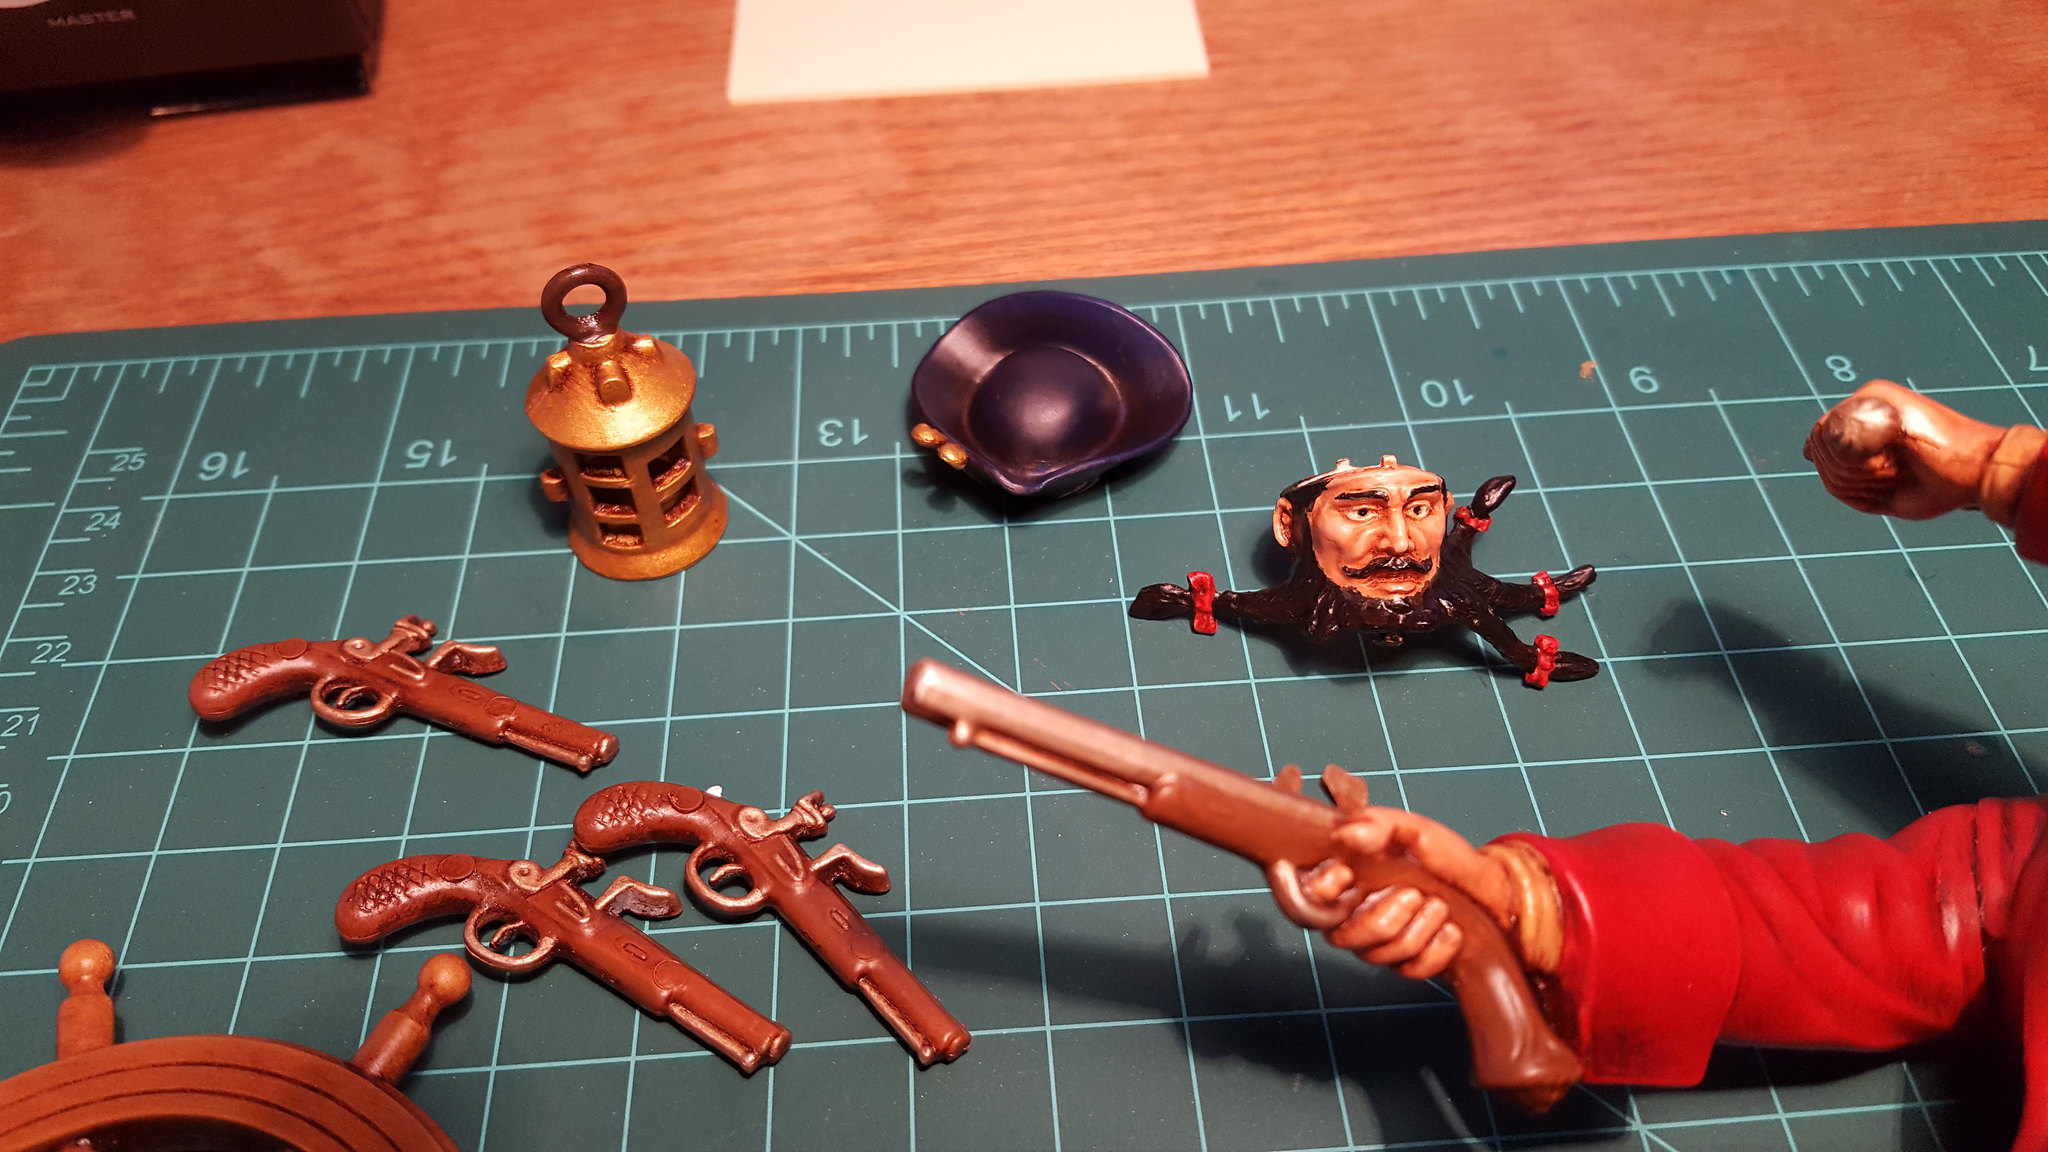
Closeup of a pistol and hand

 20171212_142736 by Dave Kump, on Flickr

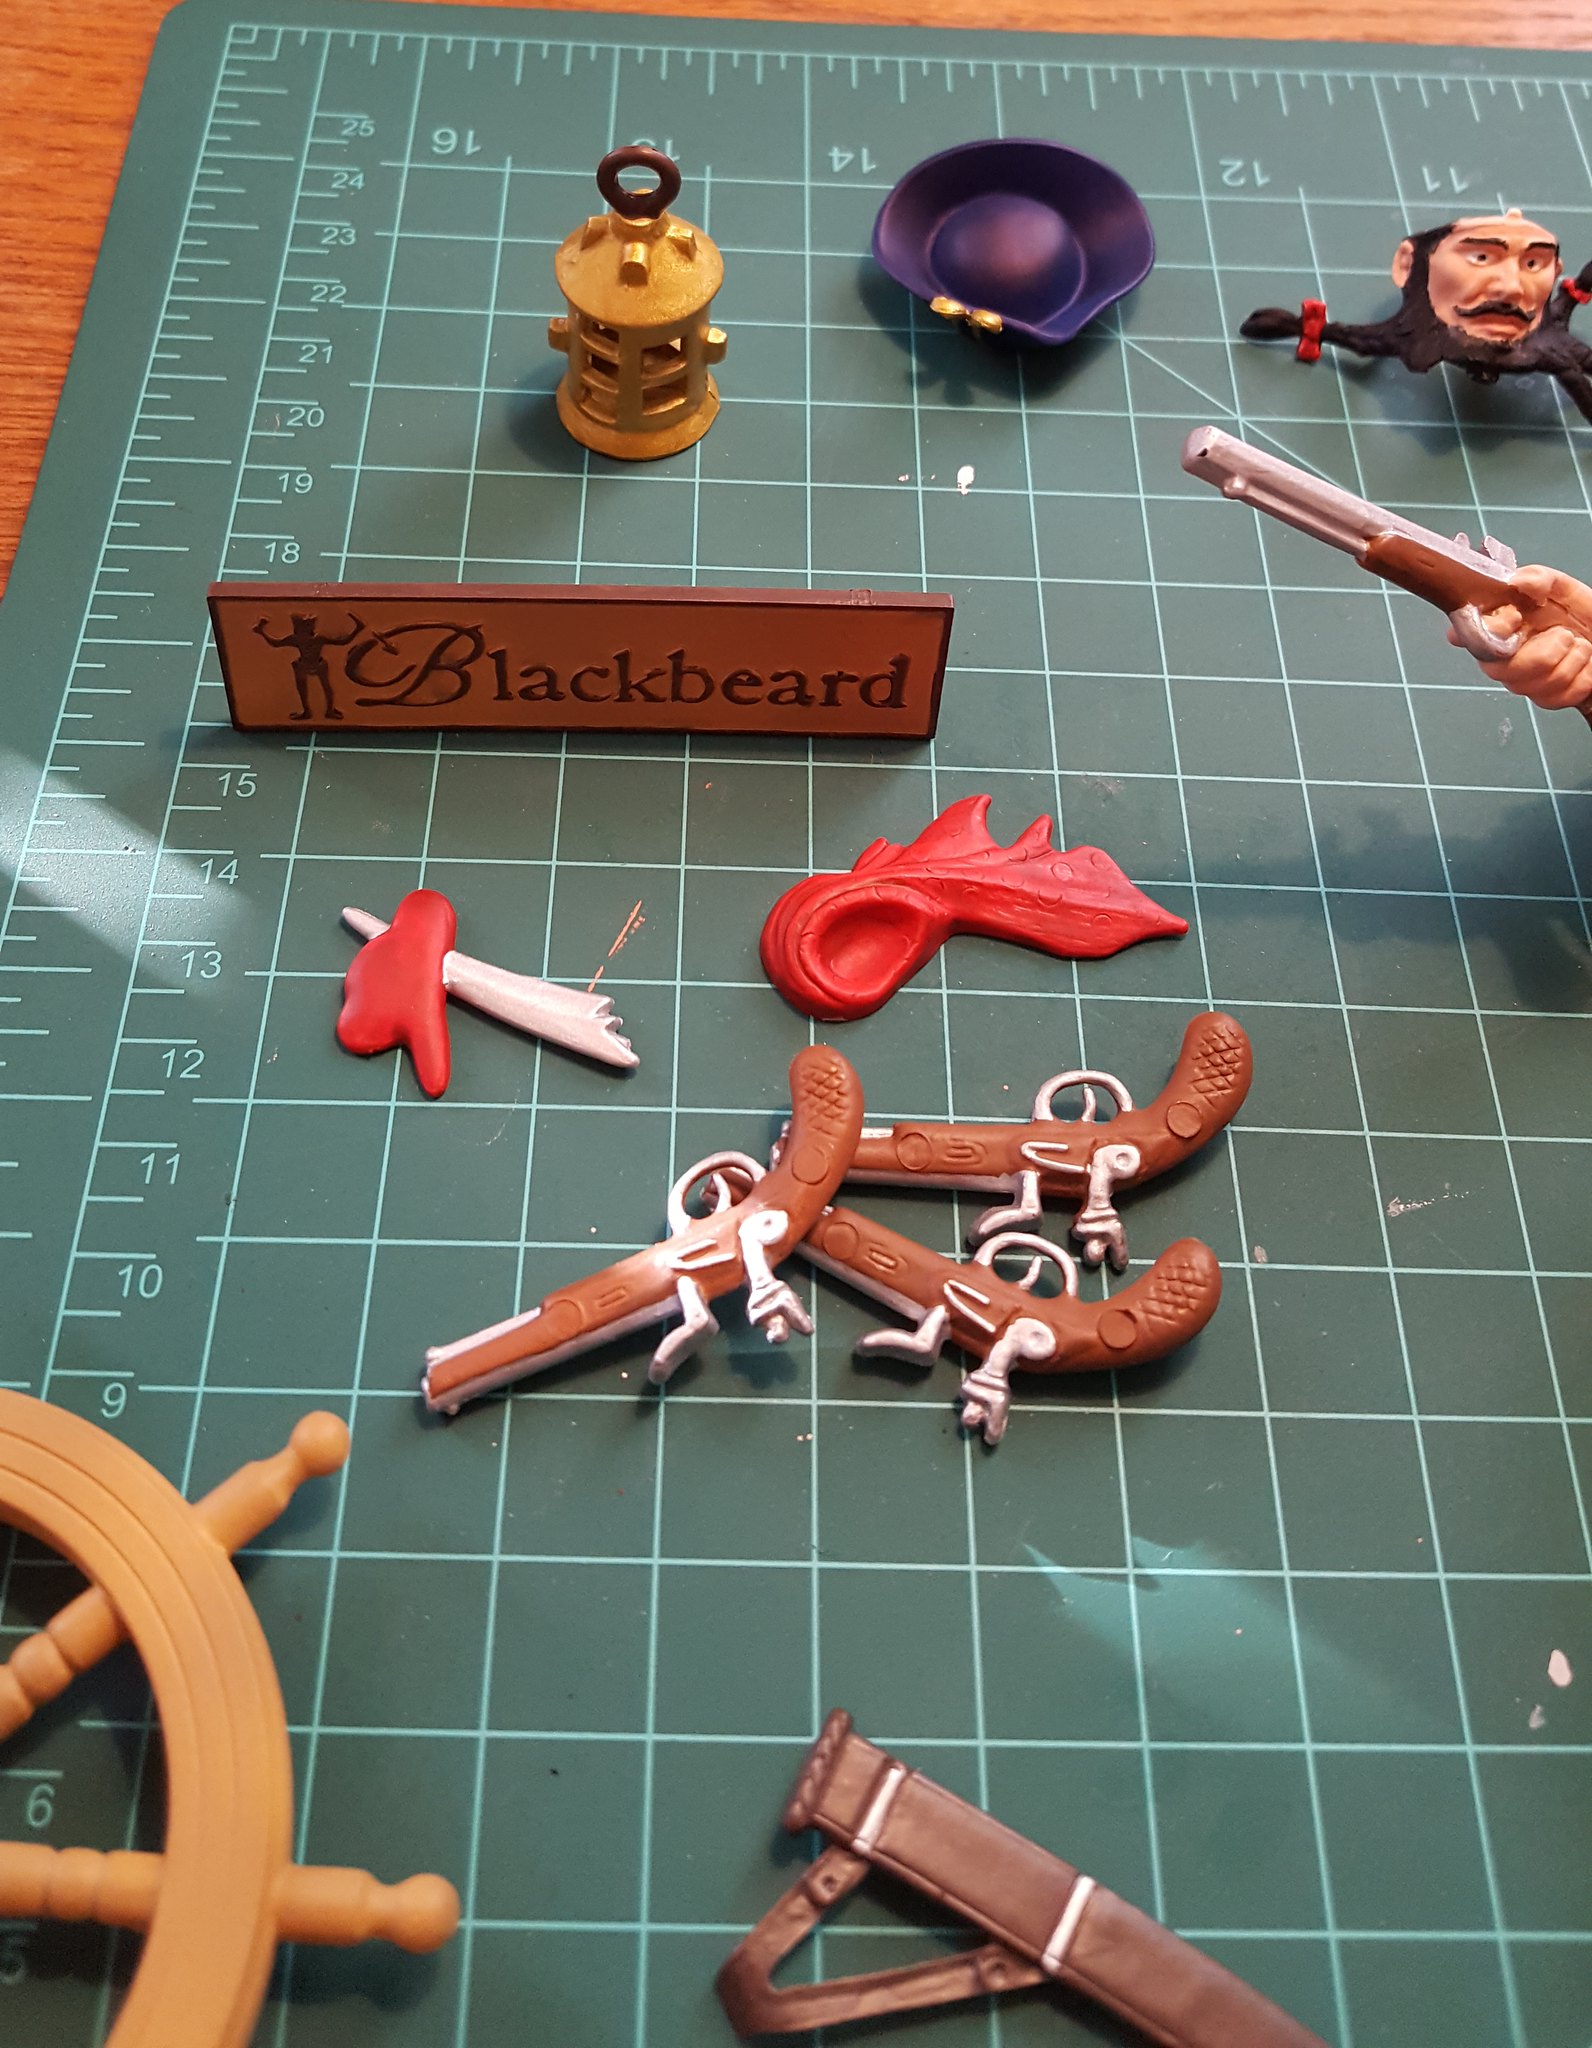
Closeup of more parts before washing....guess I took a lot of photos at this stage!

 20171212_142741 by Dave Kump, on Flickr

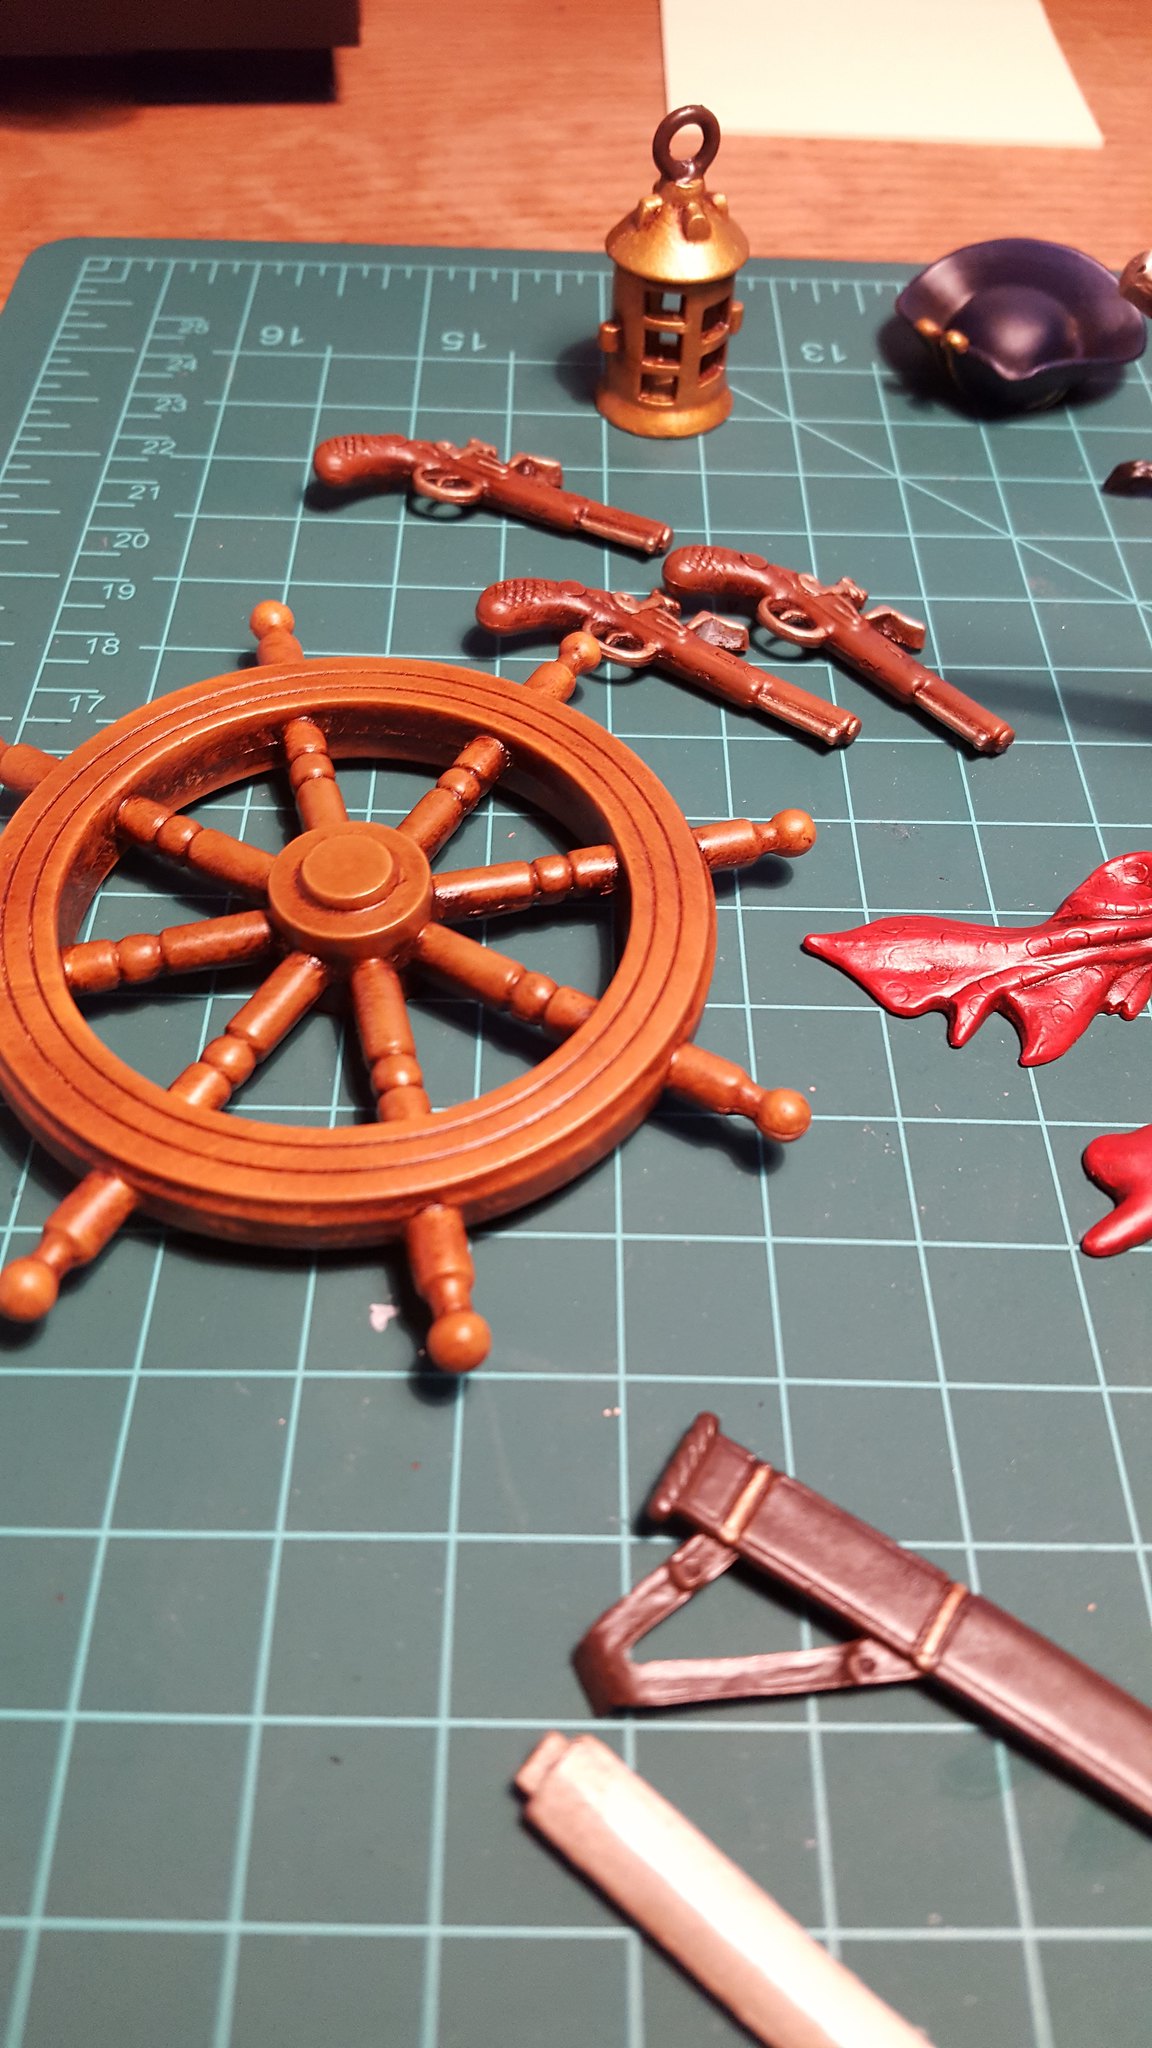
Closeup of the wheel

 20171213_160145 by Dave Kump, on Flickr

This is how everything looked after being rubbed with Burnt Umber oil...I think it looks pretty good! 

 20171213_160151 by Dave Kump, on Flickr

Closeup of the face and a few parts after washing....I knew the oil would darken everything slightly, so I was careful to keep the skin tones pretty light to begin with, and I think the oils brought it down to good shade.

 20171213_160206 by Dave Kump, on Flickr

Wheel and a few other parts after washing...It'll take several days for the oils to dry (especially now that it's getting cold) but I'll probably be able to start cementing down the deack accessories and other bits next week.  I'll post some final pics once the whole thing is finished.

Thanks!
Dave


        _~
     _~ )_)_~
     )_))_))_)
     _!__!__!_         
     (_D_P_K_)
   ~~~~~~~~~~~~~
    ~~~~~~~~~~~

Current Project:  Imai/ERTL Spanish Galleon #2

Recently Finished: Revell 1/96 Cutty Sark

Next Up:  ???


  • Member since
    September 2006
  • From: Bethlehem PA
Posted by the Baron on Saturday, December 16, 2017 12:54 PM

WOW!  Great progress!  Yeah, with Aurora's style of engraving, the deck, the wheel, the chest, and other bits all really respond well to good washes.  Yours looks really great, you've made it pop.

The bigger the government, the smaller the citizen.


  • Member since
    January 2006
  • From: California
Posted by SprueOne on Saturday, December 16, 2017 5:10 PM

Nice progress with the paint and washes. The skin tone looks good.

Anyone with a good car don't need to be justified - Hazel Motes


Iron Rails 2015 by Wayne Cassell Weekend Madness sprueone

  • Member since
    February 2006
  • From: Boston
Posted by Wilbur Wright on Saturday, December 16, 2017 7:49 PM

Wow, this brings back memories. I built this as a kid about 50 years ago. Possibly the first model I ever built.  It must have been the Aurora kit.


You're doing a great job on it.

  • Member since
    November 2009
  • From: SW Virginia
Posted by Gamera on Saturday, December 16, 2017 11:14 PM

Wow, he's coming along great!!!

"I dream in fire but work in clay." -Arthur Machen


  • Member since
    April 2003
  • From: USA
Posted by keavdog on Sunday, December 17, 2017 2:15 AM
Looking good! The washes really help give depth and detail.

Thanks,

John

  • Member since
    March 2012
  • From: Marysville, WA
Posted by David_K on Sunday, December 17, 2017 12:58 PM

Thanks for the kind words, everyone!

I'm pretty happy with the results so far, and I'll be sure to post some more photos once I get everything put together.

Thanks again!

Dave

        _~
     _~ )_)_~
     )_))_))_)
     _!__!__!_         
     (_D_P_K_)
   ~~~~~~~~~~~~~
    ~~~~~~~~~~~

Current Project:  Imai/ERTL Spanish Galleon #2

Recently Finished: Revell 1/96 Cutty Sark

Next Up:  ???


  • Member since
    June 2014
  • From: New Braunfels , Texas
Posted by Tanker - Builder on Monday, December 18, 2017 8:54 AM

David !

AAAAARGH ! Avast Matey ! Yer doin it up Shipshape and Bristol fashion ! Now bein as how I used ta be a Cap'n , I  will make a slight mention of this mate ! Methinks the Gun metal on the pistols is a wee bit too light in the colorin .

 Ya be needin more of a medium steel color mate !  Ya be handlin that and you'll be steerin a good course ta port . When we find the next Haul , I'll be puttin Ya charge of the boardin crew . Smooth sailin mate ! Cap'n Tanker - Builder

  • Member since
    December 2017
  • From: Plano (Dallas), Texas
Posted by mmthrax on Monday, December 18, 2017 11:14 AM

WOW!!  This is really looking great.  You should be really happy with your results.  Enjoyed reading through the thread.  I'll soon be starting the Atlantis Zorro.  I hope I can get results like this.  How did you find out about burnt umber oil?  It really works great. Bravo.  Two thumbs up!

Mark

Just keep picking away at it...

JOIN OUR COMMUNITY!

Our community is FREE to join. To participate you must either login or register for an account.

SEARCH FORUMS
FREE NEWSLETTER
By signing up you may also receive reader surveys and occasional special offers. We do not sell, rent or trade our email lists. View our Privacy Policy.