SEARCH FINESCALE.COM

Enter keywords or a search phrase below:

Aliens APC - Its a rescue mission, youll love it!

17803 views
118 replies
1 rating 2 rating 3 rating 4 rating 5 rating
  • Member since
    October 2014
Posted by TomZ on Friday, January 22, 2016 6:30 PM

This may well be my all time favorite build to follow!

  • Member since
    May 2011
  • From: Honolulu, Hawaii
Posted by Real G on Friday, January 22, 2016 6:49 PM

Thanks TomZ!  You do realize that at best you are watching the Moorish idol from "Finding Nemo" trying to plot an elaborate scheme, and at worst a blind person wandering through a minefield right?

Like Captain Jack Sparrow, I'm just making it up as I go along.  Pirate

“Ya ya ya, unicorn papoi!”

  • Member since
    August 2007
  • From: back country of SO-CAL, at the birth place of Naval Aviation
Posted by DUSTER on Thursday, January 28, 2016 9:19 AM

Real G

 Like Captain Jack Sparrow, I'm just making it up as I go along.  Pirate


Seems only fair then, to watch as the thing comes together.....unless there's rum   tootles

Steve

Building the perfect model---just not quite yet  Confused

  • Member since
    May 2011
  • From: Honolulu, Hawaii
Posted by Real G on Thursday, January 28, 2016 12:21 PM

Yes, just where IS the rum?  Where did all the rum go?  Oh...  Hide the rum!

“Ya ya ya, unicorn papoi!”

  • Member since
    May 2011
  • From: Honolulu, Hawaii
Posted by Real G on Monday, February 1, 2016 4:41 PM

Work has been slower than desired due to non-modeling stuff getting in the way, but another coat of primer has gone on and I got some black paint on the wheels to start the coloring process.  The Tamiya rattle can flat black probably wasn't shaken enough prior to decanting, so it ended up semi-gloss.  But it dried fast and hard like Tamiya sprays always do.

https://flic.kr/p/DzHeGV] [/url]APC-71 by N.T. Izumi, on Flickr

While checking the turret for free movement (okay, I was playing around with it, you caught me!) I noticed the relocated brush guard interfered with the gun barrels.  So some strip styrene was added to the inside of the guide rail tracks to keep the turret from sliding too far forward.  I threw in some punched bolts and washers to add some visual interest to the makeshift fix.

https://flic.kr/p/DxyCBy] [/url]APC-69 by N.T. Izumi, on Flickr

https://flic.kr/p/CLzFj6] [/url]APC-70 by N.T. Izumi, on Flickr

I just need to go over the model one more time to check for flaws, and add the "teepee" thing on the roof.  Anyone knows what this thing is supposed to be protecting?  I watched Aliens over the weekend, and it appears to be either a periscope or a strobe light that strobes really slowly.  Oh yeah, I still have to add rivets to the window frames.  But after that - it's time to paint!

“Ya ya ya, unicorn papoi!”

  • Member since
    November 2009
  • From: SW Virginia
Posted by Gamera on Tuesday, February 2, 2016 10:18 AM

She looks great G! I need to go back and rewatch the movie but she looks like I remember her.

"I dream in fire but work in clay." -Arthur Machen


  • Member since
    July 2004
  • From: Sonora Desert
Posted by stikpusher on Tuesday, February 2, 2016 1:17 PM

YesYes Superb detail work! Toast


F is for FIRE, That burns down the whole town!

U is for URANIUM... BOMBS!

N is for NO SURVIVORS...

       - Plankton

LSM


  • Member since
    May 2011
  • From: Honolulu, Hawaii
Posted by Real G on Tuesday, February 2, 2016 6:49 PM

Thanks for your continued support Gamera and Stik!  I finally found my answer to the "teepee" mystery thanks to the Internet.  Photo is for informational use only under fair use, etc. etc...

https://flic.kr/p/CNz4La] [/url]APC-72 by N.T. Izumi, on Flickr

The bump guard is made from two bent rods welded together at the apex of the pyramid, and the thing it protects does look like a white light of some kind.  That's my story, and I'm sticking to it!  They will be easy to make.  (Note to self: Finish these last little details this week and prep for painting so as not to keep everyone waiting!)

Sgt Apone:  "All right sweethearts you heard the man and you know the drill, a**holes and elbows, let's move!!!"

“Ya ya ya, unicorn papoi!”

  • Member since
    May 2011
  • From: Honolulu, Hawaii
Posted by Real G on Wednesday, February 3, 2016 2:35 PM

Like Cornholio, the toilet paper craving messiah, I now have teepee for my bunghole -er - APC!

0.015" plastic rod was bent using heat from a lighted incense stick to form the guard.  A sliver of heat stretched plastic tube (just like sprue!) was cut to form the ring base for the light.  Clear stretched sprue will be fed up from below to form the light (seen here push fit in place).

https://flic.kr/p/CPUEyy] [/url]APC-73 by N.T. Izumi, on Flickr

Aw nuts, now do I have to put in a blinkie LED for the light?  Oh well, I have to get some more lights for the Drop Ship anyway...

“Ya ya ya, unicorn papoi!”

  • Member since
    August 2007
  • From: back country of SO-CAL, at the birth place of Naval Aviation
Posted by DUSTER on Thursday, February 4, 2016 7:52 PM

I think you have done very well Yes  ......................toilet paper? bunghole? LEaD lites?.....I gets so confused  Confused  by SiFi stuff .


Steve

Building the perfect model---just not quite yet  Confused

  • Member since
    February 2014
  • From: Michigan
Posted by silentbob33 on Friday, February 5, 2016 7:13 AM
Super awesome detailing, I can't wait to see more.

On my bench: Academy 1/35 UH-60L Black Hawk

  • Member since
    November 2009
  • From: SW Virginia
Posted by Gamera on Friday, February 5, 2016 7:30 AM

As Bevis would probably say, 'Burn out the Xenomorphs with fire, FIRE, FIRE!!!!!'

Looking forward to seeing some paint slapping on this monster! 

"I dream in fire but work in clay." -Arthur Machen


  • Member since
    May 2011
  • From: Honolulu, Hawaii
Posted by Real G on Friday, February 5, 2016 2:09 PM

"As Beavis would probably say, 'Burn out the Xenomorphs with fire, FIRE, FIRE!!!!!"

Uh, huh-huh.  You'd better like, settle down Gamera.  Huh-huh.  Huh-huh.  Huh-huh-huh-huh.  Yeah, Colonial Marines kick butt.

“Ya ya ya, unicorn papoi!”

  • Member since
    November 2009
  • From: SW Virginia
Posted by Gamera on Friday, February 5, 2016 2:17 PM

Real G

"As Beavis would probably say, 'Burn out the Xenomorphs with fire, FIRE, FIRE!!!!!"

Uh, huh-huh.  You'd better like, settle down Gamera.  Huh-huh.  Huh-huh.  Huh-huh-huh-huh.  Yeah, Colonial Marines kick butt.


Stick out tongue

"I dream in fire but work in clay." -Arthur Machen


  • Member since
    May 2011
  • From: Honolulu, Hawaii
Posted by Real G on Monday, February 8, 2016 6:14 PM

Window frame is now detailed with Archer rivet decals.

https://flic.kr/p/DQbcEf] 
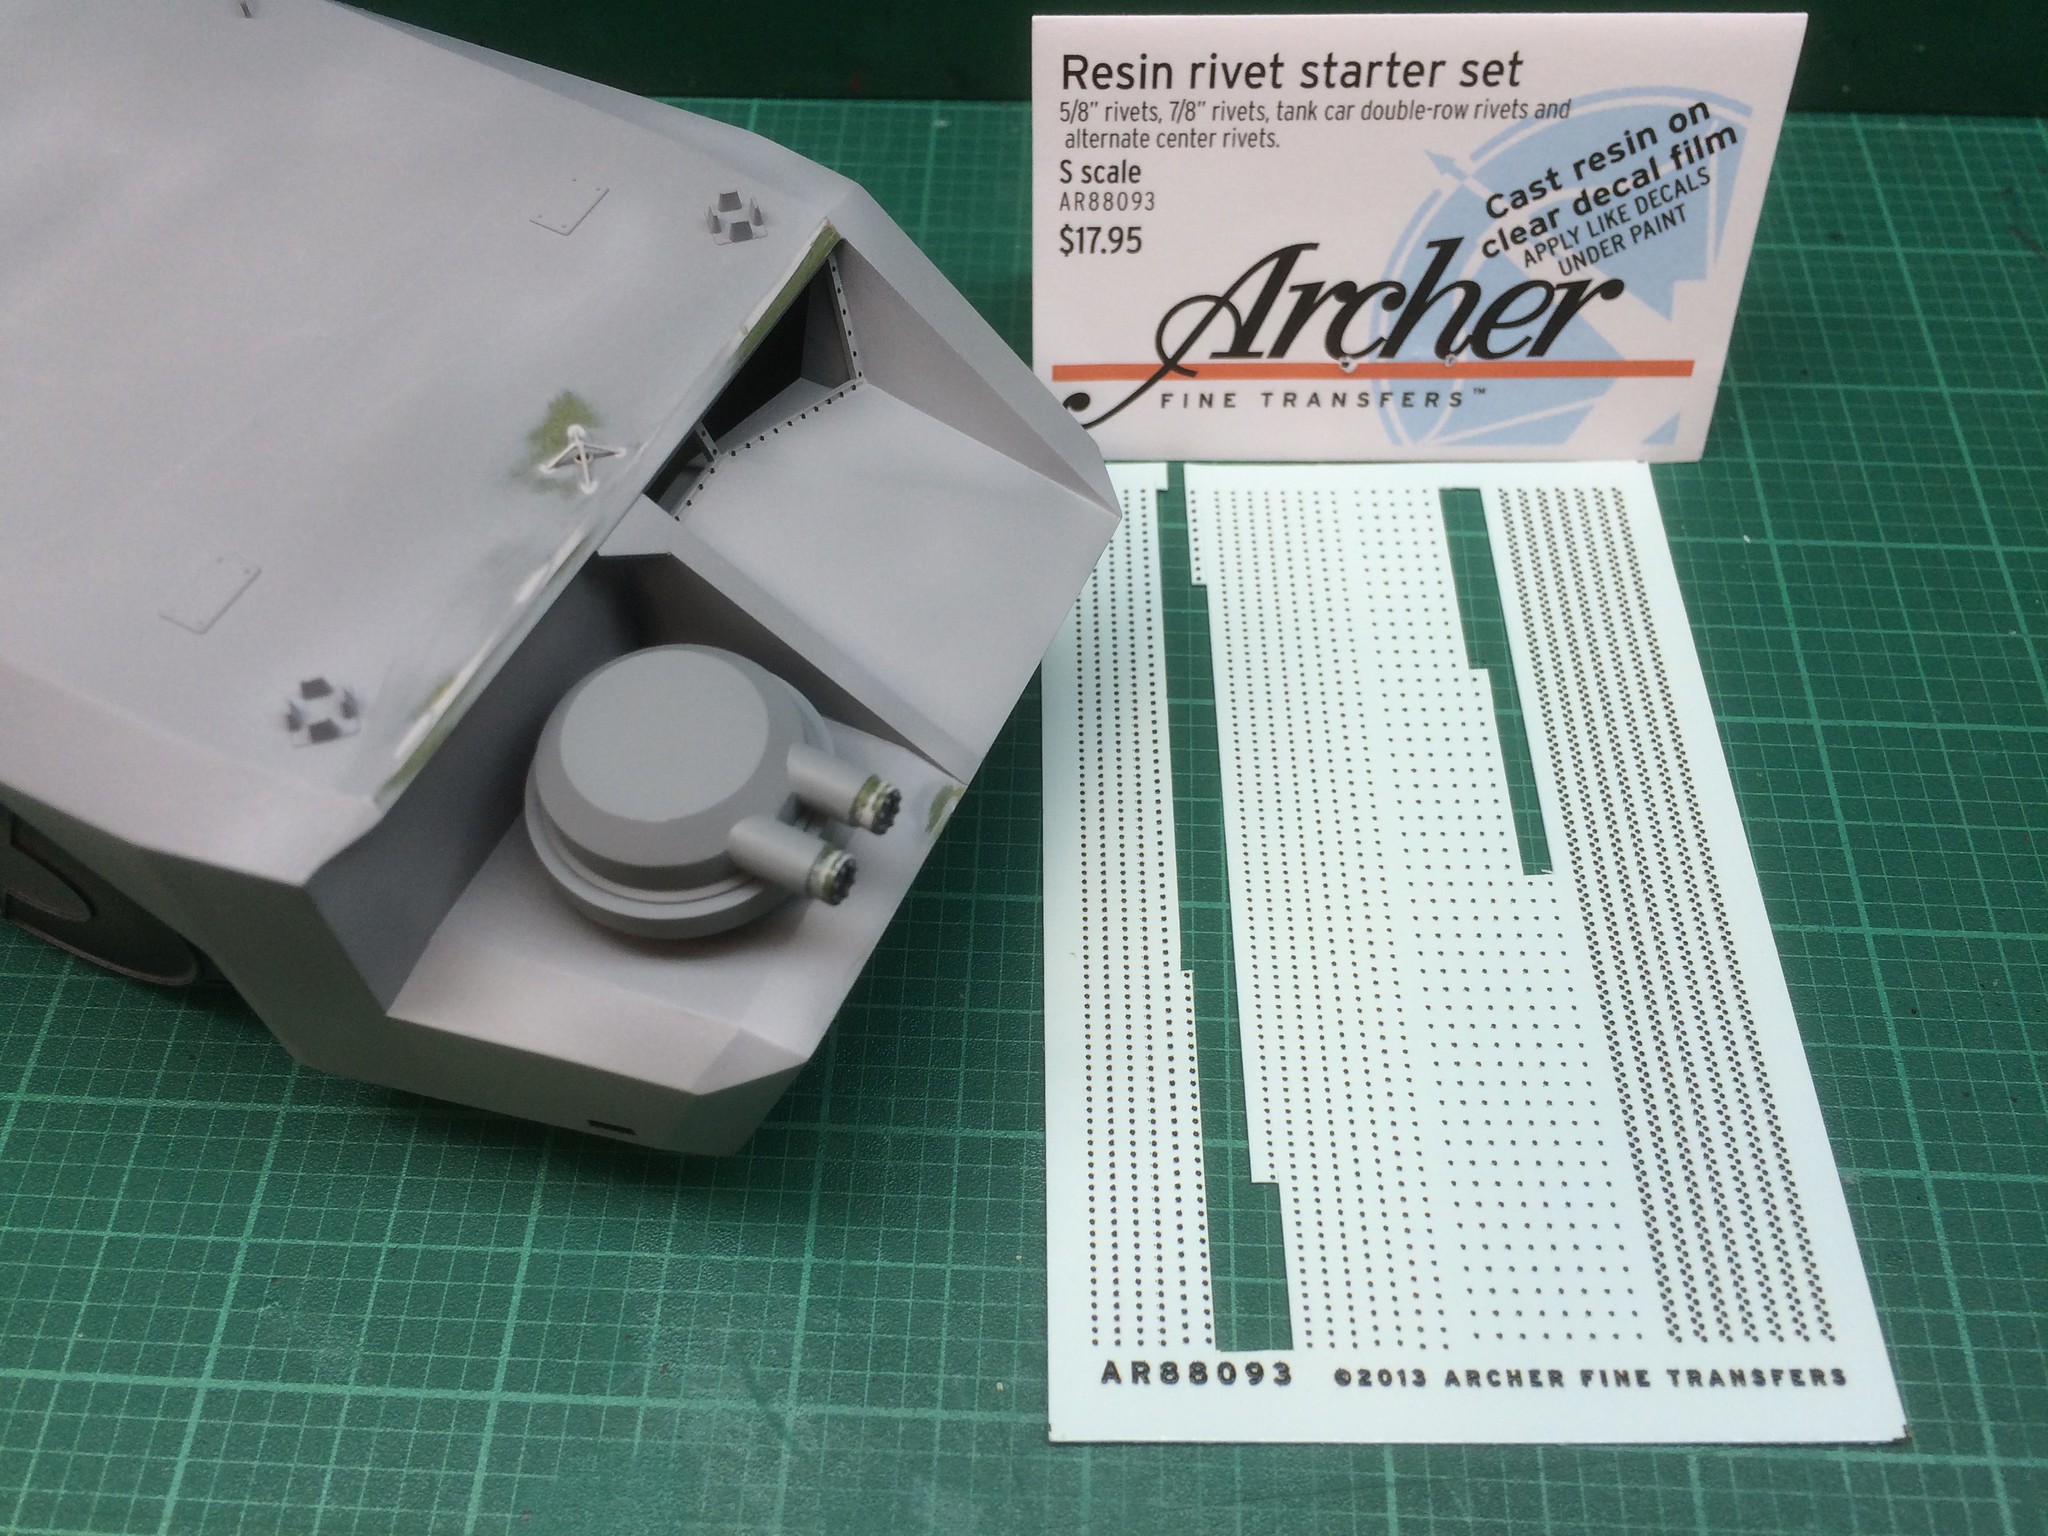
[/url]APC-74A by N.T. Izumi, on Flickr

https://flic.kr/p/CUiVx1] 
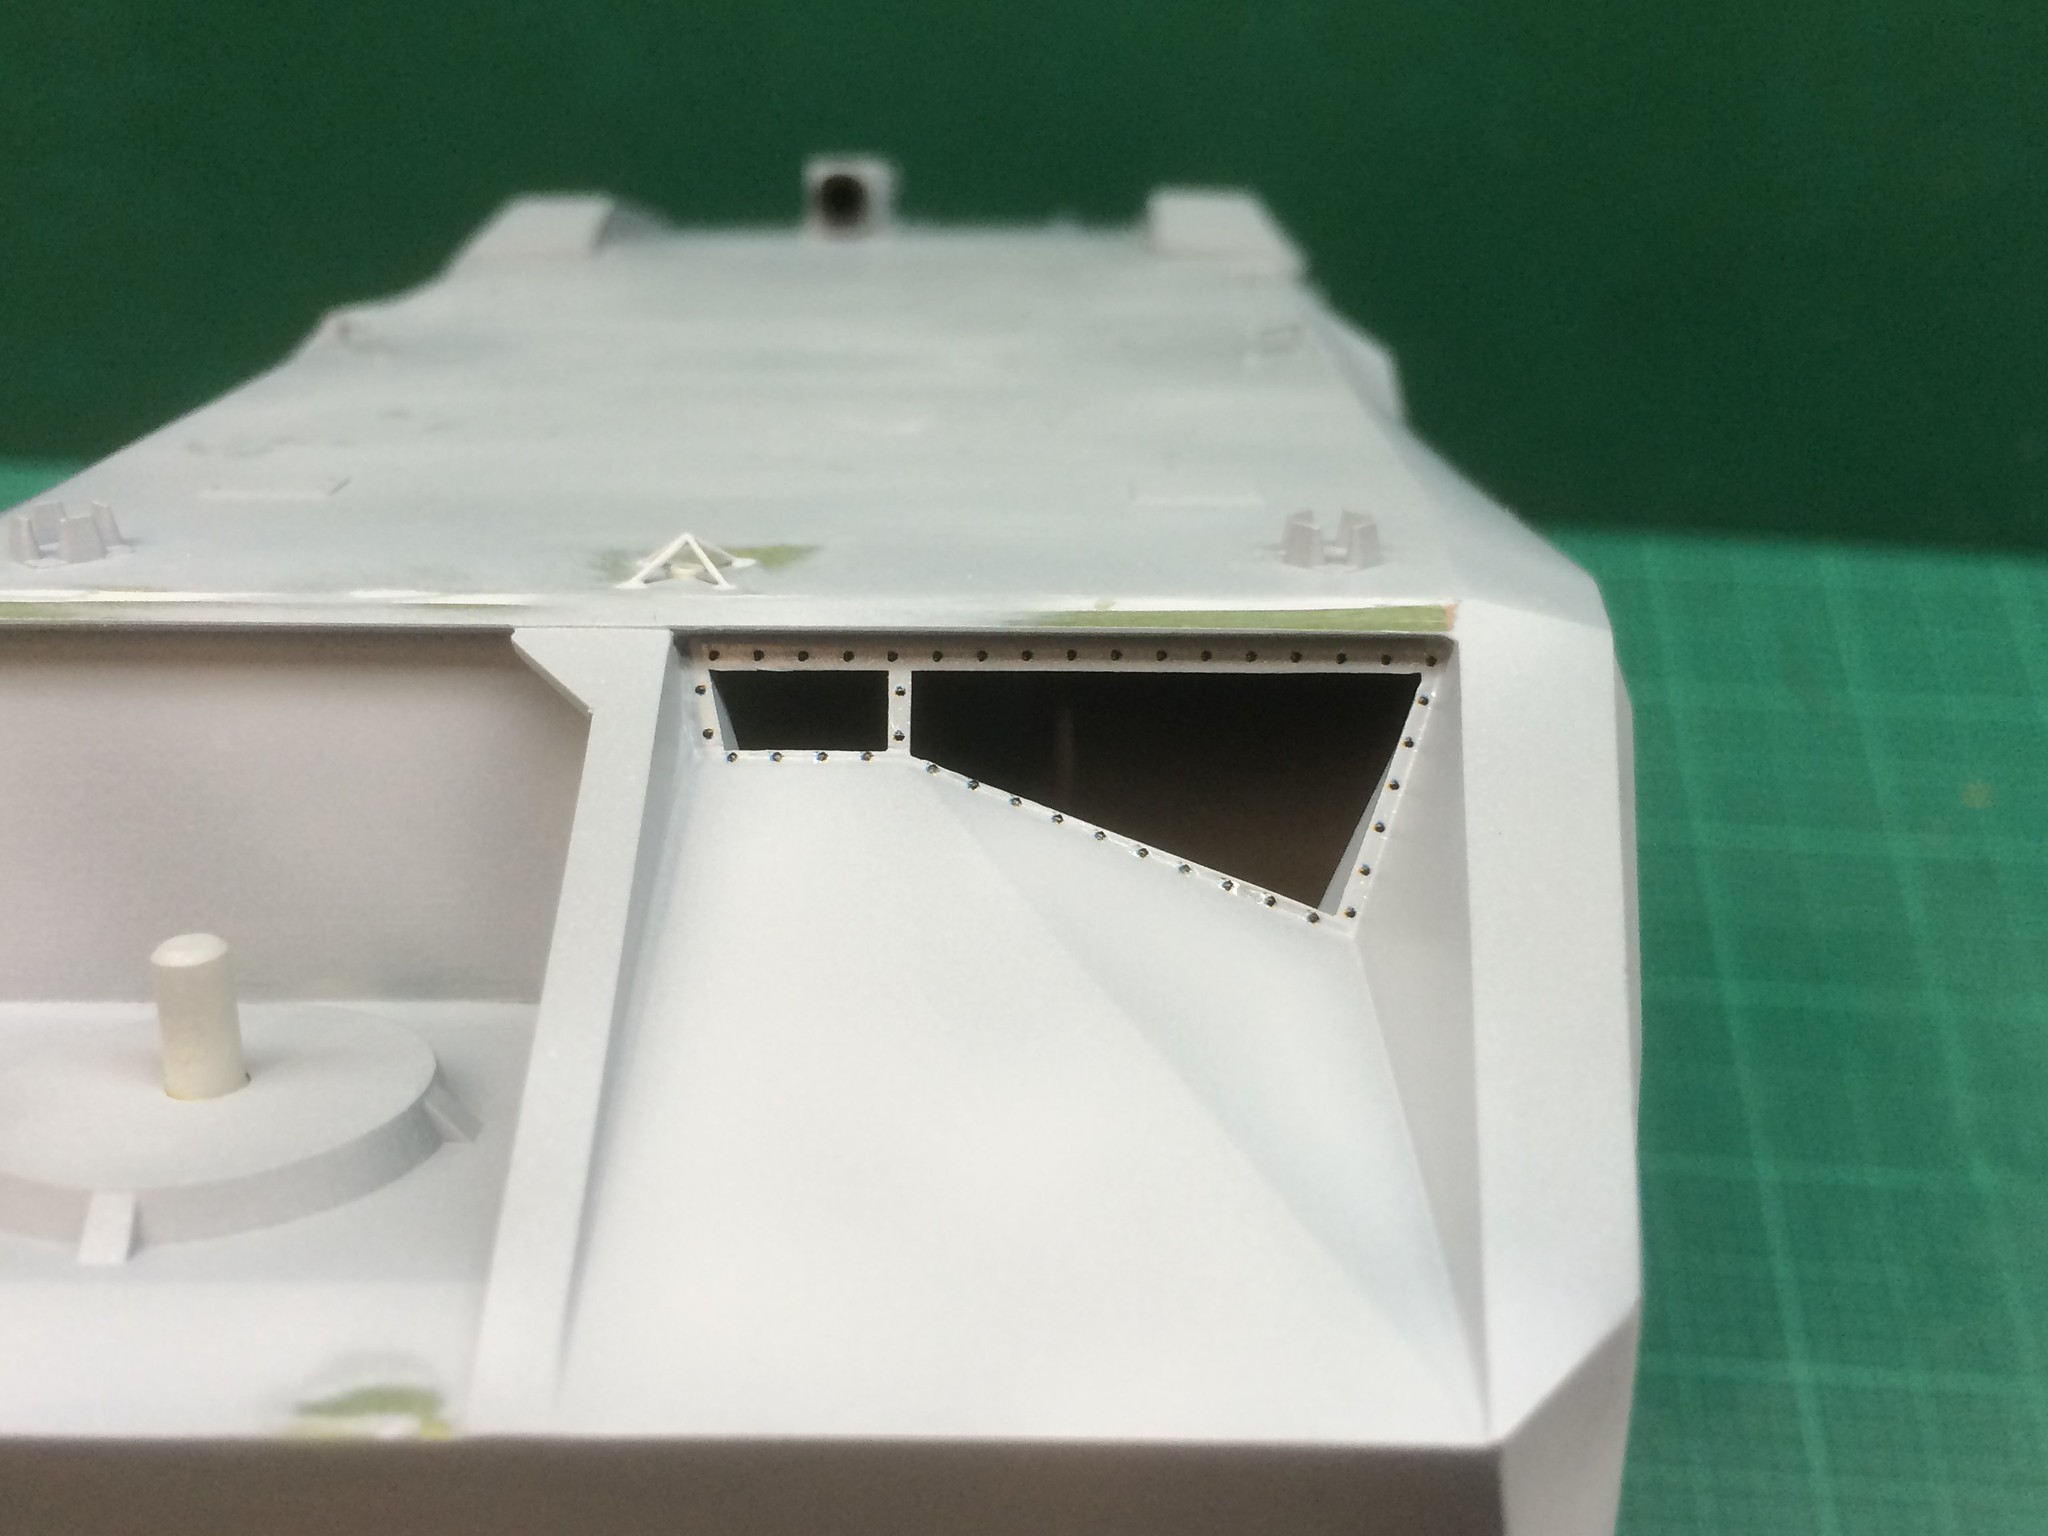
[/url]APC-74 by N.T. Izumi, on Flickr

If you haven't tried Archer rivets, you should!  They are easy to apply and suck down with the usual decal setting solutions.  Mr. Decal Softer, while a little strong, helped me skip the gloss coat and eliminate silvering over the flat primer.  But milder Micro Sol was initially used.  That little tidbit is kind of important in order to avoid destroying the decals!

Looking at the suspension, I realized that the inner hull was visible even when the wheels were in place, so so blanking plates were quickly fashioned to close off the line of sight through the hull.  The kit plastic is around 0.050" thick at the wheel wells, but I used 0.040" sheet plastic, figuring that it is better to have an obvious mismatch rather than struggling to fair in the new with old.

https://flic.kr/p/DPv24d] 
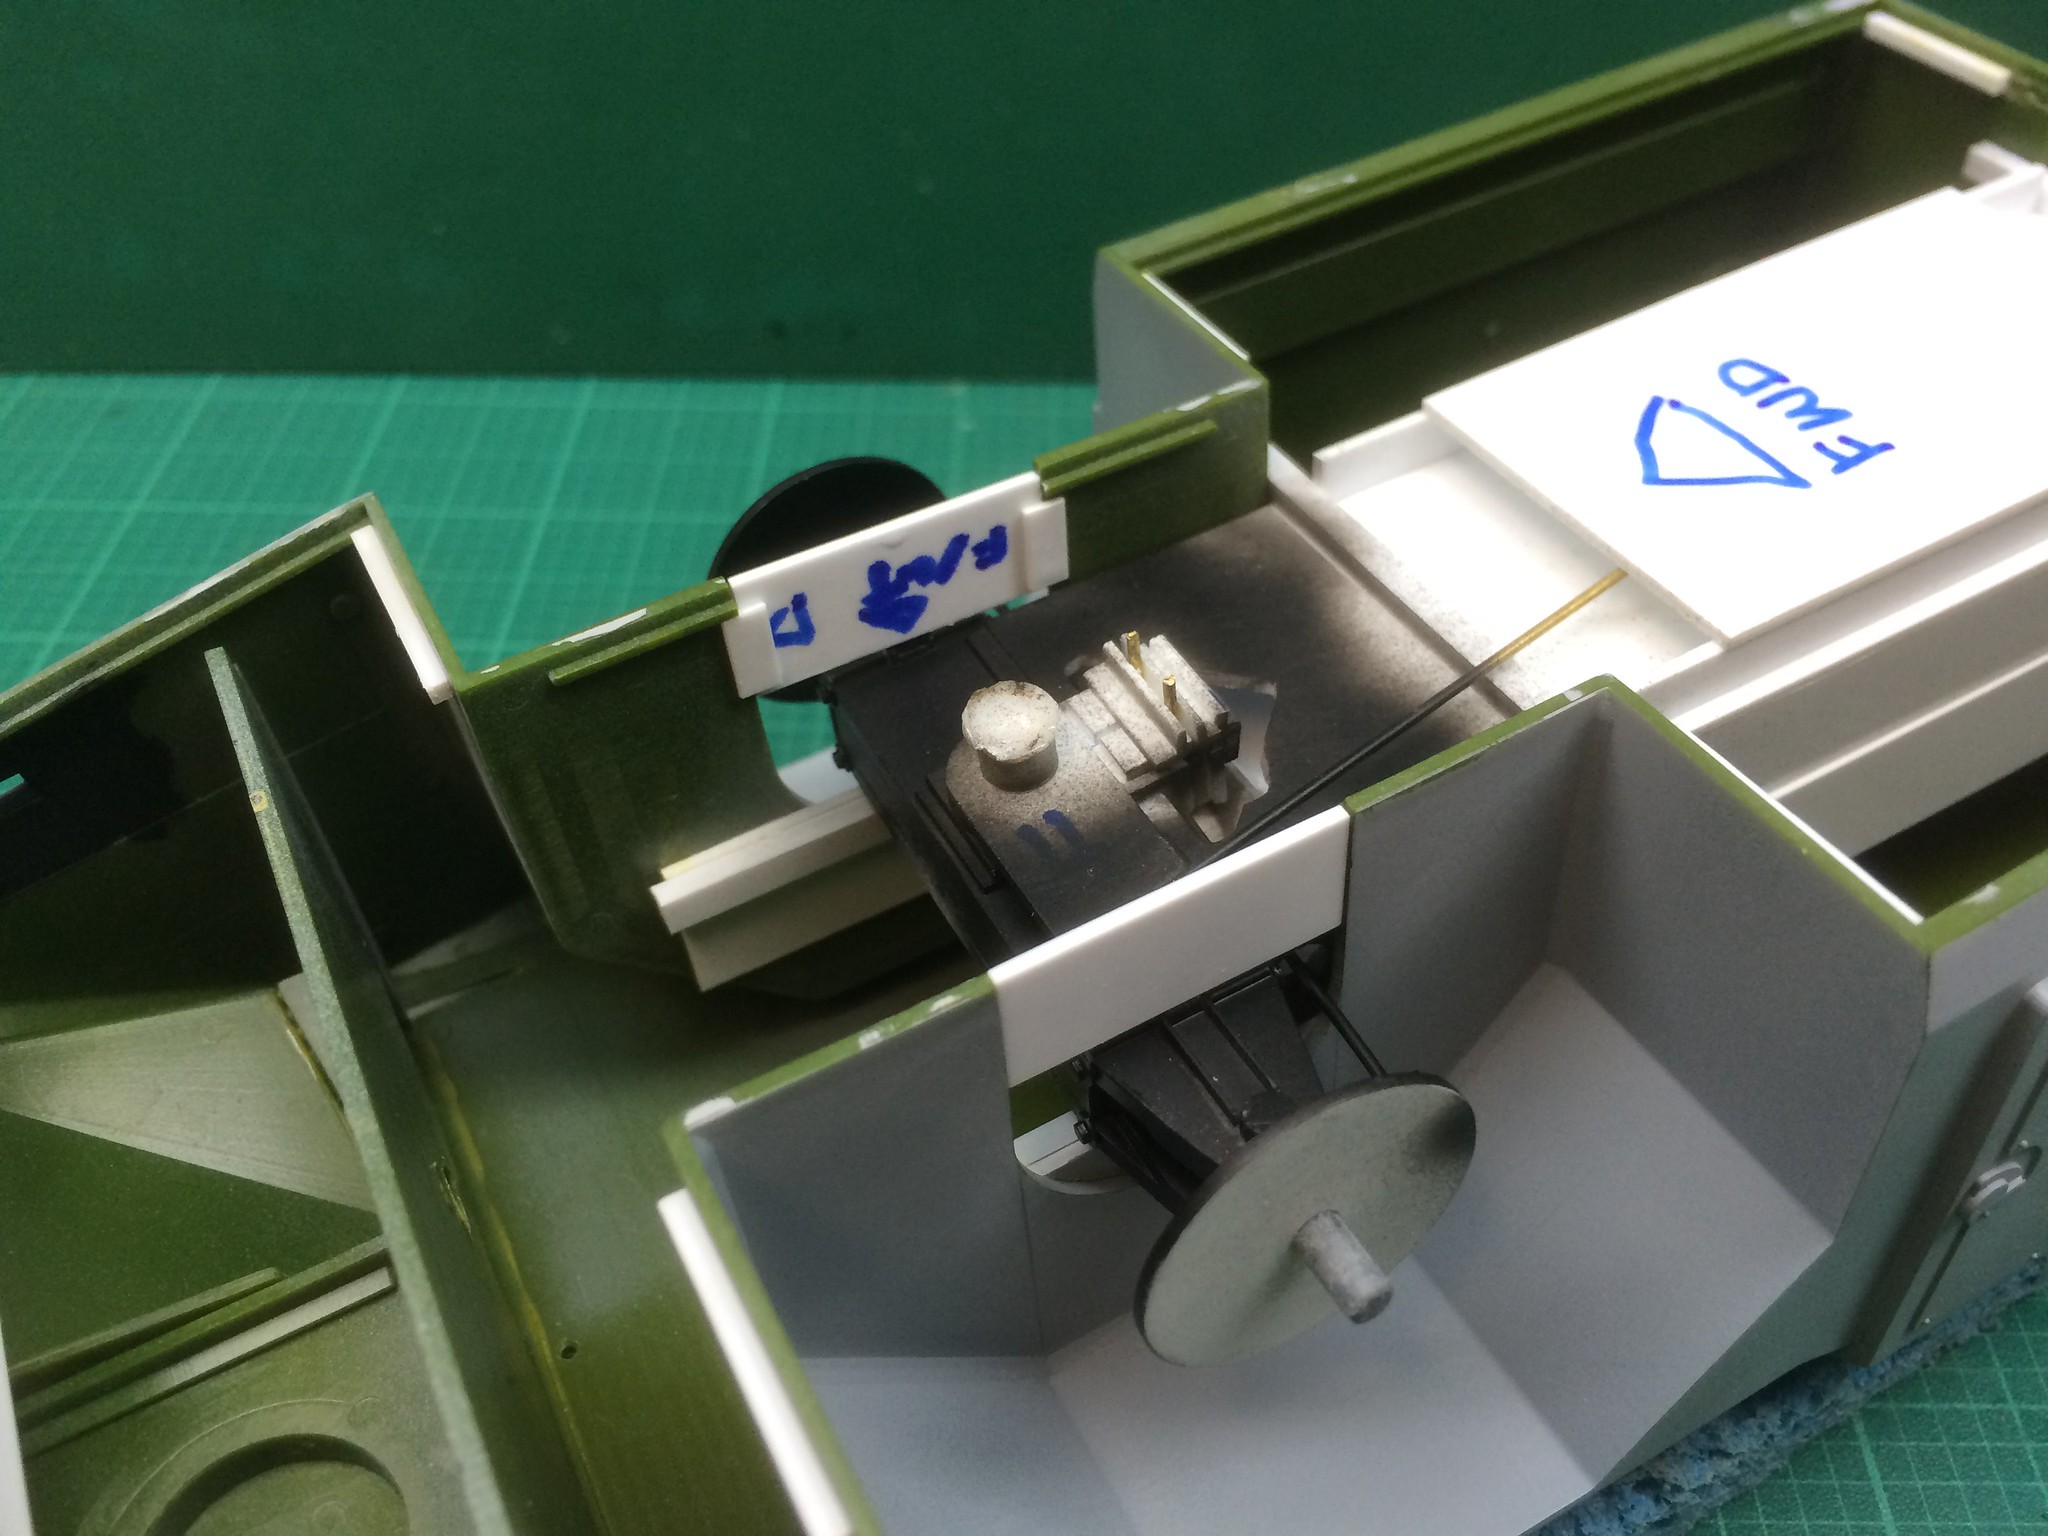
[/url]APC-75 by N.T. Izumi, on Flickr

https://flic.kr/p/DpHhqE] 
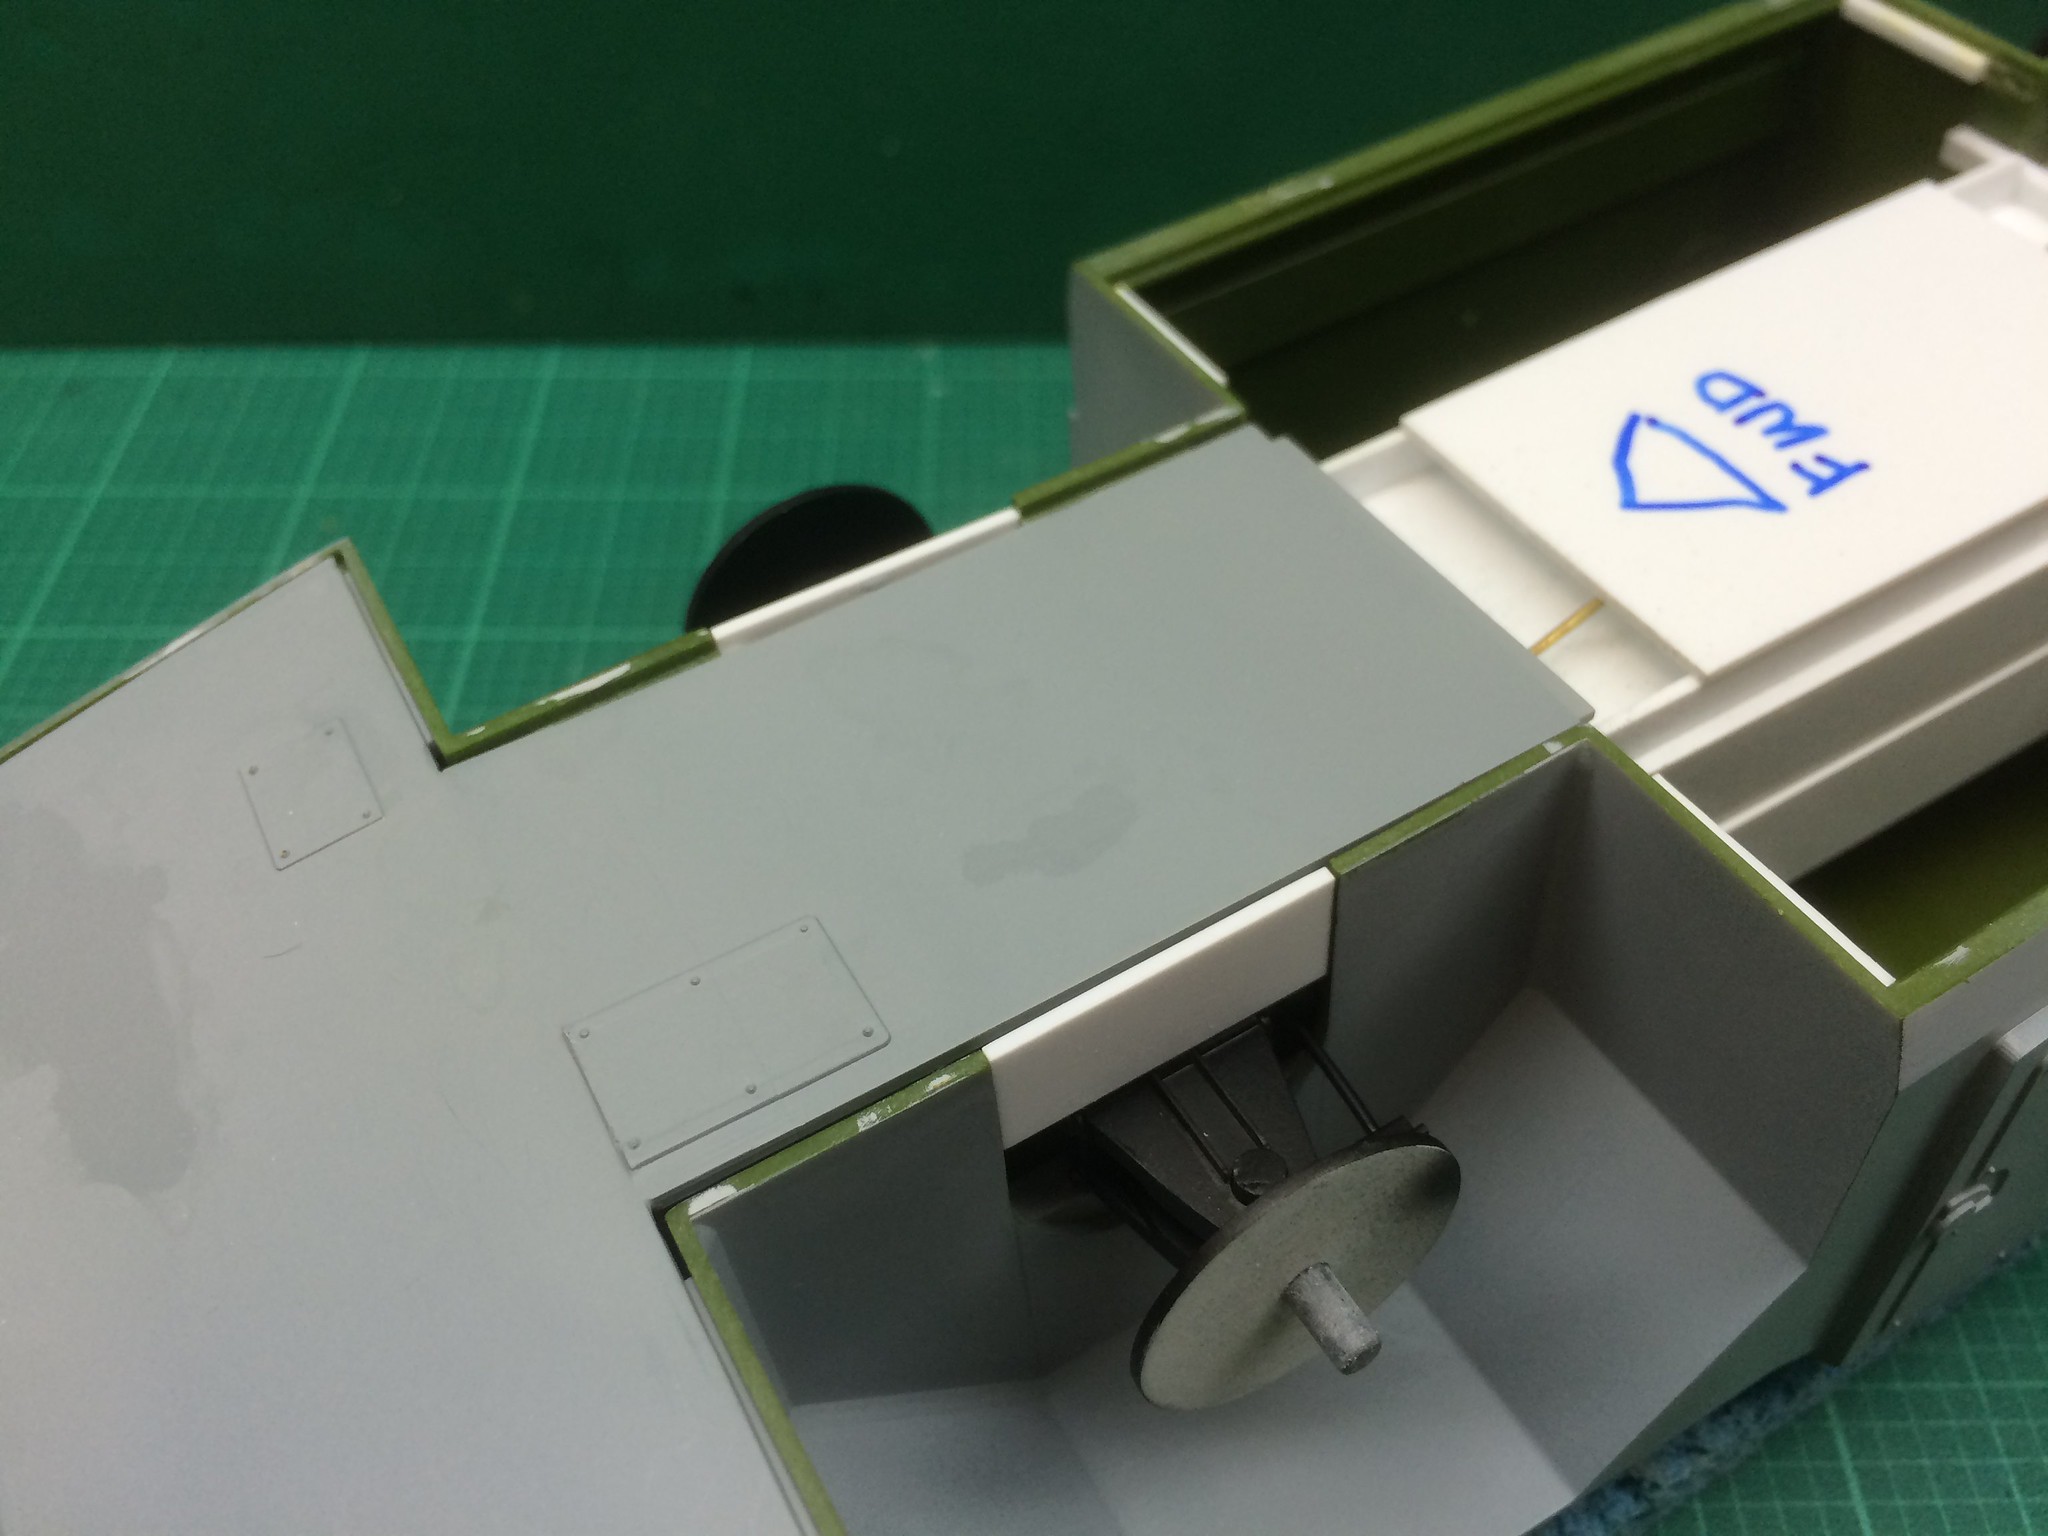
[/url]APC-76 by N.T. Izumi, on Flickr

There will be a brief intermisison, due to my fat rear end knocking the model off a chair and onto the hard floor!  The kit's plastic is horrifyingly brittle, so bits of the turret rail shattered into small pieces, and one of the rear fenders broke off in a jagged mess.  The turret got one of its guns knocked off, and a corner got chipped.   The rail damage was caused by the metal pins in the turret base smashing through as the model pancaked upside down on the floor.  At least the pins survived intact.  I recovered most of the little shards, but one piece of the turret rail is MIA.  I initially didn't want to even look at the model after the accident, but after cleaning everything up, I set about gluing the bits back together.  This is the rail with the missing shard.

https://flic.kr/p/CZgVFG] [/url]APC-78 by N.T. Izumi, on Flickr

"When single is the triple sun

what was sundered and undone

shall be made whole, the two made one,

by scratchbuilt part or else by none!"

God, I wanted to screech "HAKSKEEKAAAAA!!!!!" and take a swing at something for doing something so stupid.  Reminder to self:  Do NOT put a model on a tool box that is known to be very slippery, while on a chair that is behind my butt.

Anyway, repairs are continuing and should be completed shortly.

“Ya ya ya, unicorn papoi!”

  • Member since
    May 2011
  • From: Honolulu, Hawaii
Posted by Real G on Thursday, February 11, 2016 12:56 PM

Repairs from Saturday's accident are almost done.  A bit of 0.030" strip styrene was used to fill in the gap on the rail, after cutting away the jagged damaged section.  A little more filling and some delicate sanding is all that is left to do.

https://flic.kr/p/E2NEuP] [/url]APC-81 by N.T. Izumi, on Flickr

For some reason I was dilly-dallying getting to the belly hatch securing system.  I had thought about using rare earth magnets, so instead of going to bed like a good little boy, I set about getting it done.  The magnets are encapsulated with short plastic tubing segments and 0.015" sheet plastic caps. They were in turn glued to the belly hatch and in matching locations on triangular plastic plates fixed inside the hull.  A lot of peeking and prying was needed to get everything to match up, but it is done!

https://flic.kr/p/DzGaph] [/url]APC-82 by N.T. Izumi, on Flickr

https://flic.kr/p/Dtjupk] [/url]APC-83 by N.T. Izumi, on Flickr

The magnet force is neither too strong nor too weak, so I am satisfied.  To remove the plate, I will drill out two holes where some raised rim detail is, and use a bent paper clip to reach in and pull the hatch free.

Last item on the to-do list is to make some new headlight reflectors, as I am unhappy about the way my setup looks at the moment.

“Ya ya ya, unicorn papoi!”

  • Member since
    November 2009
  • From: SW Virginia
Posted by Gamera on Friday, February 12, 2016 8:05 AM

Great to see things back on track. I think the last time I dropped a model I stuffed it back in the box and walked away for over a year. 

Very clever idea there on the battery compartment! 

"I dream in fire but work in clay." -Arthur Machen


  • Member since
    May 2011
  • From: Honolulu, Hawaii
Posted by Real G on Friday, February 12, 2016 12:50 PM

Thanks Gamera!  I am hoping to re-prime the damaged sections and begin pre-shading this week and start painting proper next week.

I have seen people make swappable parts using hidden magnets, as well as figures that stand using them.  I also have some 12" collectible action figures that use magnets to hold optional parts and conceal battery access compartments, so the idea was cribbed from those sources. 

I'll do the same for the Drop Ship loading ramp (to access batteries, not to deploy a 1/72 APC).  I keep telling myself that over and over.  BTW, the Drop Ship can't be 1/72 because I already checked the relative size of a 1/72 APC based on the 1/35 kit, and it will NOT fit in the bay.  Yes, yes, I already said no APC...

“Ya ya ya, unicorn papoi!”

  • Member since
    June 2010
  • From: Australia
Posted by OctaneOrange on Monday, February 15, 2016 2:36 AM
i like what you've been doing to this
  • Member since
    May 2011
  • From: Honolulu, Hawaii
Posted by Real G on Monday, February 15, 2016 2:59 AM

Thanks Octane Orange!  Painting will commence shortly, as I was able to pre-shade the model over the weekend.  It looks kind of toasted right now, as I just hosed down some black on all the corners and stuff.  Pics tomorrow as I'm too stupid to do it from my phone.

Oh yeah, I'd better have a dig through the paint box to pick a color!  The real vehicle looked OD to me.

“Ya ya ya, unicorn papoi!”

  • Member since
    May 2011
  • From: Honolulu, Hawaii
Posted by Real G on Monday, February 15, 2016 12:50 PM

I managed to get some pre-shading on the model over the weekend.  I was too lazy to switch out the wide airbrush tip, so the paintwork is very sloppy.  But that's okay, as the color coats will refine the look.  That was all that could be done, as it was getting late and the cats wanted the patio back! 

https://flic.kr/p/DWiJU5] [/url]APC-84 by N.T. Izumi, on Flickr

https://flic.kr/p/Damcyz] [/url]APC-85 by N.T. Izumi, on Flickr

I also got around to cutting down some Gundam type rocket bells to use for the headlight reflectors.   I had set the LEDs too far back in the housing, so I needed something shiny up front to suggest the reflectors.  Some Alclad chrome finished them off nicely.

https://flic.kr/p/Damnki] [/url]APC-86 by N.T. Izumi, on Flickr

You can't see it in the photo, but the right side has a car headlight lens from Modeller's, and the faceting is clearly visible to the eye.

As Mathazar from "Galaxy Quest" said, "Onward Tep, onward..."

“Ya ya ya, unicorn papoi!”

  • Member since
    February 2014
  • From: Michigan
Posted by silentbob33 on Monday, February 15, 2016 7:34 PM
Nice repairs on the turret track, and it's nice to see some paint going down. I love what you're doing with this kit.

On my bench: Academy 1/35 UH-60L Black Hawk

  • Member since
    June 2003
  • From: Cavite, Philippines
Posted by allan on Monday, February 15, 2016 8:04 PM

Stunning work youve put into this. Looking forward to more WIP shots.

No bucks, no Buck Rogers

  • Member since
    May 2011
  • From: Honolulu, Hawaii
Posted by Real G on Tuesday, February 16, 2016 9:55 PM

A few final tidbits.  The headlight reflectors were made from cut-down rocket bells made by Wave.

https://flic.kr/p/Edahhv] [/url]APC-87 by N.T. Izumi, on Flickr

The kit windshield is not very clear, so a new one was cut from Squadron "thermaform" sheet.  My sample always fogged up when heated, so I was never able to use it in its intended way.  Anyway, the improvement in clarity is terrific.  Too bad I plan on painting out the backside to conceal the empty interior.

I have selected Testors MM Green Drab for the overall color.  Painting will commence after dinner tonight.  Stay tuned!

“Ya ya ya, unicorn papoi!”

  • Member since
    May 2011
  • From: Honolulu, Hawaii
Posted by Real G on Tuesday, February 16, 2016 10:02 PM

Opps, the last post had a duplicate photo and the "edit" bar does not appear!  Here is the correct pic:

https://flic.kr/p/DL3bs9] [/url]APC-89 by N.T. Izumi, on Flickr

“Ya ya ya, unicorn papoi!”

  • Member since
    September 2009
Posted by Cobra 427 on Tuesday, February 16, 2016 11:16 PM

Thank you for showing us this! What a wonderful build. You say that you're the measure once - cut twice kind of builder? So am I!!! That's MY creedo! Just look at my four foot X-wing. Wait - you can't! I keep making mistakes, and having to correct them over, and over again. There's no instruction manual, or directions for scratch building, so all is trial and error.

"What are we going to do - use harsh language?!" This is one of my favourite movies too. That's MY reaction when something doesn't go right. I hate having to do things the hard way as well, but sometimes you have to things yourself to get them right! Don't feel bad as I've had to go over my own work to many times just to get the correct overall shape, or design correct. Well, it's late, and I'm tired, and I need to get back to work tomorrow. Bed time for Bonzo - not Bitburg. I'll keep watching this thread to see how this comes out. I've thought about making a tank (kit) like this in 1/6th scale, but after doing the four foot beast everything else would be cake! It's got me burning out on building since balsa is so damned soft, and breaks so easily! At least you have solid plastic although brittle it won't simply crumble in your hand when you touch it with a little bit of force. Good night, and good luck on your project, Sir. It's looking good, and the steering idea is great! I love doing small alterations that add that special little something to a model for more realism, and detail.


~ Cobra Chris

Maybe a picture of a squirrel playing a harmonica will make you feel better?


  • Member since
    May 2011
  • From: Honolulu, Hawaii
Posted by Real G on Wednesday, February 17, 2016 1:30 AM

Cobra Chris, thanks for the kind words! I have also attempted scratchbuilt projects in the past, but had few successes.  My remedy is time - like 20 years, to learn new tricks.  The problem with that method is that I can't afford to wait another 20 years to finish my current projects!

The weather tonight is gusty with hissy rain, so no painting out in the patio!  I think I'll go and check out your X-Wing build instead...

“Ya ya ya, unicorn papoi!”

  • Member since
    May 2011
  • From: Honolulu, Hawaii
Posted by Real G on Monday, February 22, 2016 12:34 PM

The weather finally settled down, so I got the first color coat on over the weekend.

https://flic.kr/p/EgAuUN] [/url]APC-90 by N.T. Izumi, on Flickr

Painted a few panels to provide some contrast.

https://flic.kr/p/EisKcj] [/url]APC-96 by N.T. Izumi, on Flickr

https://flic.kr/p/EitbtG] [/url]APC-98 by N.T. Izumi, on Flickr

Now for some highlights.  Going to use Pazer Gelb to lighten the green instead of white, to avoid the chalky look.

Next up:  Some gloss coat, decals, and weathering.

“Ya ya ya, unicorn papoi!”

  • Member since
    May 2011
  • From: Honolulu, Hawaii
Posted by Real G on Monday, February 22, 2016 12:41 PM

BTW, the repairs from my stupid accident look okay.

https://flic.kr/p/EgBemw] [/url]APC-93 by N.T. Izumi, on Flickr

The two holes on the belly plate were drilled out to provide a means to remove it for battery and switch access for the lighting system.

https://flic.kr/p/DmxF2T] [/url]APC-94 by N.T. Izumi, on Flickr

“Ya ya ya, unicorn papoi!”

  • Member since
    January 2006
  • From: California
Posted by SprueOne on Monday, February 22, 2016 9:44 PM

Fantastic model building and excellent problem (accident) solving too Yes Idea

Anyone with a good car don't need to be justified - Hazel Motes


Iron Rails 2015 by Wayne Cassell Weekend Madness sprueone

JOIN OUR COMMUNITY!

Our community is FREE to join. To participate you must either login or register for an account.

SEARCH FORUMS
FREE NEWSLETTER
By signing up you may also receive reader surveys and occasional special offers. We do not sell, rent or trade our email lists. View our Privacy Policy.