SEARCH FINESCALE.COM

Enter keywords or a search phrase below:

Bandai Starblazers 2202 Garmillas Zoellugut

2488 views
20 replies
1 rating 2 rating 3 rating 4 rating 5 rating
  • Member since
    October 2021
Bandai Starblazers 2202 Garmillas Zoellugut
Posted by PhoenixG on Monday, March 25, 2024 9:10 PM

Hitting a section with the Spartan where there is some downtime between actions and decided to work on this.

Zoellugut

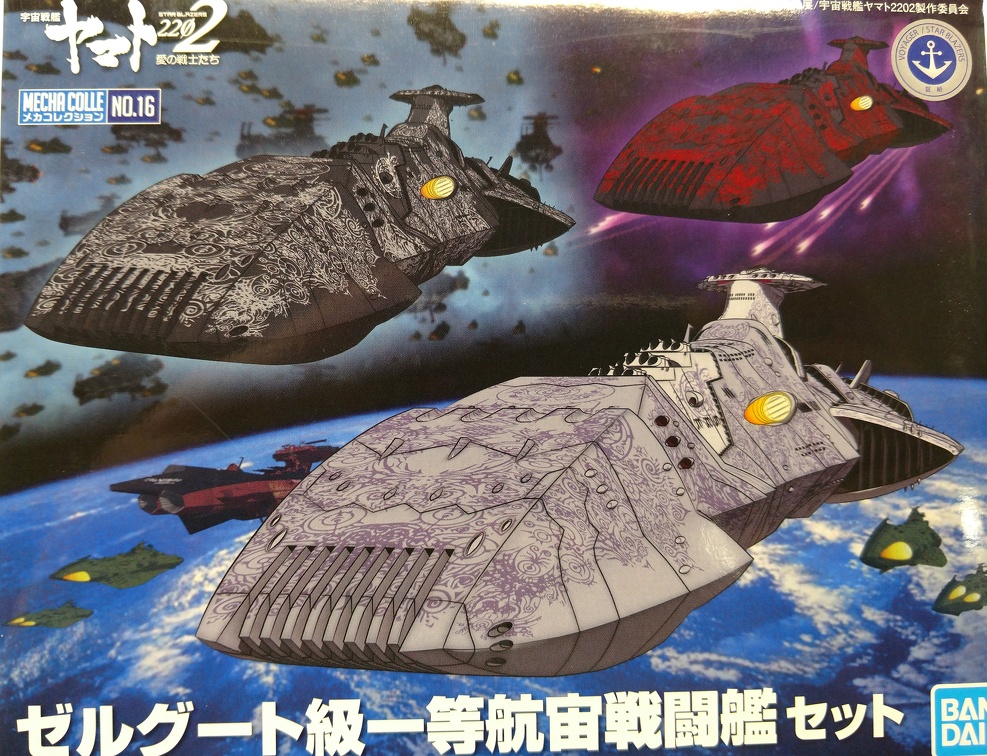
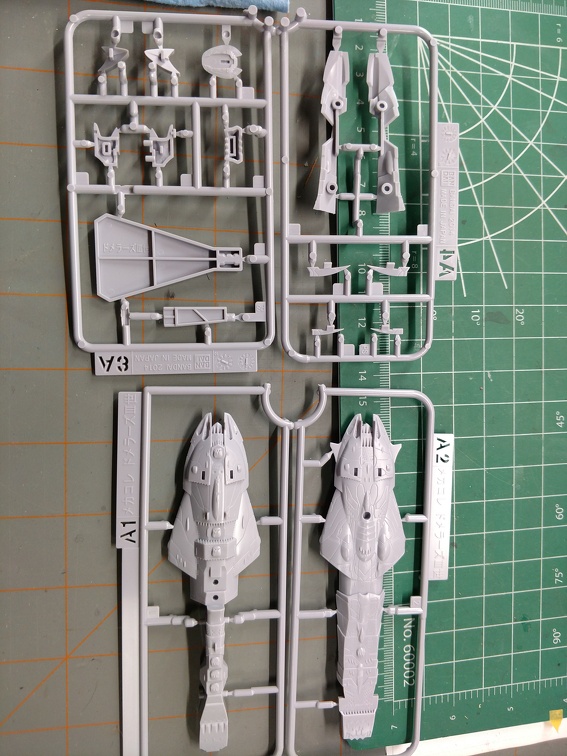
I don't know what the scale is, but the kit includes two of the vessels and decals for all three version you see on the box art.  The parts are injected in standard grey and black. 

At the moment I only intend to build one of the two vessels because this is meant to be a fun little side project. 

I am starting with the grey one. Not a lot of parts, which makes it perfect for a filler build.

part trees

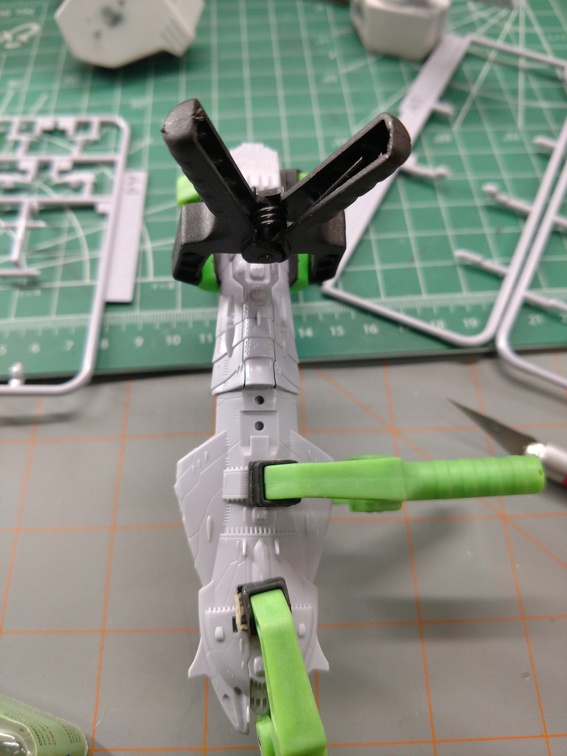
Straightforward assembly, but the pieces didn't quite fit as nicely as I'd like.  There didn't seem to be any interference from flash etc.  Possibly, a little warping after ejected from the mold. Clamping seemed like a good idea.

clamped

Had a small SNAFU when glueing in one of the small fins on the bottom.  It wasn't going in very well.  When I tried to back it out, I snapped off the front end of it.  A little dab of glue on it and almost as good as new.

whoops

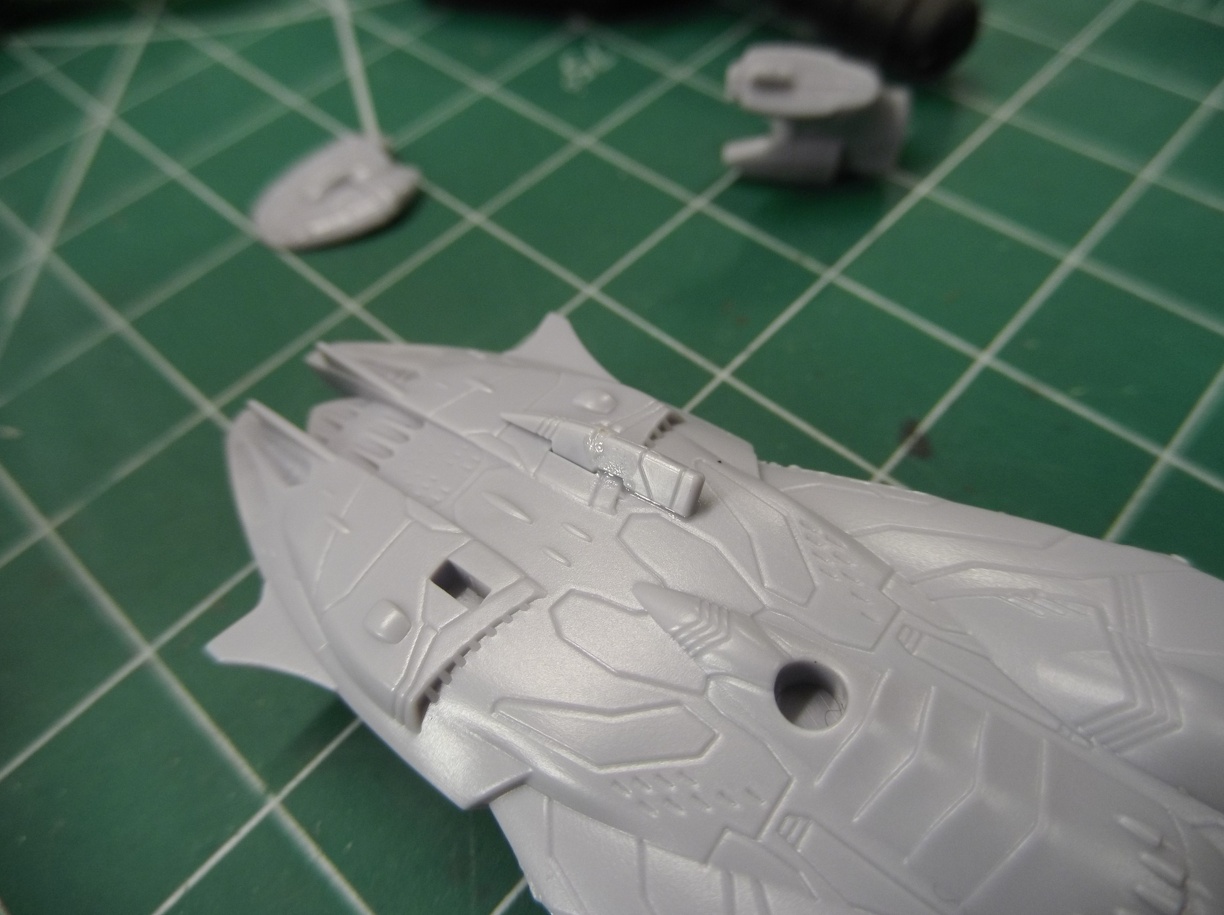
It's hard to see the photo and even harder to see it with the eyeball.

The rest of the assembly went smoothly and it primed nicely.  The Q-tip is for scale.

Primed

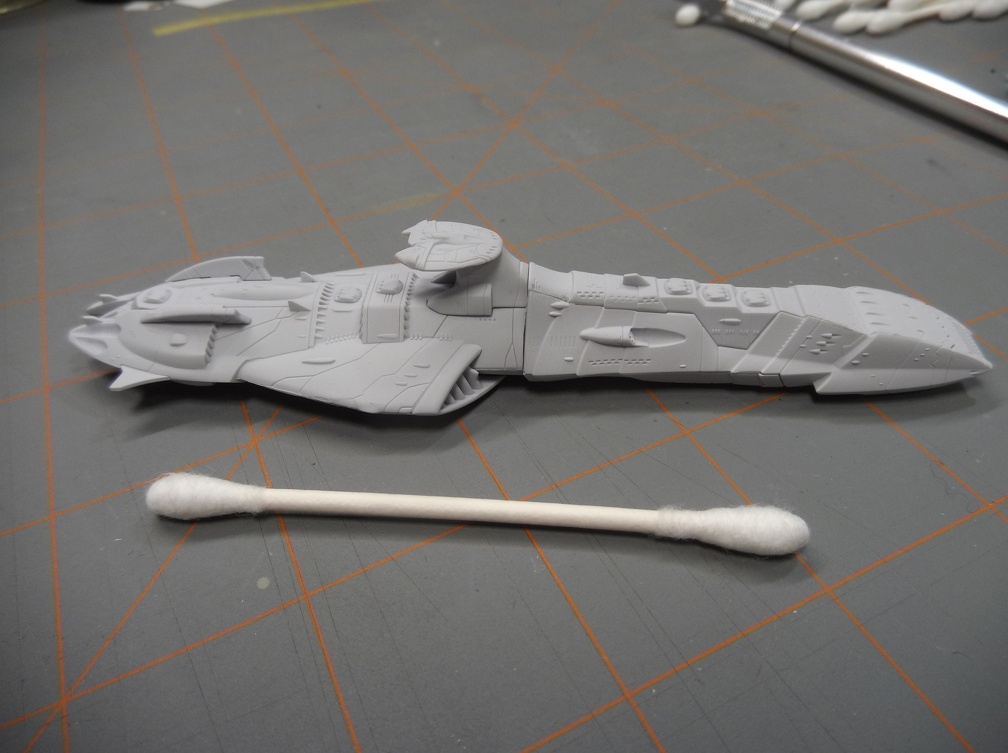
it really is a tiny little ship.

Took me a bit to figure it out, but the greys on the ship aren't just simply light or dark.  They actually have a little purple mixed into them.

it's purple

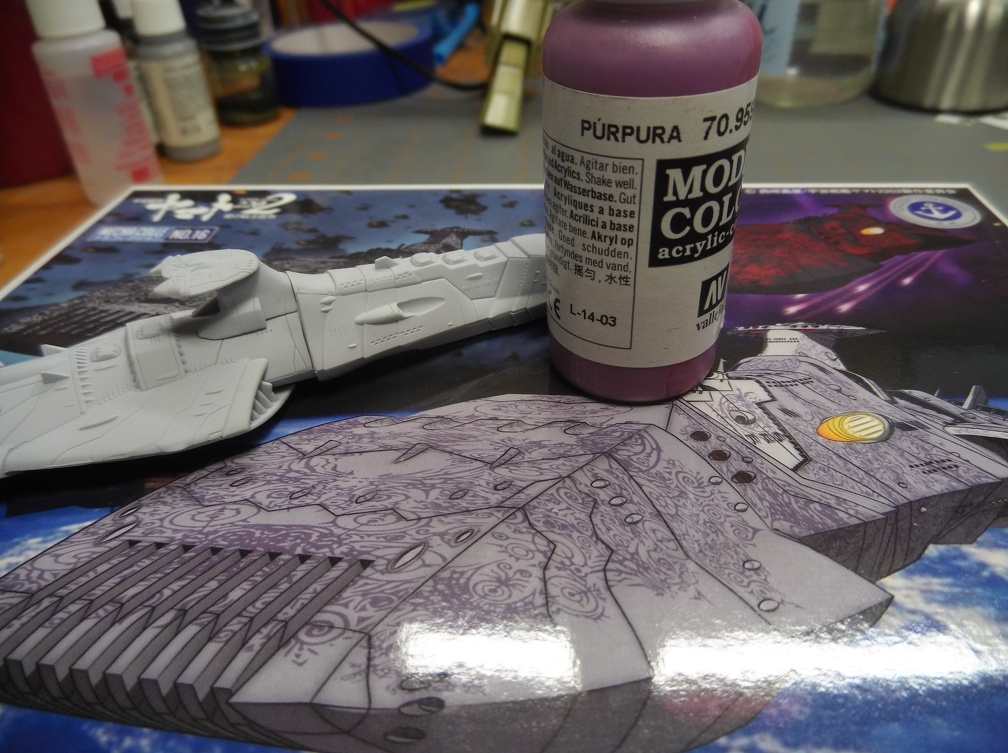
And that's what I am working on now.  Figuring out the right ratio of purple to grey in order to achieve a reasonable approximation of the color. 

It should also help tie the decals into it a lot better than if I simply use a darker grey.

decals

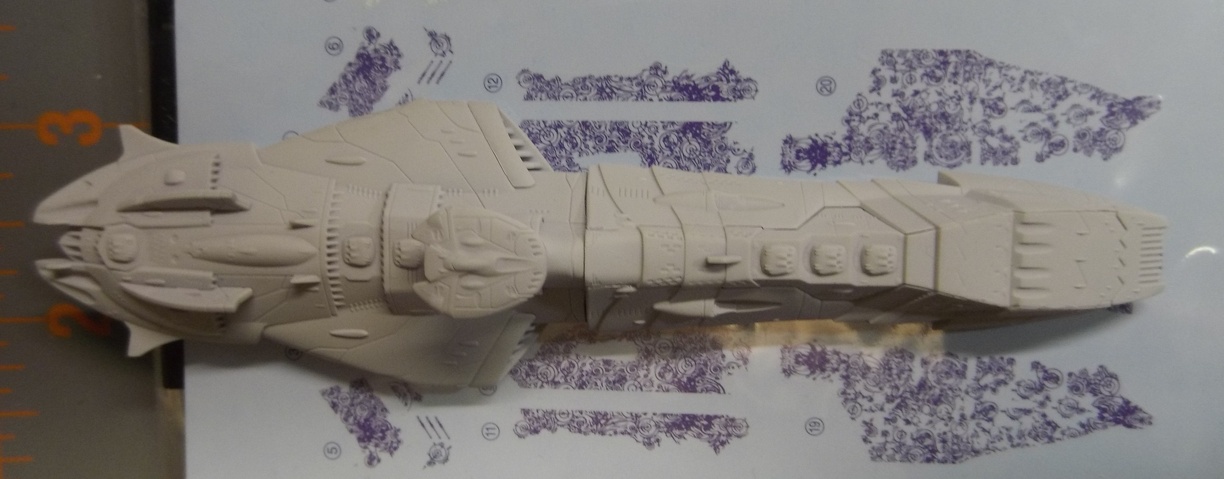
One other little twist. I failed to notice the bridge and cannon section are lighter shades.  It would have been easier to do this before assembly.

I think it will be simpler to paint the bridge and cannons first.  Mask them off and then paint the rest in the darker color.  If I do it the other way I'm going to have to mask twice.

Well that brings everything current.  Time to start experimenting with paint.  :)

On the Bench:

Bandai Starblazers 2202 Garmillas Zoellugut

  • Member since
    October 2021
Posted by PhoenixG on Tuesday, April 9, 2024 11:13 PM

I lied.  I ended up masking around the bridge.  I started worrying about overspray messing with the darker gray.

mask

A fairly quick and dirty job.  I figured a little bleed wouldn't be very noticeable.

The color as applied is a mix of Vallejo primer, AC White, and MC Purple.  The mix wasn't very precise.  Effectively 2 drops of primer+ 1 drop White + a damp toothpick tip worth of purple is how it started.  Added a little this and that till I got a color that was close enough for my satisfaction.

painted

Practically indistinguishable unless you pay close attention to the exposed stern.

Pulling off the masking makes it a bit more apparent.  I appreciate the subtlety a tiny bit of purple adds to it.

it's purple!

Next up.  Masking the bridge and the cannons and then mixing up the darker grey + purple to apply.

On the Bench:

Bandai Starblazers 2202 Garmillas Zoellugut

  • Member since
    August 2021
Posted by lurch on Wednesday, April 10, 2024 3:38 AM

This looks interesting. I like it. I will be following this one.

  • Member since
    July 2014
  • From: Franklin Wi
Posted by Bakster on Wednesday, April 10, 2024 9:07 AM

PG, this looks like a cool project. I will be following.

Looking forward to what you do with this!

  • Member since
    October 2021
Posted by PhoenixG on Thursday, April 11, 2024 2:29 PM

Thanks to those following along.  This one is going to have a slow start as it's only going to be worked on when there are pauses with the Spartan.  Once the Spartan is completed this will get my full attention.

On the Bench:

Bandai Starblazers 2202 Garmillas Zoellugut

  • Member since
    November 2009
  • From: SW Virginia
Posted by Gamera on Friday, April 12, 2024 5:20 PM

That's so cool!!! Looking forward to when you get to finishing her up! 

"I dream in fire but work in clay." -Arthur Machen


  • Member since
    May 2023
Posted by Greysteele on Sunday, April 14, 2024 11:05 AM

Those Starblazer minis are fun to build. I wish there was a larger scale kit of this ship.

"In polite society, we call our obsessions hobbies." – Stephen King

  • Member since
    October 2021
Posted by PhoenixG on Monday, April 15, 2024 3:18 PM

Greysteele

Those Starblazer minis are fun to build. I wish there was a larger scale kit of this ship.

If they ever did make a larger scale one I would seriously consider picking it up.  There is detail on this small one that I think would look simply amazing on something larger.

On the Bench:

Bandai Starblazers 2202 Garmillas Zoellugut

  • Member since
    October 2021
Posted by PhoenixG on Saturday, April 20, 2024 4:19 PM

With the Spartan out of the way this now has my full attention.

A nice little amuse bouche before starting up on another big project.

I've been busy masking off the bridge and forward cannons. After spending 30 minutes trying to find my tweezers. Confused

mask1

Lots of tiny triangles of masking tape being applied here in order to cover the area. Too many different angles for straight pieces of tape.

mask2

But you get enough of them applied and eventually you've got it masked.

mask3

The forward cannons were masked with triangles cut from Tamiya 6mm masking tape. 

Much to my surprise I was able to cover most of the upper bridge using pieces of the larger Tamiya 10mm masking tape.

mask4

Tamiya 10mm masking tape is my bread and butter tape.  However, after getting those larger sections done it was back to the 6mm.  I cut it down to about 4mm wide strips and applied it to to the lower surfaces of the bridge.

mask5

It conformed quite well to the curves of the lower sections of the bridge.  Thanks to the not quite perfect fit of the bridge I could slide the blade of the hobby under the edge and easily cut off the excess tape .

And just like that, the masking is done!

mask6

Next up is applying some clear coat to seal the mask and mixing up the color for the darker grey of the hull.  I'll probably start with a neutral gray as the base. 

On the Bench:

Bandai Starblazers 2202 Garmillas Zoellugut

  • Member since
    May 2011
  • From: Honolulu, Hawaii
Posted by Real G on Saturday, April 20, 2024 6:59 PM

PhoenixG


Greysteele

Those Starblazer minis are fun to build. I wish there was a larger scale kit of this ship.


If they ever did make a larger scale one I would seriously consider picking it up.  There is detail on this small one that I think would look simply amazing on something larger.


There is:

 https://www.scalemates.com/kits/bandai-0191395-zoellugut-class-domelaze-3rd--551325

But I don't have one.  Sorry.

I'm still hoping for a Gatlantis missile ship, the one that looked like something I'd draw in 5th grade.

“Ya ya ya, unicorn papoi!”

  • Member since
    October 2021
Posted by PhoenixG on Monday, April 22, 2024 2:48 PM

Real G


PhoenixG


Greysteele

Those Starblazer minis are fun to build. I wish there was a larger scale kit of this ship.


If they ever did make a larger scale one I would seriously consider picking it up.  There is detail on this small one that I think would look simply amazing on something larger.


There is:

 https://www.scalemates.com/kits/bandai-0191395-zoellugut-class-domelaze-3rd--551325

But I don't have one.  Sorry.

I'm still hoping for a Gatlantis missile ship, the one that looked like something I'd draw in 5th grade.


Too bad.  The larger Zoellugut appears to be out of circulation at the moment.  Fingers crossed they decide to release it again.

As for the Galantis missile ship.  This the one you are thinking of?

Galantis

Which also looks to be out of circulation.

Seems like Gunpla is dominating Bandai's production output these days. Not complaining.  However, it would be nice to have a wider variety of genres to select from. 

On the Bench:

Bandai Starblazers 2202 Garmillas Zoellugut

  • Member since
    October 2021
Posted by PhoenixG on Monday, April 22, 2024 3:07 PM

Busy weekend.

Settled on Vallejo Meidum Sea Grey, White, and Purple as the colors to use for the body.  The paper below is actually a palette paper.   Having something like this to do custom color mixes is a great aid. It's a neutral grey which really helps the eye/brain see the color as mixed.

colors

This is the color I finally settled on.  It's approximately 5 parts Medium Sea Grey + 2 parts White + 1 part Purple.  I used aircolor for the white as a way to help pre-thin the paint before transferring it to the airbrush.

color

I did paint test by applying a drop of the paint to the box section and look for color matching.  The dot on the lower right was the color mix I settled on.

test

After thinning the paint mix a bit more it airbrushed quite nicely.

completed paint

Peeling of masking is still like unwrapping gifts.  Smile

peel1

The masking turned out nicely.

peelcont

Quite pleased with how the base colors applied.

overall

Gloss coat for the pinwash went down without a hitch.  Already looking sharp!

gloss

I got as far as applying the pin wash to most of the upper structure.

pinwash

detailpic

Needed to take a break at this point.  Back was starting to complain from being hunched over for so long.  The bridge and main cannon still need the pinwash and then I can start cleaning up around everything.

On the Bench:

Bandai Starblazers 2202 Garmillas Zoellugut

  • Member since
    October 2021
Posted by PhoenixG on Friday, April 26, 2024 5:53 PM

Looks like there is a break in the bad weather (forum's server issues) going to try and squeeze in a quick update while things are a little more stable.

Finished up with the pin wash.

pin1

pin2

I like how those panels lines just pop.  Still need to clean up the mess of the wash.

Of course I just realized I did this too early.  I should have put the decals down first.  Whoops!
That got me  looking at the decal sheet and am now wondering if the darker gray is too dark for those decals.

decals

The box are has the decals as being noticeably darker than the hull.  I wonder if a mist coat of a lighter shade would work....

Otherwise it's strip it back to plastic and try again.  Given how small the model is it isn't as big a deal, but not my favorite thing to do.

Maybe I'll give the mist coat of a lighter shade a try first and go from there.

On the Bench:

Bandai Starblazers 2202 Garmillas Zoellugut

  • Member since
    November 2009
  • From: SW Virginia
Posted by Gamera on Monday, April 29, 2024 6:52 PM

That looks soooo cool Phoenix! Lots of the detail there for such a small model. 

"I dream in fire but work in clay." -Arthur Machen


  • Member since
    October 2019
  • From: New Braunfels, Texas
Posted by Tanker-Builder on Tuesday, April 30, 2024 8:27 AM

Hi!

     Fascinating project this! I just wish they made them bigger. These, like 1/700 ships are a pain for me to work on. Looks like fun though!

  • Member since
    July 2014
  • From: Franklin Wi
Posted by Bakster on Thursday, May 2, 2024 6:24 PM

Gamera

That looks soooo cool Phoenix! Lots of the detail there for such a small model. 


What he said. Watching.

  • Member since
    October 2021
Posted by PhoenixG on Saturday, May 25, 2024 3:05 PM

Between work and life I've not had the motivation to be at the bench.  No progress on it since my last post.  Every time I've looked at the model it's been "nope, not today".

However, things are looking up and I hope to have something new to show for it this weekend.

Current idea is to try and brush on a white glaze over the darker purple/grey parts and see if that gives it the tint I am looking.  Right now there isn't sufficient contrast between the hull and decals.

I admit the reason for going with the glaze is less prep work and expect it will give me more control than with an airbrush

On the Bench:

Bandai Starblazers 2202 Garmillas Zoellugut

  • Member since
    October 2021
Posted by PhoenixG on Wednesday, May 29, 2024 6:32 PM

Updates. Hurrah!

I mixed up a large batch of glaze only to need a couple of brushes worth to achieve the desired effect.  Everything was Vallejo MC.  The dilution was approximately 1 to 5.  One drop white to 3 drops glaze plus 2 drops distilled water.   I actually mixed up 4 times that amount because I wasn't sure how many coats would be necessary to achieve the desired effect.

For comparison here is how it looked before the glaze.

preglaze

And how it looks post glaze.

post glaze

It softened the color just a smidge.  I like how it reduced the contrast between the main hull and the foward batteries+bridge. 

With that done decals are now being laid down.  Tinting the hull with white is making those decals pop!

decal1

As can be seen the surface is highly irregular.  There is quite a bit for the decals to conform to.

I don't know how I ever got along without Micro Sol.  The below is after a single coat. 

SOL2

I've made some small cuts and punctures around all the raised detail so the decals can settle better and applied more Micro Sol.  It looks even better now.   This is going to be an exercise in patience.  Applying these first two at a single go was almost a disaster.  So it'll be done slowly.  One at a time.  Getting each one properly conformed before moving on to the next.   I've got 12 more decals to lay down.  I've got a feeling that's all I am going to be doing for the next two weeks, but it will be worth the effort.

Then I'll seal it all up again and go over the pin wash one more time before the final satin is applied.  With all that lace work it seems a shame to cover it with a matte.

On the Bench:

Bandai Starblazers 2202 Garmillas Zoellugut

  • Member since
    July 2014
  • From: Franklin Wi
Posted by Bakster on Friday, May 31, 2024 4:19 PM

PG, those are some cool looking decals.  And you are making some nice progress!

Thanks for sharing.  I am still following. Surprise

  • Member since
    October 2021
Posted by PhoenixG on Wednesday, June 5, 2024 10:56 PM

Short update.  I'm about 25% done with the decals.  Or half of one side.  It is going as slow as I thought it would.  Some of the decals have bends in them that require setting half the decal first.  Letting it dry.  Then applying the bend. 

They could be cut, but my luck with aligning decals and having them survive the process is about 50/50.    So far this has worked well enough.  It just means having some extra patience.

lace1

lace2

I continue to brush Micro Sol on all the decals after each addition.  They continue to settle into the panel lines and conform to the shipe and the repeated application is helping to soften the edges of the decals.

In the locations circled in red below I had to score the decal  so it would settle properly over those sections without causing creases.  The section circled in green is where I left the decal sticking out until the top half had settled and dried.  Then bent the decal across the edge to the lower hull.

application

Trying to conform all those locations at once was not possible.  Leaving that little bit out and waiting till the top half dried allowed it to go down flawlessly.

They did a fantastic job on the decals.  The edges align well and give the illusion of a continuous piece.  An errors in allignment are mine.


On the Bench:

Bandai Starblazers 2202 Garmillas Zoellugut

  • Member since
    November 2009
  • From: SW Virginia
Posted by Gamera on Wednesday, June 12, 2024 9:19 PM

She's looking really good Phoenix! I kinda get nervious around really large decals like that but the way you're putting them down seems to be working like a charm. 

"I dream in fire but work in clay." -Arthur Machen


JOIN OUR COMMUNITY!

Our community is FREE to join. To participate you must either login or register for an account.

SEARCH FORUMS
FREE NEWSLETTER
By signing up you may also receive reader surveys and occasional special offers. We do not sell, rent or trade our email lists. View our Privacy Policy.