SEARCH FINESCALE.COM

Enter keywords or a search phrase below:

Back to the Future--DeLorean Time Machine

7234 views
9 replies
1 rating 2 rating 3 rating 4 rating 5 rating
  • Member since
    January 2010
Back to the Future--DeLorean Time Machine
Posted by Klik on Thursday, November 7, 2013 3:44 PM

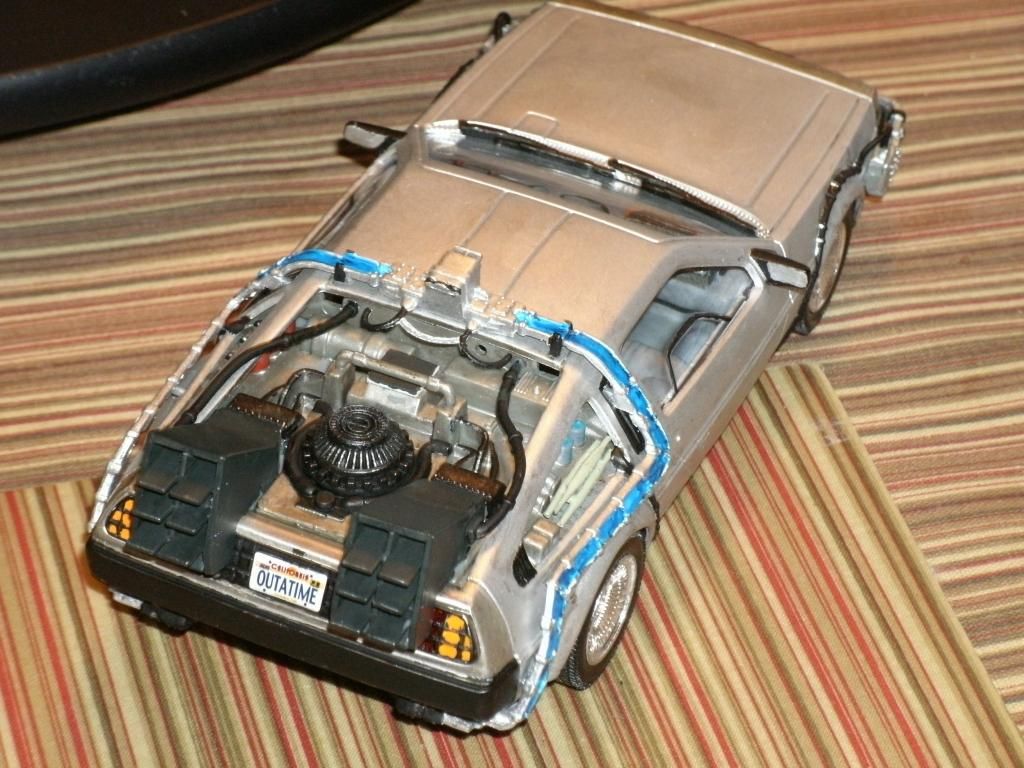
Back to the Future is one of my favorite movies, so when I saw Polar Lights' 1/25th "Snap it" kit (snap together, but more on that later), I had to get it.

For a simplistic kit, this car required a lot of work, and a ton of paint.

Finished pics for you all:
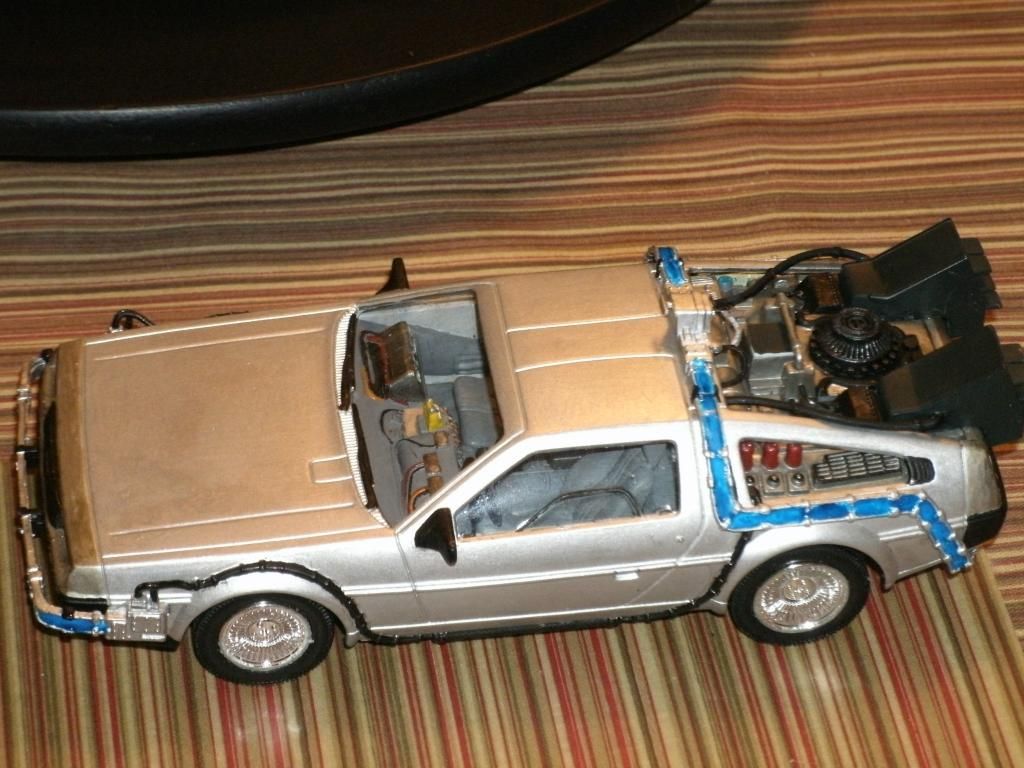
The kit was cast in grey, silver-chrome, and off-tan silver colored plastic for the various components and body shell, which was one piece. The bottom of the kit was not much of an improvement:
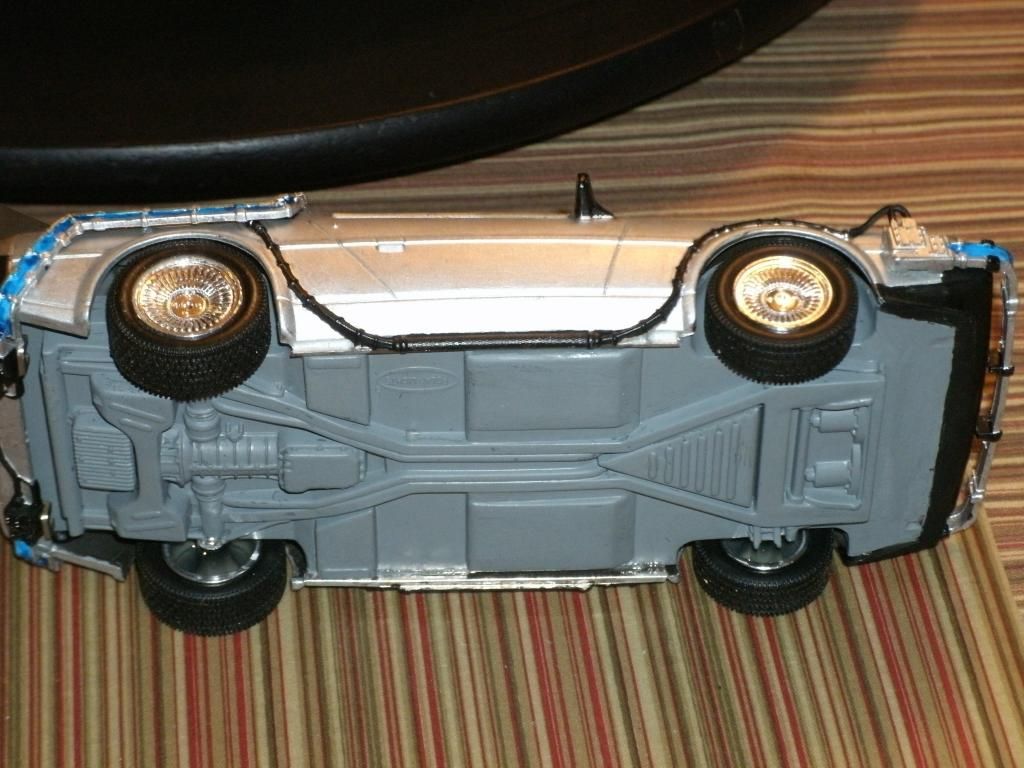
But, really, for a snap-tight kit, what can you really expect?

Although the kit had two options--the car as it appears in the first film, but with the ridiculous antenna on the back, and as it appears in the second, with the Mr. Fusion generator (no hover mode, though)--I chose the first one, and with no good reference pics (everyone who has a DeLorean, it seems, has made their car in a facsimile of the Time Machine, with no two looking exactly alike), I just put a piece of cardstock over the holes for the antenna rig.

As for fit, I cannot believe that they marketed this kit as a "Snap-Tight" type kit. Nothing just snapped into place and actually fit there (except the steering wheel, which was the only piece I neither glued nor modified in any way to get the fit). Nearly every part had to have its snap-to-fit points shaved down, off, or completely reshaped to get it to fit in the place it was meant to go. And, even with all that, there were still spots that wouldn't fit right.

When it came to painting the car, the instructions literally say "look at the box art for paint references", which would not be so bad had they included more than the one picture repeated all over the box.

Fortunately, most of the fit issues are hidden on the undercarriage, and can only be seen from this angle:
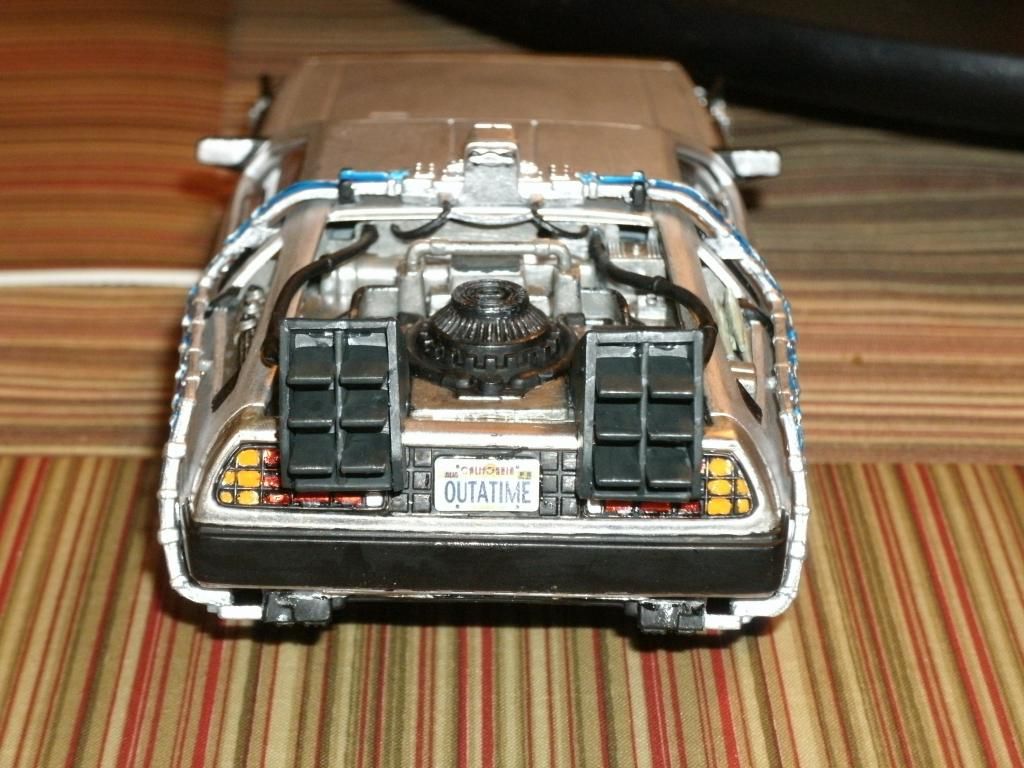
No matter how hard I tried, I couldn't get the "Flux Arrays" on the sides to sit right with the "back panel" on the underside--it was the back panel's fault. Also, the "exhaust fans" are misaligned, as you can see.

What ever the problems I had with this kit, I have to hand it to Polar Lights--every part is labeled for the builder, not just with parts numbers, but with the name of that part.

The Flux Capacitor is even molded so as  to make painting easier:
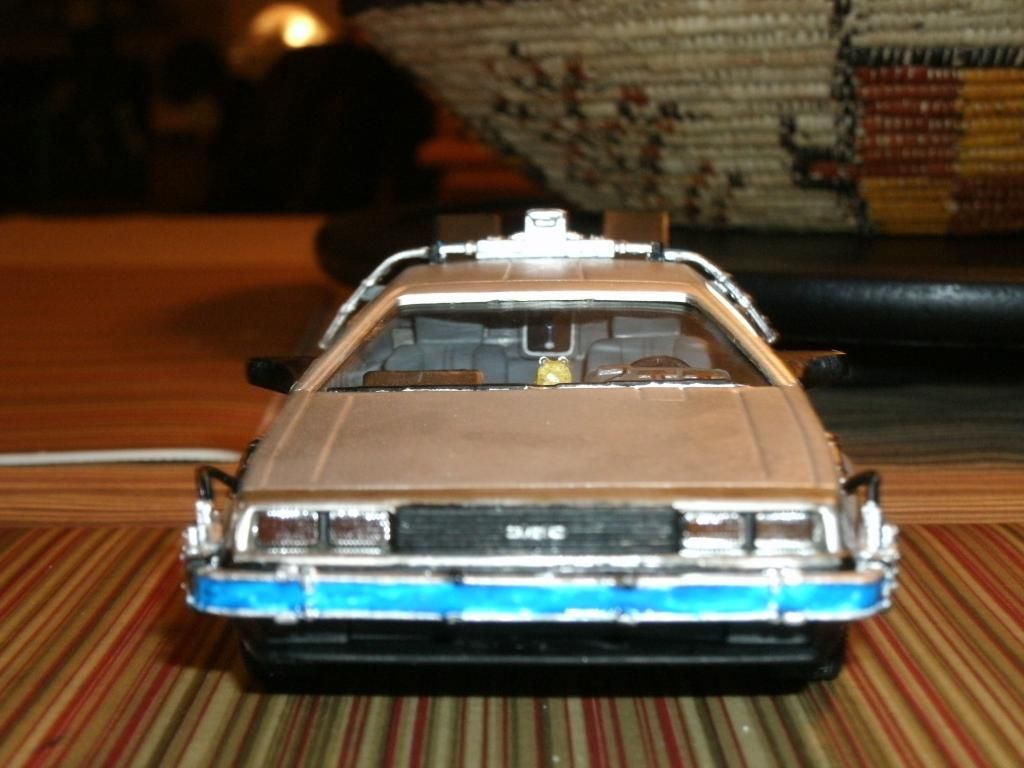
You can kinda see it peeking out in the back. (whoa, that is a BAD picture, my bad). They even included the alarm clock:
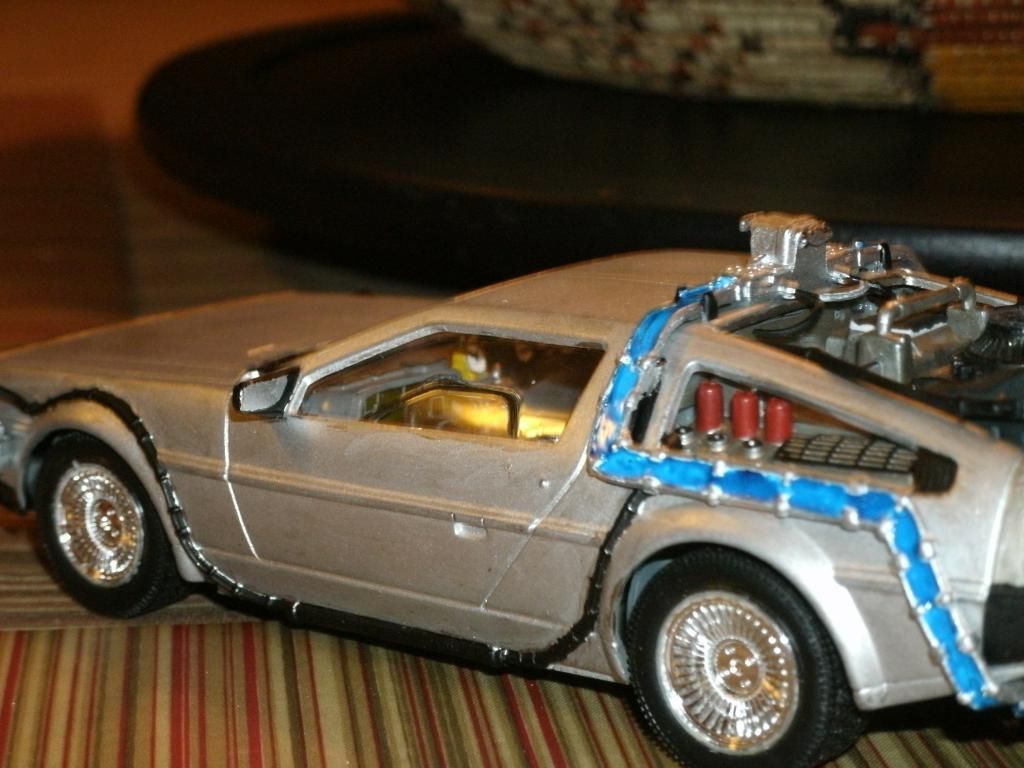
also molded so as to ease painting.

And, finally, a top-shot for you:
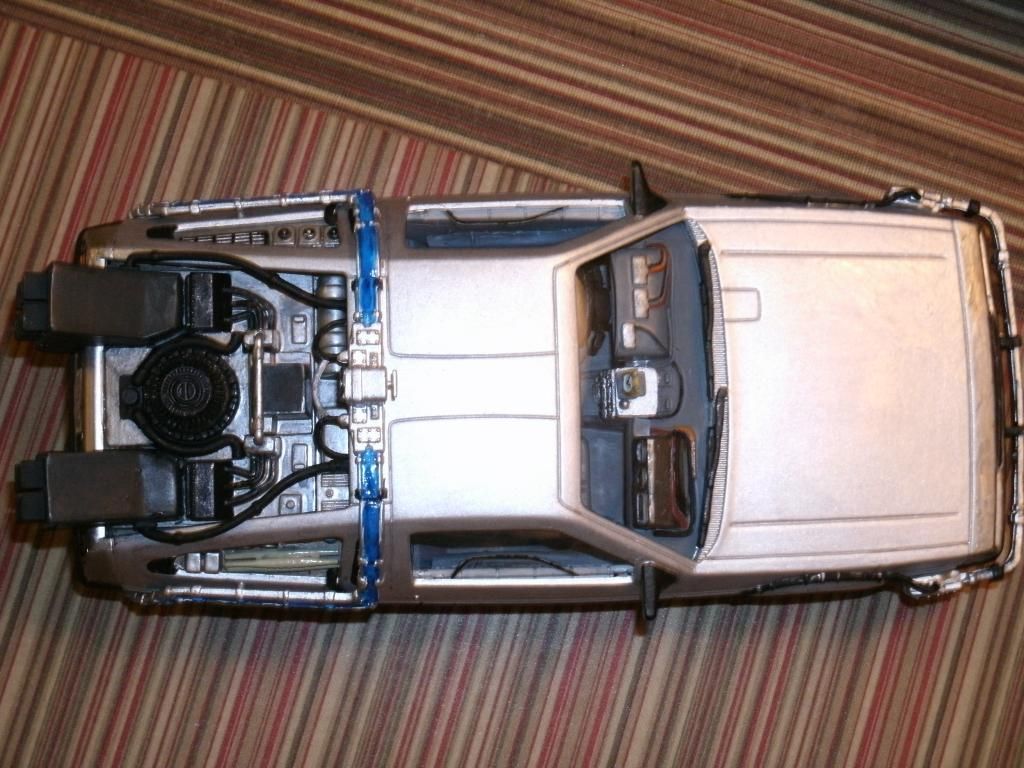
 

Overall, despite fit issues, alignment problems, and missing details, I had fun building this kit, even though it turned out not to be the relaxing, easy build that I thought it would be. I am glad with how it turned out, and the best part is that it ROLLS! (thus confirming my suspicions that this was intended as a "toy" kit)


Comments, criticisms, anything else, welcome  and appreciated.


Klik


P.S. I know that all the issues in this kit would have been easily fixed by modelers with greater skills than my own, but I am more of a Out of the Box builder and just finished several tough kits back-to-back and was looking for something easy when I picked this up.


oneyearwar1

The hardest part of flying isn't flying...it's landing.

  • Member since
    January 2006
  • From: California
Posted by SprueOne on Friday, November 8, 2013 1:05 PM

I have the Japanese mfg version but have not purchased this one. I haven't started mine yet though. I think you did a good job fitting all the parts based on your quality description and that of others as well. 

Anyone with a good car don't need to be justified - Hazel Motes


Iron Rails 2015 by Wayne Cassell Weekend Madness sprueone

  • Member since
    August 2005
  • From: Glenolden, PA
Posted by highlanderburial on Friday, November 8, 2013 9:29 PM

Great kit man, the silver to simulate stainless steel seems tricky. Still I loved this subject!

Imagine a witty signature right .....here....

  • Member since
    April 2010
  • From: San Diego, CA, USA
Posted by Gerry on Tuesday, November 12, 2013 11:33 PM

Done that one. It's a really fun kit to build. Nicely done :)

Gerry ...Young at Heart - Other parts slightly older.

  • Member since
    June 2010
  • From: Australia
Posted by OctaneOrange on Thursday, November 21, 2013 10:34 PM

It looks very good and you've captured the look correctly and i didnt' notice the misaligned vent until you mentioned it. I don't think the module in the center of the roof is quite that high on the real car.

SprueOne

I have the Japanese mfg version

the japanese version is by Aoshima, it's the same as the one by AMT. I've build a few of that version, but not the Polar Lights version. It's fit is quite good, except for the chassis, with it's folding BTTF2 wheels are sloppy and shows none of it's delorean roots.

  • Member since
    February 2003
Posted by dmcox1 on Wednesday, February 12, 2014 6:16 PM

Just a comment as an actual Delorean owner: the shot of the bottom of the car - You obviously didn't try to paint it, but I can tell you that the shapes are all correct.  It is a double-y frame, so the front angle holds the fuel bladder and the ridged plate you see protects it.  The 2 cylinders you see in front of that look like the motors for the radiator fans, although they appear to be a bit further back than real life.  The engine sits inside the rear fork, and all the bottom parts appear to be about correct.

  • Member since
    November 2003
  • From: State of Mississippi. State motto: Virtute et armis (By valor and arms)
Posted by mississippivol on Wednesday, February 12, 2014 7:01 PM

Nice job taking on all the difficulties!

  • Member since
    January 2010
Posted by Klik on Wednesday, February 12, 2014 10:37 PM

Wow, even though I posted this a ways back, I didn't expect anyone to comment at all.

Thanks for the comments. They are greatly appreciated. This was actually the first1/25th scale kit I'd ever built, but not the last.

Thanks, again. Klik

oneyearwar1

The hardest part of flying isn't flying...it's landing.

  • Member since
    November 2010
  • From: Florida-West Central
Posted by Eagle90 on Thursday, February 13, 2014 6:53 AM

Hey Klik, I think you did a great job on the build!  With all the issues you had, it came out great!  Thanks for posting the pics!  

Eagle90


  • Member since
    April 2014
Posted by Arnold J. Rimmer on Thursday, April 17, 2014 5:29 PM

I've been thinking about getting one of these. I love it! Great job

JOIN OUR COMMUNITY!

Our community is FREE to join. To participate you must either login or register for an account.

SEARCH FORUMS
FREE NEWSLETTER
By signing up you may also receive reader surveys and occasional special offers. We do not sell, rent or trade our email lists. View our Privacy Policy.