Revell's "Viking Ship" kit is actually an extremely accurate model of the Gokstad Ship, one of the two biggest Norse archeological finds of the late nineteenth century. She and the Oseberg Ship are the main exhibits at the Viking Museum in Oslo.
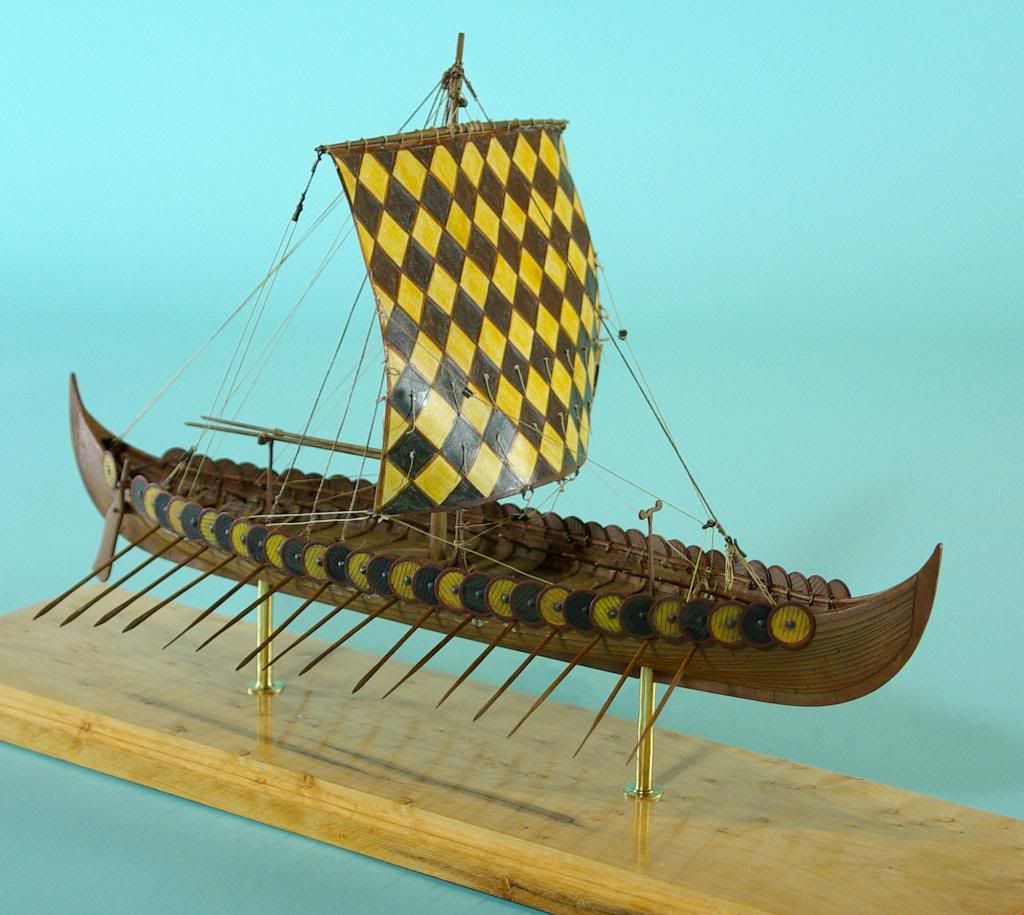
Here's a model of her that I built a few years ago, based on the Revell kit. It's one of my favorites - and, with its 1976 date, the last genuinely new sailing ship that Revell of the U.S. ever did. The planking detail on it looks remarkably like the excellent Imai kits.
The Gokstad Ship was buried in a big mound of dirt, and the stem- and sternposts stuck up into a more acidic layer. They apparently rotted away long before the ship was excavated; whether they ever had dragons' heads, or any other decoration, on them is unknown. Revell includes a pair of reconstructed parts that are based on other Norse carvings, but I didn't care for them. (It's also been said that those carvings are of the wrong date.) I decided to trim the stem- and sternposts off in a curve, as was done on the real ship when she went on exhibition.
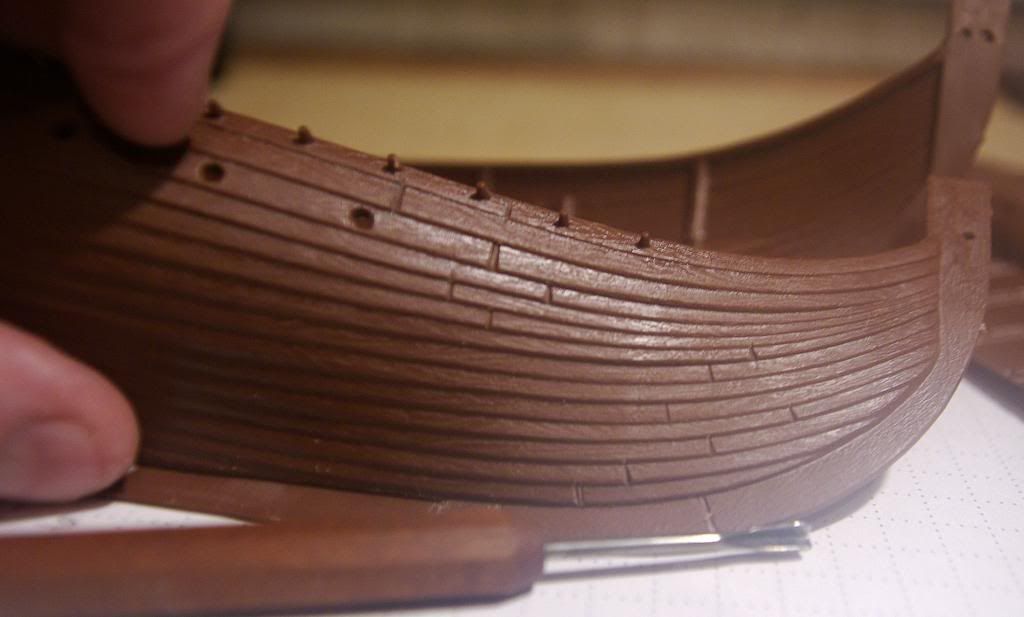
This time I actually had the foresight to snap a few shots while I was working on the model. This is about the only one that's worth looking at. The Revell designers did an amazing job with the planking - including the slight variations in the plank widths at the bow and stern. They match the detailed drawings in The Viking Ships, by A.W. Brogger and Haaken Shetelig, precisely. What Revell didn't do, for some reason, was indicate the ends of the planks. In the foreground is the little v-gouge that I used to add them.
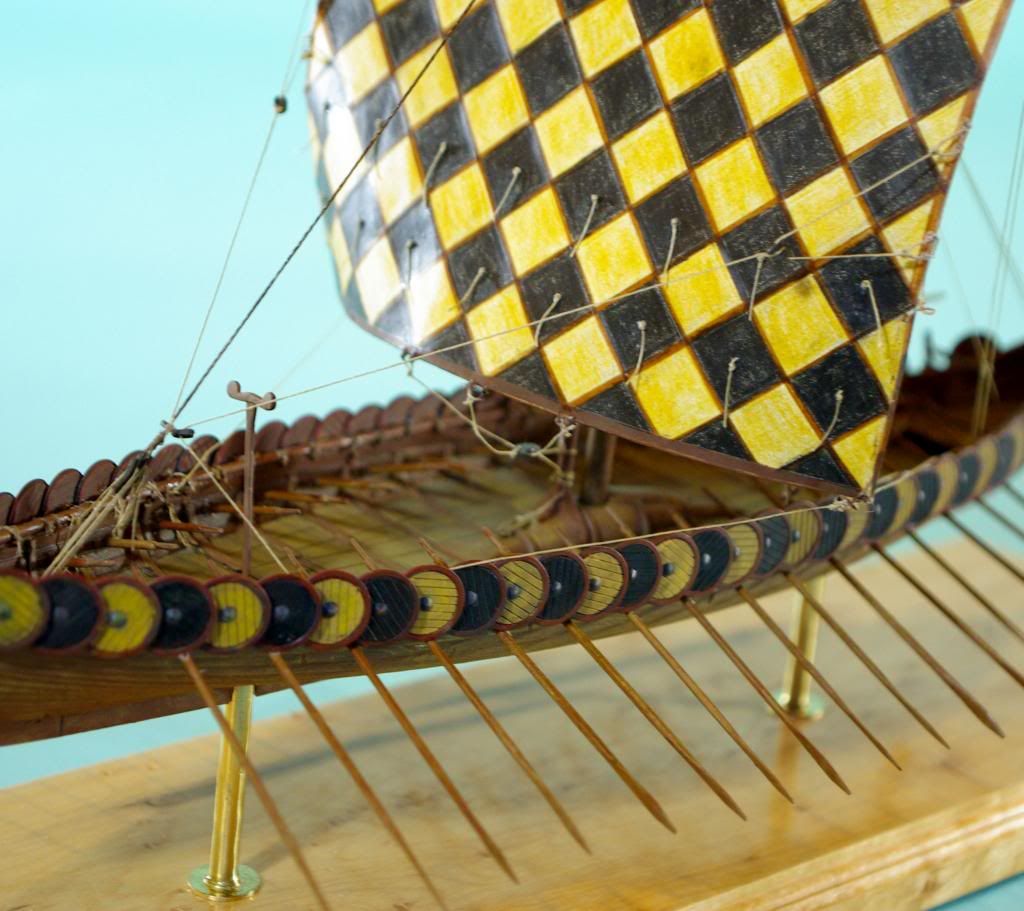
This is the only model I've built with a set sail since I was a kid. I figured it could be done pretty effectively, because the scale is so large (1/64 - contrary to what the box claims) and the sail (or what's believed to be the sail) of the Gokstad Ship was, by the standards of later centuries, quite remarkable in its construction. A big heap of yellow and black wool, badly deteriorated, was found in the grave site where the ship was buried. It's thought that this is the sail (or at least may be). Several illustrations from the Viking era show sails with criscross grids on them. One interpretation (not original to me by any stretch of the imagination) is that the sail was woven out of strips of yellow and black cloth, with strips of leather to reinforce them and give the sail its shape.
I made the sail from the lightest-weight resume paper I could find at Office Depot. (It has a clothlike texture that's believable on this scale.) I painted it with black and yellow PollyScale paint, and made the "leather" strips out of (drum roll please) Scotch magic tape. (3M says the adhesive on it is "archival quality." We'll see.) This sort of sail is easy to set in a convincing shape, just using the sheets and tacks. The reef points (closer to the foot than the head) show in several old Norse images. On each leech you can see a little rope loop, whose purpose is to hold the end of the "bietas," a long pole used to stretch the weather leech when the ship is working to windward. The two bietases are stowed on the T-shaped racks abaft the mast.
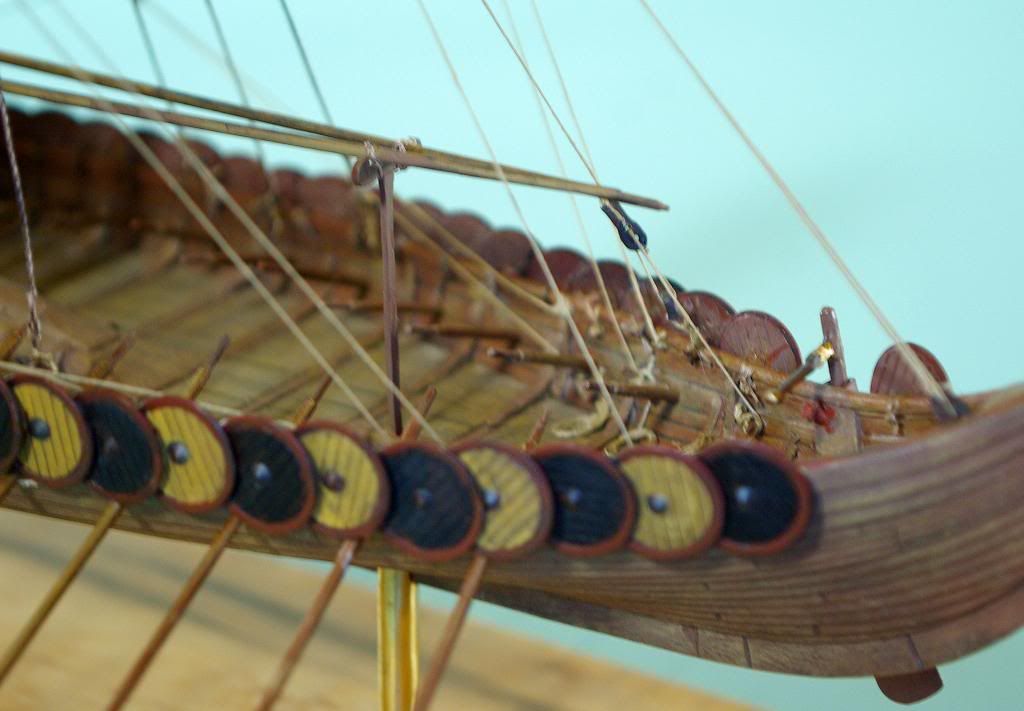
Rigging a Viking ship presents lots of interesting problems. The only obvious "belaying points" in the Gokstad Ship are four wood cleats at the stern. Some researchers have suggested that Viking ships didn't have shrouds or stays, but the guys who've built replicas and sailed them generally think such "standing rigging" would have been necessary - though it could be struck quickly when the mast was lowered.
Revell provides nice replicas of a pair of big gadgets that are thought to have functioned sort of like modern deadeyes or hearts; I figured the forestay would be a logical place for them. Just under the main rail on each side of the ship is a strip of oak with small notches cut in it. The archeologists call it the "shield rail," theorizing that the shields outside the gunwales were secured to it. I figure it also would have been a good place to belay lines. Revell molded the shield rail integrally with the hull halves (the gap between it and the gunwale would have been less than 1/64"), so I drilled holes through the gunwales at the notches, rove the lines through the holes, and brought them back in again through the adjacent holes. (The holes outside the hull are hidden behind the shields.) The few rigging blocks are made from scrap plastic.
The decals for the shields in the kit are nice, but half the shields found in the Gokstad Ship are painted black and the other half yellow. (I can't say the same for the decal that's intended to go on the vacformed "sail." It looks like a caricature lifted from a comic book. One of the first things one learns when studying the Vikings seriously is that the horned helmet is NOT part of the Norse tradition. Wagnerian sopranos, yes; Vikings no. )
The shields have leather straps, which apparently held them to the shield rail when they weren't in use. I puzzled for a long time over a material to represent the straps. It finally came to me - quite literally - in the bathroom: flat, unwaxed dental floss. (Walmart.)
My jaw practically fell off when, in the first episode of that History Channel series about the Vikings, I saw that somebody had built a replica Viking ship with the steering oar on the PORT side. No way! (Revell got it right.)
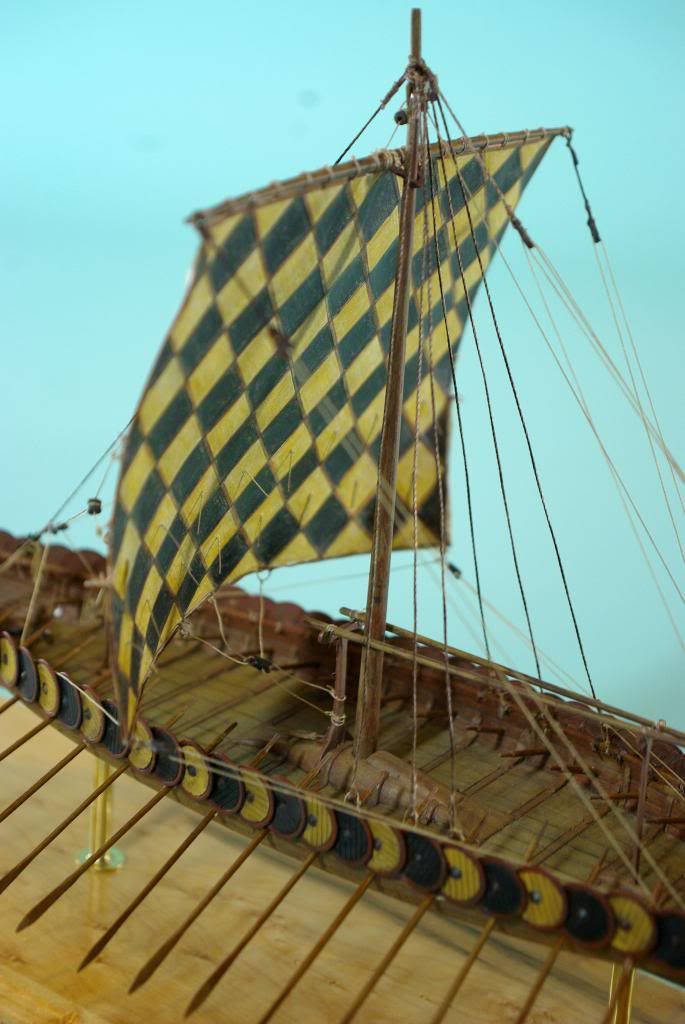
There are a few omissions from the Revell kit. The most conspicuous are two little triangular boards that stretch across from port to starboard at the bow and stern. Easily made from scrap plastic. (The after one is visible in the first photo above.) More problematically, Revell's rendition of the knees that connect the deck beams with the hull sides is fakey. I built up the knees with Milliput - the terra cotta kind, so the color would be similar to the plastic. (I paint everything, of course, but things are easier if the base color is consistent.)
The deck boards are pine, whereas the beams, knees, and hull planking are oak. I tried to take that into consideration when it came time for the paint job. Revell, according to the aforementioned plans, got the layout and dimensions of the deck boards exactly right. They apparently just sat in rabbets on the edges of the deck beams, and could be removed to get access to the hull underneath.
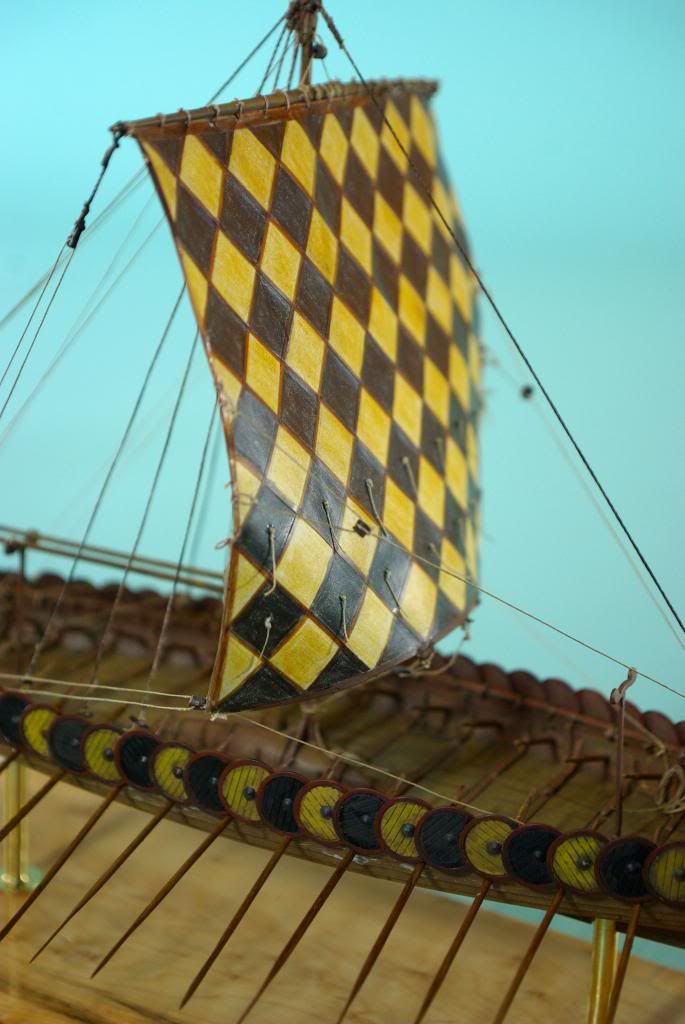
I build cases for my larger models, but this one is small enough to fit in our curio cabinet. I figured on making a walnut or cherry base for it, but when I went to the Woodcraft store looking for lumber this piece of spalted birdseye maple just screamed "Viking ship" at me. I routed a decorative edge on it (I like my little Ryobi "trim router" and a set of miniature molding bits for that purpose), and finished it with Watco Danish oil. I didn't care for the little base pieces Revell included. The model is mounted on a pair of brass tubes, their ends swaged out with a plumber's flaring tool, sitting on a pair of brass washers (all liberally coated with gloss clear lacquer). Two long bolts run through the tubes into nuts stuck (REALLY stuck) to the bottom of the deck with CA. (With 20/20 hindsight I wish I'd made the tubes a little skinnier, but I think I got the height about right. Daddy - where are you when I need you?)
This was a fascinating and fun - and not too long - project. I highly recommend the kit - though the newer Emhar model of the Gokstad Ship appears to be just as good (and maybe a little better in some ways). Getting up close and personal with a model like this leaves one in awe of the people who designed and built the original.
Thanks for looking.