SEARCH FINESCALE.COM

Enter keywords or a search phrase below:

HMS victory build

27780 views
401 replies
1 rating 2 rating 3 rating 4 rating 5 rating
  • Member since
    July 2013
Posted by steve5 on Saturday, July 21, 2018 1:48 AM

got some more work done on the fors shroud's , and the bobstay's


  • Member since
    February 2016
  • From: Western No. Carolina
Posted by gene1 on Saturday, July 21, 2018 6:13 PM

Steve, you are a very,very talented model builder & I am playing at it, but believe me I enjoy doing that still. Keep it up, it is beautiful.

  • Member since
    July 2013
Posted by steve5 on Monday, July 30, 2018 12:06 AM

cheer's gene , finally got all the shroud's and stay's done .


  • Member since
    December 2012
Posted by rwiederrich on Monday, July 30, 2018 12:45 PM

Fantastic work Steve....great siezing work.


Rob

  • Member since
    July 2006
Posted by Michael D. on Monday, July 30, 2018 10:05 PM

Moving along nicely Steve, really looks good mate!!


Michael D

  • Member since
    July 2013
Posted by steve5 on Tuesday, July 31, 2018 1:55 AM

thank's gentlemen , appreciate the nice words . I just wish they would fix the e-mail issue , feel's like i've been cut off .

using dafi's , PE , I've installed the rail's on the top's , with 1mmx1mm railing and 2-5mm x ,5mm styrene on the bottom


  • Member since
    July 2013
Posted by steve5 on Wednesday, August 1, 2018 4:22 AM

had to fill the bottom of the mast caps , so I can insert the eyebolt's .


  • Member since
    March 2018
  • From: Chicago suburbs
Posted by Luvspinball on Wednesday, August 1, 2018 9:13 AM

Don't your toes get cold on that tile floor?

Fabulous work.  Look forward to your updates.  Your work inspires me with many ideas for my Connie build.  Keep up the good work.

Bob

Bob Frysztak

Luvspinball

Current builds:  Revell 1/96 USS Constitution with extensive scratch building

  • Member since
    July 2013
Posted by steve5 on Wednesday, August 1, 2018 4:11 PM

thank's bob . no mate , it's a piece of lino , over the carpet monster , much easier to find stuff . Big Smile

glued some brass rod inbetween halve's of the top mast's , to stiffen them up .


  • Member since
    July 2013
Posted by steve5 on Friday, August 3, 2018 11:30 PM

also started some work , with the block's on the mast top's


  • Member since
    June 2008
Posted by lewbud on Saturday, August 4, 2018 7:17 AM

Just found this thread and all I can say is Wow! Great work Steve.

Buddy- Those who say there are no stupid questions have never worked in customer service.

  • Member since
    March 2012
  • From: Marysville, WA
Posted by David_K on Saturday, August 4, 2018 9:04 AM

Love it when the rigging starts!  Absolutely awesome!

Dave

        _~
     _~ )_)_~
     )_))_))_)
     _!__!__!_         
     (_D_P_K_)
   ~~~~~~~~~~~~~
    ~~~~~~~~~~~

Current Project:  Imai/ERTL Spanish Galleon #2

Recently Finished: Revell 1/96 Cutty Sark

Next Up:  ???


  • Member since
    September 2012
Posted by GMorrison on Saturday, August 4, 2018 9:35 AM

steve5

thank's bob . no mate , it's a piece of lino , over the carpet monster , much easier to find stuff . Big Smile


And its easier to find parts when you step on them with bare feet, as opposed to your sneakers.

 Modeling is an excuse to buy books.


  • Member since
    December 2010
  • From: Salem, Oregon
Posted by 1943Mike on Saturday, August 4, 2018 10:12 AM

Totally inspiring work on the rigging! Your patience and deft workmanship keeps my interest in building another sailing ship alive.

Mike

"Le temps est un grand maître, mais malheureusement, il tue tous ses élèves."

Hector Berlioz

  • Member since
    July 2013
Posted by steve5 on Saturday, August 4, 2018 6:45 PM

thankyou gentlemen appreciate the comment's , 

gmorrison , that all depend's on how sharp they are .

mike , I would to see you do a ship , or any type of boat mate .

could I get some oppinion's please , I've started the futtoch shroud's and I'm undecided on whether to do the same colour ratline's or a lighter colour to make them stand out , I would appreciate some comment's please guy's


  • Member since
    December 2012
Posted by rwiederrich on Monday, August 6, 2018 7:24 AM

I would keep the ratlines the same color as the shrouds.  Any image of any real vessels shows them just as tared as the shrouds.  They are part of the standing rigging.

My 2 cents.


Rob

  • Member since
    March 2013
Posted by LonCray on Monday, August 6, 2018 10:23 AM

I am no expert, but I'd always been under the impression that standing rigging was tarred and black, while running rigging was lighter in color.  

  • Member since
    July 2013
Posted by steve5 on Tuesday, August 14, 2018 5:41 AM

thank's guy's , thought that was the way to go .

started on the crows feet


  • Member since
    June 2011
  • From: St.Peters,Mo.
Posted by Mark Carroll on Tuesday, August 14, 2018 6:31 PM

Steve,this looks great! I don't know how you get those in such perfect alignment.I know that's how real ships are rigged and it takes a lot of patience to get it this way. I always thought(and I always make mine black) standing rigging was black with tar or pitch to protect it from the elements.How in the world are you going to tie off the horizontal lines at the top of the shrouds beings that the vertical lines are so close together? By the way have you or anyone else seen those football looking things hanging from the lower shrouds wrapped in rigging? What are those for? Anybody know? the

  • Member since
    July 2006
Posted by Michael D. on Wednesday, August 15, 2018 1:28 PM

Those are arguably one of the toughest things to rig, I see you forgone rigging the tackle, I don't blame you that phase is tough to get everything taught without pulling the stay out of shape. Nice work SteveYes

  • Member since
    July 2013
Posted by steve5 on Thursday, August 16, 2018 1:24 PM

mark - I take it you mean the rat lines , their are tools you can get for this purpose , even crochet needles are good , not sure about your other comment , maybe someone else will know

michael- it was only going to be temporary , think I just got lazy Embarrassed

thanks for the cudo's guy's too .


  • Member since
    June 2011
  • From: St.Peters,Mo.
Posted by Mark Carroll on Friday, August 17, 2018 10:59 AM

Yes,the ratlines. I don't know how you can tie off the horizontal lines and  get them to look good at the top beings the ratlines are so close together. I would love to see a picture of yours when you get done.I've only done one of these and as you might guess I am flabbergasted as to how you did these ratlines so neatly. What type of thread are you using? Did you make it yourself or did you buy it that way? I've never seen this type before?

  • Member since
    September 2012
Posted by GMorrison on Friday, August 17, 2018 12:14 PM

The thick vertical ropes are the shrouds. Teir job is to transfer the force of the wind on the sails, from the mast down to the hull. The horizontal foot ropes are the ratlines.

They only go up so far, about where the futtock shrouds come out from the mast and go up to the edge of the top and the bottom of the topmast shrouds.

Sailors scramble up the futtock shrouds and over the edge onto the top. Mere mortals like us squeeze through the lubber hole, the opening in the top in which the mast shrouds come up. 

Another term for the futtock shrouds is "crows feet."


 Modeling is an excuse to buy books.


  • Member since
    September 2012
Posted by GMorrison on Friday, August 17, 2018 12:15 PM

LonCray

I am no expert, but I'd always been under the impression that standing rigging was tarred and black, while running rigging was lighter in color.  


Yes.

 Modeling is an excuse to buy books.


  • Member since
    July 2013
Posted by steve5 on Saturday, August 18, 2018 2:13 AM

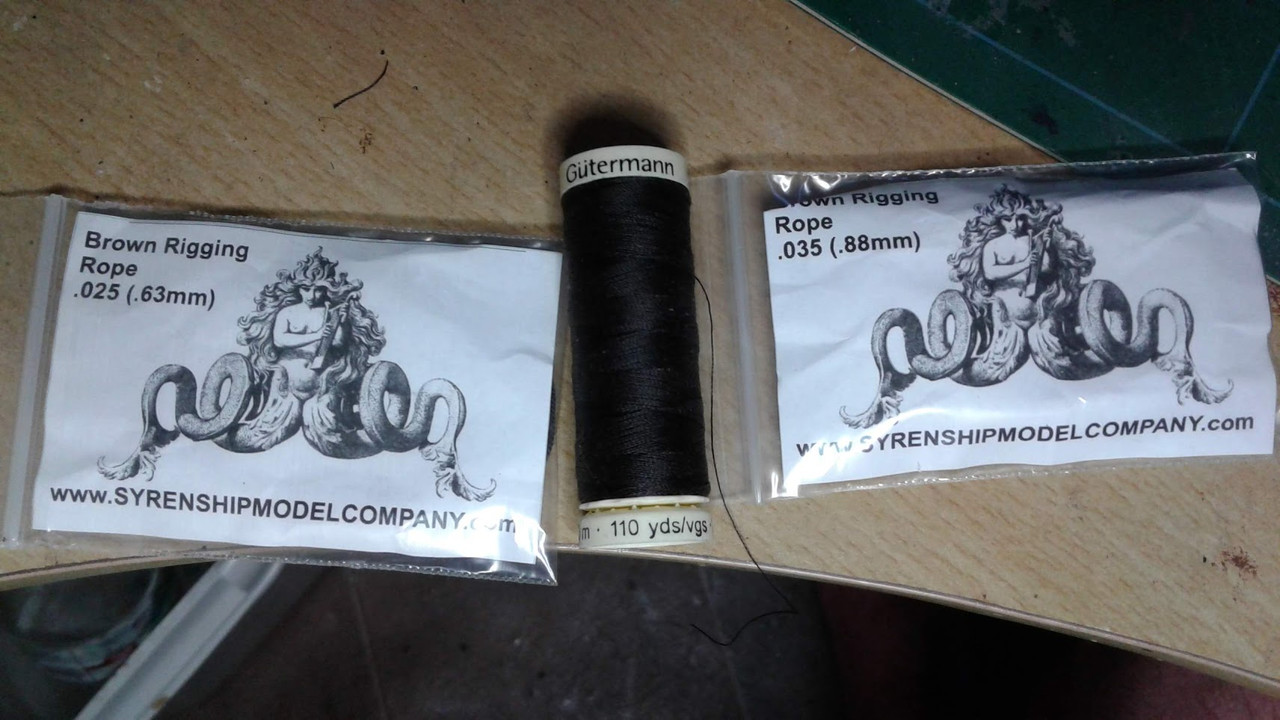
mark , I did one of the futtock shroud's , just to put a pic up for you , all I basically use , is a pair of bent nose tweezer's , this took about 20minute's . the hard part is getting your finger's to remember where they are supposed to go , the other pic is the thread i used , from syren for the shroud's , the .63mm for the top mast's , and gutermann for the rat line's , not sure how thick it is , I can't decipher their system , it's roughly .1mm thick , I chose dark brown thread , simply because I preferred it to black , not as stark .

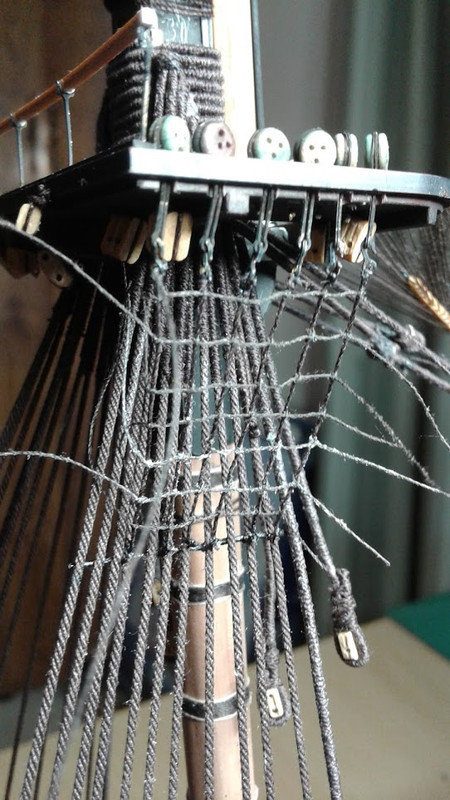
gmorrison, I alway,s thought the crowsfeet were what I did in the pic above , If I was wrong , could you please tell me , what I should be calling them .

try this mark , davidk is a very good modeler , and he show's a very easy way of doing ratline's

www.youtube.com/watch?v=yMmGFWJhi8E


  • Member since
    June 2011
  • From: St.Peters,Mo.
Posted by Mark Carroll on Sunday, August 19, 2018 6:06 PM

Thanks Steve for the pictures and info!

  • Member since
    July 2010
  • From: Tempe AZ
Posted by docidle on Sunday, August 19, 2018 11:39 PM

Steve

That is some sweet looking rigging you got going. I’m glad to see you’re using Syren’s Line. It was a thing of beauty using it on my Catalan Ship and I’m not using anything else if I can help it.

Steve


  • Member since
    July 2013
Posted by steve5 on Sunday, August 26, 2018 12:50 AM

mark , I hope it help's .

steve , cheer's mate , loved your catalan ship .

started on the upper mast's burton pendant's fall's , wish I had done this on the lower one's , before I put the shroud's in .


  • Member since
    August 2018
Posted by Flint on Sunday, August 26, 2018 6:26 AM

Looking great Steve! have been reading up on this thread as Victory's my next build. 

  • Member since
    July 2013
Posted by steve5 on Monday, August 27, 2018 4:18 AM

  thank's flint , from what I seen of your work , I'm really looking forward to it mate . any idea when you will start it .

the fall's , for the fore burton pendant's , on .


JOIN OUR COMMUNITY!

Our community is FREE to join. To participate you must either login or register for an account.

SEARCH FORUMS
FREE NEWSLETTER
By signing up you may also receive reader surveys and occasional special offers. We do not sell, rent or trade our email lists. View our Privacy Policy.