SEARCH FINESCALE.COM

Enter keywords or a search phrase below:

REVIEW (and build): Mitsuwa 1/18 Yamaha STR-23CCR Cabin Cruiser

9297 views
42 replies
1 rating 2 rating 3 rating 4 rating 5 rating
  • Member since
    June 2014
  • From: New Braunfels , Texas
Posted by Tanker - Builder on Wednesday, December 4, 2019 12:04 PM

Hi;

 Believe it or not this is a regular problem with mass produced Fiberglass Boats!. They give you that room to stand at the helm. Now My houseboat ( A 45' River-Queen).the seat was adjustable forward and aft. You sat on it and got comfy close to the controls. When you stood up it eased back so you could stand at the Helm without the seat at the back of your legs! 

    Now when I went to the bigger ( 110" boat) it had a Helm ,Binnacle and Engine Telegraph/Engine Controls. Now add to that, next to the Binnacle on the Starboard side( Right ) was the Radar Repeater! You definitely didn't sit down at her helm!! ( Old Coast Guard Bouy Tender) But She was a great Liveaboard, With a Model Workshop area!    T.B.      P.S. I got her because my wife's disability created difficulties and made life on the 45' boat hard for her!

  • Member since
    November 2013
Posted by FocusOne on Monday, July 13, 2020 12:20 PM

Finally, some progress.  I've been working on the RC system here and there but finally figured out the wood pattern painting:

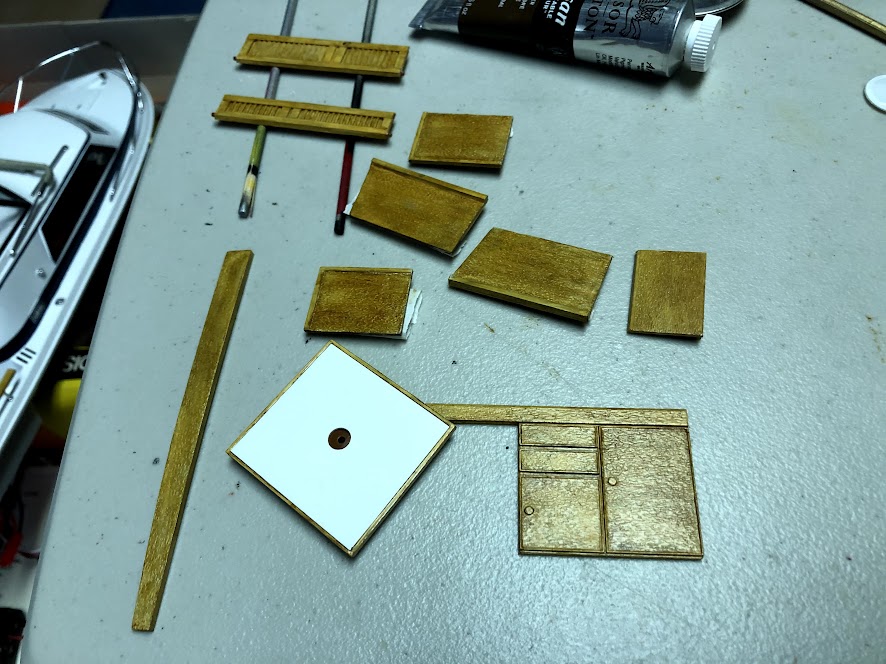
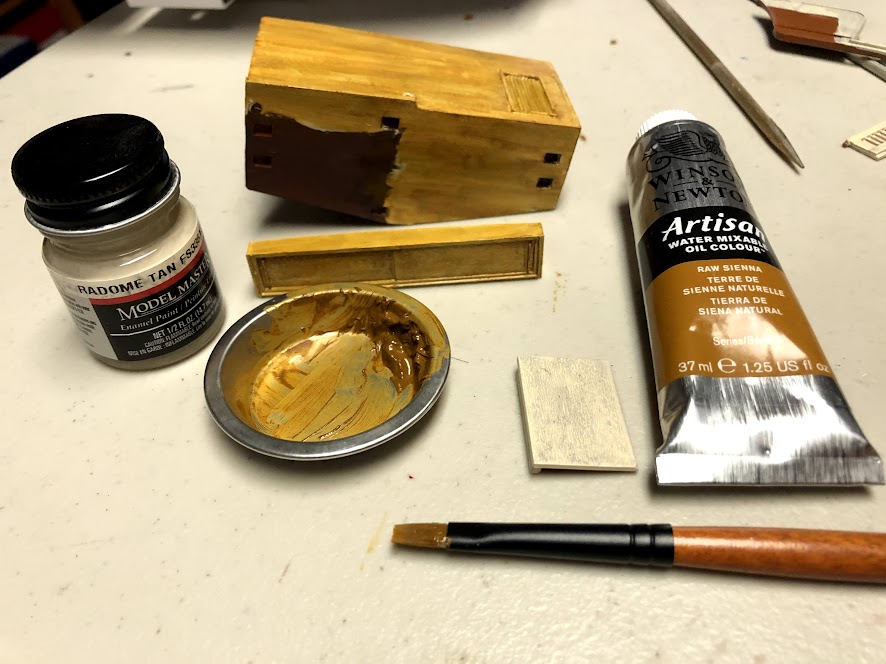
 I used a base paint of Model Master Radome Tan (enamel) and brushed over with Raw Sienna oil paint (water soluable for easy cleanup).  Saw this technique on YouTube.

This is actually my second attempt using this method as I initially used Burnt Umber which was waaaay too dark.

This may not be perfect but it's good enough for me!  I'll be using this same technique for my other boats such as the Lindberg Chris Craft Constellation and Sport Fisherman!

More photos:

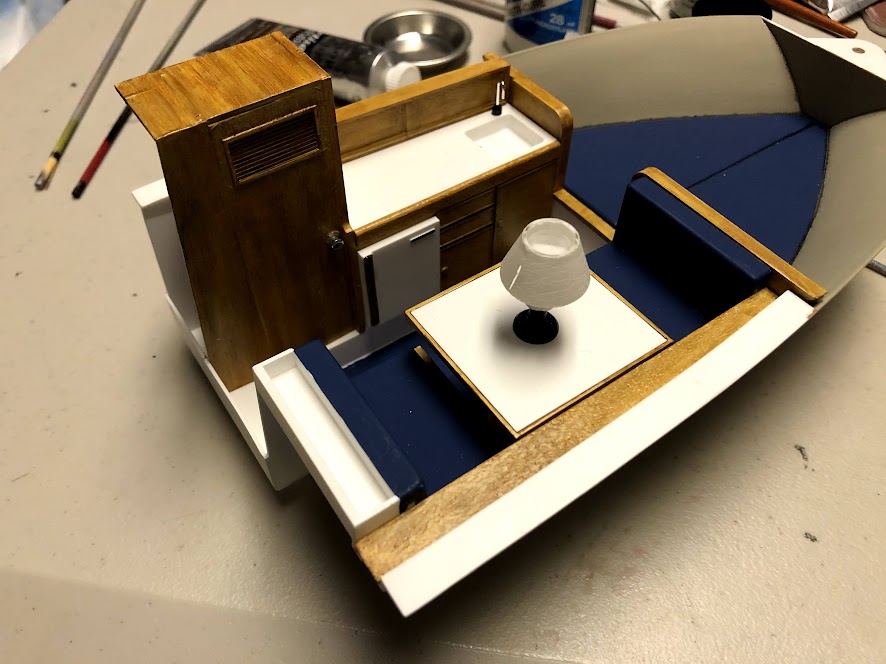
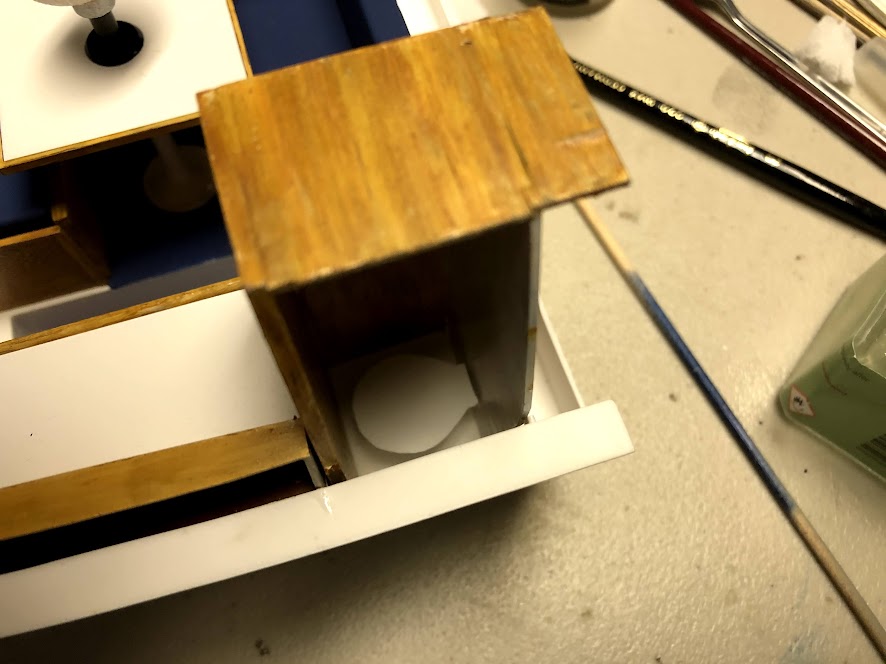
Also scratchbuilt the "head" since this could be seen through the window if you look hard enough

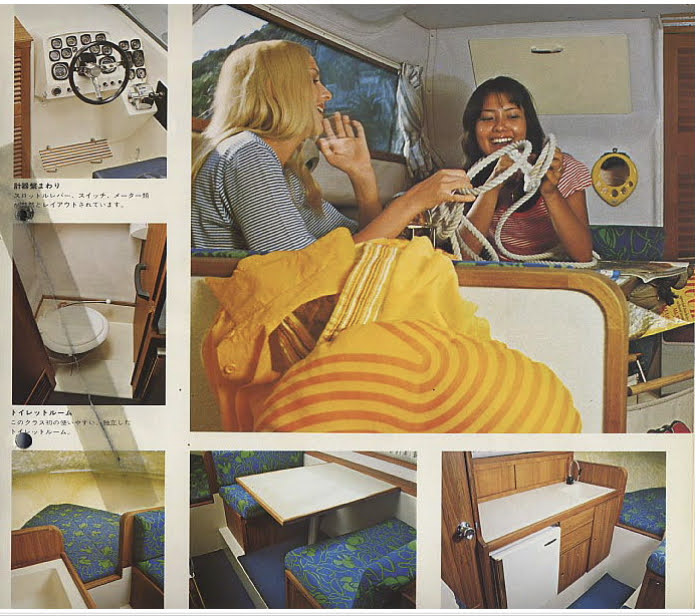
Brochure images for comparison:

I'd say the wood pattern was my biggest roadblock to working on this model.  The next major tasks left are:

- scratchbuilding curtains for the windows

- painting the bumper strip (black and aluminium) around the perimeter of the hull

- building and painting the 3 figures

- wiring up the desk lamp for lighting

- battery/ballast layout to get the boat to sit right in the water.

Hopefully I can get this finished in the next week or so so i can call this project done!


  • Member since
    November 2013
Posted by FocusOne on Wednesday, July 15, 2020 12:04 PM

Big Smile

  • Member since
    April 2003
  • From: USA
Posted by keavdog on Wednesday, July 15, 2020 12:11 PM

Great project.  I need a pool toy like this and would love to build. 

Thanks,

John

  • Member since
    November 2013
Posted by FocusOne on Wednesday, July 15, 2020 12:26 PM
Yeah, it's a shame they don't make many boat kits like this these days
  • Member since
    November 2013
Posted by FocusOne on Wednesday, July 15, 2020 12:29 PM

Drive electronics done.  Just need to wire up the LED lamp.  I was originally planning on having it powered off the Aux port of the receiver so that it's on everytime the boat is on, but I think I'll power it off a button cell with its own switch.

  • Member since
    November 2013
Posted by FocusOne on Monday, July 20, 2020 10:59 AM

Finished the figures and some details.  I still plan to detail the interior a bit more, give the massenger a book to read, and add an additional passenger either sitting inside or at the stern of the boat, but those can wait til later.

Anyways, finally got to take the boat out on Sunday!


  • Member since
    November 2013
Posted by FocusOne on Monday, July 20, 2020 11:05 AM

Even before going to the pond i knew the boat was a little too heavy, but i also realized the boat was quite slow.

After the weekly pond meet up with the guys at BAMMRC I replaced the standard servo with a MUCH smaller servo, rearranged the electronics and replaced the 4 AA batteries with a li-po.  even at 60% throttle it's significantly faster than before, but I won't know til I take it back to the pond for some "sea trials"

One more thing i did to this kit earlier was to modify the stand.

I've placed neoprene pads to grip and protect the hull so it doesn't slide around.  I also added some lead weight sticks to give the base some heftiness to it.  After that, I glued a black styrene sheet to seal it up and added foam pads so the base itself doesn't slide around.

  • Member since
    October 2019
  • From: New Braunfels, Texas
Posted by Tanker-Builder on Friday, July 24, 2020 10:49 AM

Hi;

 Just a little info.The "Antenna" you describe on the forward rail, was a small flagstaff on which to put the Manufacturers flag or your Yacht Club Burgee!

  • Member since
    October 2019
  • From: New Braunfels, Texas
Posted by Tanker-Builder on Friday, July 24, 2020 10:54 AM

Another Tip;

     AAH; It's too late. But you could get some Aluminum H.O. scale track, Polish it to a high sheen and fit it to the Bump Rail locations. When done Take Black wire insulation and insert it in the groove on the side fastened with C/A, and viol'a, one realistic looking and performing " Bump Rail " or "Integral, Deck Edged Fender"

  • Member since
    November 2013
Posted by FocusOne on Friday, July 24, 2020 11:00 AM

I've got another 1/20 scale model of this as well.  I might try it with that one.

Thanks

  • Member since
    November 2013
Posted by FocusOne on Friday, July 24, 2020 11:02 AM

Also, I could snap off the current bump strip (black plastic strip), re-paint, and try your method.  I'll see...

  • Member since
    November 2013
Posted by FocusOne on Monday, July 27, 2020 1:03 PM

Tanker-Builder

Hi;

 Just a little info.The "Antenna" you describe on the forward rail, was a small flagstaff on which to put the Manufacturers flag or your Yacht Club Burgee!


I saw your post earlier on this.  The railings are solidly attached with the metal connector, so i won't be able to use the flag post.  Also, I'm concerned of its durability, so I likely keep it off.

JOIN OUR COMMUNITY!

Our community is FREE to join. To participate you must either login or register for an account.

SEARCH FORUMS
FREE NEWSLETTER
By signing up you may also receive reader surveys and occasional special offers. We do not sell, rent or trade our email lists. View our Privacy Policy.