SEARCH FINESCALE.COM

Enter keywords or a search phrase below:

Another 1/96 USS Constitution - third time's a charm (I hope)

20905 views
175 replies
1 rating 2 rating 3 rating 4 rating 5 rating
  • Member since
    September 2012
Posted by GMorrison on Sunday, January 14, 2018 11:09 PM

Entirely accurate

 Modeling is an excuse to buy books.


  • Member since
    September 2012
Posted by GMorrison on Sunday, January 14, 2018 11:14 PM

Nips and marlines are an under represented feature.

Also where the loose ends of the sheets are put when close hauled.

 Modeling is an excuse to buy books.


  • Member since
    September 2012
Posted by GMorrison on Sunday, January 14, 2018 11:25 PM

On my model yacht,

The sheets are probably the length of the boat.

Thats a lot of rope, and they sure didn’t Flemish coil it.

Folded into a wire basket fixed against the backside of the deck furniture.

 Modeling is an excuse to buy books.


  • Member since
    December 2005
  • From: San Diego
Posted by jgonzales on Monday, January 15, 2018 8:35 AM

Thanks for the etymology lesson, Cap'n, I love looking up the origins of old words and phrases, and the English language owes a lot of its phrases to nautical jargon!

Mr Morrison, you make a great point regarding the belaying of lines in model ships. The lengths of line required for the braces and sheets must have been quite long, considering how much the ends of the yards had to move from one tack to the other. 

There is a lot of information about these old ships on the net. I found this

https://books.google.com/books?id=4bYoCwAAQBAJ&pg=PA88&lpg=PA88&dq=anchor+stowed&source=bl&ots=3xane347m-&sig=kHSHqr2pD8rAo7IPhq7hfFApAqM&hl=en&sa=X&ved=0ahUKEwiSnpaklNrYAhVO1mMKHXUZCX84ChDoAQg-MAY#v=onepage&q=anchor%20stowed&f=false 

while looking up information on anchor cable stowage. The information regarding anchors and cables starts on pg 88 ff. Though the book is about the HMS Victory, I found some interesting information which may be applicable to Old Ironsides.

1. The larboard anchor cable was stowed in the starboard cable tier, and vice versa for the starboard anchor cable.

2. There was always a messenger wrapped around the capstan and laid along the deck ready for use.

There are some very nice drawings of handling the anchor, including "nipping".

I suspect if the anchor cables were ever wrapped around the bitts, it would only be while anchored. No need to secure the cables that way while underway or moored.

Jose

Jose Gonzales San Diego, CA
  • Member since
    November 2005
  • From: Formerly Bryan, now Arlington, Texas
Posted by CapnMac82 on Monday, January 15, 2018 7:28 PM

jgonzales
the anchor cables were ever wrapped around the bitts

That's just it.  These cables are bigger around than a man's leg, the bits would need to be near 3 foot around to take a bend.

Then, consider where the "free" ends of the cable are--one end is a fifth a mile into the cable tier, the other end is bent around the anchor.

Let's say you are anchored up in 10 fathoms of water, this means you have 70 fathoms of rode paid out.  It's going to be rather complicated to go force a bend in the anchor line just to fetch it over the end of a bit.  And a single riding turn is not going to snub that line off.  Whereas passing a dozen turns of smaller line around the rode would stop the nine, and would far easier be bound to the bits.

Using a line to control another line is incredibly common in the sailing world.

  • Member since
    September 2012
Posted by GMorrison on Monday, January 15, 2018 7:59 PM

So I'm curious. When the anchor is "dropped", and it's a big one on a heavy cable, would the stopper just be cut, unscrewed released etcetera? That's a 5,000 lb bower on the end of a heavy rope. 

Can't find anything in Royce's about that.

 Modeling is an excuse to buy books.


  • Member since
    September 2012
Posted by GMorrison on Monday, January 15, 2018 8:05 PM

 Modeling is an excuse to buy books.


  • Member since
    November 2005
  • From: Formerly Bryan, now Arlington, Texas
Posted by CapnMac82 on Tuesday, January 16, 2018 8:33 PM

GMorrison

So I'm curious. When the anchor is "dropped", and it's a big one on a heavy cable, would the stopper just be cut, unscrewed released etcetera? That's a 5,000 lb bower on the end of a heavy rope. 

Can't find anything in Royce's about that.


Well, line is valuable, you never cut it but in extremis.

An anchor hpist to the rail or chains puts no weight on the rode.  Somewhere around 9/10 of the rode is below deck, so it will mind its own business as it were.

Which would not stop a bo's'n from taking 5-6 turns around rode and bitts.

Now, setting the anchor, with a large enough bower, you might messenger the bower down, and use the ratchet to controll how fast.  Or not, most sailing navies prefered shallow anchorages, 4-6 fathoms.  You could just let the rode run for the 50-70' to the bottom (not even the length of the main deck, really).

When you get to the length of scope you want (seven times depth, prudently) you'd likely snub the rode to the messenger and set the ratchet on the capstan.  At which point you'd pass the stopper the 11 or so times it wanted before taking the riding turns on the bits.  At which point the messenger can be cast away, and slacked off the capstanso the upper deck portion can be used if needed.

Taking in the anchor, you'd nip the messenger in, and take a strain on the capstan (with the ratchet set) to slack the stopper.   Which is then unbent from bitts and rode.

At least that's how I, and my 2¢ see it.

  • Member since
    September 2012
Posted by GMorrison on Tuesday, January 16, 2018 8:49 PM

Curious to hear what you thought of my  youtube.

Anyhow, Constitution as I recall has a single deck capstan. But a big multi-decker has the tars on the handles and the pawls on one deck, and the messenger and cable operation on a lower deck.

There was a story where when the cable for the C was made, it was taken on a parade through the streets of Boston.

So Jose, any detail you can add makes for a better model. It took 80 men to set and raise the bowers.

 Modeling is an excuse to buy books.


  • Member since
    September 2012
Posted by GMorrison on Tuesday, January 16, 2018 9:14 PM

It can't be overestimated what "cable" and "rope" meant in the days of sail.

My yacht America (model), she has a 12" forestay. Thats a 4" diameter rope.

Why you ask, after all the wind force is from the stern, eh?

Nope, she's a schooner and can sail many points up the wind. In that case the strain is all over the mast, equal to the strain on shrouds in multiple on a downwind leg.

We've all built model sailing vessels and probably started with mom's thread.

But in reality, standing rigging is a structural component of the ship.

 Modeling is an excuse to buy books.


  • Member since
    July 2014
  • From: Philadelphia Pa
Posted by Nino on Saturday, January 20, 2018 10:02 AM

GMorrison

Curious to hear what you thought of my  youtube.


 An unforgetable video.  Lucky the crew backed up. Looked like once it was unbraked too much the momentum just took it away. No braking could stop it.  There was a reply in the comments. Posted here to save some time.


     "I have not viewed this video in over a decade. The good news was no one was killed in this incident. This took place in an extremely busy Hong Kong Harbor. I was on the bridge giving the orders during this evolution. The anchor is lowered to the bottom, chain is let out, the brake holds while the flukes are set. Once you are holding, chain is let out. It is the weight of the chain that holds a ship in position. The chain link in this incident gets wedged on the lip of the chain pipe. The brake men released too much brake to get the chain moving. When it finally broke free there was no friction and once the momentum built there was no stopping the chain. Everyone cleared the area quickly and injuries were prevented. The team shifted to the alternate anchor and we anchored quickly and safely. The anchors today are the same as they were in WW II and a replacement came from a mothballed WW II ship. This was a final port visit following a 7 month deployment with operations in East Timor, Somalia, and Kuwait where the crew and embarked Marines performed flawlessly. The guy in khakis with his hands in his pockets was a fresh minted knucklehead baby ensign onboard less than a month. Thanks for posting Haze Gray - That is all!"


Jose,

      Thank you for getting and keeping us interested. You've started quite a learning lesson on this Thread.

     Nino

  • Member since
    December 2005
  • From: San Diego
Posted by jgonzales on Tuesday, January 30, 2018 12:20 AM

Hi all,

A terrifying video, thanks for sharing, Mr Morrison! I was impressed by the professionalism of our sailors. 

An update - I've installed the starboard anchor cable. I added two eyebolts in the main hatch area, and rigged stoppers to them, then added stoppers to the eyebolts on the anchor bitts.

 _DSD2118 by Jose Gonzales, on Flickr


Jose Gonzales San Diego, CA
  • Member since
    December 2005
  • From: San Diego
Posted by jgonzales on Tuesday, January 30, 2018 12:23 AM

Hi all,

A terrifying video, thanks for sharing, Mr Morrison! I was impressed by the professionalism of our sailors. 

An update - I've installed the starboard anchor cable. I added two eyebolts in the main hatch area, and rigged stoppers to them, then added stoppers to the eyebolts on the anchor bitts.

 _DSD2117 by Jose Gonzales, on Flickr

 _DSD2116 by Jose Gonzales, on Flickr

I added rollers in the manger area for the messenger cable to pivot around. They were made from two black finishing nails

 _DSD2118 by Jose Gonzales, on Flickr

I will add the messenger, but am debating whether or not to add the port cable. I read somewhere that while at sea many captains detached the cables from the anchors and cleared the deck of the cable, stowing the cables in their tiers. Another reference states that one anchor was kept at the ready with the anchor cable attached, the other cable stowed.

I also note that several references, including the excellent Bluejacket builder's guide for their Constitution, and other references cited in Force9's build, state that the anchors were lashed to the fore chains, and not suspended from the catheads. I'll be reviewing resources online to help me decide how I'll display the anchors.

Cheers!

Jose


Jose Gonzales San Diego, CA
  • Member since
    December 2006
  • From: Jerome, Idaho, U.S.A.
Posted by crackers on Tuesday, January 30, 2018 1:56 AM

Beautiful model of the CONSTITUTION you are making, Jose. But if you wanted to portray the CONSTITUTION as she appeared on her launching day, here is an accurate oil painting by Paul Garnett, entitled "Launching CONSTITUTION at Hart's Yard, Boston, October 21, 1797"  The CONSTITUTION has a broad yellow ochre strip on her hull, rather than the white stripe, different decorations on her stern with eight windows, and a figurehead of a stridant full figure of Hercules shouldering a club. Paul Garnett's oil painting is based on Michelle F. Corne's painting of the CONSTITUTION in 1805.

Happy modeling   Crackers   Surprise

Anthony V. Santos

  • Member since
    December 2012
Posted by rwiederrich on Tuesday, January 30, 2018 8:06 AM

Sorry to interject as such a late date, but I missed how you weathered the copper hull..what was your technique?

Rob

  • Member since
    December 2005
  • From: San Diego
Posted by jgonzales on Sunday, February 4, 2018 1:29 PM

Hi all!

Thanks Crackers for posting that pic of Constitution at launch. I seriously considered depicting her from her early days, and even looked up sites that sold figurines of ancient warriors that I might modify to form the Hercules figurehead, but decided to stick to her 1812 configuration. Hercules will have to wait for the next build.

Rob, thanks for asking about the weathering. The hull came pre-painted with copper, and it was already slightly tinged green. My original plan was to copy Force9 and pick out individual copper plates to highlight with bright copper or dark to black. My masking did not work so well and I got a lot of bleed through, and so I determined to go a different route. I saw the pics of old Ironsides going into drydock for her most recent restoration, and noted the look of her copper sheathing as the water was being drained, and choose to copy that look. I bought ModelMaster acrylic Patina, a very light green color that reminded me of the green patina on the Statue of Liberty (which is of course made of copper), and applied an undiluted wash to the hull with a broad paintbrush, letting only a little copper show through. I then applied small splotches of flat white and flat black paint in small patches account the copper. 

Let me know what you think of the look.

Cheers, Jose


Jose Gonzales San Diego, CA
  • Member since
    December 2005
  • From: San Diego
Posted by jgonzales on Friday, February 9, 2018 11:10 AM

 _DSD2140 by Jose Gonzales, on Flickr

 _DSD2141 by Jose Gonzales, on Flickr

 _DSD2146 by Jose Gonzales, on Flickr

 _DSD2155 by Jose Gonzales, on Flickr

The anchor cables are installed, along with the messenger cable. I've also added shot racks between the guns. 

FYI a messenger cable is a cable of a smaller diameter than the anchor cable, that wraps around the capstan (the anchor cable itself is too thick for the capstan), then loops forward along one side, around a couple of rollers in front, then back to the capstan as a single loop. To haul the anchor, the anchor cable is temporarily nipped to the messenger via a series of small ropes tied around both the anchor cable and messenger. As the capstan is turned, the messenger pulls in the anchor cable. As the cable reaches its dropping point at the main hatch, the nips are undone, and brought back forward to be recirculated. The messenger loop is closed by lashing together eyes at the ends of the messenger cable (last picture).

Jose Gonzales San Diego, CA
  • Member since
    September 2012
Posted by GMorrison on Friday, February 9, 2018 11:27 AM

Super work!

The galley stove is nicely done, looks hot, black and shiny.

Can't wait to see more!


Bill

 Modeling is an excuse to buy books.


  • Member since
    December 2005
  • From: San Diego
Posted by jgonzales on Saturday, February 10, 2018 2:58 PM

Hi Bill,

Thanks! I appreciate your compliment.

Today is relatively quiet, so I'd like toA  step back and review some things.

First, a list of references I have been using for my last build and this current build:

A Most Fortunate Ship

by Tyrone Martin, Commander USN (Ret)


Old Ironsides, the Rise, Decline, and Resurrection of the USS Constitution

Thomas Gillmer with illustrations by William Gilkerson


Rigging Period Ship Models

Lennarth Petersson


USS Constitution Old Ironsides

Photography by Steve Dunwell


Anatomy of the Ship - The 44 Gun Frigate USS Constitution

Karl Heinz Marquardt


The Anatomy of Nelson's Ships

C Nepean Longridge


HMS Victory - Her construction, career, and restoration

Alan McGowan


The following two books were very inspirational to me and sparked my initial interest in sailing ships:

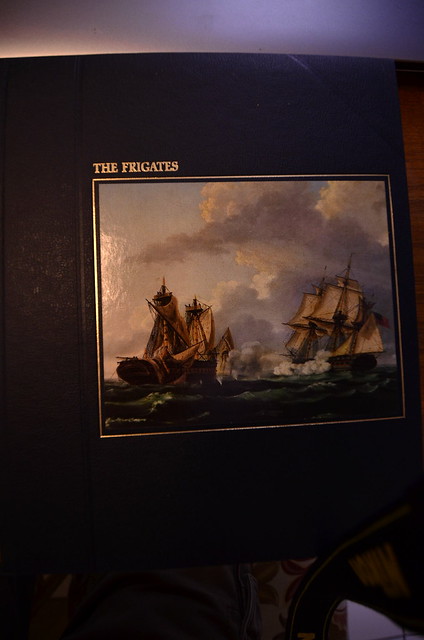
The Seafarers: The Frigates

Henry Gruppe and Time-Life editors

 _DSD2164 by Jose Gonzales, on Flickr

I mentioned to my wife a short while ago that I used to go to the library on weekends and pore over the Seafarers series of books for hours. Look what she got me for my birthday last month! All 22 volumes!

 _DSD2166 by Jose Gonzales, on Flickr
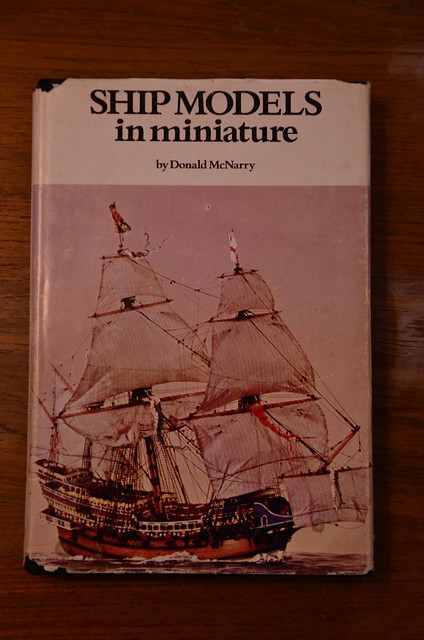
The second book:

 _DSD2158 by Jose Gonzales, on Flickr

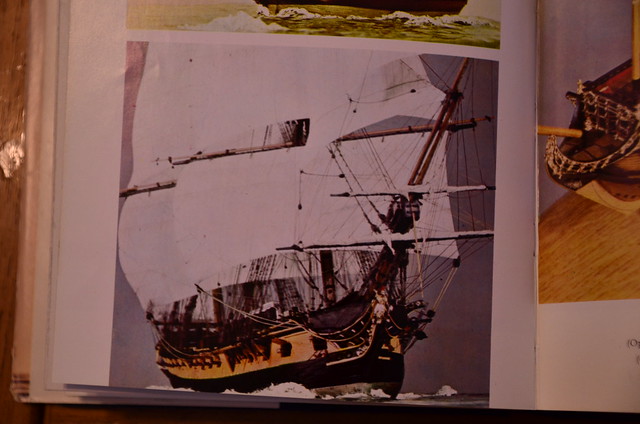
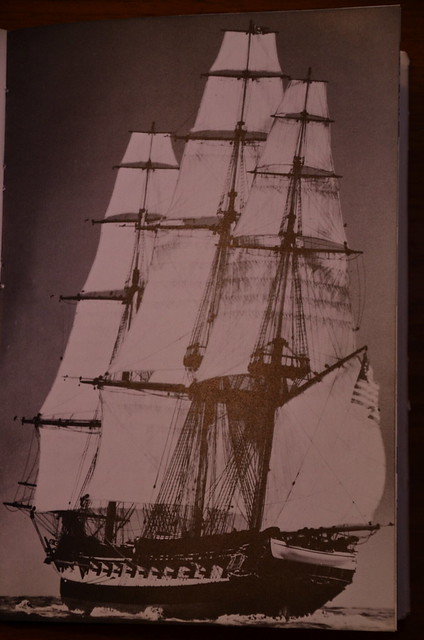
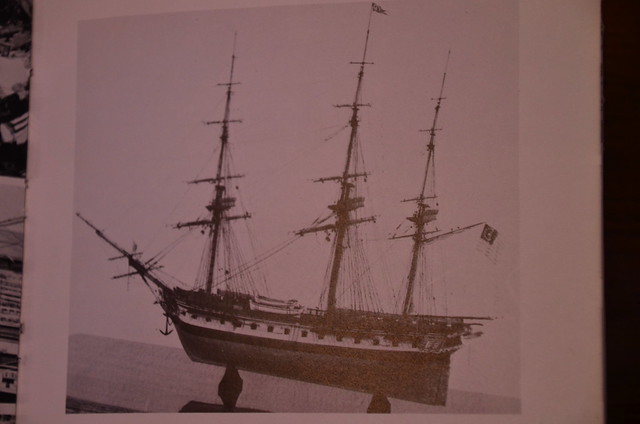
I got a copy of this book from e-bay recently. Donald McNarry was the premier ship modeler of the 20th century,  particularly for small-scale modeling. He built 6 models of the Constitution, all of them portray her early years (Hercules figurehead) and one is a full-sail diorama. They were all built at 1/192 scale

 _DSD2159 by Jose Gonzales, on Flickr

 _DSD2161 by Jose Gonzales, on Flickr

 _DSD2162 by Jose Gonzales, on Flickr

 _DSD2163 by Jose Gonzales, on Flickr

I'm finishing up the gun deck with last few details. I kept the fore and mainsail sheets and tack lines rigged on the gun deck, unlike Force9 (Evan), who got rid of the chesstrees and moved the rigging of these lines up to the spar deck. So now, I have to run the Sheet and Tack lines through the chesstrees and holes in the hull, and belay them to some large cleats that I installed inside the gun deck. As mentioned before by you, Bill, the sheets will be quite long, as the ends of the sails travelled a long way from one tack to the other tack, so I'm looking for references regarding how these long lines (braces, sheets) were belayed and coiled. I haven't seen any references to coil baskets on the Constitution, so if anyone has any references or knows anything about this, I'd be happy to take your suggestions.


Cheers!

Jose


Jose Gonzales San Diego, CA
  • Member since
    July 2013
Posted by steve5 on Saturday, February 10, 2018 3:06 PM

man ! that's some library ,


  • Member since
    December 2010
  • From: Salem, Oregon
Posted by 1943Mike on Saturday, February 10, 2018 7:00 PM

This is turning into a magnificent build!

And, yeh, your wife's a keeper. Big Smile

Mike

"Le temps est un grand maître, mais malheureusement, il tue tous ses élèves."

Hector Berlioz

  • Member since
    December 2005
  • From: San Diego
Posted by jgonzales on Sunday, April 1, 2018 10:33 PM

Hi all,

I've been working on the model off and on for the last month, time permitting. The post by Crackers showing the two fine models of the HMS Pandora, as well as the McNarry Constitution builds have spurred me on, and I have decided to add as many crewmen as possible. I am also turning around the idea of turning this into  a water diorama with the ship under sail. Since I will be depicting the ship under normal sail, and not at battle stations, I have decided to complete the captain's cabin, including the captain's quarters as well as the great cabin.

To that end, i created furniture from scratch, and built up the temporary dividers. It took a few tries to get the scale correct, hence the two tables and the initial attempt at a chair - see the tiny one, what looks like a child's stool with brass rod legs, as well as the oversized table. The final versions are the ones painted brown.

 DSD_2244 by Jose Gonzales, on Flickr

 DSD_2248 by Jose Gonzales, on Flickr

 2018-04-01_08-31-40 by Jose Gonzales, on Flickr

See the desk in the captain's private quarters

 2018-04-01_08-33-35 by Jose Gonzales, on Flickr

and the sleeping cot covered with a veil.

I assembled the lower masts and bowsprit, and sanded down the seams. I also tried to fix the warpage of the spar deck pieces by gluing wood dowels to the undersides, but u fortunately, the tactic ended up stiffening the decks in a too-straight state, countering against the sheer of the deck (the upward curve of the deck at the bow and stern). I ended up cutting notches into these dowels at regular intervals to try to restore some flexibility to the deck. 

I also started adding some crew to the gun deck. I also had a handful of leftover barrels I obtained for my last build, and installed elm pumps that came from the BlueJacket kit.

 2018-04-01_08-34-23 by Jose Gonzales, on Flickr.

More pics to come shortly.

Jose

Jose Gonzales San Diego, CA
  • Member since
    July 2013
Posted by steve5 on Sunday, April 1, 2018 10:53 PM

really enjoying your build jose , 

steve5


  • Member since
    December 2005
  • From: San Diego
Posted by jgonzales on Sunday, May 20, 2018 11:30 AM

Hi all,

Work on the model has been slow; life as usual gets in the way. I completed my work on the gun  deck and prepared for laying down the spar deck. A few things got in the way.

1.  I decided to remove the eye bolts from the Bluejacket kit thati had originally mounted on the spar deck bulwarks and replace them with photoetch eyebolts from Dafi that i had purchased for the Heller Victory, so I purchased extra photoetch eyebolts and hooks.  Unfortunately I broke a few of the bluejacket eyebolts while removing them, leaving the straight stems stuck in the bulwarks, I ended up removing them by drilling from the outside to push them out. I installed Dafi's eyebolts and they look pretty good.

2. I had intended on buying planking from BlueJacket to plank over the plastic spar deck, and lower the plastic deck by sanding down the nubs on the  bottom of the plastic. However, instead of buying the intended 9/32 x 1/32 planking, I accidently purchased the 9/32 x 0.020 inch thick planking. This planking was intended to be used as the external planking for the solid wood hull, and was much thinner than 1/32. I had to adjust my plans, and tried to shave down the nubs accordingly. 

Here are pics of the nearly finished spar deck planking.

 DSD_2442 by Jose Gonzales, on Flickr

 DSD_2453 by Jose Gonzales, on Flickr

 DSD_2451 by Jose Gonzales, on Flickr

 DSD_2446 by Jose Gonzales, on Flickr

 DSD_2441 by Jose Gonzales, on Flickr

Jose Gonzales San Diego, CA
  • Member since
    March 2019
  • From: San Diego, CA
Posted by Jose Gonzales on Tuesday, March 26, 2019 3:30 AM

Hello all,

I've created a new account to continue this build log. It has been 10 months since my last entry, and not much has happened since then, but a few posts from some other build logs of Old Ironsides has stoked my fires, and I am proceeding full sail ahead!

 _DSD5647 by Jose Gonzales, on Flickr


  • Member since
    March 2019
  • From: San Diego, CA
Posted by Jose Gonzales on Tuesday, March 26, 2019 5:48 PM

 _DSD5639 by Jose Gonzales, on Flickr

carronade carriages mounted and rigged

  • Member since
    March 2018
  • From: Chicago suburbs
Posted by Luvspinball on Wednesday, March 27, 2019 12:20 PM

Looks good, Jose!  Will you add the breach lines once you install the carronades?  Are those the original Revell carriages, or are they custom?  They look like they are made of wood when I zoom in (and not plastic).

Bob


Bob Frysztak

Luvspinball

Current builds:  Revell 1/96 USS Constitution with extensive scratch building

  • Member since
    March 2019
  • From: San Diego, CA
Posted by Jose Gonzales on Wednesday, March 27, 2019 9:44 PM

Hi Bob! The breech lines will go in with the carronade barrels. These are the guns from the BlueJacket Shipcrafters Constitution kit that I'm mashing with the Revell kit. The gun deck guns also come from the BlueJacket kit. The guns and carriages are made of Britannia Metal. I painted the carriages with a ModelMaster red. The barrels have been blackened using a Pewter Black solution from Bluejacket.

  • Member since
    March 2019
  • From: San Diego, CA
Posted by Jose Gonzales on Saturday, November 9, 2019 8:54 AM

Hi all

Here is a link to a primary source. It is a hi res pic of a watercolor of the uss president by antoine roux, in the digital collection of the new York public library:

https://digitalcollections.nypl.org/items/510d47d9-7b45-a3d9-e040-e00a18064a99

I would paste the pic itself but it is a high res tiff and too large to post.

And another of the same ship by the same artist, from the website of the USS Constitution Museum:

http://2.bp.blogspot.com/-pj9N-CD2WxM/UJEm-RBABfI/AAAAAAAAAGM/xH0jYBY2JPA/s1600/294_1+USS+President.jpg

There are a lot of very interesting things to be minded from these two amazingly detailed paintings. 

1. During normal sailing, gunport covers were removed...they were removable.

2 in stormy weather, gunport covers were in place with the guns run out, through the covers. This means the covers were half covers, top and bottom, with semicircles cut out to accommodate the guns running between them.

3. Look very closely at the quarter galleries, you will see that there appear to be dead lights in place of windows with only a small actual window.

4. In preparation for the storm, all spars were lowered, presumably to lower the center of gravity and stabilize the ship.

I cannot take credit for these observations as I saw discussions about these topics I n other forums,  but I do love these paintings.  Review Roux's work online , you'll find other amazing art. Note that his work was made during the time his subjects were in their prime.

Cheers


  • Member since
    March 2019
  • From: San Diego, CA
Posted by Jose Gonzales on Monday, November 11, 2019 5:43 PM

 _DSD6763 by Jose Gonzales, on Flickr

 _DSD6762 by Jose Gonzales, on Flickr

Carronades completed, starting on pinrails. I was planning on using the Revell provided pinrails, but when I pulled out the sprue, nearly all belaying pins were bent or broken.

JOIN OUR COMMUNITY!

Our community is FREE to join. To participate you must either login or register for an account.

SEARCH FORUMS
FREE NEWSLETTER
By signing up you may also receive reader surveys and occasional special offers. We do not sell, rent or trade our email lists. View our Privacy Policy.