 John Howling Mouse wrote: John Howling Mouse wrote: |
|
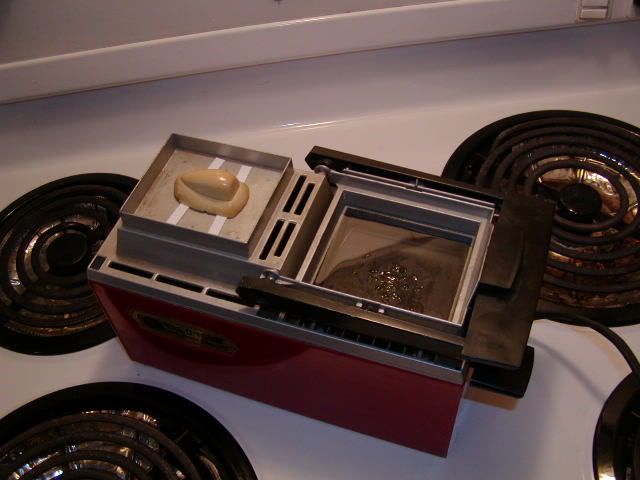
For my kitbashed "Morsair" canopy, instead of using my big, heavy-duty set-up which would be overkill, I'm trying out my 1960's Mattel Vac-U-Form today, using specially made, clear .020" clear sheets from Callari Modelworks (and, yes, I've even remembered to remove the clear protective film).
I'm currently letting the plastic sheet warm up for a full (timed) ten minutes before swinging over the forming arm. The sheets seem just fine but I seem to be getting some very prominent wrinkles.
I would expect this if I was doing something with either a very high or irregular profile but I'm simply trying to vacform over my own (positive master) 1:48 canopy mold. It is very similar to a common teardrop canopy like you'd see on a Mustang or P-47 yet most of the heavy wrinkling I'm experiencing is right on top of the canopy's curve.
There seems to be an inherent problem with the Mattel Vac-U-Form in that pumping the vacuum lever on the side draws air from the molding
tray but also pumps air right back into the molding tray on the reverse stroke. So, my mold master is lifted right off the molding tray with each return stroke of the little vacuum pump.
I do not have the instructions for this (second-hand) Mattel Vac-U-Form device, so, any advice any of you could provide would be greatly appreciated! Are you supposed to pump like crazy, pump slowly, etc. and how do you avoid the machine's inherent tendency to blow air right back into the molding tray?
Do I need to create a negative mold instead? I sure hope not, since I had accommodated for the final product being slightly larger than the mold pattern by the .020" thickness of the plastic I'm using.
P.S. The bubbled, molten plastic you might notice on the right-hand side of the heating tray is from the former owners of this toy. I’m not letting the plastic droop to the point where it is touching the heating element!

It would appear this is a pretty common problem with these machines and here is a potential solution (has anyone here ever tried this aftermarket valve repair kit?):
http://cgi.ebay.com/Mattel-VAC-U-FORM-vacu...1QQcmdZViewItem
|
|
John;
No you don't need to make a reverse mold. I have one of these units and the instruction manual.
Now from what I see your problem is not the mold you're using or the machine. It is the height at which your mold is.
The plastic will start to cool as soon as it is removed from the heating element, hence the wrinkles you're getting at the top.
The solution is raise the mold up even with the top of the vacuum box. This can be done by creating a platform to sit tightly inside the vacuum box and place your mold on top of this. Remember to drill enough holes in the platform to allow the pump to work correctly.
I have seen a few modellers using these to make canopies with the canopy on a stem and the plastic really gets drawn around the entire mold. The only drawback is that the mold ends up locked inside the plastic and must be carefully removed with a knife.
As far as how much pumping you have to do. Pump like crazy to draw the air out seems to be the way for my unit. I am considering for the future (and to save my hands) having a small electric vacuum pump put on by a friend recently retired from vacuum system installation for commercial uses.
Hopefully this works ot get your canopy done.
Cheers;
Gregory