SEARCH FINESCALE.COM

Enter keywords or a search phrase below:

Fixing Painting Disaters

723 views
5 replies
1 rating 2 rating 3 rating 4 rating 5 rating
  • Member since
    December 2002
  • From: USA
Posted by DDonSS3 on Friday, October 23, 2009 9:25 AM
I tend to use mostly Modelmaster Flats and find that they and my favorite alternative (Xtracolor) don't really need thinning.
  • Member since
    March 2005
Posted by philo426 on Thursday, October 22, 2009 11:48 AM
Yes use a good quality camel-hair brush and be sure to thin the paint to avoid brush strokes.
  • Member since
    January 2003
  • From: Peoples Socialist Democratic Republic of Illinois
Posted by Triarius on Wednesday, October 21, 2009 10:36 AM

Sign - Ditto [#ditto]Sign - Ditto [#ditto]Sign - Ditto [#ditto]Sign - Ditto [#ditto] Phil's comments.


 And Don, that is most impressive!

Ross Martinek A little strangeness, now and then, is a good thing… Wink

  • Member since
    December 2002
  • From: USA
Posted by DDonSS3 on Wednesday, October 21, 2009 10:08 AM

Dittos on Phil H's comments, get yourself some good quality brushes and take care of them, they'll last you a long time with the proper care (I've got some 15-20 year old brushes that I still use on a regular basis).

 Once you get that done...

 When you paint your first coat of paint on the model, try and brush in only one direction, don't go back and forth over an area that doesn't look like it's well covered. After the paint's had a couple of days to dry (maybe longer for glass paint) then go over it again with another light coat of paint. Now, I don't do this myself, but I have a friend who swears by this technique (and I should give it a try as he's a MUCH better modeller than I), when he puts more coats, he paints perpendicular to the previous coat (coat #1 fore and aft, coat #2, side to side, and so on).

  Here's some example photos of my Hasegawa P-47D:
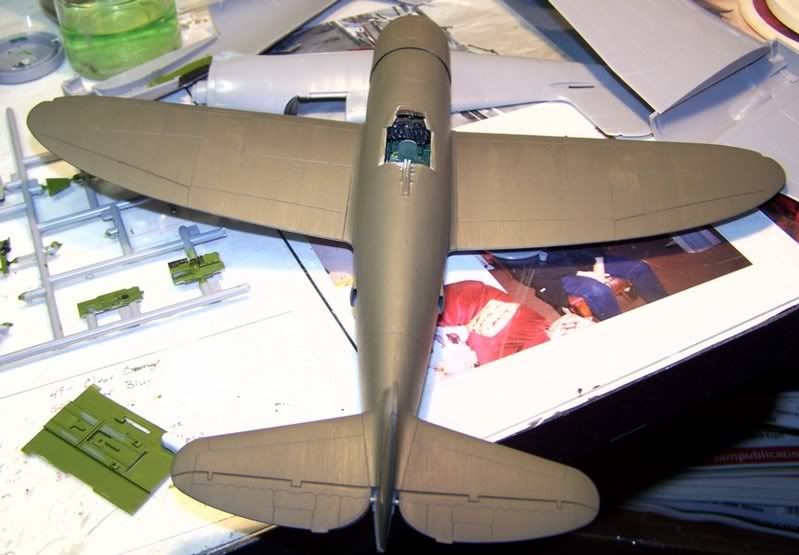
 

 You can see the "streakiness" on the upper wing suraces and below the cockpit.

 Now after another couple more coats of  MM OD and two coats of Future, there's still a little streaking on the OD, but overall, I'm happy with it:
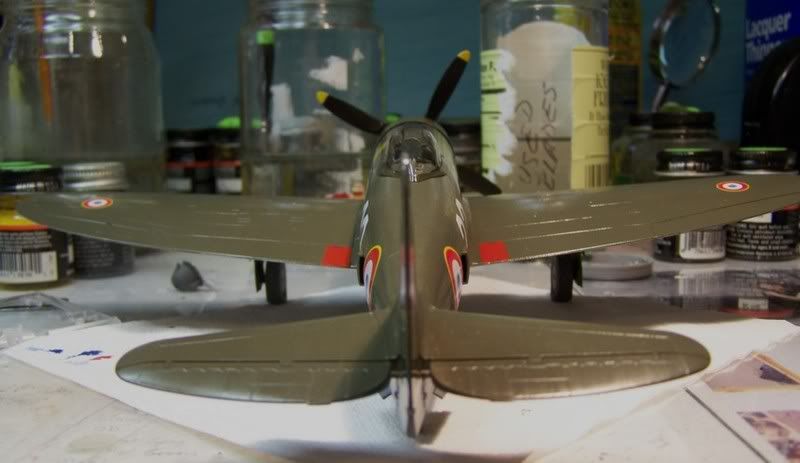
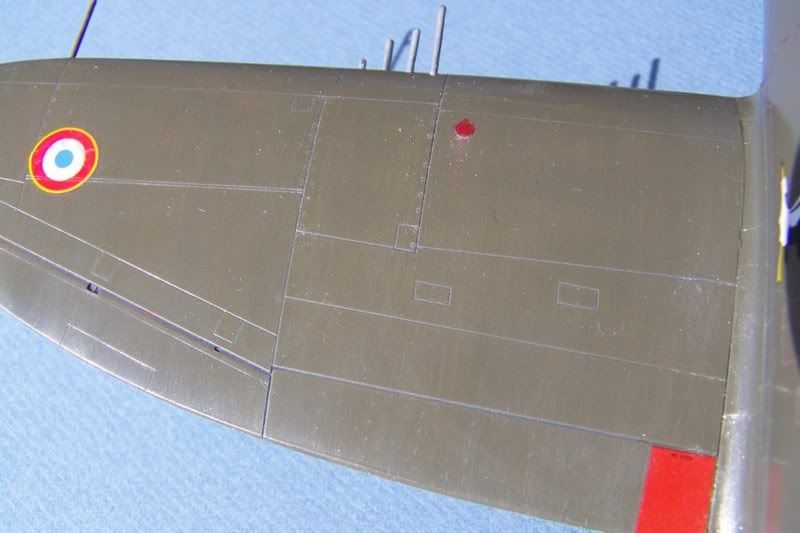
 

The gray streak below the cockpit was an attempt at adding weathering.
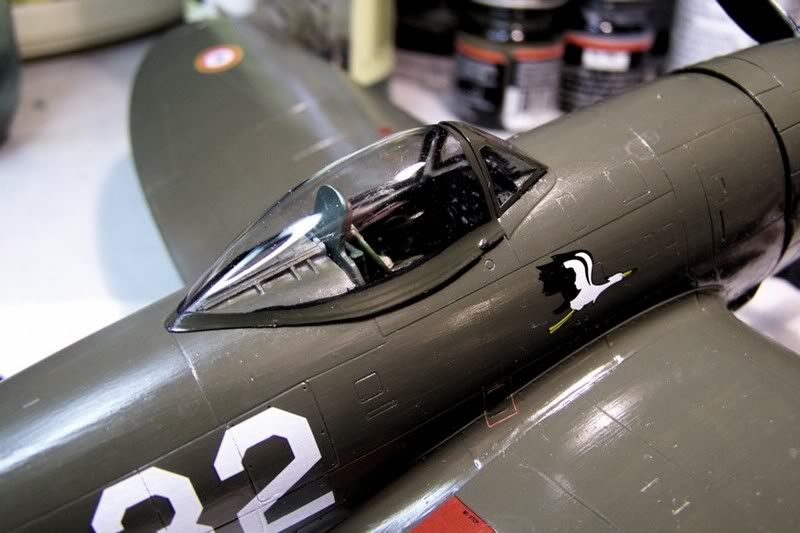
 

 More pics here:

http://s20.photobucket.com/albums/b229/DDonSS3/Built%20Models/Hasegawa%20P-47D/


  • Member since
    August 2005
  • From: Sydney, Australia
Posted by Phil_H on Wednesday, October 21, 2009 8:34 AM
 Khalee2 wrote:
I don't have a air brush so I'm brush painting it with the brushes that came with the set.

Oh dear...

I hope you don't mean those little white plastic handled "make up" brushes from Testors.

If you used those, I would have been surprised if there had been no streaking.

If you are indeed using those, stop now. Put them in the "circular file", get yourself to an art supplies store and pick up some proper paintbrushes.

Look at some quality Taklon (synthetic) or sable (natural fibre) brushes. 

  • Member since
    October 2009
  • From: Oklahoma USA
Fixing Painting Disaters
Posted by Khalee2 on Wednesday, October 21, 2009 6:59 AM

I have just got my model finished And somewhat painted, But when the paint dried man it looks streaked. Is there any way to fix the streaks,I am useing testors flat enamel Finishing set. I don't have a air brush so I'm brush painting it with the brushes that came with the set.

Please say there is a way to fix it without me chucking the whole thing.

JOIN OUR COMMUNITY!

Our community is FREE to join. To participate you must either login or register for an account.

SEARCH FORUMS
FREE NEWSLETTER
By signing up you may also receive reader surveys and occasional special offers. We do not sell, rent or trade our email lists. View our Privacy Policy.