SEARCH FINESCALE.COM

Enter keywords or a search phrase below:

CENTAURO Nearly Finished April 24th

11122 views
34 replies
1 rating 2 rating 3 rating 4 rating 5 rating
  • Member since
    May 2005
  • From: Dublin Rep Of Ireland
CENTAURO Nearly Finished April 24th
Posted by terry35 on Saturday, February 6, 2010 9:53 PM

Well I finally got back to theh bench about two weeks ago.  I signed up to an eight wheeler GB and really wanted to get stuck into this. With the work going on in the house I put the 251/20 away while the work was going on. I'm still getting the work area set up to my usual filthy way of doing things.

Well on with the build.

I wanted this for a long time but the resin kit was pretty costly.

There was no real problems so far and the only thing slowing me up is doing the welds which are very neat on the real vehicle but quite prominent in places. The kit has the extra armour plates as seperate pieces and the fit is first rate.

THe hull is quite big.

The underside is beautifully detailed but I am not adding any extra details as everything will eventually be hidden behind those huge wheels.

i assembled the drive shafts off the vehicle as it seemed easier to do it that way. the detail is quite good even for an area that will be hidden.

I just stippled the anti-slip area with liquid glue as it is not very prominent on the real vehicle.

I have got a good bit of the welding done on the upper hull but it's slow going. Stretched sprue and all that crap.

This is a link to the reference I'm using at the moment.

http://www.afvplanet.com/especial/centauro/index.html

Thanks for dropping by,

Terry.

  • Member since
    July 2003
  • From: On my kitchen counter top somewhere in North Carolina.
Posted by disastermaster on Sunday, February 7, 2010 2:15 AM

     THERE  http://smileys.smileycentral.com/cat/1/1_4_120.gif      you are.

I had HOPED you were working on some WWII beast of destruction.

Whatever,

          I know it will turn out super 10.

http://www.innovationbyinstinct.com/services/hosting/clients/accountyp/status/DisasterMaster/%23t1-4.jpg

 https://i.imgur.com/LjRRaV1.png


  • Member since
    July 2006
  • From: New Jersey
Posted by redleg12 on Sunday, February 7, 2010 7:11 AM

Looks like you are off to a nice start! Stay with it!!

Rounds Complete!!

"The Moral High Ground....A Great Place to Emplace Artillery."

  • Member since
    January 2009
  • From: Springfield, MA
Posted by sk3tch on Sunday, February 7, 2010 8:05 AM

I'll be watching this.  Interesting build...I remember seeing the kit previewed in FSM and was like:  Now that kit looks friggin cool.

  • Member since
    December 2007
  • From: Bridgeview, Illinois
Posted by mg.mikael on Sunday, February 7, 2010 10:23 AM

I've seen this kit and it's many variants at my LHS so many times.....nevertheless glad to see someone finally building one of them. Can't wait to see how this one progresses, terry35!Smile

"A good plan executed now is better than a perfect plan next week." - George S. Patton

  Photobucket 

  • Member since
    August 2008
  • From: S.W. Missouri
Posted by Pvt Mutt on Sunday, February 7, 2010 11:53 AM

I see you're off and running at a high rate of speed Terry.Yes

Lookin Good

Tony LeeSmile

Shoot Low Boys They're Ridin Ponys

  • Member since
    May 2005
  • From: Dublin Rep Of Ireland
Posted by terry35 on Saturday, February 20, 2010 4:19 PM

Well thanks for hte encouraging words, Steve, Tony, Redleg, Sk3tch and Michael. I got a lot done since the first post but I must admit  that I am not happy with the images as the plastic does not seem to like being photographed.I got most of the welds done and I am pretty satisified with the results. Trumpeter included some photo etch parts, what I have used so far I found pretty ill fitting and they would probably have been betterr done in plastic but that is only a personal opinion.I hope to get the turret done asap and then on with the paint. I am very undecided as to the weathering and I will wait until the vehicle is p[ainted before I decide.

Well on with the pics

This just about shows some of the weldind up close.

I painted over the anti slip stuff only for my own reason and that was just to see it.

That is a big turret and this is going to be a big puppy. the wheels are just fine and I don't want to go off the OOB track. The subject is not important to me and the kit seems fine.

One reason for not adding too much extra detail to the suspension, its done well enough in theh kit and will be covered by thos monster wheels.

I took this one just to show people the tools they are fine even against photos of the real thing.

http://www.afvplanet.com/especial/centauro/pages/P5227221.html

Thanks for looking in again.

Terry.

  • Member since
    July 2004
  • From: Texas
Posted by wbill76 on Saturday, February 20, 2010 4:35 PM

Nice to see you back building again Terry! This one's going to be fun to watch, you're already roaring along at top speed. Beer

  • Member since
    May 2005
  • From: Dublin Rep Of Ireland
Posted by terry35 on Wednesday, March 3, 2010 4:44 PM

THanks for the replies Guys. THis is turning out to be a very enjoyable build and my only gripe is still the etch provided by trumpeter, well its workable but of crap quality and most of the etch parts would have been better in styrene anyway but that just a personal opinion. Other than that a great kit.

I just took some quick shots and just want to show the turret while its "naked", this baby is loaded with extra armour and is simply beautiful.

I decided to add some chains to the smoke dischargers so I used the twisty twisty method. It's slightly over scale but will in the end just be visible behind the outer basket/armour. I know Ben was having trouble with chains but onlyy got around to doing this Monday evening.

THis is the thinnest wire I could find.

A slight lenght that was cut as needed.

Finished chains on the smoke dischargers.


Thanks for dropping by.

Terry.

  • Member since
    April 2005
  • From: Piscataway, NJ!
Posted by wing_nut on Wednesday, March 3, 2010 6:01 PM

Hey Terry  Have not crossed paths with you in a while.  Looks really good so far.  The thinnest wire I been able to find is from the cord from an old cell phone charger or form the wire to an ear bud on a cheap headset.  Way thinner than a hair.

Marc  

  • Member since
    May 2005
  • From: Dublin Rep Of Ireland
Posted by terry35 on Wednesday, March 3, 2010 6:43 PM

Thanks for the heads up Marc, My problem is now that when I find anything that fine these days I just can't see it. Really thanks, believe me I'm smiling here.

Terry.

  • Member since
    July 2006
  • From: New Jersey
Posted by redleg12 on Wednesday, March 3, 2010 6:51 PM

Very nice.....like the method for the small chain....I hear you on the "seeing it" .....that's always a problem with the small stuff. One of the reasons I don't even attempt braille scale.

Rounds Complete!!

"The Moral High Ground....A Great Place to Emplace Artillery."

  • Member since
    May 2005
  • From: Eugene, Oregon
Posted by hughes2682 on Thursday, March 4, 2010 2:48 AM
Terry, Wheels with teeth! Very big teeth! I'll be following this one. Good to see you building again! Cheers Dave

http://img.photobucket.com/albums/v317/Aaronw/Groupbuilds/ClassicAviationGB2010bomb.jpg

With enough thrust, pigs fly just fine.

  • Member since
    May 2005
  • From: Dublin Rep Of Ireland
Posted by terry35 on Saturday, April 3, 2010 6:37 PM

Well it's been a while since I posted an update on this one. Well I have made progress and am looking forward to the final leg of this project.

I got the kit primed about 2 weeks ago and left it to sit for a couple of days for the primer to cure/harden properly. I then decided to got back to Humbrol paints because they provided the closest match that was readly available in a hobby shop here in Dublin.

I have not used humbrol in a couple of years and decided to use their thinners as well. I used a very dilute mix and go for the several light coats as opposed to my usual heavier acrylic coats.

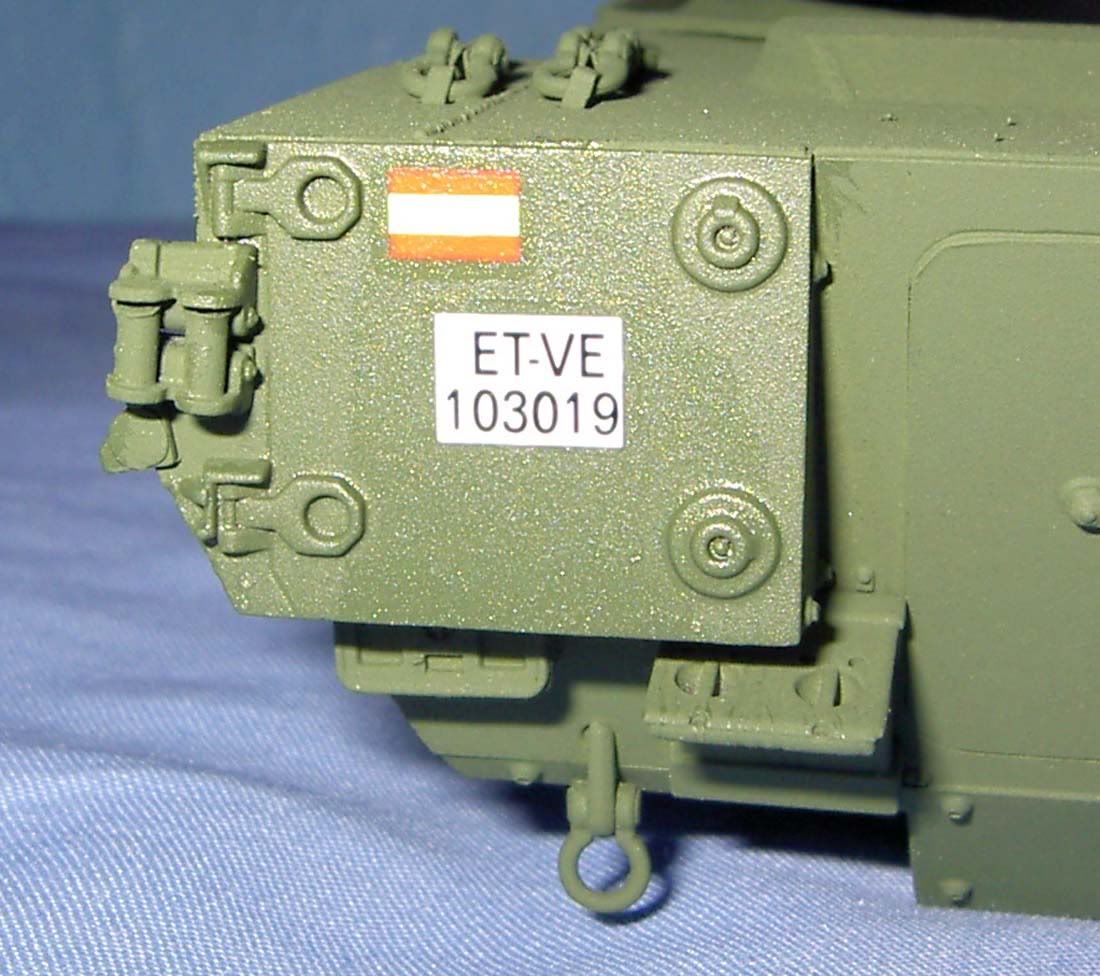
I finally finished getting the base coat down over a couple of sessions during the week and today decided to get the decals down and take some pic's of the progress.

So on with the pics.

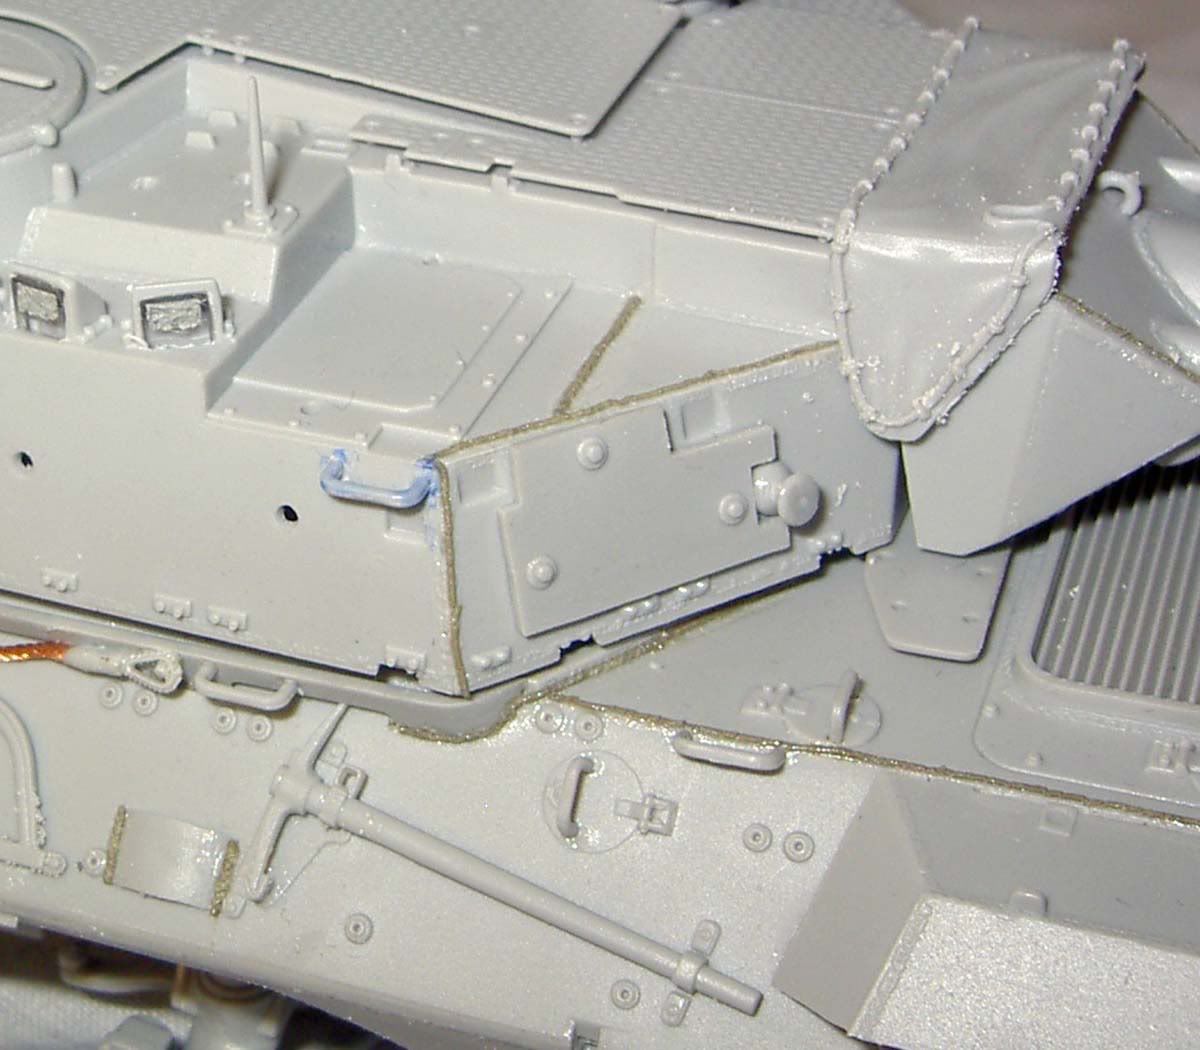
This is an earlier shot of the turret showing some of my home made welds. I'm now glad I took the time to do all these on visible parts of the vehicle as in straight green it would be quite boring and these details washed and lightly drybrushed should add some eye candy to any blandness and break up any open spaces.

The same area with just a base coat.

This shot shows the anti slip plating on the roof armour.

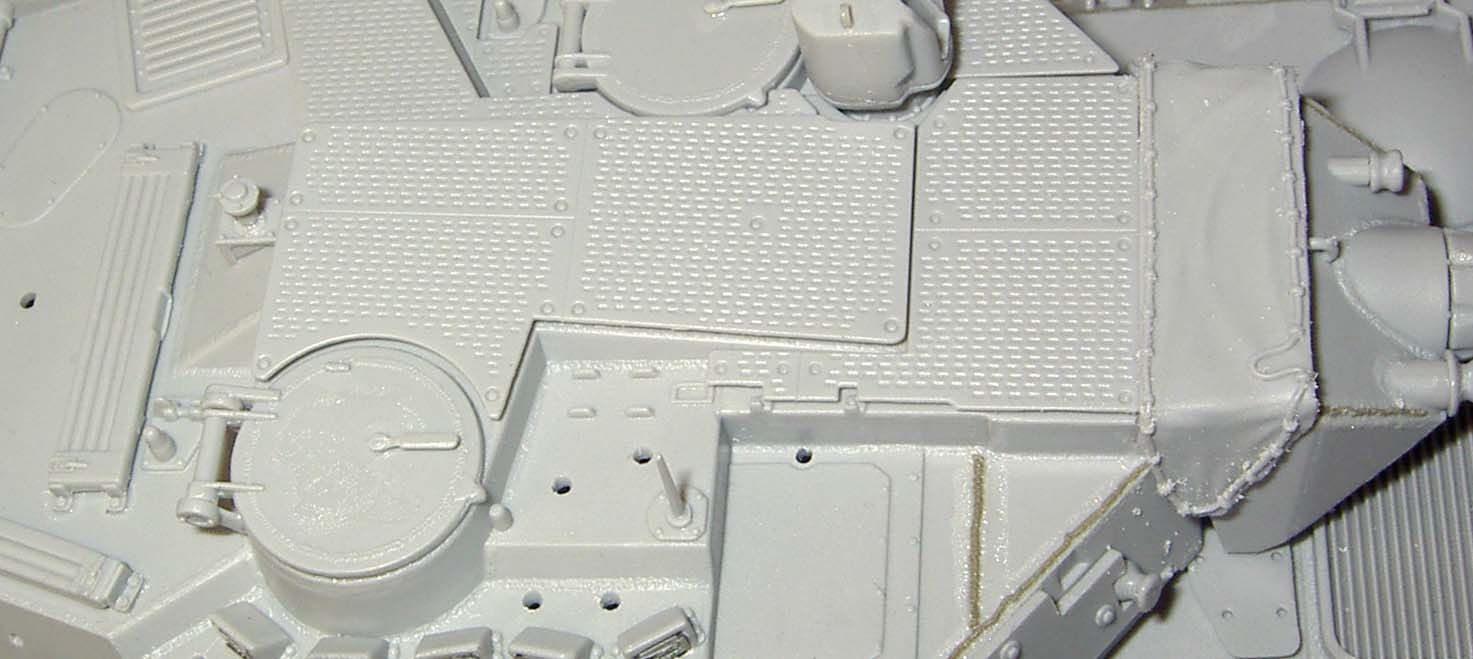
this one shows the spacing.

More home made welds.

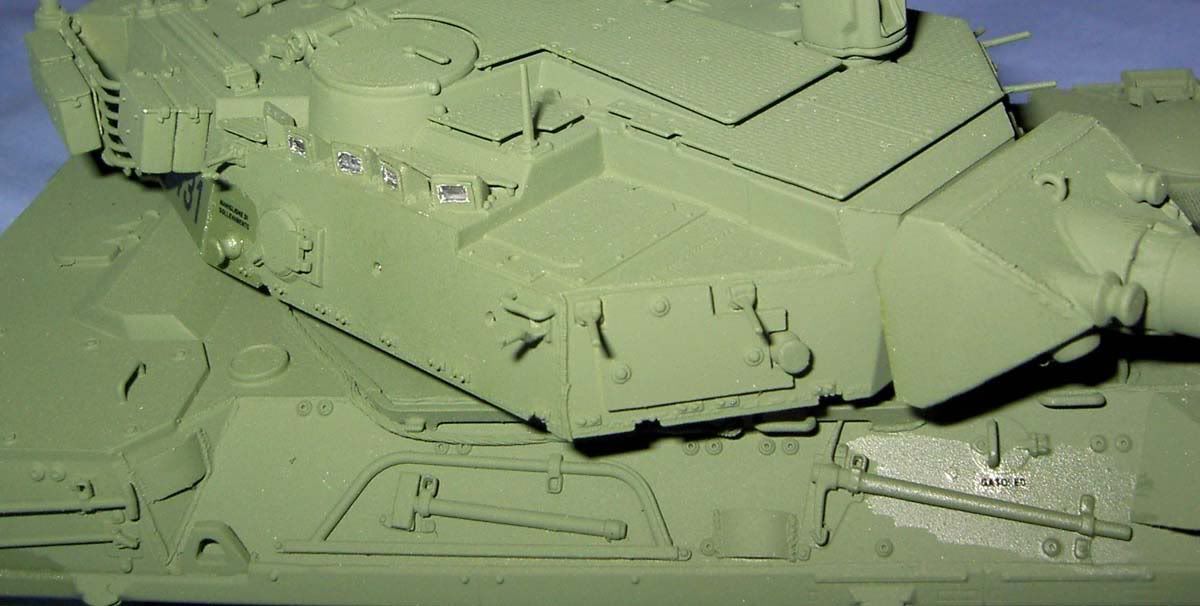
I think this shot gives a good impression of the turret, I know about the gloss, its just there for the decals, I'm going to give a nice coat of matt mixed slightly with satin if I get the weather tomorrow.

Just more Decals.

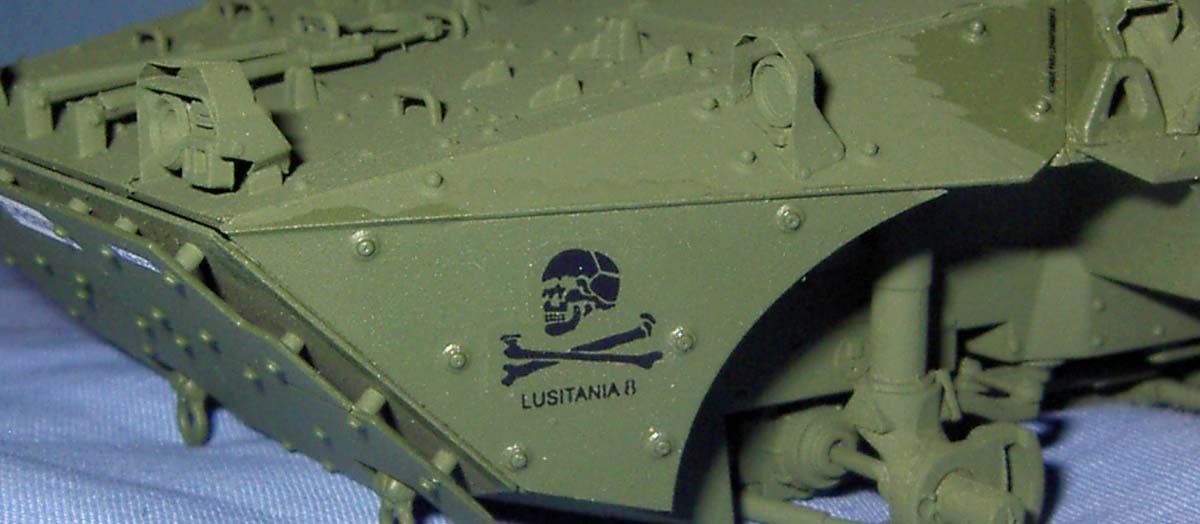
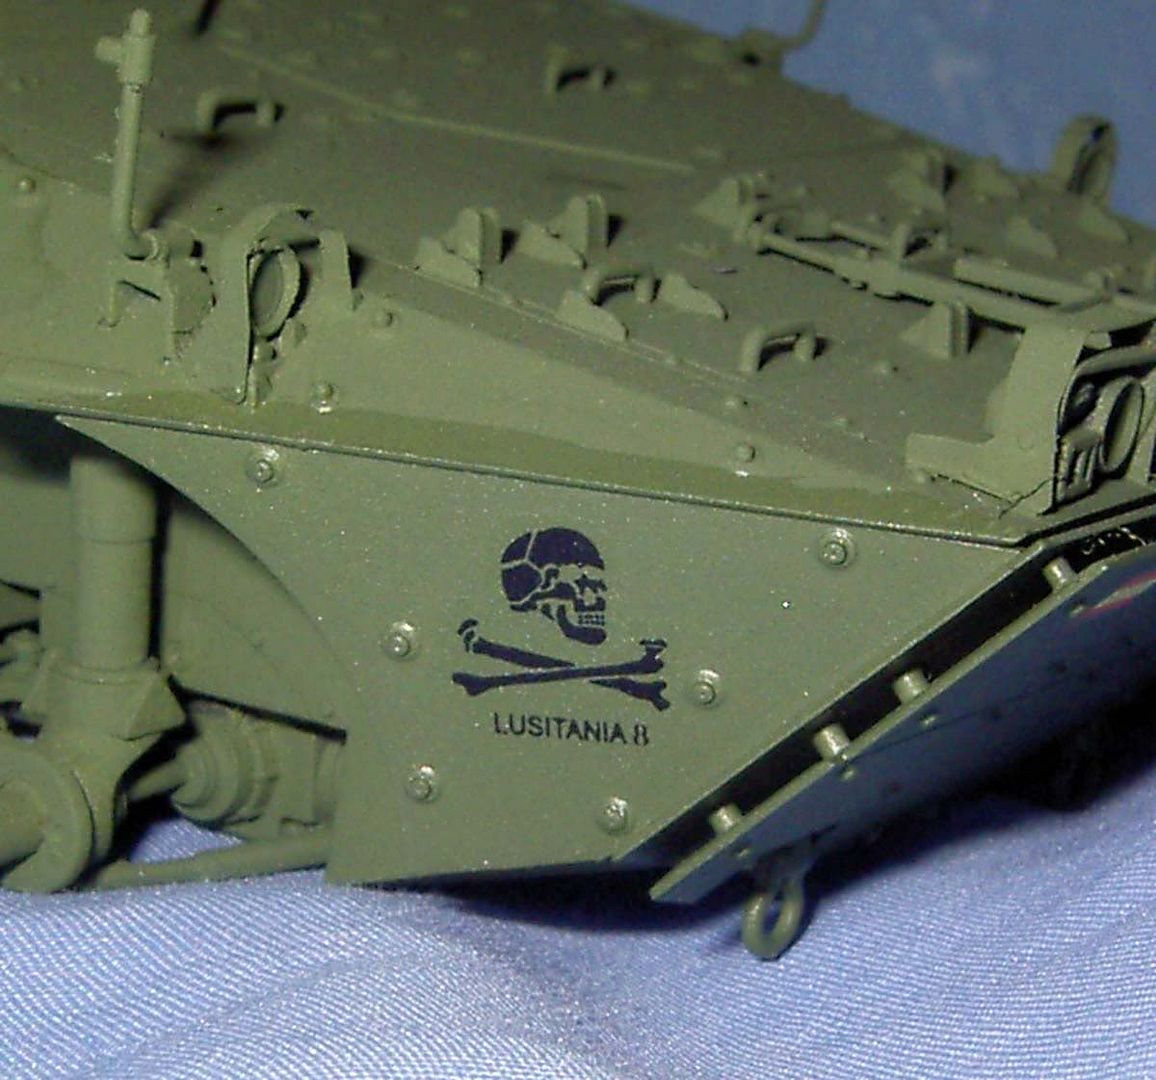
THese next two clearly show the spacing on the frontal armour.

I'm going to try and get all the detail painting done by next weekend.

I must just add that this is one classic kit te only problem was the side steps provided by trumpeter in etch that was useless, actually as I've stated elsewhere I think that trumpeter could easily have provided these parts in plastic.

It's not like they can't do it. a lot of there new releases have super fine moulded detail and I think they have simply jumped on a popularity wagon of providing etch parts.


Thanks for dropping by.

Reagrds.

Terry.


P.S. happy easter to everybody .

  • Member since
    July 2004
  • From: Texas
Posted by wbill76 on Sunday, April 4, 2010 10:21 AM

Nice to see this one's still moving along Terry, have to agree with you about those weld seams. They look great with paint on and will allow for some nice finish detail/variation when the time comes. Yes

  • Member since
    May 2005
  • From: Dublin Rep Of Ireland
Posted by terry35 on Sunday, April 4, 2010 3:07 PM

Thanks Bill. this is turning into the most enjoyable kit I've built in a while. I got the final coat of matt finish down today before the detail painting and weathering.

The effect I'm heading for will be the most subtle I've ever done.

Thanks again ,

Terry.

  • Member since
    May 2005
  • From: Eugene, Oregon
Posted by hughes2682 on Monday, April 5, 2010 10:50 AM

Terry,

Now this is one I would like to have for a daily commuter.Wink   This one is coming along nicely.  Keep the updates coming.  

Cheers

Dave

http://img.photobucket.com/albums/v317/Aaronw/Groupbuilds/ClassicAviationGB2010bomb.jpg

With enough thrust, pigs fly just fine.

  • Member since
    May 2005
  • From: Dublin Rep Of Ireland
Posted by terry35 on Wednesday, April 7, 2010 5:23 PM

Thanks Mike Dave and Bill. I'm posting some progress shots of where I am at the moment. I've started the undercoats for the chipping. I want to keep it to a minimum, but have decidecd that in service the turret would get a fair bashing with crews climbing on and off. but on the upper parts of the hull I'm trying to get a balance.It's kinda hard to put into words so I'll just post pics and wait on opinions of my colleagues here, I will appreciate any advice.

I have done very little work on modern vehicles that have not been in battle so to say.

Well on wit the pics.

The front plate, I think maybe more here?

The welds can be seen on the back here.

The outer wheels. I'm happy with this and hope to finish the wheels at the weekend. Remember Thursday is beer night.

The inner wheels I painted the brake discs shiny because they are constantly in use.

The turret side the homemade chains are clear now and I'm looking forward to drybrushing these to see how they look.

The roof the two lifting lugs on the sight thingy are grandt line.

An idea of how big this monster is, its about teh sizr of a king Tiger.

Thanks for looking.

Terry.

  • Member since
    July 2006
  • From: New Jersey
Posted by redleg12 on Wednesday, April 7, 2010 7:08 PM

Looking good with a couple of thoughts.

  • You can take a scotch brite pad and rough up the tread on the tire so it looks worn. Just a touch on the sidewall to knock off the shine also.
  • Go easy on the chipping. Modern vehicles do not chip that much and with their coatings do not rust. Plus good crews will always touch up bare spots when pulling maintenance.
  • The vision blocks  are normally polarized. You may want to do a little research on what clear color they normally are

Good stuff...keep it up

Rounds Complete!!

"The Moral High Ground....A Great Place to Emplace Artillery."

  • Member since
    July 2006
  • From: San Francisco, CA
Posted by telsono on Wednesday, April 7, 2010 7:18 PM

Nice work Terry, I have the late Italian version on my bench right now, I need to finish it off. Its good to see another one being worked on. I just get a little put off about working on the PE accessories. Just so many of them.

Clear Green looks like the color for the vision blocks from the photo's I have seen.

Beware the hobby that eats.  - Ben Franklin

Do not fear mistakes. You will know failure. Continue to reach out. - Ben Franklin

The U.S. Constitution  doesn't guarantee happiness, only the pursuit of it. You have to catch up with it yourself. - Ben Franklin

  • Member since
    May 2005
  • From: Dublin Rep Of Ireland
Posted by terry35 on Thursday, April 8, 2010 7:06 AM

Thanks Telsono, I would agree with the colour choice with the glass.

Mike thanks, taken onboard. I want to finish a couple of the chips at the weekend and hopefully get more opinions. The input is appreciated, all valid points and as you now I am a chipping maniac so to be "restrained" for me is an effort.

Thanks again guys.

Ps. I haven't even thought about mud, oh gloriuos mud..Ha...Ha..

Terry.

  • Member since
    May 2005
  • From: Dublin Rep Of Ireland
Posted by terry35 on Wednesday, April 14, 2010 4:28 PM

Well I got painting fever at the weekend and got the highlighting done and the wash in. I mixed the base humbrol colour with some oils to allow for blending as opposed to actual drybrushing which can be pretty harsh.

With the blending you can get more time to work the colours as opposed to just working with enamels straight.This allowed me to subdue any harshness from chipping. So after 2 days drying I was away with the first light wash. I have only got he first in so far and tonight done some mud. Its still drying and I need a while to decide my next move.

So on with the pic's.

Early wheel.

The wheel installed and mud etc added.  The harsh chips are almost gone but still visible.

Almost finished roof I think I need to get another wash in to bring out the anti-slip plating.

Just a quick line of pic's.

Thanks for looking,

Terry.

  • Member since
    July 2004
  • From: Texas
Posted by wbill76 on Wednesday, April 14, 2010 5:55 PM

Making good progress on this one Terry! Yes

  • Member since
    August 2008
  • From: S.W. Missouri
Posted by Pvt Mutt on Wednesday, April 14, 2010 6:13 PM

Boy that is a big one and looking good too.Yes

Tony LeeSmile

Shoot Low Boys They're Ridin Ponys

  • Member since
    May 2005
  • From: Dublin Rep Of Ireland
Posted by terry35 on Wednesday, April 14, 2010 6:28 PM

THanks Tony, its an amazing kit. Almost one where you shake the box and a model falls out. Hope your keeping well.

Terry.

  • Member since
    July 2003
  • From: On my kitchen counter top somewhere in North Carolina.
Posted by disastermaster on Wednesday, April 14, 2010 10:43 PM

http://t2.gstatic.com/images?q=tbn:AwJ6z2bwjU6TcM:http://www.illuminatephotography.com/blog/wp-content/uploads/2010/01/by-jove.jpg

You've really put the  http://i186.photobucket.com/albums/x109/Baby_Girls_Bucket/smileys/confused-smiley-17512.gif  "english" on those chains.

http://i17.photobucket.com/albums/b98/Carlosnsp/Smileys/4_1_81.gif mate.

http://i20.photobucket.com/albums/b232/gluetank/Decorated%20images/th_T1-4-copy.jpg

 https://i.imgur.com/LjRRaV1.png


  • Member since
    May 2005
  • From: Dublin Rep Of Ireland
Posted by terry35 on Saturday, April 24, 2010 5:31 PM

Well I'm calling this one finished with the exception of just a little cleaning here and there.

I need to get some beauty shots in better lighting. I based the final weathering on the strykers I've seen in books in Iraq, very dusty vehicles. I think any vehicle on manouvers will end up in the same condition.

I will be doing a STRYKER soon and just took this shot of the STRYKER hull up against this beast to give a sense of scale.


Thanks for looking and as always all comments welcome.

Terry.

  • Member since
    July 2004
  • From: Texas
Posted by wbill76 on Sunday, April 25, 2010 11:07 AM

Very nice work on this one Terry, congrats on getting it done! Yes

  • Member since
    July 2003
  • From: On my kitchen counter top somewhere in North Carolina.
Posted by disastermaster on Wednesday, June 2, 2010 11:52 AM

And as closure, here are the results.

http://i20.photobucket.com/albums/b242/terryburke/021.jpg

Quite a reward for all the good work. For something with wheels I really like this. Super Job Terry.

http://i20.photobucket.com/albums/b232/gluetank/Decorated%20images/th_T1-4-copy.jpg

 https://i.imgur.com/LjRRaV1.png


  • Member since
    June 2009
Posted by Guney on Wednesday, June 2, 2010 6:04 PM

Looking good....Congrats...:)

JOIN OUR COMMUNITY!

Our community is FREE to join. To participate you must either login or register for an account.

SEARCH FORUMS
FREE NEWSLETTER
By signing up you may also receive reader surveys and occasional special offers. We do not sell, rent or trade our email lists. View our Privacy Policy.