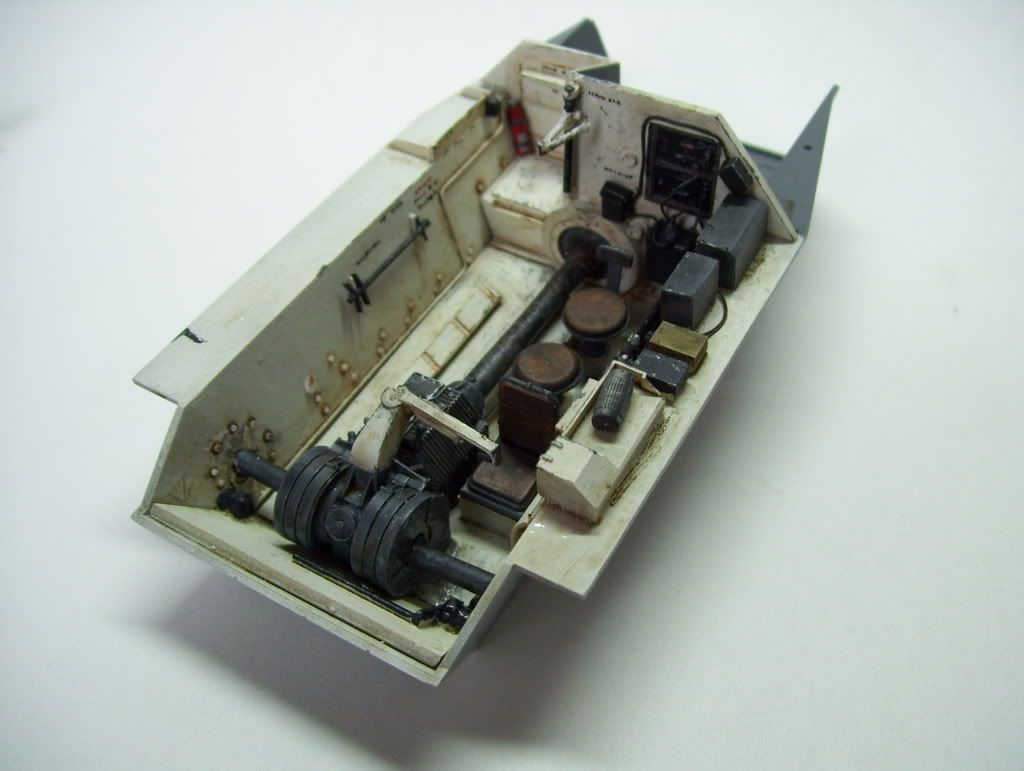
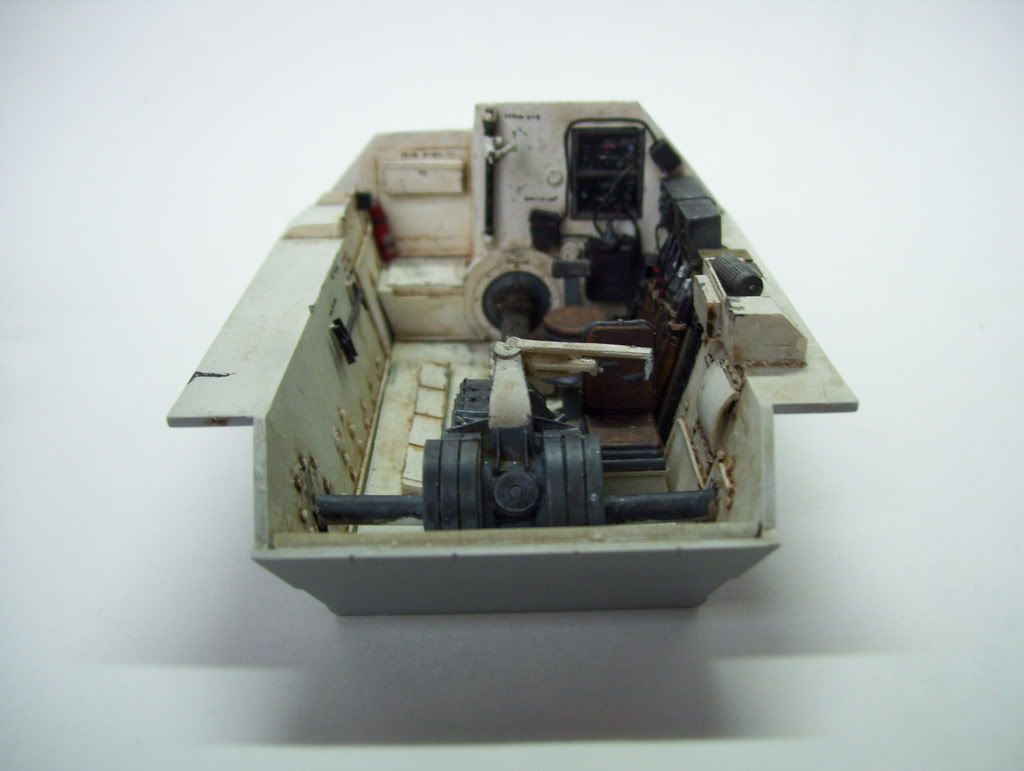
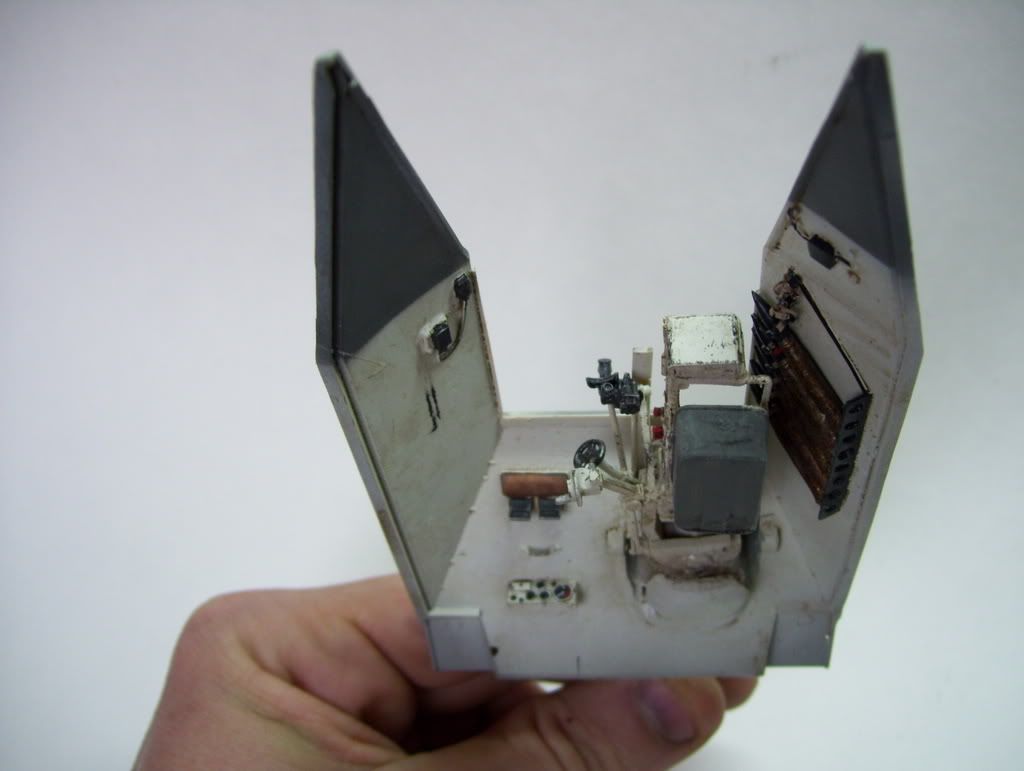
Well, here's what I've done so far to the interior of the fighting compartment. I'll take you through the pictures and call out what I've added/deleted/corrected from the Verlinden interior set:
1 & 2. First, heres two overall views, left and right...

3. A closer view of the left wall...You can see the completed shells in place. Each one is secured by a lead foil strap and plastic buckle. They were painted in a mix of Testors copper, brass, gold and black, then washed with black acrylic to give 'em that oiled look, which was done to protect them from corrosion. I added a crew compartment heater duct under the radio on the wall; the Verlinden interior lacked a loader's seat so I made one from an old Panther (?) engine deck intake cover, carefully filing it with a needle file to shape a leather seat pad from it. The tranny is painted Tamiya XF-24 Dark Gray and weathered with oils and light DB in chrome silver, while most everything else got "reverse highlighted" with a steel-brown oil mix...I just realized that that curved pad to the left of the driver should be painted in leather; I'll do that right away-it was a pad of some sort; I added the strips and bolts securing it to the wall...handles were added to the steering arms...the various lettering on the walls was done with a sewing needle...
4.The right side: a fire extinguisher from the SP box was added above the rear storage bin; Verlinden had a seat there but my photographic reference proved that inaccurate. I added a "lid" to the bin, sawed off the backrest on the upper wall and added another little bin and lid where that was...that wierd thing on the side wall ain't some kind of Nazi mace for close combat!; it's a "Hulsenzieher"--a tool to help pull jammed shells; I made it out of strip. Lets see...made the bin on the fender base, put a bunch of bolts all over the hull walls......HELP!...can't....stop......super....detailing...!....
5. How it'll look with the hull top on,,,
6....and why I just had to saw the roof off; I couldn't see doing all that work only to have a gnat's-eye view of it!...hey, I managed to get the sight lined up through the peekaboo hole!![Big Smile [:D]](/emoticons/icon_smile_big.gif) Of course the engine still has to be finished and dropped in...
Of course the engine still has to be finished and dropped in...
7. Overall view from the front...
and 8: a shot of the upper hull and gun...I muffed up the actual Verlinden gun mounting by working too late into the wee hours and not reading directions properly! Luckily I was able to salvage it. I actually had to cut about 2mm out of the breech guard because of the fiddlin' necessary in order to get the sight to line up through the hole; then the gun extended way too far back. I think that the kit that this interior was designed for-the Italeri Hetzer-was quite a bit dimensionally different from the DML kit, so this may explain all the extra work. The ammo rack was scratchbuilt and the shells inserted properly--Verlinden had them portrayed UPSIDE-DOWN! ( must've been a particularly good bottle of rose that night!). They're secured by lead-foil straps as well...all the fuse boxes were added...the handle added above the instrument panel and the black traverse wheel on the gun is from the SP box....
PHEW! Well, that's it for now...gotta start detailing and weathering the engine!--any questions, comments, and criticisms are welcomed and much appreciated!