Thanks, Dom! Lol, don't worry - the crow is grinning too  . Frankly, I kinda like the old avatar better too. I might put it back and maybe move the crow patch down to the bottom if I can figure out how. Ken told me once but I've lost track of the post - along with my car keys...
Moved from Page 2 and updated 8/3/19 from my notes.
Adding Steps to the Main Hatch
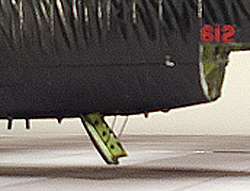
The steps on the kit main hatch are only represented by slightly raised lines while the actual hatch steps were substantially deeper.

1.) Carefully remove the step outline on the hatch, as shown below. Then fill and sand the mold marks.

2.) From 0.5 mm thick styrene or equivalent stock, cut out two side pieces 3.5 mm x 19 mm.
3.) As shown in the diagram below, trim the top and bottom edges with an angled offset of 1.5 mm.
4.) Starting from the bottom of each side piece, locate 3 hole centers as indicated in the diagram and drill a 0.5 mm dia. hole at each.
5.) From 0.5 mm stock, cut 4 each step pieces 3.5 mm x 7.25 mm.
6.) Glue the two side pieces in place on the hatch cover.
7.) Glue each step piece in place.
8.) From 0.5 mm stock, cut out 3 ea step guards 1 mm x 8 mm.
9.) Glue the step guards in place as shown to the top three steps only. Bevel the the top edges of the guards with sandpaper.

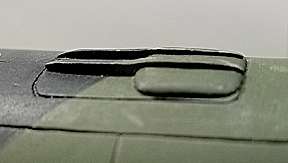
Also missing from the kit hatch cover is the hatch lifter detail. The hatch lifters were part of the seat ejection system. When the ejection sequence was initiated, the front end of the hatch lifter was forced up into the air stream, creating a heavy drag that helped pull the top hatch clear before the ejection seat fired.
The hatch lifter "scoop" shape was created with a piece of 1 mm thick styrene 11 mm x 13 mm, sanded to shape.The reinforcing ribs were made from 1.5 mm strip sanded to shape per the photos below.
My main hatch lifter "scoop" (shown in the first photo below) is not quite the correct shape, as I discovered later. The front part should be more squarish at the corners, as shown in the second and third photos of the EWO hatch.


Finally, if you've gone this far, you will probably want to add the hatch lifting cables, as shown below. I made mine from 0.3 mm round stock (Plastruct #90709) painted black.

Cheers,
Russ