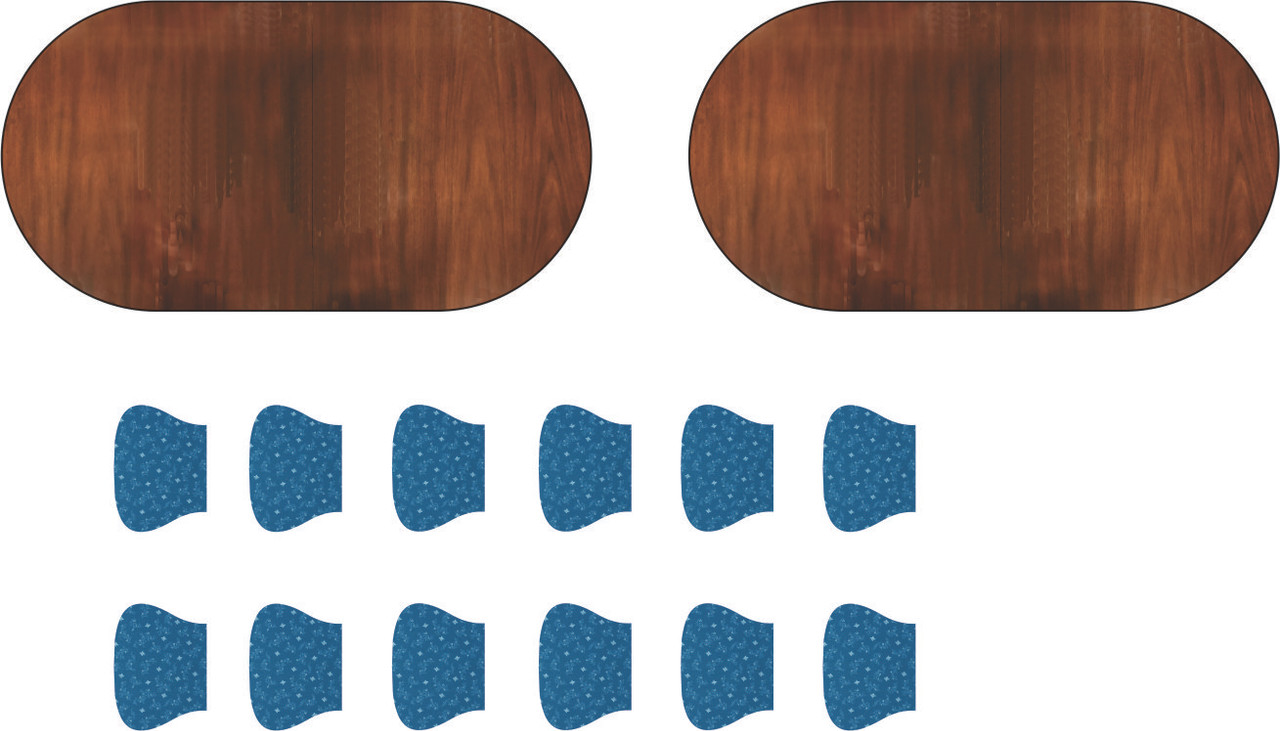
Not much construction, but a lot of activity. I decided to use photo methods to create the dining room table top. I photoed our own table, did some Corel PhotoPaint work to remove the highlights from the room lights and the cleaned up the shape and then dropped it into a shape that exactly matches the table I printed. I will print it both as a decal and on HP Photo Paper to see which one is better. I also found some 19th Century upholstery fabric and will cover the chair seats with it.
I'm also doing the same thing on the little Baker Server we have in the dining room. I've drawn that and will print it, and will use the images to create the surface. It will be on the new back wall in the dining room so you'll be looking at it head on.
My China Cabinet print failed in a very strange way. It actually didn't fail. The sliced file already had the errors in it. The printer just did what it was told. The holes for the glazed portions closed up in the print. I went back and ran the animation of the sliced file and found that in the middle of the print a layer formed that closed the openings this ruined the print. I've re-set it at an angle with supports on the its back and will reprint it.
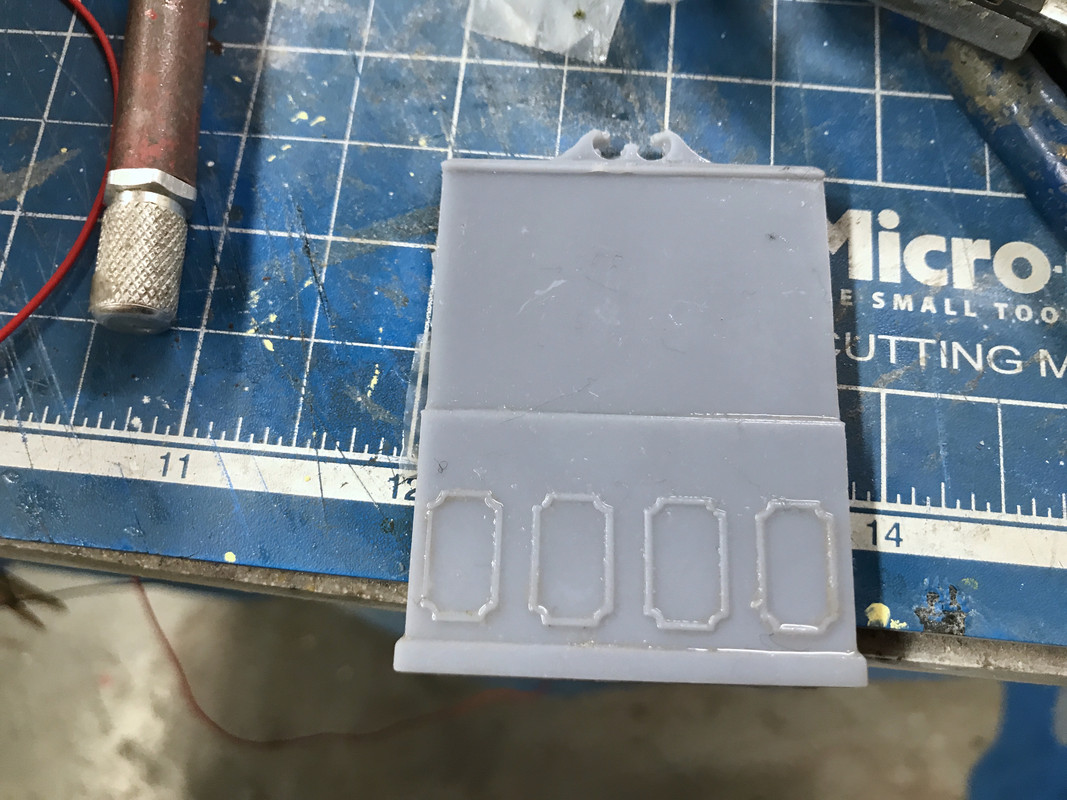
The back part of the cabinet printed perfectly.
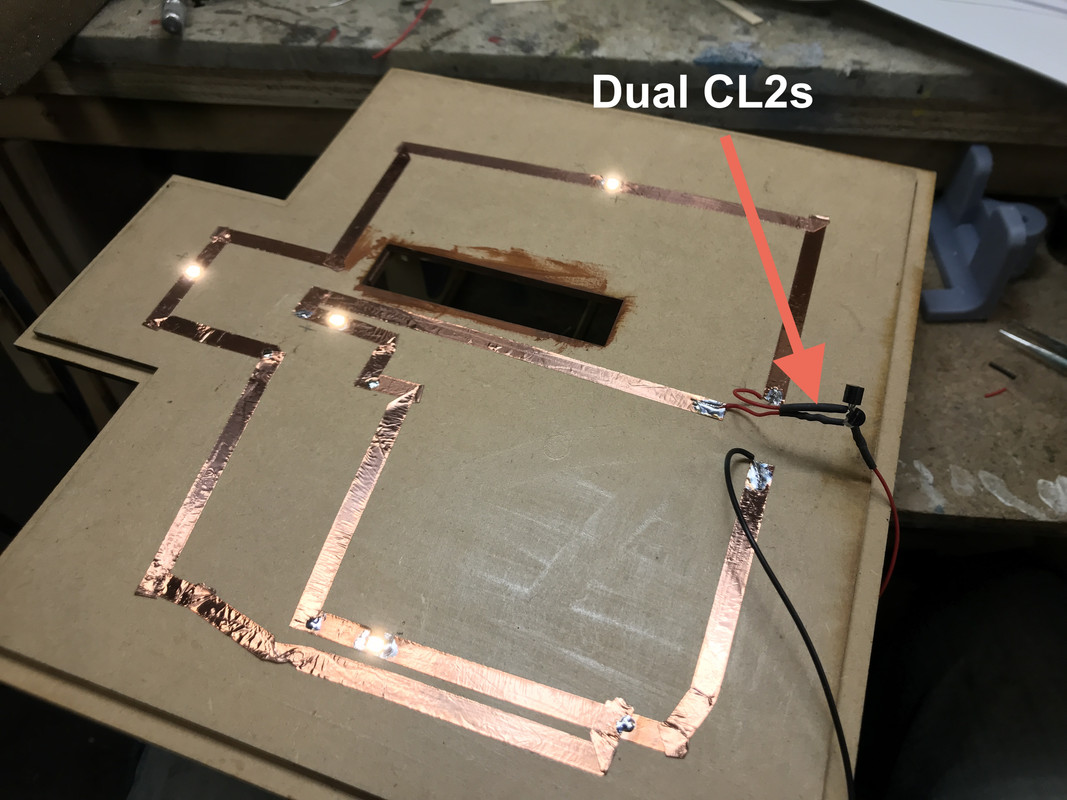
I got the wiring and lighting done for the 2nd floor ceiling. Again, I had to split the circuit and drive it with CL2s in parallel. I'm assuming that these surface mount LEDs draw drop more than 3.0 VDC. When I split the circuit they were perfectly bright. I did put some gold paint over the foyer LED so it will not be so bright. I tied the two power ends of the CL2s together and soldered the hot sides together along with the attachment lead. They now lit as they should. I will have to check the specs on those LEDs to see what I'm missing.
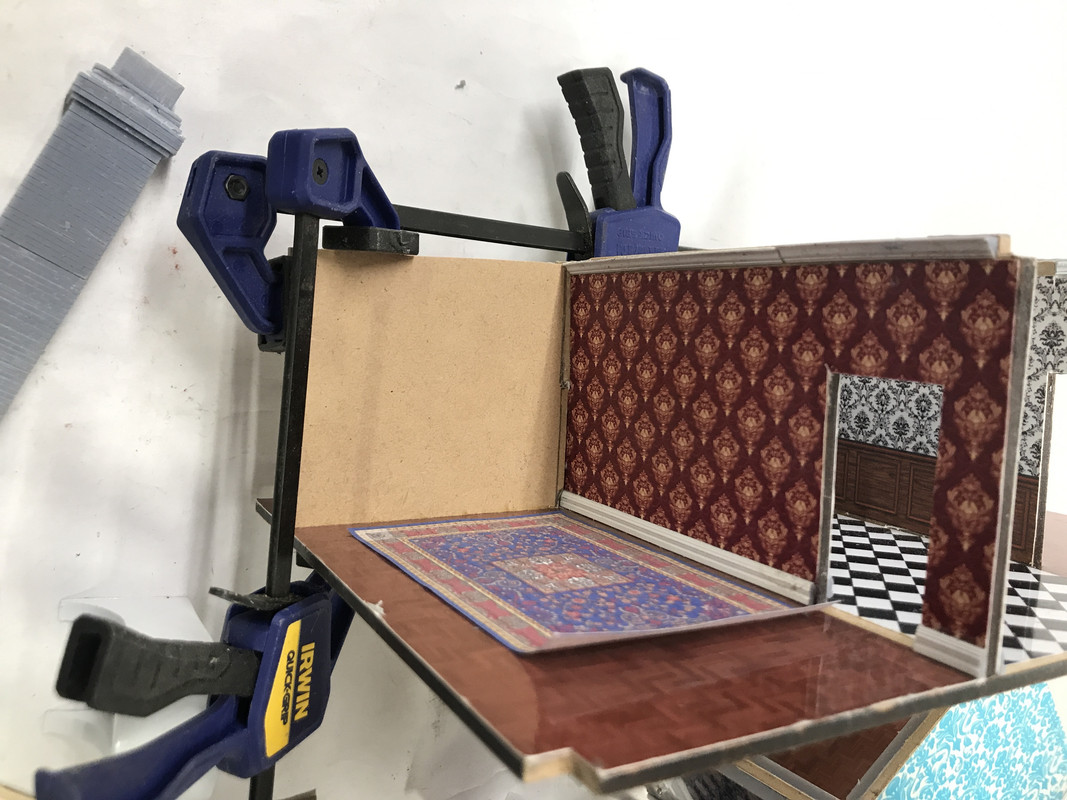
I added a new partition wall to the dining room. I needed more wall space for the now-acquired furnishings. I removed the floor and wall coverings before gluing this piece is so it had solid MDF to which to glue.
Now onto the aforementioned furnishings.
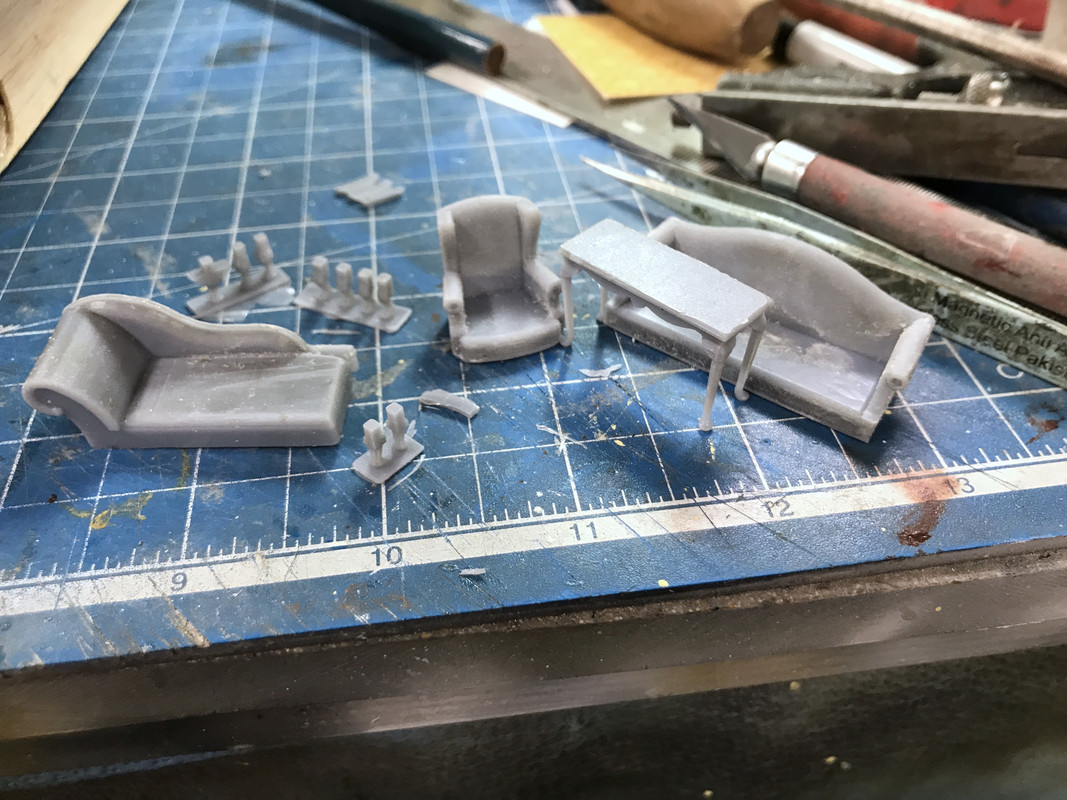
I found on Thingaverse the same artist who did the scale furniture that was listed for sale on Shapeways. She had downloadable STL files. They were oversized, probably 1:32 or larger. I imported the STLs into SU and measured them. The file had the 1:1 size of the furniture in the file name. So for example, if the sofa was 56" wide, I scaled the STL file in SU to 56" so I knew what its 1:1 size would be. Then I reduced it by the O'scale .021 factor and got the O'scale version. When I calculated the actual difference in size between the Small Things file and the O'scale and found it needed to be reduced about 78%. ChiTuBox (the slicer) has a scaling feature, so instead of bringing all the files into SU to do the scaling, I just dropped the STLs into the Slicer and scaled it 78%. The artist was kind enough to have files that were already set up to plop onto the plate and print without supports. I just finished two sofas, a sofa table and a wing chair in one go. It's hardening as I write this.
Here's what the End Table array that I will print at one time (upside down of course). I like how she did the cabriole legs. I doubt she used SketchUp.

So with this find, plus what I'm drawing or already had, I now have all the furnishing I need and will be able to button up the building fully furnished. As a 19th building, I'm going to put the kitchen in the basement and therefore don't have to furnish one. I have a Chippendale sofa, a chaise sofa, two Chippendale love seats, sofa and coffee tables, all the end tables I'll need, nightstands and two beds (the same as I've used in the Tie Hacker's Cabin), a china cabinet, a console server, and the piece de resistance, a spiral staircase. All I need is decor and table lamps. Have to think about how to do those.
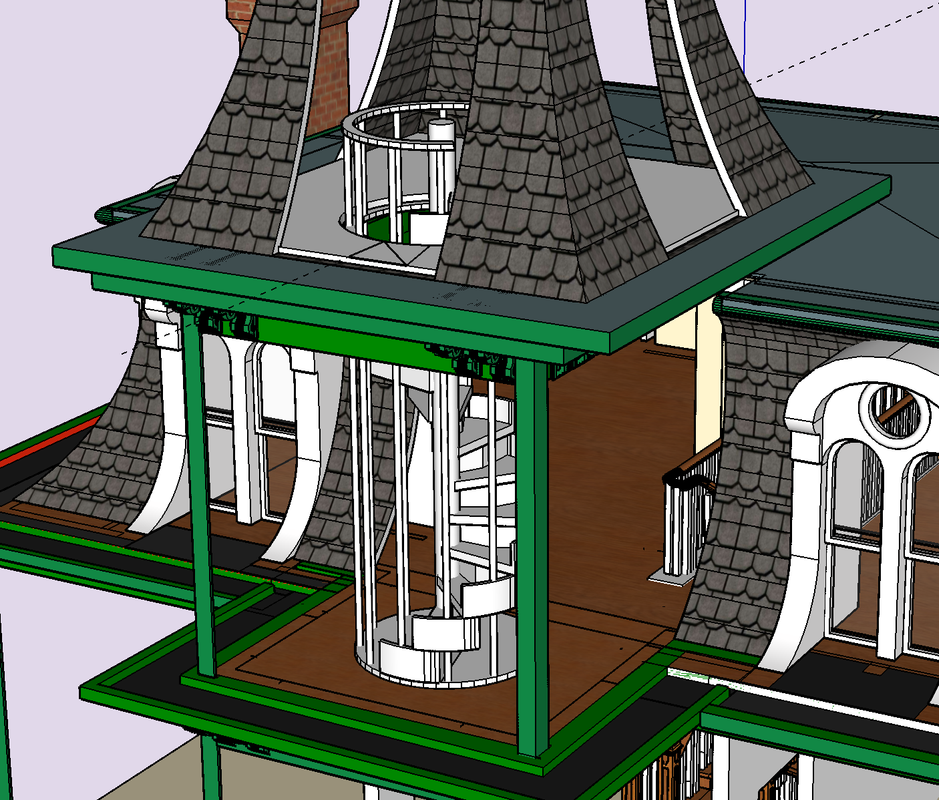
Yes! You read that correctly. I needed a way to get from the 2nd floor turret to the cupola. I'm assuming that if that space was usable there had to be a way to get up there. I searched the SU 3D Warehouse and came up empty. I then did a search on the STL sites and the same artist had a stone-looking version that would work in a pinch and was entirely printable.
I ended up drawing my own. My first version, while mechanically correctly, didn't have enough meat in it and therefore created a lot of islands in the print process forcing me to go with supports and this is the mess that would have printed. I would not have been able to extricate the part from the supports without damage.
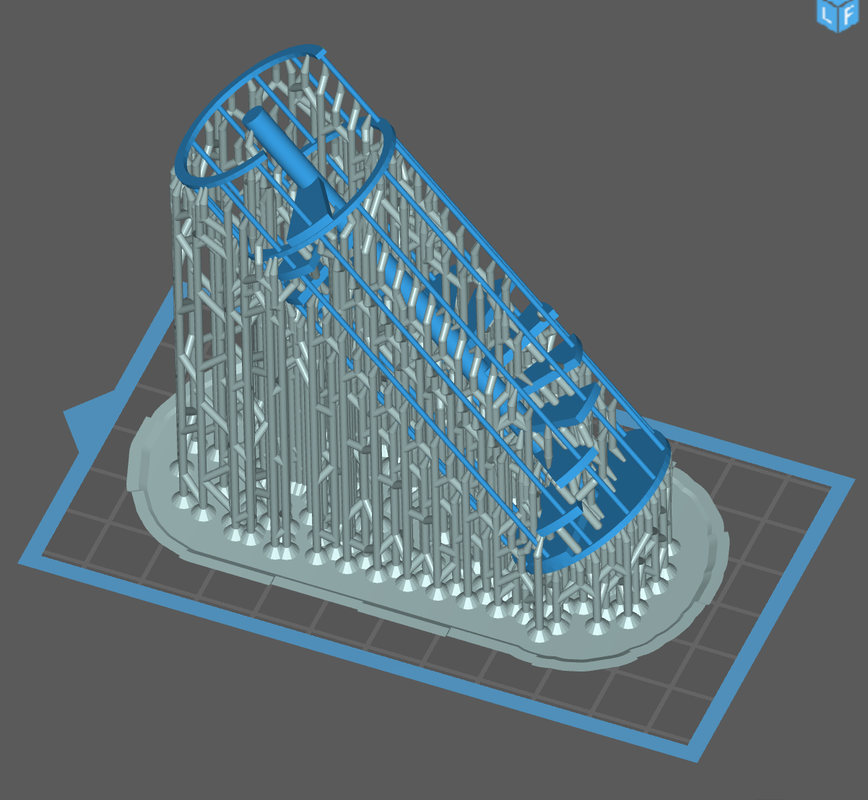
I re-designed the stair to tie the steps to one another thereby eliminating the islands and (hopefully) printing without supports. This is how the revised version looks on the slicer. The only questionable areas will be the horizontal supports. They will be constrained with the vertical rods. This part is on the printer now and will be ready tomorrow. It's a 10 hour print job.

Here's how it will go into the building. The hardest part is cutting the access hole in the cupola floor. I'll have to rout that out and hope for the best. Wished I would have thought of this addition BEFORE gluing the cupola on the turret walls.
During the time I was writing all this up the furniture finished up. The main parts printed nicely, but the reason pre-coating can be a problem showed up. There are square holes in the undersides of the upholsetered pieces to accept the separate legs. The precoat formed a hard (but thin) layer over these openings and traped un-cured resin inside. I had to sand off the precoat layer to expose the holes which did form underneath as they should. The square lugs on the legs look bigger than the slots. I may have to trim the legs a bit to fit into these holes with some careful filing. Otherwise, they will do quite well.
This crazy project certainly has been a perfect example of "scope creep". I wasn't sure, when I started, about furnishing and now in one weekend I basically furnished the whole deal. I'm going to produce some grand artworks and this time I'm going to 3D print the picture frames. Again... nuts... right! But it keeps producing more proof of concept.