YOU GET WHAT YOU PAY FOR
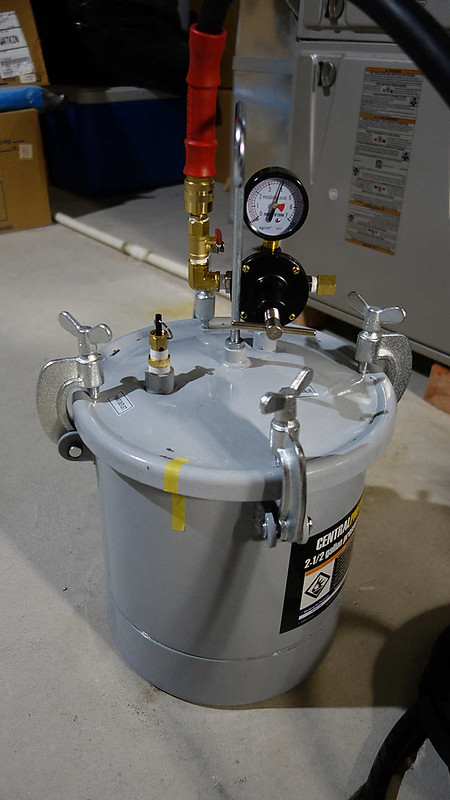
I followed this fellers instructions to convert a Harbor Freight Paint Tank:
https://www.youtube.com/watch?v=5jOttgLQvpA
I found several videos that explain how to covert this tank and by far this is the best. The man tells you everything that you need to know and it made the process easy.
Below: My rig

So, I make the changes and begin filling the pot with air. At around 30 lbs, hisssssssssssssss. The tank leaked air like a sieve. I localized the leak to the cover and it was leaking air past the gasket. I crank the bolts down and still, no improvements. I remove the lid and try repositioning it, still no improvement. Eventually, I search the internet, low and behold, this is a common problem with this tank. Some say to crank the bolts more, some say to apply silicone grease to the gasket, some say to make a new one out of silicone rubber. I inspect the gasket and what a piece of (beep). "You get what you pay for..."
Well, since I happen to have silicone rubber compound, I set out to make a new gasket. I pull the shoddy gasket, mix silicone, and make the pour.
Below: The gasket that came with is white, what I poured is blue.

Once cured I tried it again. After hand tightening, I gave the bolts an additional twist using channellock pliers. I attached the air hose and what do you know, I was able to load 50lbs. The tank is rated for 60 so I stayed below that.
Time to pot a cast. I started with using Puduo. I did the PBJ method of loading resin on both pieces, poked at areas that trap bubbles, slap the halves together, band the mold, and into the pot it went. This resin is slow curing, so I left the mold under pressure for a good 24 hours.
Here is the difference. The left cast under pressure, the right with no pressure. The difference is "clear." Many of the bubbles in the unpressurized piece reached the surface of the piece causing divots. It would have been a lot of work to fix. The pressurized piece came out absolutely perfect. I had flash to clean, but that is true with either.

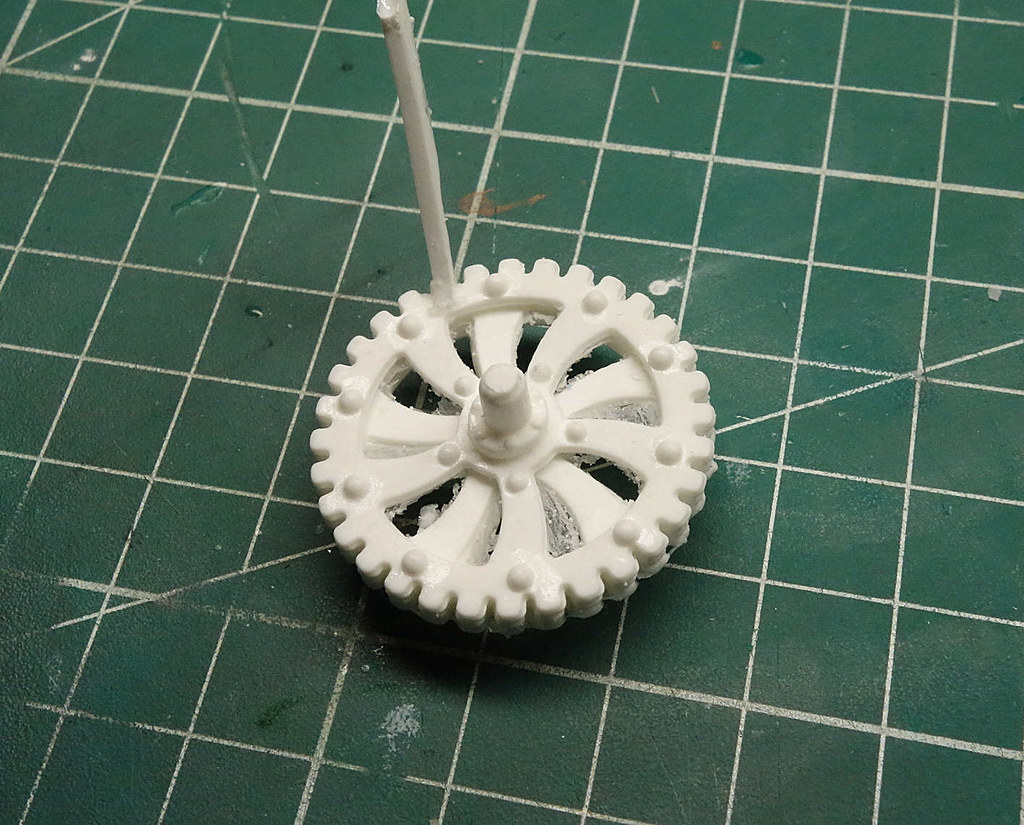
So, I tried the Smooth On resin and it came out perfect. And with both resins the pressure moved material into all the areas I had problems with. Every gear nub came out perfect, as well as the rivets.
Below: Before clean up.

After clean up


Whats the moral of the story? Sometimes you just need the right tools. I don't think I would have ever reached the goal without a PP. There is a lot more I could note but it is too much work. If anyone has questions, let me know. I will note this though:
1. I will use the Smooth On resin for the final pieces. It is stronger, lighter, and easier to sand than the Puduo. I think the Puduo resin I have is going bad because it remains somewhat pliable. It takes a few weeks to firm up and even then, body heat of handling causes it to become a little pliable. The stuff is over 3 years old now so ... probably bad.
2. I cast the above pieces using my second mold, not the third one that I made. Either would work but the third one is more difficult to demold with the added vents.
So, that is that. I have another cast in the pot. Moving forward I need to make a master for the other side of the vehicle. Then make another mold and cast.
Hopefully, soon, I can get back to assembling the model. I almost forgot what I am doing here, building a model or casting?
Anyhow, I am glad for all this. I learned a new skill and I am already scheming some casting ideas.