SEARCH FINESCALE.COM

Enter keywords or a search phrase below:

1/48 Tamiya F-4B, USMC VMFA-323 2258 WIP (FINISHED!)

4910 views
31 replies
1 rating 2 rating 3 rating 4 rating 5 rating
  • Member since
    April 2020
Posted by Eaglecash867 on Monday, September 12, 2022 7:31 PM

Finally got the landing gear assemblies and doors all attached.

"You can have my illegal fireworks when you pry them from my cold, dead fingers...which are...over there somewhere."

  • Member since
    April 2003
  • From: USA
Posted by keavdog on Monday, September 12, 2022 9:22 PM

Looking good.  Death Rattlers are/were stationed at MCAS Miramar (where I used to live).  I've been thinking about doing an F-18 in their markings.

Looks like you're on the home stretch.

Thanks,

John

  • Member since
    April 2020
Posted by Eaglecash867 on Tuesday, September 13, 2022 5:59 AM

Thanks for looking in, John!

Yup...getting closer.  Next up is putting on all of the "things under wings".  Giving this one an air-to-ground loadout.  Also have an Eduard vertical stab without ECM gear on the cap, since its a pre-1968 Phantom.

"You can have my illegal fireworks when you pry them from my cold, dead fingers...which are...over there somewhere."

  • Member since
    January 2020
  • From: Maryland
Posted by wpwar11 on Tuesday, September 13, 2022 7:27 AM

I have this and the and one of the Zoukei-Mura Phantoms.  I'm sure the Tamiya is better for fit and engineering.   Have you built one of the ZM Phantoms?  It's looking really nice.  

  • Member since
    May 2013
  • From: Indiana, USA
Posted by Greg on Tuesday, September 13, 2022 7:41 AM

Good-looking Phantom. Yes

  • Member since
    April 2020
Posted by Eaglecash867 on Tuesday, September 13, 2022 8:17 AM

wpwar11

I have this and the and one of the Zoukei-Mura Phantoms.  I'm sure the Tamiya is better for fit and engineering.   Have you built one of the ZM Phantoms?  It's looking really nice.  

 
Thanks Paul!  Haven't built one of the Zoukei-Mura Phantoms yet, but its hard to imagine anything better than this Tamiya Phantom.  I think the landing gear is one of this one's stand-out features.  The gear and all of the doors are designed to quickly and easily snap right into place AFTER the majority of the model is assembled and painted.  No messing around with masking around everything, and no brain damage coming up with ways to reliably attach the doors and actuators.
 
Thanks for looking in, Greg!

"You can have my illegal fireworks when you pry them from my cold, dead fingers...which are...over there somewhere."

  • Member since
    April 2020
Posted by Eaglecash867 on Sunday, September 18, 2022 4:59 PM

Got the centerline tank built and installed.  I cut off the molded-in mounting pins, drilled the area underneath them with a 1mm drill, and glued in some 1mm brass rod.  The whole thing slipped snugly into the 1mm brass bearings I glued inside the fuselage.  Nice clean, tight fit, with no further gluing needed.  The tank can be removed and reinstalled at will.  I love it when a plan comes together.  Pirate

"You can have my illegal fireworks when you pry them from my cold, dead fingers...which are...over there somewhere."

  • Member since
    April 2020
Posted by Eaglecash867 on Sunday, November 6, 2022 3:41 PM

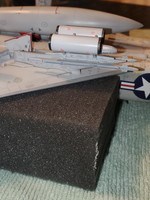
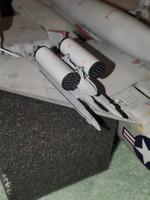
Finally figured out all of the components I had to graft together to mount a TER and 2 LAU-3/As on the inner pylons.  The pylon itself is from the kit, but the kit LAU-7 missile rails were of course meant to have AIM-9s loaded on them, which I wasn't going to be doing.  So, I found some great resin LAU-7 rails from Phase Hangar, and grafted those to the adapter brackets from the kit that I had carefully removed the kit rails from.  So now I have fully-detailed missile rails that look like empty missile rails.

The TERs are Eduard Brassin which went together pretty easily.  The trick was figuring out how to mount them on the kit pylon, which I did by drilling holes in the pylon that were the diameter of the diagonal dimension of the Brassin suspension lugs.  Then it was just press fit with a little Gorilla super glue.

The LAU-3/As?  Those were a real head-scratcher.  Simple enough assembly, but the front and rear are separate pieces.  The front piece was easy, since it sits in a recessed cup at the front of the tube.  The back piece was major brain damage, because I was going to be mating two flat surfaces, that had to first have casting blocks cut away.  Burned the first 2 sets, because those mating surfaces were anything but flat and square after cutting and sanding them.  So, I got 2 more sets, and fabricated a couple different sanding jigs made of 2024T3 aluminum, and let my little Micromark powered sanding tool do the precision work.  My jewelers saw played the role of the stone axe to do the brute force work beforehand to remove the casting blocks.  SUCCESS!  Completely square, flat, and flush joints!  Then they were mounted by cutting off the molded-on suspension lugs, drilling those stumps with 0.4mm holes (made corresponding holes in the mounting points on the TER) and then glued some 0.3mm copper beams into the LAU-3s.  Press fit and glued those onto the TERs and that was done.

Decaling all of the individual components took a long time to get right, but overall, that went well.  I think there were over 30 decals involved.  Did the corrogard leading edges on the front of the pylon too.

A couple of pics:

"You can have my illegal fireworks when you pry them from my cold, dead fingers...which are...over there somewhere."

  • Member since
    April 2020
Posted by Eaglecash867 on Sunday, December 18, 2022 4:05 PM

This is where I ran into my latest issue with trying to hang air-to-ground ordnance on this thing.  Used 0.5 mm brass rod bent at the correct 13.5 degrees to simulate the angled MER installation that Navy and Marine Corps Phantoms had.  Everything went well, except for the forward rod on this one.  The glue had already cured on it before this photo showed that the bend is standing off the bottom of the pylon by a tiny bit.  Tried to correct it by using super glue debonder...but ended up melting parts of the plastic instead.  Got another sprue coming so I can re-do it.

"You can have my illegal fireworks when you pry them from my cold, dead fingers...which are...over there somewhere."

  • Member since
    April 2020
Posted by Eaglecash867 on Saturday, January 14, 2023 1:39 PM

Got my replacement sprue for the outboard wing pylons, along with a new set of MERs.  Everything is all painted, decaled, and temporarily put together.  The MERs angle outward, per the Navy/Marine Corps solution.  I have 0.3mm holes drilled in the MERs on the stations I'll be hanging the Mk 77s on.  Just have to build the Mk. 77s next.  I'm making a square tube sanding jig for those out of 0.025" aluminum, so the leftover resin casting blocks can be removed the rest of the way by sanding, and the ends will stay flat and true instead of rounded and uneven like they tend to get with hand sanding.

"You can have my illegal fireworks when you pry them from my cold, dead fingers...which are...over there somewhere."

  • Member since
    April 2020
Posted by Eaglecash867 on Monday, February 6, 2023 6:08 PM

WHEW!  FINALLY got all of the planets aligned for the MERs and Mk77s to come together.  The Mk77s build up from 2 resin pieces, with one of them (the igniter assembly at the front of the bomb) being extremely thin.  I had to come up with a good way to get flat, square mating surfaces between the bomb body and the igniter assembly, without removing too much material from either one.  Came up with an idea for a couple of sanding jigs, which I then made out of 2024T3 sheet aluminum, some styrene sheet, and some 90 degree angle brass to put them together.  Getting all of the materials together and getting the measurements just right (without losing any fingers on the sheet metal shear) was a PITA, but it all paid off.  With that out of the way, it should be easy from here on.

When I loaded the MERs with the Mk77s, I could see in 1/48 scale the reason the 1:1 versions had to stagger the Mk77s, and that 13.5 degree outward cant of the MERs on Navy and Marine Corps Phantoms was 100% necessary.  The inboard Mk.77 at the back BARELY clears the main gear doors.

"You can have my illegal fireworks when you pry them from my cold, dead fingers...which are...over there somewhere."

  • Member since
    January 2020
  • From: Maryland
Posted by wpwar11 on Monday, February 6, 2023 8:40 PM

Everything looks really cool.  Did you use the kit decals/stencils?  Looks like they laid down nice.  Do you use decal setting solutions?  

  • Member since
    April 2020
Posted by Eaglecash867 on Tuesday, February 7, 2023 6:00 AM

It was a couple of aftermarket decal sets from Furball Aero.  One for the Marine Corps squadron markings, and another that had the hundreds of generic Navy/Marine Corps F-4B stencils.  Furball Aero decals are leaps and bounds better than anything I have ever gotten in a Tamiya kit...even the tiniest text on the stencils is readable.  On most of the kit decals for this one, that "text" is just a few squiggly lines.  I used both MicroSol and Solvaset on all of them, but I don't think that was even needed, they laid down that nicely on their own.

"You can have my illegal fireworks when you pry them from my cold, dead fingers...which are...over there somewhere."

  • Member since
    December 2002
  • From: Northern California
Posted by jeaton01 on Tuesday, February 7, 2023 11:20 AM

Nice!

John

To see build logs for my models:  http://goldeneramodel.com/mymodels/mymodels.html


  • Member since
    January 2015
Posted by TheMongoose on Wednesday, February 8, 2023 8:58 PM

Eaglecash867

This is where I ran into my latest issue with trying to hang air-to-ground ordnance on this thing.  Used 0.5 mm brass rod bent at the correct 13.5 degrees to simulate the angled MER installation that Navy and Marine Corps Phantoms had.  Everything went well, except for the forward rod on this one.  The glue had already cured on it before this photo showed that the bend is standing off the bottom of the pylon by a tiny bit.  Tried to correct it by using super glue debonder...but ended up melting parts of the plastic instead.  Got another sprue coming so I can re-do it.


not sure which debonder you have? If it's not Great Planes pick up their CA Debonder. I've never melted anything with it. I've had 2 other brands and they did melt...

In the pattern: Scale Shipyard's 1/48 Balao Class Sub! leaning out the list...NOT! Ha, added to it again - Viper MkVii, 1/32 THUD & F-15J plus a weekend madness build!

  • Member since
    April 2020
Posted by Eaglecash867 on Thursday, February 9, 2023 6:52 AM

jeaton01

Nice!

 
Thanks John!

TheMongoose
not sure which debonder you have? If it's not Great Planes pick up their CA Debonder. I've never melted anything with it. I've had 2 other brands and they did melt...

Thanks for the tip, Mongoose.  It was Bob Smith Industries Uncure that I used, so I guess I won't be using that again.  I actually used to have the Great Planes stuff, but I think I ended up spilling the whole bottle somehow.  I'll see if I can pick some more of that up.

"You can have my illegal fireworks when you pry them from my cold, dead fingers...which are...over there somewhere."

  • Member since
    April 2020
Posted by Eaglecash867 on Thursday, February 9, 2023 5:54 PM

Got the stabilators and all of the "things under wings" permanently mounted.  Just have the canopies to install, a boarding ladder, and a couple of decals around the radome.  The vertical stab mounts so tightly that I'm probably just going to skip gluing it on.  Ordered my Vietnam era hard stand and revetment walls to display it on so I won't have to continue risking disaster by picking it up to move it.

"You can have my illegal fireworks when you pry them from my cold, dead fingers...which are...over there somewhere."

  • Member since
    January 2020
  • From: Maryland
Posted by wpwar11 on Thursday, February 9, 2023 7:35 PM

Stunning!  Looks like you got some nice paint tones going on there.  Hope I get a similar result when I start mine.  Nice going Eagle.  

  • Member since
    May 2004
  • From: Land of Lakes
Posted by cbaltrin on Thursday, February 9, 2023 10:13 PM

Looks real nice. Love those Da Nang phantom squadrons!

On the Bench: Too Much

  • Member since
    April 2020
Posted by Eaglecash867 on Friday, February 10, 2023 6:13 AM

Thanks for the comments guys! Big Smile

"You can have my illegal fireworks when you pry them from my cold, dead fingers...which are...over there somewhere."

  • Member since
    May 2022
Posted by Eugene Rowe on Friday, February 10, 2023 7:56 AM

I like the coiled rattlesnake on the rudder;So cool!

  • Member since
    April 2020
Posted by Eaglecash867 on Friday, February 10, 2023 5:01 PM

Thanks Eugene!

"You can have my illegal fireworks when you pry them from my cold, dead fingers...which are...over there somewhere."

  • Member since
    April 2020
Posted by Eaglecash867 on Sunday, February 12, 2023 11:11 AM

My F-4B project that began on November 4th of 2021 is FINALLY DONE!  

"You can have my illegal fireworks when you pry them from my cold, dead fingers...which are...over there somewhere."

  • Member since
    August 2015
  • From: the redlands Fl
Posted by crown r n7 on Sunday, February 12, 2023 11:02 PM

That's beautiful, very nice job on that clean USMC F4.


 Nick.

  • Member since
    April 2020
Posted by Eaglecash867 on Monday, February 13, 2023 6:02 AM

Thanks Crown!

"You can have my illegal fireworks when you pry them from my cold, dead fingers...which are...over there somewhere."

  • Member since
    February 2003
  • From: Between LA and OC, SoCal
Posted by oortiz10 on Monday, February 13, 2023 8:54 AM

That's a great looking build. I'm a big fan of large/heavy/uncommon/odd loadouts, and I'm really digging this one!

-O

-It's Omar, but they call me "O".

  • Member since
    April 2020
Posted by Eaglecash867 on Monday, February 13, 2023 9:10 AM

Thanks O!  I was trying to replicate what I have in photos of this exact BuNo from the era matching the markings on it.  Looking at the photos, I wasn't sure why they had the staggered loadout for the Mk 77s.  Now I know why.  Their diameter and length are too large to get 6 of them on the MER.

"You can have my illegal fireworks when you pry them from my cold, dead fingers...which are...over there somewhere."

  • Member since
    April 2020
  • From: West Texas
Posted by JBRaider on Monday, February 13, 2023 9:39 PM

Beautiful build. Definitely one to be proud of.

  • Member since
    April 2020
Posted by Eaglecash867 on Wednesday, February 15, 2023 6:16 AM

Thanks JBRaider! Big Smile

"You can have my illegal fireworks when you pry them from my cold, dead fingers...which are...over there somewhere."

JOIN OUR COMMUNITY!

Our community is FREE to join. To participate you must either login or register for an account.

SEARCH FORUMS
FREE NEWSLETTER
By signing up you may also receive reader surveys and occasional special offers. We do not sell, rent or trade our email lists. View our Privacy Policy.