SEARCH FINESCALE.COM

Enter keywords or a search phrase below:

1,000 Roadwheels - 2009

154803 views
1823 replies
1 rating 2 rating 3 rating 4 rating 5 rating
  • Member since
    August 2003
  • From: Connecticut, USA
Posted by Nachtflieger on Monday, October 19, 2009 3:28 AM

Thanks for the compliment Panzer88, I appreciate it! This one has been a joy to build.Big Smile [:D]

Nate


  • Member since
    May 2006
  • From: Queensbury,NY
Posted by panzer88 on Sunday, October 18, 2009 5:32 PM
Nachtflieger- Love that camo, very,very nice.


  • Member since
    December 2002
  • From: Bury St Edmunds, Suffolk, England
Posted by Bish on Sunday, October 18, 2009 5:17 AM

NucMedTech I can only assume they did. Photos of the Ostwind are not very clear. The ones i have show the front and side. But alongside the prototype are photos of several prototype Wirbelwinds, and these had the axuallery motor removed also. And production Ostwinds were built on Ausf J hull which had it removed even in the tanks. As for success, ground mounted AA guns, like the Flak guns that are used on these vehicles are all hand powered, and they seem succesful enough.

Looking at your CMK kit, it has to be the prototype as it has the older style exhaust. This was built useing an old Ausf G chassis. I will try to get some pics up of mine tomorrow as i still have a bit of the Zim to finish off. 

I am a Norfolk man and i glory in being so


On the bench: Airfix 1/72nd Harrier GR.3/Fujimi 1/72nd Ju 87D-3

  • Member since
    August 2003
  • From: Connecticut, USA
Posted by Nachtflieger on Sunday, October 18, 2009 5:08 AM

Looking forward to seeing some pics p38jlSmile [:)]

Thanks for the comment NucMedTech. Yes, this build is definately winding down. I've been quietly working on my next entry to this build; Dragon's new Wirbelwind. I'll post some pics later today.

Nate


  • Member since
    January 2003
  • From: Hancock, Me USA
Posted by p38jl on Saturday, October 17, 2009 5:41 PM

ok... tracks are coming along.. slowly..lol  Marc's suggestion for the Testors glue works better, Also reminds me of why some of us in the area jokingly call ourselves the Acadia Glue Sniffers....lol.. reminds me of the old glue days in the 70's...whew!!! Chemicals Are Our Friends!

Also have started the Ausf J I got on Ebay.. sweet deal.. Tamiya Ausf J, with a metal barrel, zimmermit kit, PE tool set, resin stowage stuff.. the hull and running gear are moving along...

Pics to come!

Granitecon tomorrow!

[Photobucket]

  • Member since
    September 2006
  • From: Central Texas
Posted by NucMedTech on Saturday, October 17, 2009 4:25 PM

Bish-I'm building the CMK kit. Did they traverse the turrent manually then? Seems like a lot of work especially if they were trying to track planes. Makes me wonder how successful they were.

Nachtflieger- Paint job looks awesome. Starting to see the light at the end of the tunnel now.

Dupes- It's like an assembly line.

-StephenCowboy [C):-)]

Most barriers to your successes are man made. And most often you are the man who made them. -Frank Tyger

  • Member since
    August 2003
  • From: Connecticut, USA
Posted by Nachtflieger on Saturday, October 17, 2009 1:34 PM

Hi guys,

Ok, here's where I'm at right now. The camo is done, as is the base coat for the tracks. Next on the "to do" list will be ; gloss coat for decals, then flat coat, filters, detailing, etc., etc.....Big Smile [:D] This is where I'm stopping for today....my eyes are pooped!


The tracks, and road wheels are not attached yet, so if they're outof alignment, I'll take care of them during final assembly. Feel free to comment.Smile [:)]

Nate


  • Member since
    August 2003
  • From: Connecticut, USA
Posted by Nachtflieger on Saturday, October 17, 2009 11:49 AM

All three are coming along nicely, but I'm partial to the Ausf. E. Love that detailing!Big Smile [:D]

Nate


  • Member since
    December 2002
  • From: Bury St Edmunds, Suffolk, England
Posted by Bish on Saturday, October 17, 2009 11:47 AM
NucMedTech Which Ostwind kit are you building, it doesn't look like the Italeri kit. If i might make a suggestion, you might want to remove the auxillery m,otor for the turret trfers as this was removed from the prototype and wasn't present on production versions.

I am a Norfolk man and i glory in being so


On the bench: Airfix 1/72nd Harrier GR.3/Fujimi 1/72nd Ju 87D-3

  • Member since
    November 2006
  • From: Coastal Maine
Posted by dupes on Saturday, October 17, 2009 10:39 AM
It's hull madness! Cool [8D]
  • Member since
    September 2006
  • From: Central Texas
Posted by NucMedTech on Saturday, October 17, 2009 10:29 AM

Alright, rolling right along. Here is were I'm at this morning

The Sturmgeschutze

The Ostwind

and the ausf E

Most barriers to your successes are man made. And most often you are the man who made them. -Frank Tyger

  • Member since
    September 2006
  • From: Central Texas
Posted by NucMedTech on Friday, October 16, 2009 7:16 AM

Great job Detailfreak! How many will this make for the GB? I think Dupes will have to make a new badge.

Work is progressing on mine. Working on the upper hull primarily on the Sturmgeschutze. I think I'm alittle ahead of my schedule as I did not think I would get to this part until the weekend. I'll get some update pics soon.

-StephenCowboy [C):-)]

Most barriers to your successes are man made. And most often you are the man who made them. -Frank Tyger

  • Member since
    August 2003
  • From: Connecticut, USA
Posted by Nachtflieger on Friday, October 16, 2009 3:34 AM

Very nice job! I love how your engine came out...........sweet!Thumbs Up [tup] It's coming along very well, keep up the good work!Big Smile [:D]

Nate


  • Member since
    December 2006
  • From: t.r.f. mn.
Posted by detailfreak on Thursday, October 15, 2009 9:21 PM
Greetings;Yesterday was somewhat productive with the fighting compartment floor supports were installed by simply using the kit floor for a pattern.The actual floor plates are Eduard pieces.Please note that any of the interior under the floor are simply to imply that the fuel tanks and the idler machinery are in that general location.The idler machinery is there only the two floor covers hide the.The machinery itself is actually from the verlinden panzer 3 engine compartment set,and just the little angled section with the idler machinery on it.It fit on the hornisse like it belonged there.The fuel tank and lines are simply the use of artistic licsence.As the only pictures i've seen show the drivers area(and that was pretty fuzzy)and gun compartment.The engine and its cradle were primed firewall mocked into place.She's coming along steady by jerks.I'm kinda using this somewhat larger P.E. to as they say,cut my teeth?My wife is forever in aw at the minute size of some parts.This may take me to the deadline.Make a Toast [#toast]

[View:http://s172.photobucket.com/albums/w1/g-earl828/]  http://i158.photobucket.com/albums/t104/cycledupes/1000Roadwheels4BuildBadge.jpg

  • Member since
    December 2006
  • From: t.r.f. mn.
Posted by detailfreak on Wednesday, October 14, 2009 3:43 PM
great looking camo. although the second one with the whitewash looks mighty tempting.The Hornisse has progressed some.Will post some w.i.p.. soon.Thumbs Up [tup]

[View:http://s172.photobucket.com/albums/w1/g-earl828/]  http://i158.photobucket.com/albums/t104/cycledupes/1000Roadwheels4BuildBadge.jpg

  • Member since
    August 2003
  • From: Connecticut, USA
Posted by Nachtflieger on Wednesday, October 14, 2009 3:24 PM

Hey Guys,

Thanks for the positive words about my Jagdpanzer.....makes it worthwhile!Big Smile [:D]

Marc, and detailfreak: for a camo scheme, I'm going to go with what's in the kit instructions for a three color scheme.


http://www.modelarmour.com/index.php?option=com_content&view=article&id=471:dragon-jagdpanzer-iv-l70v&catid=37:kits&Itemid=60


If you click on the link, it will take you to a review on this kit. Scroll to the bottom, and you'll see the instructions. I'm planning on doing the last scheme on the page.......it's for the 7th Panzer Div.

NucMedTech: You might want to try the schurzen on your StuG after all. Personally, I think schurzen looks good on most German tanks. I just don't like it on Panthers, and Jagdpanzers.Smile [:)]

Keep up the good work guys! 

Oh yeah, I almost forgot.....I started my Dragon Wirbelwind!Big Smile [:D] Looks like this one will be another slammer!

Nate


mmc
  • Member since
    February 2007
  • From: Newcastle upon Tyne, England
Posted by mmc on Wednesday, October 14, 2009 1:58 PM

Very nice Nachflieger

Look forward to seeing her covered in paint

Mark

  • Member since
    November 2006
  • From: Coastal Maine
Posted by dupes on Wednesday, October 14, 2009 1:57 PM

The Ausfwerks one is here (great site, btw - sweet store, good tutes):

http://ausfwerks.com//techniques/indies/main.html

And the Doog's indy tute:

/forums/810349/ShowPost.aspx

I know I have a couple more links kicking around that I've used before. If I find them, I'll throw them up here. Thumbs Up [tup]

  • Member since
    November 2006
  • From: Coastal Maine
Posted by dupes on Wednesday, October 14, 2009 1:54 PM
Sure, let me round those up for you. 10 minutes.
  • Member since
    January 2003
  • From: Hancock, Me USA
Posted by p38jl on Wednesday, October 14, 2009 1:42 PM

Black Eye [B)] tutorials? humm? where?? I've read some on FSM in the mags.. so I have kinda a clue, but more info would be good! I have about 3/4 of a bottom run done. Using my miter box as a straight edge.

got a link to those tut's ??...

[Photobucket]

  • Member since
    November 2006
  • From: Coastal Maine
Posted by dupes on Wednesday, October 14, 2009 1:31 PM

Chris - did I point your toward any of the track tutorials available? Either the one by Doog on this forum, or on Ausfwerks? Makes indies easy.

Nate - super solid construction. I'm with you on the skirts/no skirts issue...what sort of scheme are we looking at for this puppy?

  • Member since
    January 2003
  • From: Hancock, Me USA
Posted by p38jl on Wednesday, October 14, 2009 10:11 AM

hey guys, all are looking good.. !

My road wheels are almost done.. just some touch up needed.. Been working on the tracks I traded Marc for, Acedemy ones.. again my first time with individual tracks..

also been working on a JAP 2 man mini sub for my GF,,, in vacuform..


[Photobucket]

  • Member since
    September 2006
  • From: Central Texas
Posted by NucMedTech on Wednesday, October 14, 2009 7:36 AM

Nachtfleiger- Nice build! Can't wait to see it with paint. I agree with you the schurzen takes away from the model. Now I'm wondering if I shoul use it on my sturmgeschutze.

Detailfreak- Working on another one! You must have a good stash of Pz IV chassis vehicles. I'm working on the only three I have.

-StephenCowboy [C):-)]

Most barriers to your successes are man made. And most often you are the man who made them. -Frank Tyger

  • Member since
    December 2006
  • From: t.r.f. mn.
Posted by detailfreak on Wednesday, October 14, 2009 6:40 AM
nachtflieger:the maybach engine is by cornerstone.yes it is fairly well detailed.and the set even comes with the small turret traverse engine.your build is looking very good.decided on a camo. scheme?

[View:http://s172.photobucket.com/albums/w1/g-earl828/]  http://i158.photobucket.com/albums/t104/cycledupes/1000Roadwheels4BuildBadge.jpg

  • Member since
    August 2003
  • From: Connecticut, USA
Posted by Nachtflieger on Wednesday, October 14, 2009 3:37 AM

Nice start on your Hornisse detailfreak.Thumbs Up [tup] Who does the resin parts? The detail on that engine looks great!

Stephen: thanks for letting me know what your other two kits are.

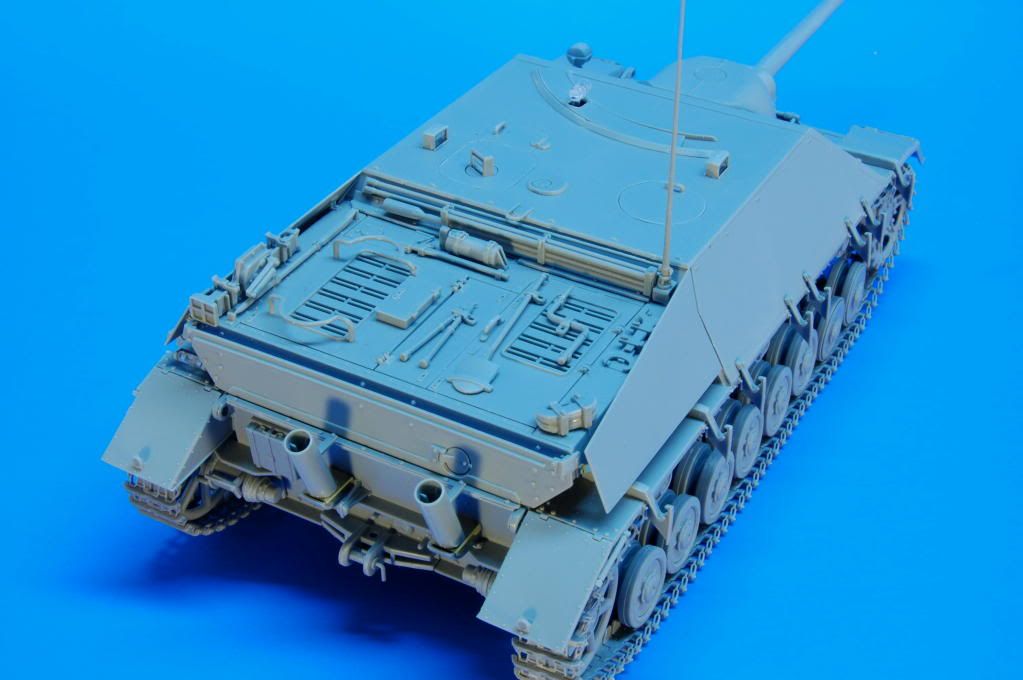
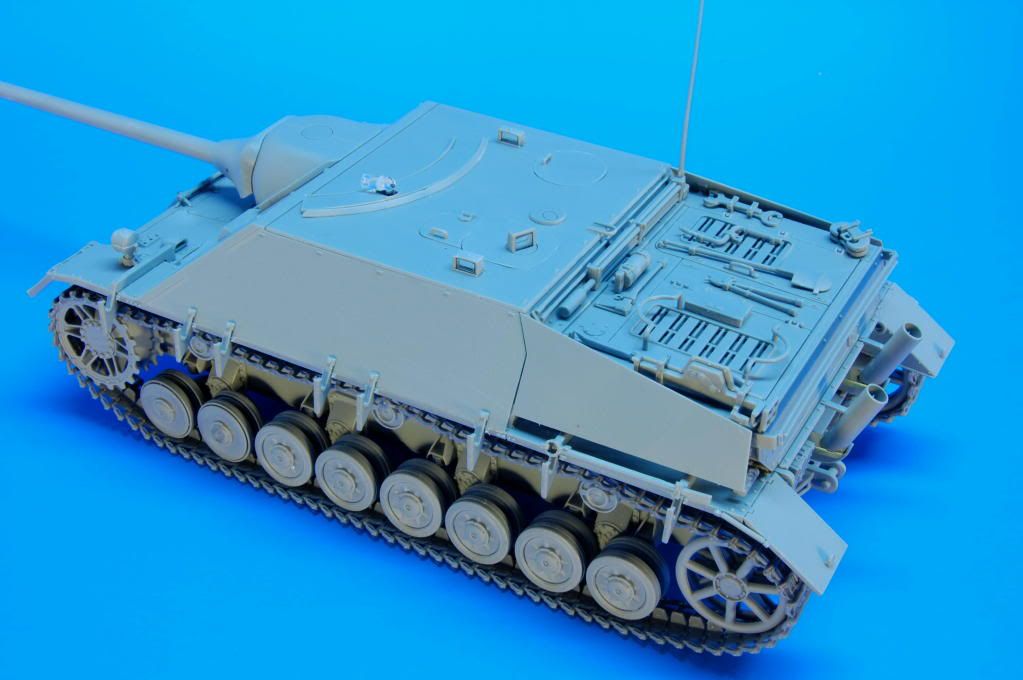
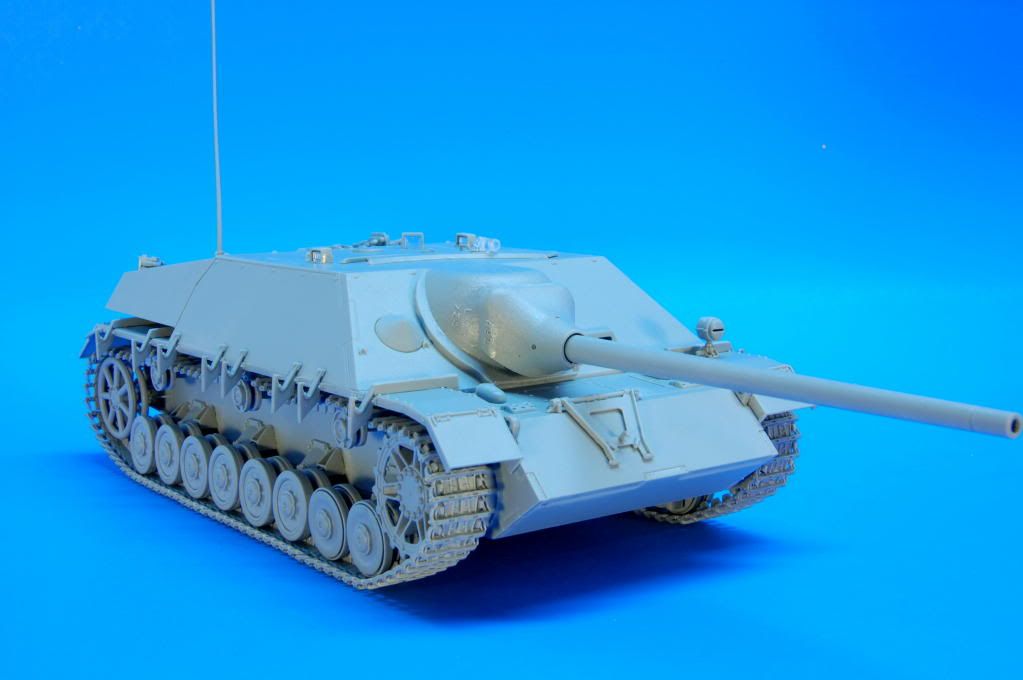
Well, I'm finished with the build portion of my Jagdpanzer. I don't know exactly how many hours I have into building it, but lets just say it went real quick, and really enjoyable! This has been a great model to build by Dragon. Not quite as easy as a modern Tamya kit, but still relatively painless. I've built some of Dragon's older kits, and finished up pulling my hair out!Banged Head [banghead] These new smart kits ( at least the ones I have built) assemble very easily, and the detail is excellent.

Here's a few pics of were I'm at right now. I probably won't start painting until this weekend, as I like to take my time when it comes to that.Smile [:)]


In this next pic, you can JUST make out the rifling in the barrel.


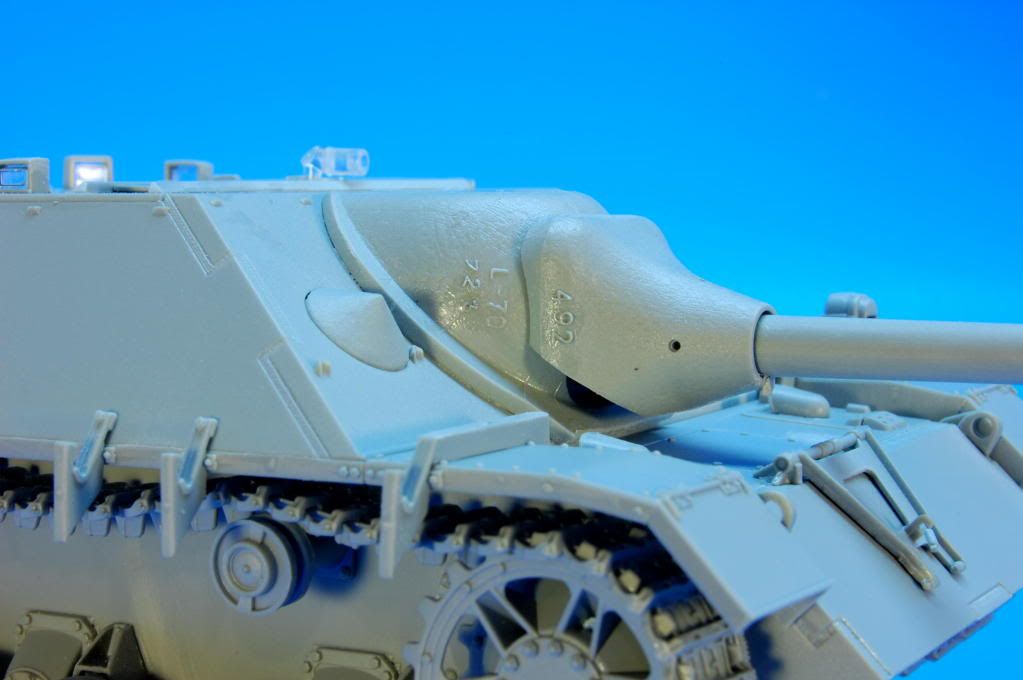
Here's a close-up of the casting numbers I applied. This was about the most difficult part of the build.


Here's two pics of the schurzen on the tank. It's just hanging on the brackets, so I can remove it. After seeing it on the kit, I don't really like it.......I think it spoils the sleek, low-slung look of the Jagdpanzer. If I build another of these, ( and I might!), I won't even add the brackets for the schurzen.
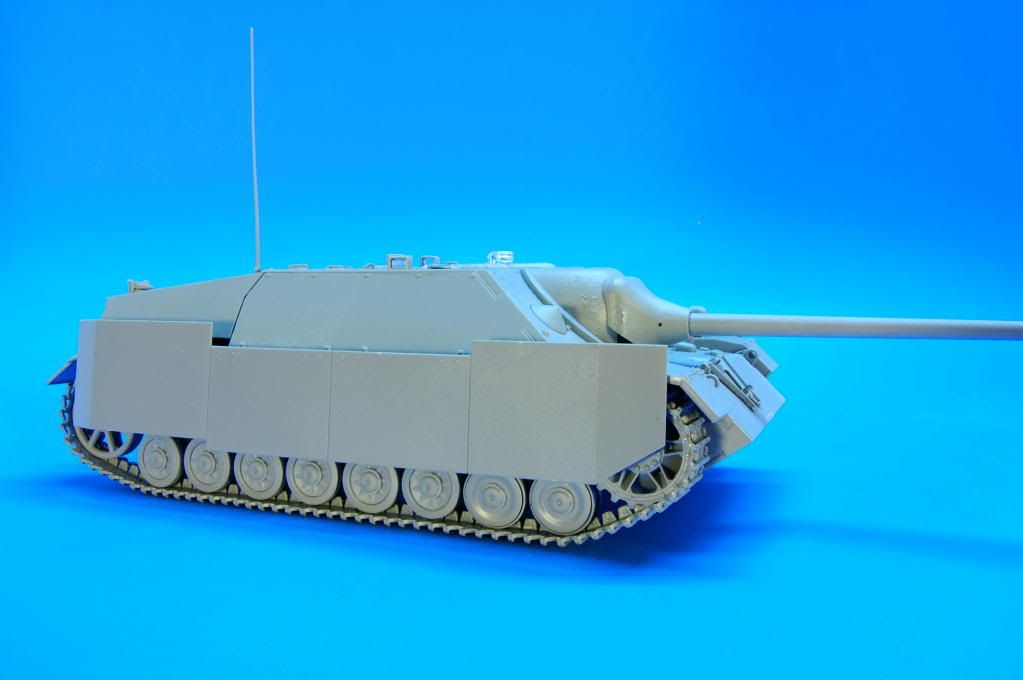
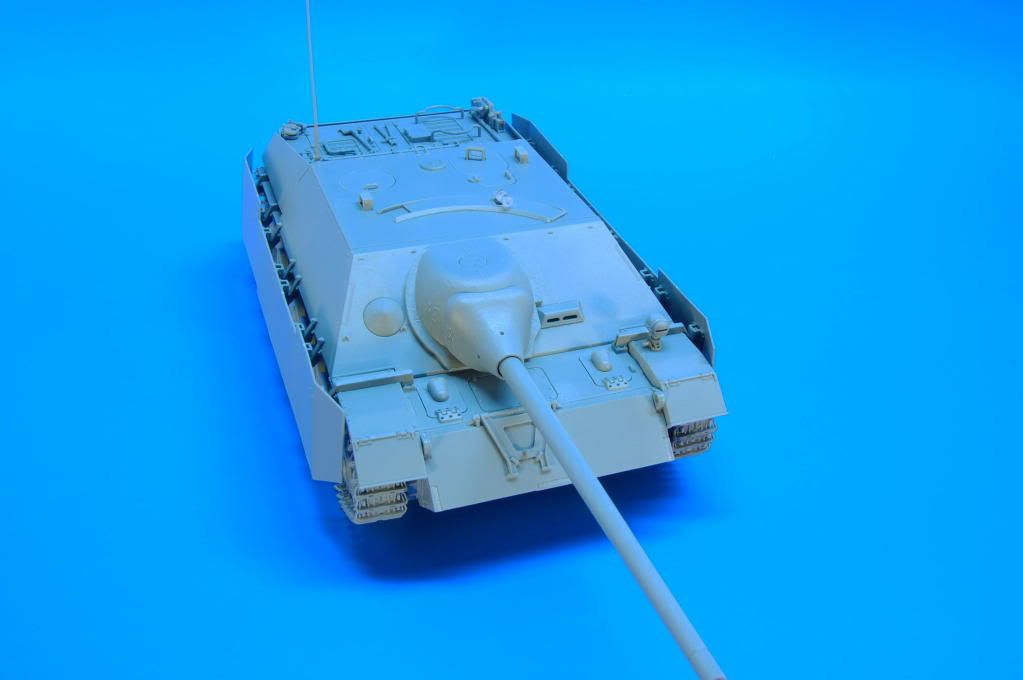


That's it for now!Big Smile [:D] Feel free to comment.


Nate


  • Member since
    November 2006
  • From: Coastal Maine
Posted by dupes on Tuesday, October 13, 2009 2:20 PM
 Bish wrote:

dupes just to let you know i have started the Ostwind tonight.

Mmmmm...Ostwind. One of my favorite 'IV chassis variants! Let's see some pics!

  • Member since
    December 2006
  • From: t.r.f. mn.
Posted by detailfreak on Tuesday, October 13, 2009 2:13 PM
Ok,got a start on the hornisse while i try to get some ammo racks together for the brummbar.As you may have read I am attempting to model this vehicle with the drivers compartment open for maintenance.So far i have assembled the running gear using that from the spares given in the Selbsfahrlette 10.5 kit.Which are much better detailed.The corners of the drivers compartment were removed and some small angles installed to support the plate if i chose to put it back in place..Well got some other business to attend to so thats all for now.One last thing,does anyone have the nuts and bolts book on the hornisse/nashorn?Looking for some better quality pics or diagrams showing the interiors.

[View:http://s172.photobucket.com/albums/w1/g-earl828/]  http://i158.photobucket.com/albums/t104/cycledupes/1000Roadwheels4BuildBadge.jpg

  • Member since
    September 2006
  • From: Central Texas
Posted by NucMedTech on Tuesday, October 13, 2009 12:44 PM

Still working on the dragon ausf E. This kit is simply amazing. All the detail they put into just the lower hull would make this kit ideal for a maintenance dio. It's got the reduction gears, gas nozzels behind the caps, individual nuts and screws for the tensioners. But all this means more time to put it together. Hopefully will progress to the upper hull by this weekend.

-StephenCowboy [C):-)]

Most barriers to your successes are man made. And most often you are the man who made them. -Frank Tyger

  • Member since
    December 2002
  • From: Bury St Edmunds, Suffolk, England
Posted by Bish on Monday, October 12, 2009 2:36 PM

dupes just to let you know i have started the Ostwind tonight. I won't be able to get any pics up until the weekend, by which time i hope the zim will be done.

Some real nice work there guys Thumbs Up [tup]

I am a Norfolk man and i glory in being so


On the bench: Airfix 1/72nd Harrier GR.3/Fujimi 1/72nd Ju 87D-3

  • Member since
    December 2003
  • From: Colorado
Posted by psstoff995 on Monday, October 12, 2009 2:23 PM
Nachtflieger- that looks like a great kit, you're really flying on this one, can't wait to see it finished- I'll have to add that to my wish list

 panzer88 wrote:

Awesome camo work Panzer88- that's one cool looking scheme- sorry I've been MIA for so long, everyone else- good work, like the salt weathering tricks

I'll have mine finished up by the end of next month or so!

Keep it up

-Chris

US Army Infantryman

JOIN OUR COMMUNITY!

Our community is FREE to join. To participate you must either login or register for an account.

SEARCH FORUMS
FREE NEWSLETTER
By signing up you may also receive reader surveys and occasional special offers. We do not sell, rent or trade our email lists. View our Privacy Policy.