SEARCH FINESCALE.COM

Enter keywords or a search phrase below:

1,000 Roadwheels - 2009

154803 views
1823 replies
1 rating 2 rating 3 rating 4 rating 5 rating
  • Member since
    September 2006
  • From: Central Texas
Posted by NucMedTech on Monday, October 12, 2009 1:44 PM

Amazing stuff guys!

That salt technique looks good, could also be one heck of a hail storm!

Nacthflieger, the other kits are the academy sturmgeschutze and the CMK ostwind

-StephenCowboy [C):-)]

Most barriers to your successes are man made. And most often you are the man who made them. -Frank Tyger

  • Member since
    November 2006
  • From: Coastal Maine
Posted by dupes on Monday, October 12, 2009 10:50 AM

Nate, Panzer88, Chris...all looking great!

That's the beauty of the IV chassis - so many different looks you can pull off. Thumbs Up [tup]

  • Member since
    January 2003
  • From: Hancock, Me USA
Posted by p38jl on Monday, October 12, 2009 8:58 AM

Nacht, thanks for the compliments..! This is first armor kit in over 27yrs.. been building planes.. Marc kept after me..lol so here I am..

In retrospect, I might next time crush up the salt more.Or use regular table salt. I used sea salt and crushed it some. We'll see after the weathering is done. I did have to rub a wet Qtip in some areas to scrub off salt residue.

Working on the wheels today, stay tuned...

[Photobucket]

mmc
  • Member since
    February 2007
  • From: Newcastle upon Tyne, England
Posted by mmc on Monday, October 12, 2009 8:08 AM

Fantastic camo panzer88 looking forward to seeing her all finished

Mark

  • Member since
    August 2003
  • From: Connecticut, USA
Posted by Nachtflieger on Monday, October 12, 2009 1:58 AM

P38jl: looking good. I like the camo scheme. It definately looks like paint chipped off. A little stark, but it will blend in when you weather it.Thumbs Up [tup]


Scott: I couldn't agree more about the detail on this kit! I can't sing it's praises loud enough. It has TRULY been a joy to build with the only glitch being my own fault. 

As a warning to others who may build this kit: There are 2 brackets on the rear sides of the engine deck that are also sprue attachment points. Be VERY careful when snipping this part from the sprue!!!!! I didn't realize they were brackets, and snipped one side off. Naturally, it went flying off into never never land, and now I'll have to scratch something to go in it's place. I have some leftover PE brass parts I plan on using for this.......they'll look more in scale I think.

Nate


  • Member since
    January 2003
  • From: Hancock, Me USA
Posted by p38jl on Sunday, October 11, 2009 8:00 PM

unsalted 3" border="0" />now AND some with the salt picked off...

unsalted 1" border="0" />

unsalted 2" border="0" />

unsalted 3" border="0" />

[Photobucket]

  • Member since
    January 2003
  • From: Hancock, Me USA
Posted by p38jl on Sunday, October 11, 2009 7:58 PM

camo 2" border="0" />camo 1" border="0" />Ok, here are some with the Desert Yellow, and camo Green and Brown

Photobucket" border="0" />

camo 2" border="0" />


[Photobucket]

  • Member since
    January 2003
  • From: Hancock, Me USA
Posted by p38jl on Sunday, October 11, 2009 7:36 PM

salt job 2" border="0" />ok.. finaly got back in the room,,, I'm trying the salt weathering trick.. here are some pics.. with salt on the Panzer Grey.

1st salt job" border="0" />


[Photobucket]

  • Member since
    December 2002
  • From: Reno, NV
Posted by espins1 on Sunday, October 11, 2009 6:58 PM

I like that camo scheme too Panzer88, way cool!

Nachtflieger - I can't wait to start on my Jagdpanzer IV L/70(V), yours is looking awesome!  I just can't start on it until I have all the parts pics ready for publishing in case I need to do a reshoot.  The detail on this kit is kick ***!  Cool [8D]

Scott Espin - IPMS Reno High Rollers  Geeked My Reviews 

  • Member since
    August 2003
  • From: Connecticut, USA
Posted by Nachtflieger on Sunday, October 11, 2009 5:57 PM

detailfreak, and panzer88....thanks for the compliments, I appreciate them!Big Smile [:D]


Panzer88......that is one COOL looking camo scheme you have there, I love it!Thumbs Up [tup] Looking very, very good!

Nate


  • Member since
    May 2006
  • From: Queensbury,NY
Posted by panzer88 on Sunday, October 11, 2009 5:05 PM

Nachtflieger- Your Jagdpanzer is coming along nicely. That looks like one sweet kit. I'm actually working on the older one right now.

For everyone else, your builds are looking sweet also. I've been without a camera for awhile, so I haven't been able to show any progress pics. I was able to snap a couple of where I'm at with my Dragon Ausf. J Late ( yes the real old kit) with the mesh schurzen. I've used the Eduard etch set for the schrzen and some Modelkasten tracks ( first time using them, very nice). Still have a ways to go though. Here's where she is right now.


  • Member since
    December 2006
  • From: t.r.f. mn.
Posted by detailfreak on Sunday, October 11, 2009 1:00 PM
the jagdpanzer is looking great,suprised they didnt give you the aluminum schurzen as in the brummbar smart kit.also noticed that the final drives are different than other dragon smart kits in the configuration of the sprocket mount.one can only wonder what goes through there twisted minds.Thumbs Up [tup]

[View:http://s172.photobucket.com/albums/w1/g-earl828/]  http://i158.photobucket.com/albums/t104/cycledupes/1000Roadwheels4BuildBadge.jpg

  • Member since
    August 2003
  • From: Connecticut, USA
Posted by Nachtflieger on Sunday, October 11, 2009 12:31 PM

Hi Mark,

Yes it is a great kit.Big Smile [:D] It does come with a full set of schurzen that is made in plastic. The edges are bevelled for a more realistic look. I haven't decided if I want the schurzen or not.......I like the look of the tank without it, but I kinda like the way the skirts look too. It looks like I could actually make them removable, which is probably the way I'll go. Thanks for looking.

Nate


mmc
  • Member since
    February 2007
  • From: Newcastle upon Tyne, England
Posted by mmc on Sunday, October 11, 2009 11:35 AM

Wow that really is a nice looking kit, I may need to raid my piggy bank Whistling [:-^].

Does it come with the schurzen armour?

Mark

  • Member since
    August 2003
  • From: Connecticut, USA
Posted by Nachtflieger on Sunday, October 11, 2009 6:58 AM

Hello All,

I've made quite a bit of progress with my Jagdpanzer. The build portion is rapidly coming to an end. Then it's on to painting and finishing.

I have to say once again how impressed I am with this kit! The detail is extremely well done, and the fit is VERY good. 

For an example, the gun barrel is a one-piece plastic affair, but it actually has rifling inside the muzzle! The magic tracks are also well detailed, but more importantly, they are super easy to assemble. I had one side built in 15 minutes......no kidding! The longest part of building them was waiting for the glue to set-up enough for me to wrap them around the running gear. Each link does have two ejector pin marks, but they are raised so you can choose to sand them off. I left them as I didn't want to spend all day sanding each link.

As I mentioned in a previous post, I plan on building this kit with all the hatches closed. I did however build up the breech end of the gun so you can see the detail in that area. I wasn't too careful with building it, as it won't be seen after I attach the roof.

The engine deck, and casemate are just placed on the hull for photo purposes. They do lock in easily, and when I do glue them down, the fit will be as close to perfect as you can get! 

Well, here's some pics of where I'm at now.


Here's a close-up of the gun mantlet........the casting numbers are molded into the plastic, but there is also another set of numbers that I have to shave off the parts trees, and apply next to these.....yikes!


That's it for now, enjoy the pics, and comments are welcome.


Nate


  • Member since
    August 2003
  • From: Connecticut, USA
Posted by Nachtflieger on Saturday, October 10, 2009 5:33 PM

Hey Stephen,

That's a very neat pic of your PzSmile [:)] IV production line!  I see you have the proper fuel for an extended modeling session (Milk Duds).Big Smile [:D]

Man, that's a LOT of parts for the bogies! The smart kits of the later versions of the Pz IV have a simplified bogie assembly that goes together pretty quick.

I may have missed it in your other posts, but what are the other two besides the Dragon kit?

I made a TON of progress on my Jagdpanzer today. The tracks on both sides are done, the gun is built and installed in the casemate, and I built quite a bit of the rear deck. Whew! I'll post some pics tomorrow.

The detail and fit on this kit are awesome! It's a bit more work than a Tamiya kit, but it's worth it. Geez,this one is moving along so nicely, I may have to build another Pz. IV variant for this build.Wink [;)]


Nate


  • Member since
    September 2006
  • From: Central Texas
Posted by NucMedTech on Saturday, October 10, 2009 3:31 PM

Moving right along Nachtflieger! I have two pics loaded up not to much progress, but at least it's something

The dragon will hold me up more than the other two obviously, but I'm trudging along

-StephenCowboy [C):-)]

Most barriers to your successes are man made. And most often you are the man who made them. -Frank Tyger

  • Member since
    August 2003
  • From: Connecticut, USA
Posted by Nachtflieger on Saturday, October 10, 2009 5:43 AM

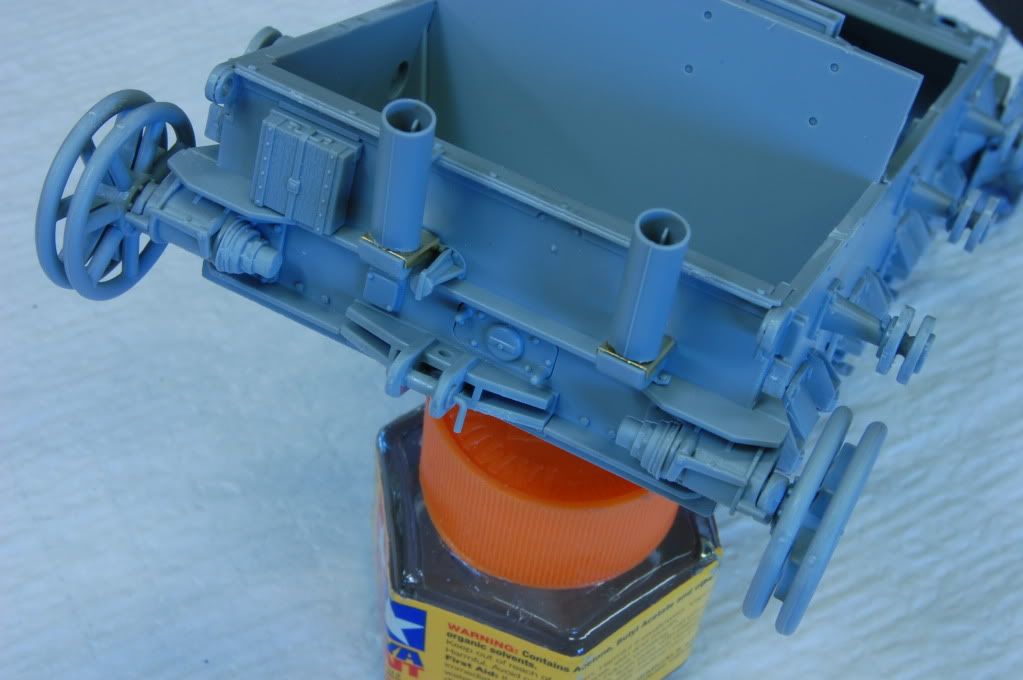
Here's a pic of the completed running gear. The road wheels are attached with blue tac, so I can remove them for painting. Now, I'll attach the fenders, and build the tracks. I'll try and post another up-date this afternoon.Smile [:)]


 On another note, it's amazing to me how much I miss during building that shows up on camera! I could swear I have the attachment points all cleaned up, but when I look at the pics, they're bigger than life! I'm gonna have to start bringing my opti-visor to work with me! Wink [;)]

Nate


  • Member since
    August 2003
  • From: Connecticut, USA
Posted by Nachtflieger on Saturday, October 10, 2009 4:41 AM

Stephen: thanks for the comments. Dragon has included two different sets of mounting plates in this kit, so I'll have plenty of spares! I have completed building the roadwheels, and bogies, and have mounted them to the hull. I will work on building the tracks today. I'll post a pic of the roadwheels before moving on to the tracks.


Marc: I am a mechanic at a bus company here in Connecticut. I have a room where I re-build starters, alternators, water pumps, etc., etc. This is where I've been building all summer. It has fairly good lighting, and a nice, steel workbench to build on! I'll take a pic of it on Monday.

I also have the responsibility of our only hydrogen fuel cell bus. Our company is going to get 5 more of these after the first of the year, so I will probably not have a lot of free time anymore!

For the most part, I only build in the morning BEFORE I punch in, and at my lunch break. Occasionally, I may sneek a little parts sanding while I'm waiting for parts to be ordered for my starters.Wink [;)]

I'll post some pics a bit later.

Nate


  • Member since
    December 2006
  • From: t.r.f. mn.
Posted by detailfreak on Friday, October 9, 2009 3:34 PM
I hear ya DUPES but never fear,my new workspace is getting closer.just takes time when you build by yourself.does'nt help much when i guy gets laid-off. cash flow is squeky tight right now.Sign - Off Topic!! [#offtopic]but i have gotten a start on #6or#7,can't even remember how many of these panzerIV's i've completed,or started for that matter.The hornisse is also been tinkering with will have the photo-etched fighting compartment,and the drivers compartment will be featured opened up for trans./brake work.Will also feature an engine compartment.anyone know if the nuts and bolts ref. is any good as far as showing these two compartments?Thumbs Up [tup]This will probably be a fairly ambitious undertaking.Whistling [:-^]I'm pretty confident in my ability to pull this off.

[View:http://s172.photobucket.com/albums/w1/g-earl828/]  http://i158.photobucket.com/albums/t104/cycledupes/1000Roadwheels4BuildBadge.jpg

  • Member since
    January 2003
  • From: Hancock, Me USA
Posted by p38jl on Friday, October 9, 2009 3:02 PM

lol.. yup.. i figured what the he**.. The Pershing was WAY over priced.. and he had nothing else I wanted or didn't already have in the stash..

On Evilbay bidding on Tamiya for $23.75 and a photo etch/resin kit for $9.99..

I thought the Kubel looked kinda mean..

[Photobucket]

  • Member since
    November 2006
  • From: Coastal Maine
Posted by dupes on Friday, October 9, 2009 1:43 PM

Chris - a Kugelblitz, eh? He's had that kit for a while...been trying to talk myself into it for eons now. Can't wait to see what you do with it! I'm sure you can find that Tamiya Pershing on Evilbay for considerably less than $52, btw.

Nate - portable tripod? Building at work? What is it exactly that you do? Smile,Wink, & Grin [swg]

Detailfreak - what I wouldn't give to get you an actual photobooth...looks great. Thumbs Up [tup]Thumbs Up [tup]

  • Member since
    December 2002
  • From: Bury St Edmunds, Suffolk, England
Posted by Bish on Friday, October 9, 2009 1:03 PM
Seems to be a popular kit this year. We have had two finished in this GB and theres one in the AA GB. Not a bad kit for an old one.

I am a Norfolk man and i glory in being so


On the bench: Airfix 1/72nd Harrier GR.3/Fujimi 1/72nd Ju 87D-3

  • Member since
    January 2003
  • From: Hancock, Me USA
Posted by p38jl on Friday, October 9, 2009 12:11 PM

Dead [xx(] ok,, went to the local hobby store with a gift cert from my recent Bday and one with some $$ left over from Xmas.. Intention was to buy some later war, WWII, American Armor.. Pershing or something.. the Pershing was $52.00!!!! ouch!!! Dead [xx(] so.. I left with a DML Kubelblitz..($42.00) only had to cough up $11.00 of my own dineros..

.Wink [;)] Marc's evil influence is spreading...


[Photobucket]

  • Member since
    September 2006
  • From: Central Texas
Posted by NucMedTech on Friday, October 9, 2009 6:47 AM

Detailfreak-Wow, that's looking good and so close to finishing it. It's good to know there is an end to all those parts.

Nachtflieger- Good work so far! Looks like your mounting plates are a little different than the ones in the E. I like to see how the bogies are.

Still working on my suspension.

-StephenCowboy [C):-)]

Most barriers to your successes are man made. And most often you are the man who made them. -Frank Tyger

  • Member since
    August 2003
  • From: Connecticut, USA
Posted by Nachtflieger on Thursday, October 8, 2009 3:29 PM

Hi Guys,

I love your Ausf. E and your 10.5 cm, detailfreak! Excellent work!Thumbs Up [tup]

Mark: Yes I agree the Jagdpanzer IV is a pretty mean looking beats, isn't it?Smile [:)]

P38jl: I think you got a very good deal on your ebay score....congrats!

Marc: Thanks for the comments! Yes, the fit is VERY good on this one, and the detail has to be seen to be appreciated!


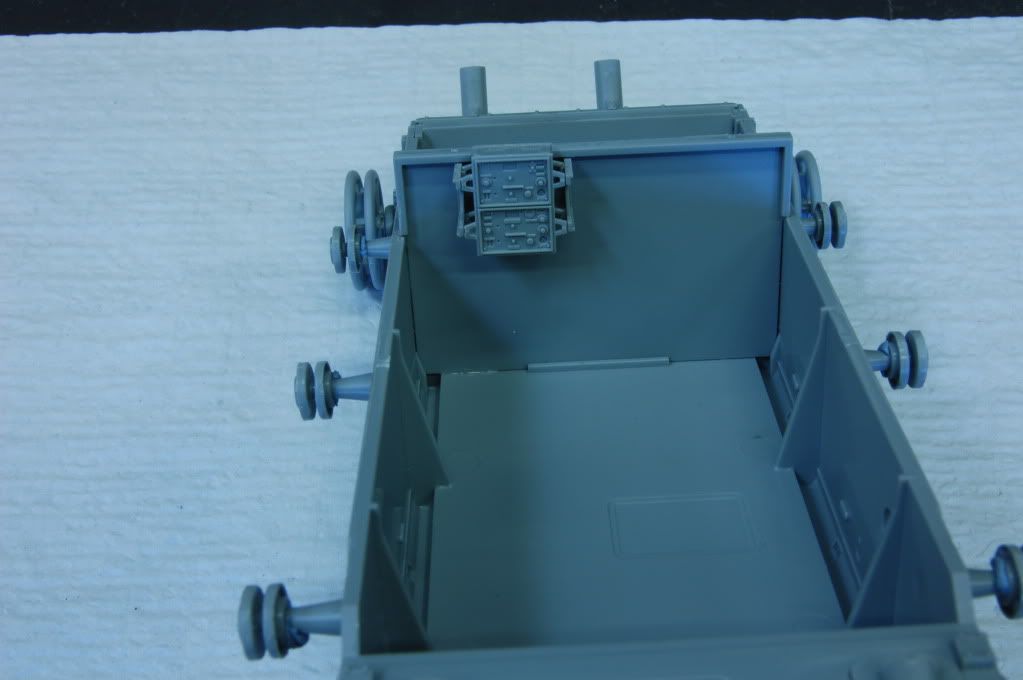
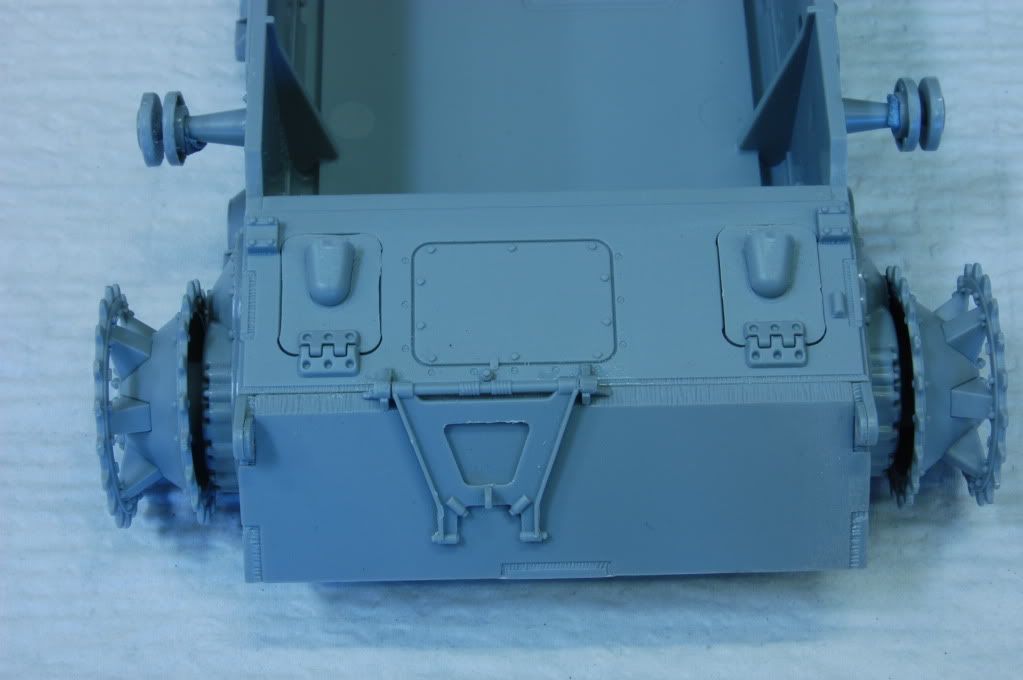
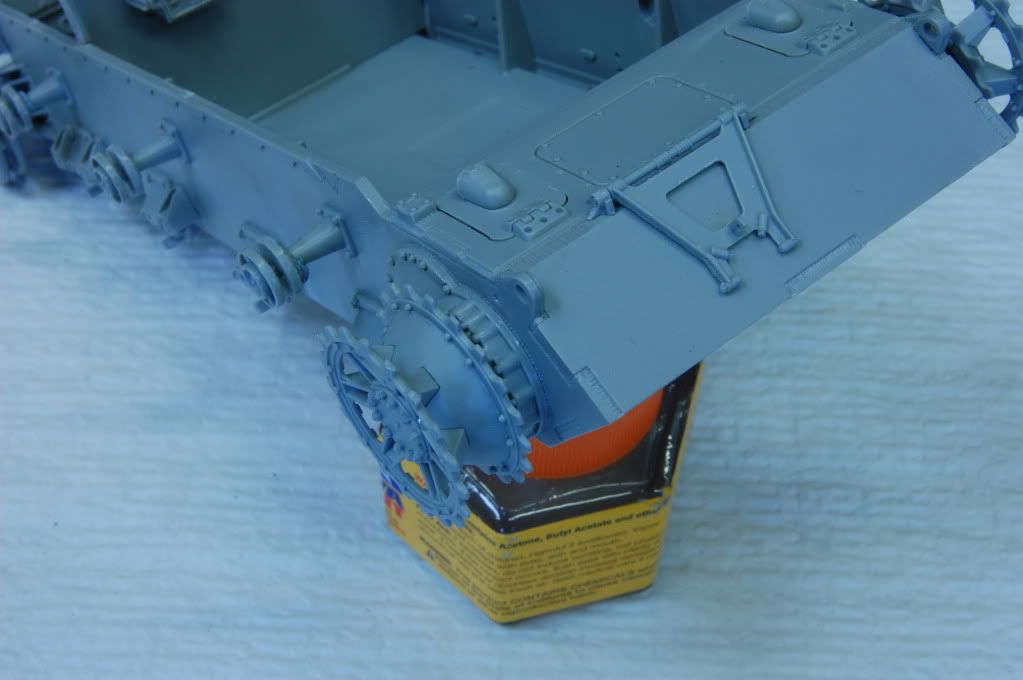
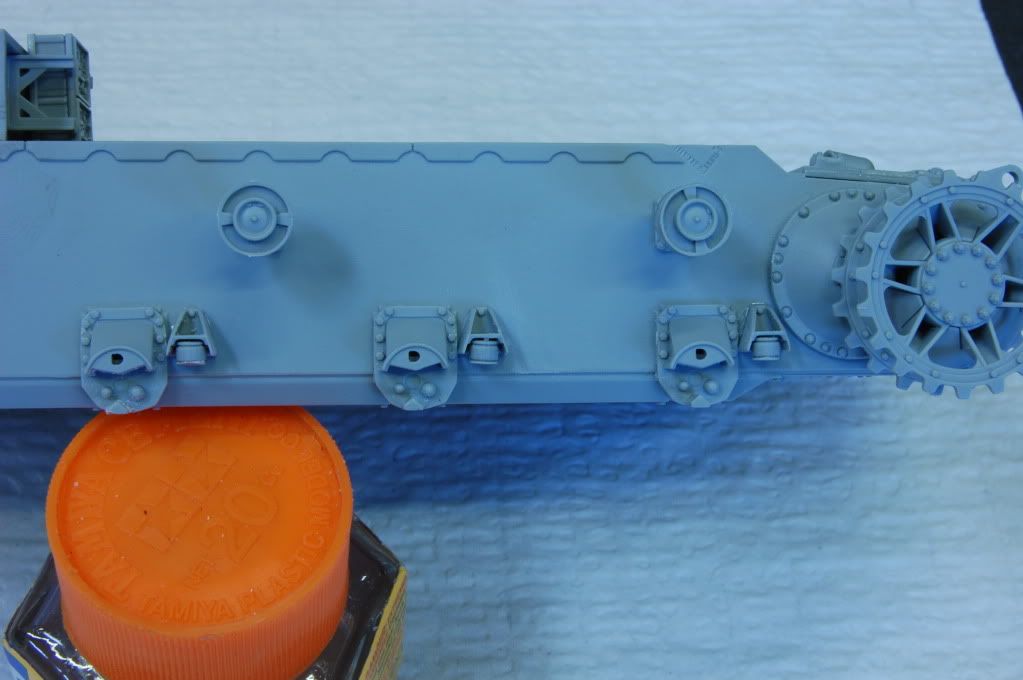
I brought my portable tri-pod to work, and took some better pics of my progress so far. Today I was able to build the upper glacis with brake doors, and the gun barrel travel lock; the "bump stops" for the bogie assemblies, and the bogie mounting plates. 

I also added the interior bulkhead and radio. I'm actually going to build this one with the hatches closed, but I wanted to let everyone see what's in the box. 

Lastly, I started work on the running gear itself. I built the drive sprockets, idlers, and return rollers, and attached them all with blue tack temporarilly.

I should say at this point, that you are given a number of options in this kit. You can choose one of three different return rollers, and late exhaust ( like I have) or the earlier cylinder type muffler. As I come across any other options, I'll let you know.

Tomorrow, I'm hoping to build the bogie assemblies with their road wheels.

Now, here are some pics of today's efforts. I'm glad I took these as I can see a lot of areas that I'll need to go back, and clean up!Blush [:I]


  • Member since
    January 2003
  • From: Hancock, Me USA
Posted by p38jl on Thursday, October 8, 2009 10:36 AM
I'm still really liking the weathering on this beast..Big Smile [:D]

[Photobucket]

  • Member since
    December 2002
  • From: Reno, NV
Posted by espins1 on Thursday, October 8, 2009 9:51 AM
Thanks Nick!  I appreciate the support!  Smile [:)]

Scott Espin - IPMS Reno High Rollers  Geeked My Reviews 

  • Member since
    December 2006
  • From: t.r.f. mn.
Posted by detailfreak on Thursday, October 8, 2009 9:40 AM
i guess it wo'nt hurt to update the 10.5 selbsfarhlette ausf.B at this time.the unit was changed from the 12th to the 16th panzer div. after more research led me to the conclusion these vehicles were issued there.and heres one in the old b.w..anyone who may know more about these vehicles ,any info. would be welcome.

[View:http://s172.photobucket.com/albums/w1/g-earl828/]  http://i158.photobucket.com/albums/t104/cycledupes/1000Roadwheels4BuildBadge.jpg

  • Member since
    January 2003
  • From: Hancock, Me USA
Posted by p38jl on Thursday, October 8, 2009 9:39 AM
Looks sweet to me.. ! Hard to tell for sure in the pics, but I like the subtle weathering..Smile [:)]

[Photobucket]

JOIN OUR COMMUNITY!

Our community is FREE to join. To participate you must either login or register for an account.

SEARCH FORUMS
FREE NEWSLETTER
By signing up you may also receive reader surveys and occasional special offers. We do not sell, rent or trade our email lists. View our Privacy Policy.