SEARCH FINESCALE.COM

Enter keywords or a search phrase below:

1,000 Roadwheels - 2009

154803 views
1823 replies
1 rating 2 rating 3 rating 4 rating 5 rating
  • Member since
    May 2006
  • From: Queensbury,NY
Posted by panzer88 on Sunday, October 25, 2009 6:02 PM
Nachtflieger-Man you are pumping these things out. Your Jagdpanzer came out awesome and this Brummbar looks like it will be a winner also.


  • Member since
    November 2006
  • From: Coastal Maine
Posted by dupes on Sunday, October 25, 2009 7:39 PM
Chris - two at once, eh? Can't wait to see how THAT pans out! Smile,Wink, & Grin [swg]
  • Member since
    August 2003
  • From: Connecticut, USA
Posted by Nachtflieger on Monday, October 26, 2009 2:36 AM

Thanks panzer88! Yeah, I have been on a roll lately!Big Smile [:D] These new smart kits are very buildable, so they build up pretty quick. I'm planning on building this one almost out of box, the only addition being magic tracks versus the DS tracks that are included with the kit. I'm going to use one of the markings from the kit for a Brummbar in Italy. I'm thinking I may be able to paint it next weekend.Smile [:)]


p38jl: Indy tracks are a pain sometimes, but they are worth it! Coming along good.Smile [:)]

Nate 


  • Member since
    November 2006
  • From: Coastal Maine
Posted by dupes on Monday, October 26, 2009 8:32 AM
Nate - I just noticed your Tank Destroyer badge from '05...is there some sort of story there about you joining back in '03, hanging around a bit, then coming back recently? Or were you just a perpetual "lurker"? Laugh [(-D]
  • Member since
    August 2003
  • From: Connecticut, USA
Posted by Nachtflieger on Monday, October 26, 2009 3:36 PM

Marc: Check your PM for an explanation.

Nate


  • Member since
    January 2003
  • From: Hancock, Me USA
Posted by p38jl on Monday, October 26, 2009 5:15 PM

Wink [;)] yup Marc, 2 at once.. 3 if ya include the Jap Mini sub.. The Tamiya panzer goes together nicely.. its moving along. I got the metal barrel and front mantlet zimmermit plate added last night. The mantlet and other parts took a bit of fiddling to get them to fit nice, but it worked out well.. Pics soon...I'm at the point to add the resin zimmermit to the hull that came with the kit.

The Ausf J, just needs the tracks painted, weathered... then the tank weathered and tools attached, and final touches.. maybe this week.. completion...


Right now I;m stuck at the fire station entering run reports.. blah..Angry [:(!]

maybe in the fumes later...Big Smile [:D]

[Photobucket]

  • Member since
    September 2006
  • From: Central Texas
Posted by NucMedTech on Tuesday, October 27, 2009 7:28 AM

Been away for a week, now looking forward to getting some bench time. Guys your builds are looking great.

Bish- That zim looks great. To rehash a previous subject about the turrent motor. The flak unit on the ground would be lighter since it did not have the extra steel protection the Ostwind had. Not saying that your not correct as I have no info on this vehicle. Just seems that they would've used some device to help traverse the turrent.

Nachtflieger- Looking forward to how the Brummbar turns out. If it's any thing like the jagd it should be awesome.

I'll start up on my builds again tonight after work and will post pics as soon as I have anything worthwhile to show.

-StephenCowboy [C):-)]

Most barriers to your successes are man made. And most often you are the man who made them. -Frank Tyger

  • Member since
    December 2002
  • From: Bury St Edmunds, Suffolk, England
Posted by Bish on Tuesday, October 27, 2009 7:48 AM
 NucMedTech wrote:

Bish- That zim looks great. To rehash a previous subject about the turrent motor. The flak unit on the ground would be lighter since it did not have the extra steel protection the Ostwind had. Not saying that your not correct as I have no info on this vehicle. Just seems that they would've used some device to help traverse the turrent.

-StephenCowboy [C):-)]

Its not as hard as it might seem. The Wirbelwind deffinatly had the turret motor removed as there are a number of pics of both prototype and production versions with it blanked off, and this must have been at least as heavy as the Ostwind turret. Also, the Pz IV Ausf J had it removed to make space for extra fuel, and this was deffiantly heavier. And i once trained as a warrior gunner, and as well as power traverse it had hand traverse, and while it does take a bit of effort its not to hard. Just to me, seeing as the Ostwind was built on the Ausf J hull it would make sense that it was removed. But then seeing as there is so little info on the production Ostwind it could really be anyones guess as to what they really did with it.

I am a Norfolk man and i glory in being so


On the bench: Airfix 1/72nd Harrier GR.3/Fujimi 1/72nd Ju 87D-3

  • Member since
    August 2003
  • From: Connecticut, USA
Posted by Nachtflieger on Tuesday, October 27, 2009 2:57 PM

Hey Stephen.......thanks for the comments.Smile [:)] The Brummbar is really starting to take shape now. I've built the gun, the engine deck, and the main housing. Lots of bits and pieces left though, hatches, tools, schurzen mounts etc. Oh, and I still have to build the track. I'm hoping to get some paint on it this weekend.

Nate


  • Member since
    September 2006
  • From: Central Texas
Posted by NucMedTech on Tuesday, October 27, 2009 4:13 PM

Bish- Interesting info. I'll remove the muffler and see if I can find something to put in it's place. Like a box similar to what the sturm. has.

Nachtflieger- looking forward to your progress pics.

-StephenCowboy [C):-)]

Most barriers to your successes are man made. And most often you are the man who made them. -Frank Tyger

  • Member since
    December 2002
  • From: Bury St Edmunds, Suffolk, England
Posted by Bish on Tuesday, October 27, 2009 5:37 PM
 NucMedTech wrote:

Bish- Interesting info. I'll remove the muffler and see if I can find something to put in it's place. Like a box similar to what the sturm. has.

-StephenCowboy [C):-)]

You don't need a box. The Germans simply welded a small steel plate over the opening left behind. If you look at the pic off the back of mine, theres a small white patch on the left side. Thats all you need. I just used two pieces of sheet styrene, one ontop of the other, then put putty around the edge. If you can hang on till the weekend i will try to get a close up pic of mine and scan a close up pic i have of the real thing on the back of a wirbelwind.

I am a Norfolk man and i glory in being so


On the bench: Airfix 1/72nd Harrier GR.3/Fujimi 1/72nd Ju 87D-3

  • Member since
    September 2006
  • From: Central Texas
Posted by NucMedTech on Wednesday, October 28, 2009 7:25 AM

Sounds good Bish. I'm working on the upper hull of the sturmgeschutze right now so I probably won't get to the Ostwind until these weekend anyhow. Look forward to the reference pic, but there's no rush.

-StephenCowboy [C):-)]

Most barriers to your successes are man made. And most often you are the man who made them. -Frank Tyger

  • Member since
    April 2005
Posted by Thunderbolt379 on Wednesday, October 28, 2009 7:50 AM

Hi Guys,

It's been ages since I was round this GB, though I keep up with the messages and watch everyone's fabulous builds. Life's been pretty hectic and I have nearly a dozen builds in progress all clamouring for my limited bench time.

I scored a Dragon Kugelblitz on eBay today though I'm not sure if it'll arrive in time to be part of this GB. I'm hoping to get back to my Tamiya StuG IV shortly, and will be aiming to complete at that one only, as something tells me the Italeri Jagdpanzer will be a model too far by the end of the year.

Cheers, great work and wonderful references here,

Mike/TB379

http://worldinminiature.blogspot.com/

  • Member since
    November 2006
  • From: Coastal Maine
Posted by dupes on Wednesday, October 28, 2009 9:18 AM
Thunderbolt - looking forward to more progress on your StuG IV! Hey, maybe we'll get lucky and see some of that Jagdpanzer as well. Wink [;)]
  • Member since
    January 2003
  • From: Hancock, Me USA
Posted by p38jl on Wednesday, October 28, 2009 9:19 AM

gRRRR...Angry [:(!],, a structure fire and a phantom EMS call back to back.. took up most of my evening last night.. so.. no building..

Hopefully tonight!

[Photobucket]

  • Member since
    December 2002
  • From: Bury St Edmunds, Suffolk, England
Posted by Bish on Wednesday, October 28, 2009 2:35 PM
 NucMedTech wrote:

Sounds good Bish. I'm working on the upper hull of the sturmgeschutze right now so I probably won't get to the Ostwind until these weekend anyhow. Look forward to the reference pic, but there's no rush.

-StephenCowboy [C):-)]

No worries. I can only scan pics at the weekend as my scanner is at home, and i have problems downloading pics onto the site from camp as the signal is lousy, so i will do them this weekend with some update pics.

I am a Norfolk man and i glory in being so


On the bench: Airfix 1/72nd Harrier GR.3/Fujimi 1/72nd Ju 87D-3

  • Member since
    January 2003
  • From: Hancock, Me USA
Posted by p38jl on Thursday, October 29, 2009 10:02 AM

Ahh.. fairly quiet night..

Got some resin ZIM on my Ausf H..'

Pics soon..


[Photobucket]

  • Member since
    August 2003
  • From: Connecticut, USA
Posted by Nachtflieger on Friday, October 30, 2009 3:47 PM

OK Guys,

This is where I'm at with the Brummbar. Not as much as I had hoped to get done this week, so instead of painting this weekend, I'll concentrate on finishing the build. Not too much left really. Just the tools, schurzen brackets, and schurzen, and the aircleaner, and the tracks. Hopefully, I'll finish it up iver the weekend, and start painting it sometime during the week. I'm going to build this as a command Brummbar, with two antennas, and one with the star assembly on top. It will be the one on the markings sheet based in Italy, and will be dark yellow with wavy red brown lines. Well, here's the pics. Feel free to comment.

Nate


  • Member since
    November 2006
  • From: Coastal Maine
Posted by dupes on Friday, October 30, 2009 5:09 PM

Nate - looks real solid. Those pistol port plugs are cool - is that a kit part?

Only thing I'm noticing is on the front-mounted spare tracks...are those ejector marks, or am I just seeing where you filled already?

Flying through another one! Cool [8D]

  • Member since
    August 2003
  • From: Connecticut, USA
Posted by Nachtflieger on Friday, October 30, 2009 5:27 PM

Hi Marc,

You're right....those are ejector pin marks. I have sanded them twice now, and you can still see the ghost of an outline. I'm hoping the paint will take care of it, but if not.......back to the sanding sticks!Banged Head [banghead]

The pistol ports are included in the kit, but I substituted some ship anchor chain for the pe chain supplied in the kit. As nice as pe is, it just doesn't work for some things!Wink [;)]

Thanks for looking!Smile [:)]

Nate


  • Member since
    November 2006
  • From: Coastal Maine
Posted by dupes on Friday, October 30, 2009 6:07 PM
 Nachtflieger wrote:

The pistol ports are included in the kit, but I substituted some ship anchor chain for the pe chain supplied in the kit.

Is that something you're able to pick up locally?

  • Member since
    December 2002
  • From: Bury St Edmunds, Suffolk, England
Posted by Bish on Saturday, October 31, 2009 7:37 AM

NucMedTech heres the image i scan of the back of a Wirbelwind. The Ostwind prototype would have the same plate IMHO. I'll get the pics of my kit up later today.

I am a Norfolk man and i glory in being so


On the bench: Airfix 1/72nd Harrier GR.3/Fujimi 1/72nd Ju 87D-3

  • Member since
    December 2002
  • From: Bury St Edmunds, Suffolk, England
Posted by Bish on Saturday, October 31, 2009 1:33 PM

Heres my latest pics. Construction is now complete, so hopefully i can get some paint on on Monday night.  I normally do paint my tools off the vehicle and add them at the end. But with this kit i don't even have to worry about that as the pics show no tools fitted.

All comments appreciated as always.

NucMedtech I tried getting a close up of that area at the rear but they came out really blurred. Luckly my model skills are alot better than my photography. But hopefully you can see on the real thing.


I am a Norfolk man and i glory in being so


On the bench: Airfix 1/72nd Harrier GR.3/Fujimi 1/72nd Ju 87D-3

  • Member since
    November 2006
  • From: Coastal Maine
Posted by dupes on Saturday, October 31, 2009 5:21 PM
Bish - that looks really good so far...the homemade zim is sweet, and that gun assembly is pretty awesome. Who's PE parts are those on there?
  • Member since
    August 2003
  • From: Connecticut, USA
Posted by Nachtflieger on Saturday, October 31, 2009 5:39 PM

Hi Marc,

While the nearest hobby store to me does sell chain for ship models, I picked my chain up from Free Time Hobbies on line.

Nate


  • Member since
    December 2002
  • From: Bury St Edmunds, Suffolk, England
Posted by Bish on Saturday, October 31, 2009 6:12 PM

 dupes wrote:
Bish - that looks really good so far...the homemade zim is sweet, and that gun assembly is pretty awesome. Who's PE parts are those on there?

The darker ones are Eduard. But some of the clamps in the pics were different from the ones in the set, so i used a few Aber ones two. Though the Eduard set is for the Italeri kit, it seems to be more right for a late model Pz IV hull, like a J. So i just adapted them to fit the photo. The barrel is from Aber.

I am a Norfolk man and i glory in being so


On the bench: Airfix 1/72nd Harrier GR.3/Fujimi 1/72nd Ju 87D-3

  • Member since
    January 2003
  • From: Hancock, Me USA
Posted by p38jl on Saturday, October 31, 2009 9:20 PM

Good evening... Here are few shots of my Ausf H and J in various stages..

This is the J's rear hull with the resin zimmermit replacement.panzer j hull rear" border="0" />

J Turret with resin Zim on the mantlet and the front plate

Ausf J front" border="0" />

J with resin zim on the turret skirts, I knicked them up a bit to make look not new...

Ausf J turret skirt" border="0" />

another J shot, bow on...

Ausf J on H" border="0" />

J turret oeverhead..

AUsh J turret" border="0" />

H and J.. side by side

Ausf J front 1" border="0" />

H bow on with tracks..no weathering yet..

Ausf H frontal" border="0" />

[Photobucket]

  • Member since
    September 2006
  • From: Central Texas
Posted by NucMedTech on Monday, November 2, 2009 6:48 AM

P38j-Your H is coming along quite well.  I'm liken it!!

Nachtflieger- That brummbar is sweeeet! Can't wait to see the paint.

Bish- Thanks for the pics it really helps. Your kit is looking great! Which one are you building again. The gun looks more detailed that the one in my kit.

I've got the upper hull done on the sturm and now working on the Ostwind. Once that is done I'll be working on the E. Iexpect that part to take the longest. Did not get any progress pics this weekend so I'll try to get some up this week.

StephenCowboy [C):-)]

Most barriers to your successes are man made. And most often you are the man who made them. -Frank Tyger

  • Member since
    December 2006
  • From: t.r.f. mn.
Posted by detailfreak on Monday, November 2, 2009 9:39 AM
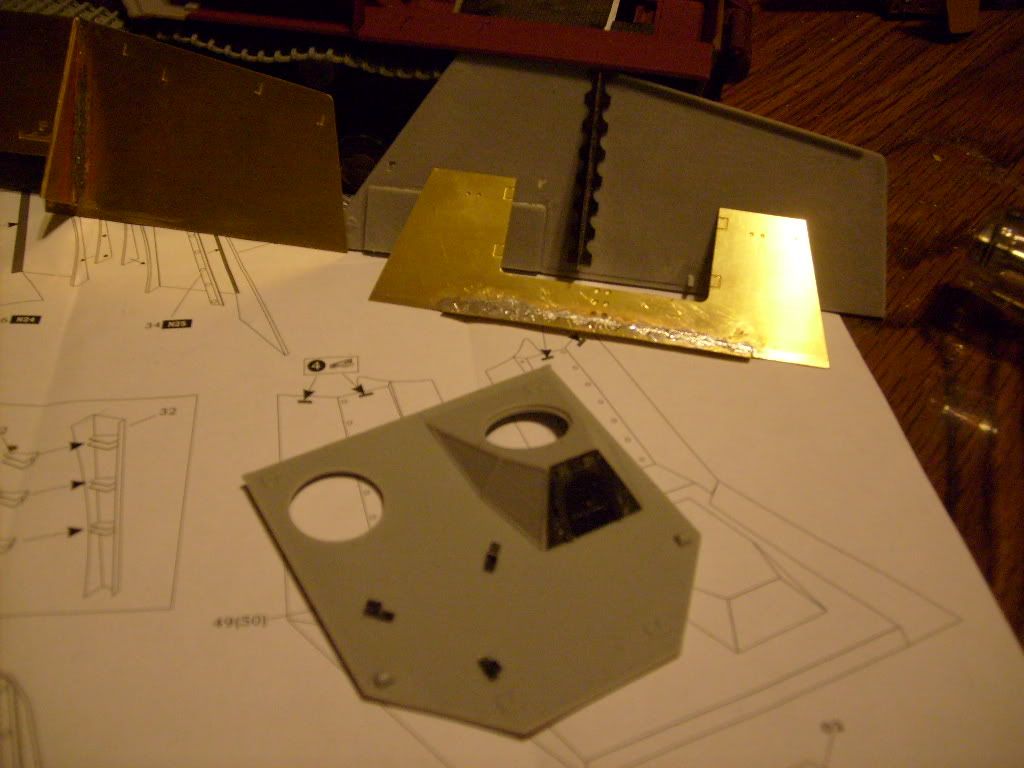
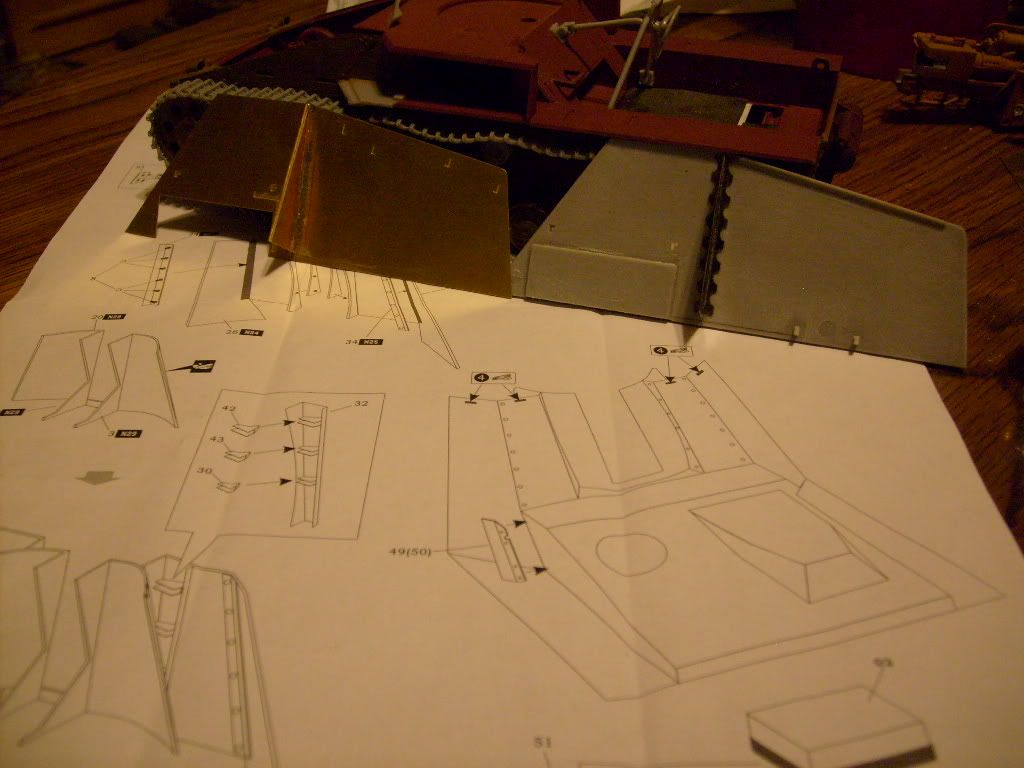
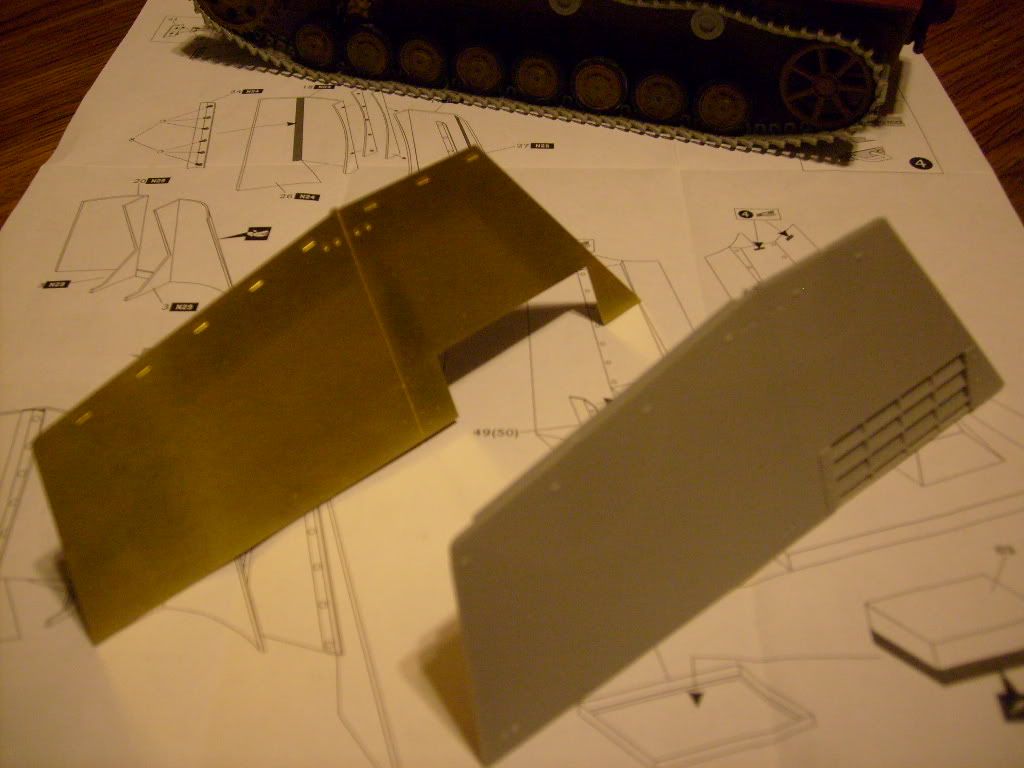
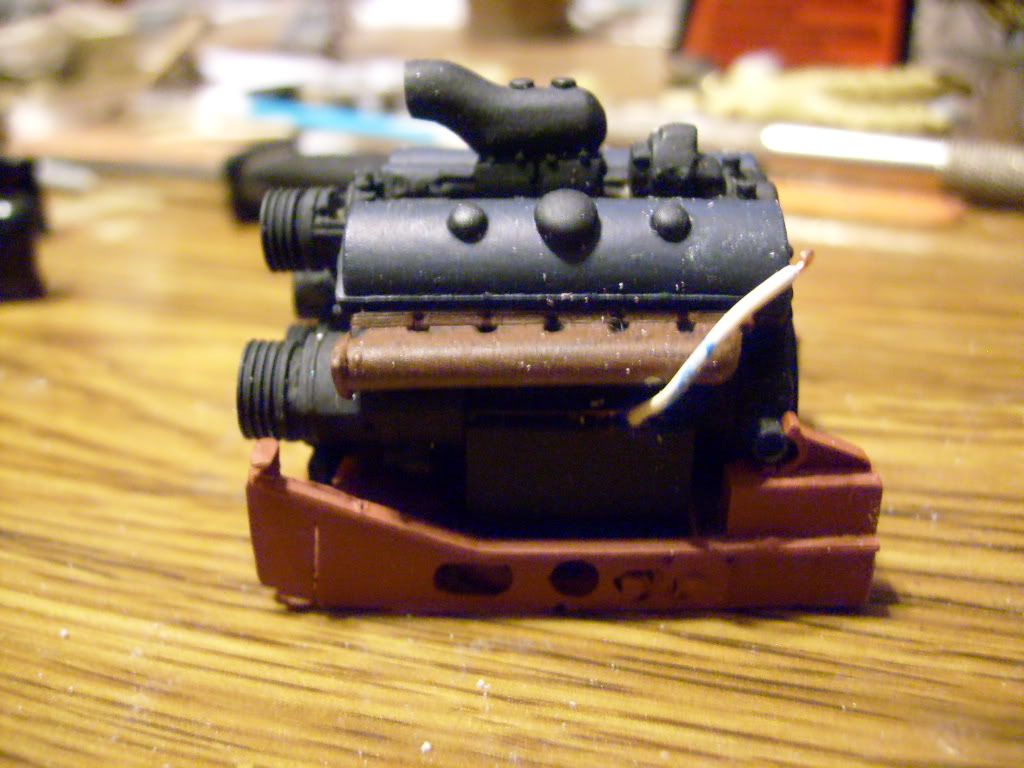
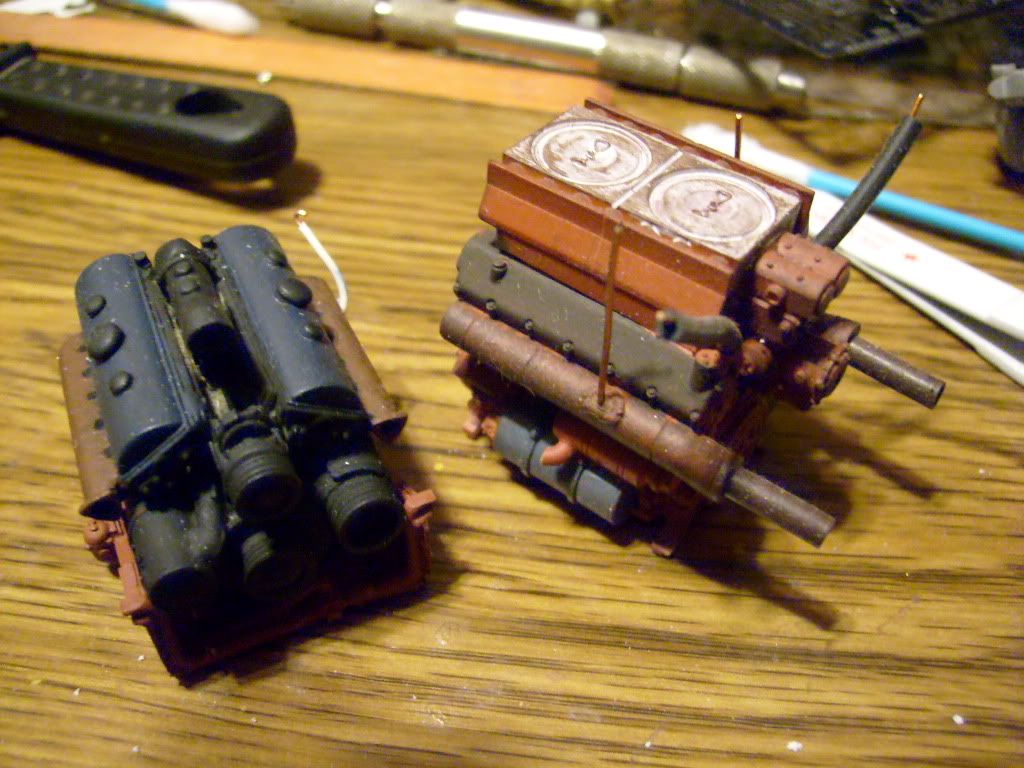
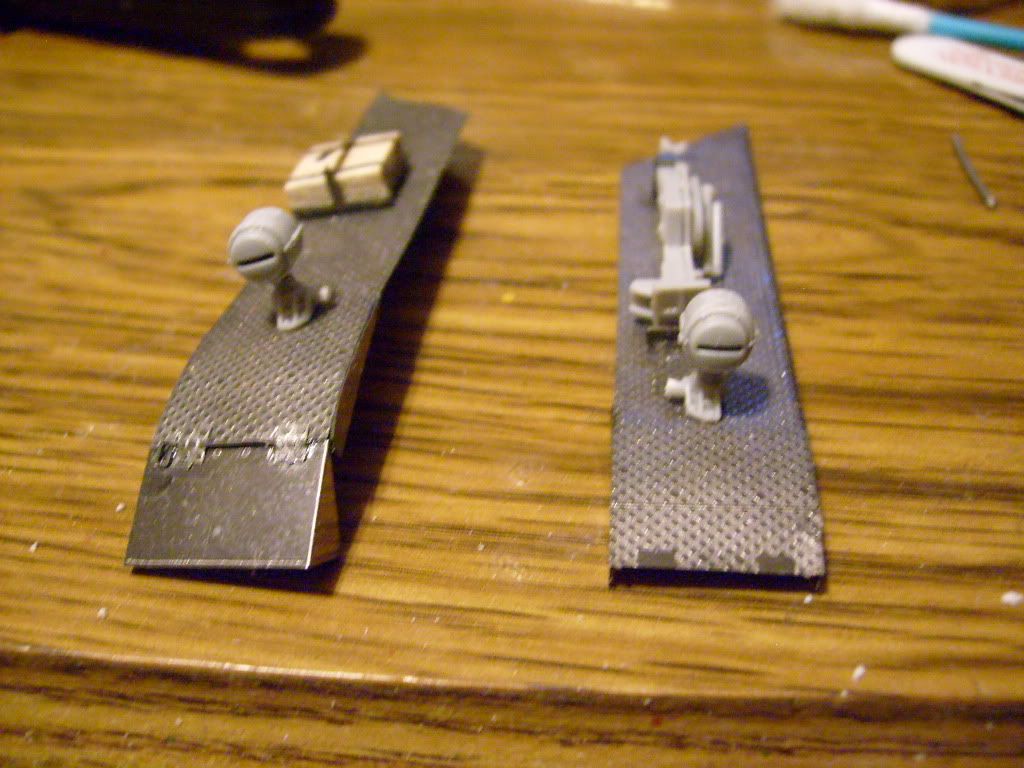
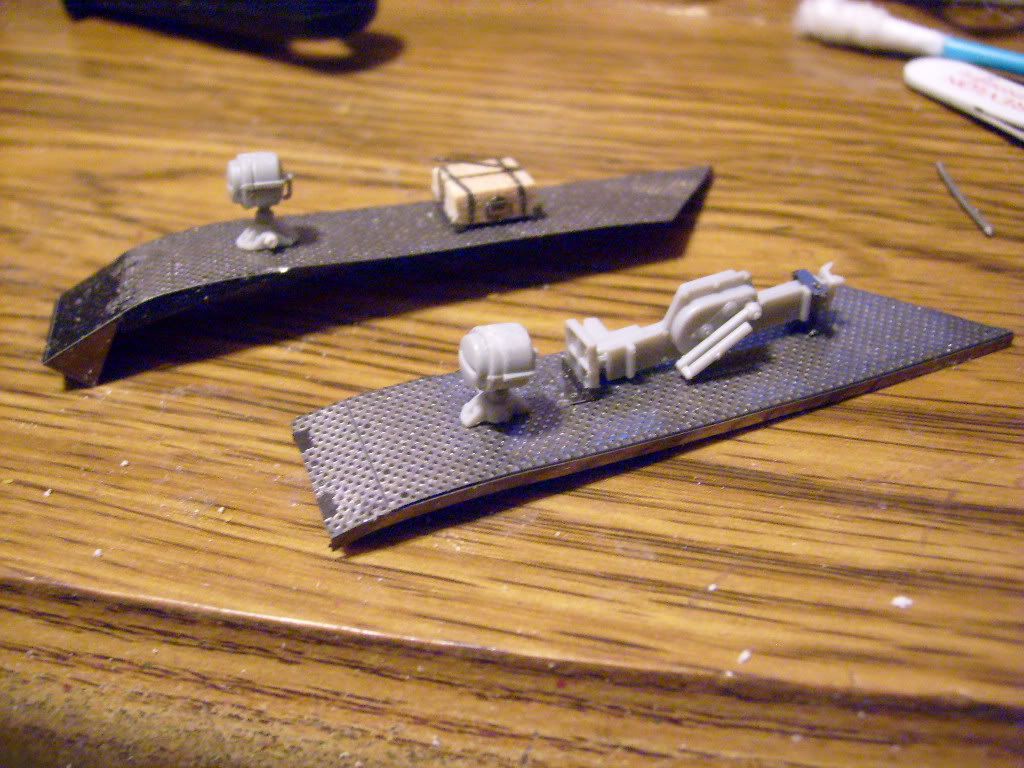
Great scotts.everybodies got the roadwheel fever i see.Great work everyone.Myself I was indulging in some precision soldering when i came up short on parts.As you can see the two fighting compartment panels are for the same side.the brass for the opposite side is the one missing all of the parts to make the brace,about six in all.so until i can rectify this dilemna i will use the factory dragon pieces.I have permanently installed the firewall and added many of the transmission details.the engine exhaust was painted and a dipstick added.although it may never be seen.The large knob in the middle i would dare say is a breather and the two smaller ones the rocker cover holddowns which should show some fluting detail so that will likely be added later.compared to the panther engine there is a quite a bit of size difference.And lastly I did a little work on the fenders.The lights of course are spares box items as the kit supplied lacked some detail.The jack block is real wood.Any comments or questions welcome .See yous guys later.

[View:http://s172.photobucket.com/albums/w1/g-earl828/]  http://i158.photobucket.com/albums/t104/cycledupes/1000Roadwheels4BuildBadge.jpg

  • Member since
    November 2006
  • From: Coastal Maine
Posted by dupes on Monday, November 2, 2009 9:57 AM
Whoah, that is a LOT of pics you guys! Rather than melt the phone lines, I'll have to look at these later today at the coffee shop. Meh. Sigh [sigh]
JOIN OUR COMMUNITY!

Our community is FREE to join. To participate you must either login or register for an account.

SEARCH FORUMS
FREE NEWSLETTER
By signing up you may also receive reader surveys and occasional special offers. We do not sell, rent or trade our email lists. View our Privacy Policy.