SEARCH FINESCALE.COM

Enter keywords or a search phrase below:

Bf-109: Reich Defender GB The End

186296 views
1406 replies
1 rating 2 rating 3 rating 4 rating 5 rating
  • Member since
    October 2004
  • From: League City, Texas
Posted by sfcmac on Thursday, January 1, 2009 2:38 AM

Happy New Year Fellows!  Still plugging away and practicing.

Figure I better snap some progress pics before I get to much deeper into it.  Chose a scheme that is an odd mix of hard line wings and soft fuselage.  Hard to recognize it as an Arii kit anymore. I am making it a bomber hunting gunship with the 20mm pods under the wings.  That mottle scheme is pretty tricky. Takes a lot of hand eye coordination. I really got some repect for you all who make it look so easy. This one had pretty big blots but look faded. Giving it a go!  Looking like Fairy make -up!

  • Member since
    February 2007
  • From: Bournemouth UK
Posted by Luftwoller on Thursday, January 1, 2009 4:32 AM

Looking great aaron. Didnt take you long to become an experten my friend.

All i can say is you must have some trick looking fairies around your way.

...Guy

..'Your an embarrassment to the human genus, makes me ashamed to call myself Homo'.
  • Member since
    October 2004
  • From: League City, Texas
Posted by sfcmac on Thursday, January 1, 2009 4:41 AM

Ah Guy I figured the sun would be up over there by now.

 I am still working.

 The Fairies are also a good distraction from my horrible photography!

If my pics would cooperate in the night lighting you can see things I added like a weld seam on the supercharger intake itself and around the cowling where it joins.  Liquid cement and some very thinly stretched sprue. A hobby knife to add a bit of bead texture.

The Sub assembly of the gear are about done. Added  the brake pads and some home made brake lines using the PE as a pattern. The very bottom where it will join to the PE brake pad is rubber with silver clamps as in the pics earlier in this GB. Also weathered the inside of the Gear covers like Chuck did on his Hell Diver to bring out some detail.

 Basically what I am trying to accomplish is to use things that you all have been doing and see what works for me. My foam rubber was to thick to mask the wheel wells so I used silly putty to fill them in and cover the exhaust. Not as much finess but it works.  

I don't know if the pics are good enough to make out the thin wire actuators added to the PE radiator cover and oil coolers but they are there added prior to attaching as Guy suggested.

Letting things dry a bit and I think I am ready to get it together!

  • Member since
    February 2007
  • From: Bournemouth UK
Posted by Luftwoller on Thursday, January 1, 2009 5:43 AM

Aaron, your work is looking superb fella. Really! Mottle is a sod to do, but it looks like your getting the hang nicely. The U/C is looking spot on. As for masking the wheel wells, if they are shallow like the 109, i use a small wodge of tissue paper and dampen it with water. Not too much, and mold it in place. It stays there a treat.

...Guy

..'Your an embarrassment to the human genus, makes me ashamed to call myself Homo'.
  • Member since
    November 2003
  • From: Naples, FL
Posted by tempestjohnny on Thursday, January 1, 2009 7:32 AM
Nice work Aaron Before you know it you will have a collection of 109's like the rest of us.


  • Member since
    September 2003
  • From: South Central Wisconsin
Posted by Daywalker on Thursday, January 1, 2009 9:24 AM

 tempestjohnny wrote:
Nice work Aaron Before you know it you will have a collection of 109's like the rest of us.

Sign - Ditto [#ditto] Nice work Aaron!  Love that paint stand. Approve [^]

Happy New Year everyone, hope this year is wonderful to all of you. Make a Toast [#toast]

Frank 


  • Member since
    December 2004
  • From: Yokosuka, Japan
Posted by luftwaffle on Thursday, January 1, 2009 10:03 AM
Aaron- Looking good, paint came out real nice!

aka Mike, The Mikester My Website

"He has all the virtues I dislike and none of the vices I admire."   -Winston Churchill

  • Member since
    December 2005
  • From: back seat of your car with duct tape streched out
Posted by soulcrusher on Thursday, January 1, 2009 3:44 PM

Wow Aaron impressive job of observing and appying what you have learned. The 109 looks awesome.Thumbs Up [tup]

                                                                                   SoulcrusherPirate [oX)]


  • Member since
    June 2004
  • From: Akron ohio
Posted by phoenix7187 on Thursday, January 1, 2009 4:49 PM
looks good from here aaron
Stan
  • Member since
    April 2005
  • From: Piscataway, NJ!
Posted by wing_nut on Thursday, January 1, 2009 5:11 PM

Aaron the work is far looks great.  I must have missed something somewhere so while I am not sure why they are there, I don't necessarly want the Non-109 pics to stopWink [;)]

I am calling this one, except for some stain on the base, done.   The Pegasus snap together Me 109G-6 in the markings of White 1 flown by Erich Hartmann.  The tulip would have gone down great except for some poor planning on my part and the poinot on the side ran into the exhuat. Thismade for some weird settling.  With some black and white touch ups they look ok in the pics but would not stand up to a judges scrutiny.  Built to IMPS OOB rules so not much can be done to it but the kit overall is really nice and with some detailing can be turned into a beautiful model. as finished, that is a total of 16 parts for the build without the stand. Since I was not "allowed" to make heavy modifications to parts and the LG is the worst of the parts I deciced to go with the wheels up.

Thnaks for another great GB Frank.


Marc  

  • Member since
    November 2003
  • From: Naples, FL
Posted by tempestjohnny on Thursday, January 1, 2009 5:19 PM
Nice wrok Marc.  For a snap that looks great.


  • Member since
    September 2003
  • From: South Central Wisconsin
Posted by Daywalker on Thursday, January 1, 2009 5:20 PM
Exceptional work as always Marc!  Thanks for showing us what can be done with these beginner level kits.  Love the display as well, great choice on camera angles.  Very impressive stuff. Approve [^]

Frank 


  • Member since
    December 2004
  • From: Yokosuka, Japan
Posted by luftwaffle on Thursday, January 1, 2009 5:40 PM
Absolutely gorgeous, Marc!

aka Mike, The Mikester My Website

"He has all the virtues I dislike and none of the vices I admire."   -Winston Churchill

  • Member since
    September 2008
  • From: North Carolina
Posted by WarHammer25 on Thursday, January 1, 2009 5:52 PM
Very nice indeed Marc! It is amazing that is a snap kit.
The only easy day was yesterday - U.S. Navy Seals
  • Member since
    February 2007
  • From: Bournemouth UK
Posted by Luftwoller on Thursday, January 1, 2009 5:53 PM

Fantastic work Marc, If you hadnt of said it was a snap together, id have been none the wiser. And as for the Tulip Decals. They look sweet as. A bit like mine. Look good on the photos, but dont look to close.

...Guy

..'Your an embarrassment to the human genus, makes me ashamed to call myself Homo'.
  • Member since
    October 2004
  • From: League City, Texas
Posted by sfcmac on Thursday, January 1, 2009 6:54 PM

Marc! I love those Pegasus Kits!  They really are a great value and something nice a kid can still afford and actually get built. They are also so well fitting and detailed enough that if you really wanted to you could add a few things and make something out of them that makes them even more cool!  As is your skills with the painting and decaling make that look like the black devil himself is on an attack run!


  • Member since
    October 2004
  • From: League City, Texas
Posted by sfcmac on Friday, January 2, 2009 1:04 AM

 Well things are turning sideways so I took a break. Found some pics I was going to use as an update but saw so many glue and painting errors I had to go back sand and touch up spots to smooth things out a bit. Looks better now actually really good considering all the scribing and hacking I have done. It's drying so I'll use the older pic to show a comparison of what it is becoming when compared to an original I dug out the Garage.

The undercarrage gives an idea of how reworked this kit is. I have Almost tripled the parts count from the original 40. No wonder it is taking me so long. Using the Hasegawa kits as a ref I have sanded scribed and recut details untill my fingers hurt and eyes have crossed.  But the learning experience is tremendous! 

Touched up everything and got rid of some of the flaws the paint revealed. Touched everything up and decaled away. Would have taken more undercarrage pics but the Future is drying where I sealed these really really old and thick decals.  Made them look painted on though. The  Green band is actually painted as I did not like the color green on any decal I had.  Looks better.

 The topside finish is smooth as silk and the bottom while still not perfect is much better. Hey it's the bottom.  The Canopy is just temporaily taked in place so I can add a few more things inside now that it is all painted and is easier to fix if a mask oozed under.

Well I think it will have to dry and I am going to bed earlier than & AM tonight.   SShould be darn near close to finishing it up tomorrow. Party [party] May have to do a OOB Hasegawa just to recoup! Laugh [(-D]

  • Member since
    March 2007
  • From: Carmel, CA
Posted by bondoman on Friday, January 2, 2009 1:22 AM
Sweet Gustav, McNeal. See my PM
  • Member since
    December 2003
  • From: Indiana
Posted by hkshooter on Friday, January 2, 2009 1:25 AM
Dhat chure is purty!
  • Member since
    July 2003
  • From: waynesboro va, via Ireland
Posted by sidure on Friday, January 2, 2009 3:19 AM

Marc, very nice job on a snap kit, the paint is great and you did a great job on displaying it.

Aaron, comming along nicely and another great paint job. You should be done soon. Dont look back as I am right behind ya with #1 and should have pics tomorrow.

Steve

  • Member since
    April 2005
Posted by Thunderbolt379 on Friday, January 2, 2009 3:59 AM

Marc -- superb job! The Blonde Knight's "White 1" looks absolutely sweet, it's a terrific job. The AB and weathering, the panel detailing, decals, everything.  I hope one day to build every set of markings Eric Hartmann ever had, so there's an installment I'll build too in time.

Excellent work, and an inspiration,

Mike

http://worldinminiature.blogspot.com/

  • Member since
    February 2007
  • From: Bournemouth UK
Posted by Luftwoller on Friday, January 2, 2009 4:40 AM

Aaron, your really kicking that kit for all its worgh. Its turning into a beauty. Your paint work looks fantastic. I may be wrong (Probably am) but arnt the cowl badges North Africa related? Might put your time scales out a touch for a Reich Defender LOL.

...Guy

..'Your an embarrassment to the human genus, makes me ashamed to call myself Homo'.
  • Member since
    September 2003
  • From: South Central Wisconsin
Posted by Daywalker on Friday, January 2, 2009 7:19 AM

Looking very good Mac!

If you hadn't said otherwise, I would have thought you've been building 109's for a long time.  Looks like you're on the home stretch now. Thumbs Up [tup]

Frank 


  • Member since
    April 2005
  • From: Piscataway, NJ!
Posted by wing_nut on Friday, January 2, 2009 10:47 AM
Looks real nice there Aaron.  That paint stand does look vaguely familiar.Whistling [:-^]

Marc  

  • Member since
    October 2004
  • From: League City, Texas
Posted by sfcmac on Friday, January 2, 2009 11:50 AM
 Luftwoller wrote:

Aaron, your really kicking that kit for all its worgh. Its turning into a beauty. Your paint work looks fantastic. I may be wrong (Probably am) but arnt the cowl badges North Africa related? Might put your time scales out a touch for a Reich Defender LOL.

...Guy

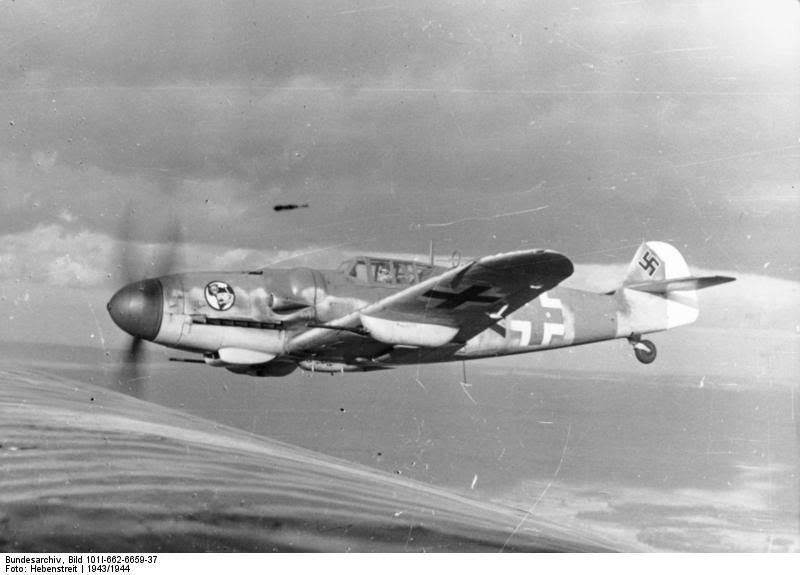
Ah now see this is a test for the experts. This is a Bf 109-G-6 from JG 27. Jg 27 was in existence from 1940 until March 1945.

By November JG 27 was back serving with Reich air defense, flying operations in the Southern Germany and Austria against the USAAF 15th Air Force bombing raids. On 2 November JG 27 suffered its highest losses on a single day, losing 53 aircraft with 27 pilots killed and 11 wounded, to the P-51 escort fighters of the USAAF, in return for six USAAF P-51 Mustangs shot down[12]

The Geschwader also took part in the ill-fated Operation Bodenplatte attacks on Allied airfields on New Year's Day 1945, losing 15 pilots[13]. The IV Gruppe was disbanded in March 1945 to provide reinforcements to the other Gruppen

The photo is the key. The time frame is shown to be 1943/1944. The Markings are definately 1944.  The unit had G-6's from 1943 but not with that bright green DOR band and totally black chevrons on the sides. Also the underwing cannon were added to beef up the firepower for use against the American Bombers. What you have here is a compliation of markings from a unit that was moved all over, destroyed. reformed extc.  Official records are lost with the war but I am certain the Green DOR band was not used in the Meditarian Theatre or Greece. My bet is you are looking at a G-6 that saw a lot of action and history. My best guess is that the markings on this particular G-6 are a complilation of the units highlights from the Battle of France to it's reformation in Southern Germany in 1944 after it was pretty much wiped out in FRance after D-day.  It even spent some time in Austria getting reformed with G-10 As and K-4's prior to Bodenplate which was yesterday 64 years ago.

Don't worry Guy I'll get you straightened out yet! Laugh [(-D]Make a Toast [#toast]


 Hey if I am wrong I can always do another right?

Thanks for the comments fellows but I am just following your techniques. Bow [bow]

  • Member since
    September 2003
  • From: South Central Wisconsin
Posted by Daywalker on Friday, January 2, 2009 6:25 PM

Mac- Great job on the references, you are becoming a 109 Master.  I shall look to you for help in the future.  Now, about this stand...

For just $19.95, I will send you not one, not two, but THREE complete Frank-n-stand Mk.II's!  I accept cash, cash, and cash. Smile,Wink, & Grin [swg]

Frank 


  • Member since
    October 2004
  • From: League City, Texas
Posted by sfcmac on Friday, January 2, 2009 6:34 PM

 Hmmm everyone has vanished for the weekend it seems!

 Gonna call it done. I'll post the pics and you tell me what looks good and what doesn't. More research shows the lower antenna was used to receive instructions  from ground control to vector the fighters to the bombers. This is a definate defender of the Reich there Guy ! One that represents the begining of the term as fighter units were called back into Germany to fight the bombers in Feb 1944.

Did I get the wheels right? Vey odd angles in the pics

Well as things dry and finalize I figure there may be a few small things but I have learn't a lot and tried a lot of cool stuff on this beast of a kit. Kinda like the old school method of super detailing before the era of the wonder kits.  I had a lot of fun with it and am encouraged to try a Hasegawa now.

  • Member since
    December 2005
  • From: back seat of your car with duct tape streched out
Posted by soulcrusher on Friday, January 2, 2009 6:51 PM

Aaron let me be the first to say nice job! You have sucked up all of this 109 info and applied it well. The landing gear legs are at the correct angle but the wheels are splayed out to much. They should be paralell to the gear legs. You might have time to pull them in a bit if the glue has not completly set. Job well done now report over to the Regia Aeronautica GB soilder!

                                                                                 SoulcrusherPirate [oX)]


  • Member since
    October 2004
  • From: League City, Texas
Posted by sfcmac on Friday, January 2, 2009 6:54 PM
 Sorry Frank I forgot to refresh before I posted and you snuck in there on me. That stand is an idea? Gonna get some of that foam core from hobby lobby and some real skurers from the grogery store. The reg styrofoam and stirring straws were a bit flimsy but it really does make things easier. Er how much is the charge?
  • Member since
    October 2004
  • From: League City, Texas
Posted by sfcmac on Friday, January 2, 2009 7:01 PM

 Thanks SC I havenot permanently attached them yet. Only white glued until I worked it out.

Take a look at this pic from the Hasegawa G-10 directions. Does this look correct?

JOIN OUR COMMUNITY!

Our community is FREE to join. To participate you must either login or register for an account.

SEARCH FORUMS
FREE NEWSLETTER
By signing up you may also receive reader surveys and occasional special offers. We do not sell, rent or trade our email lists. View our Privacy Policy.