SEARCH FINESCALE.COM

Enter keywords or a search phrase below:

Bf-109: Reich Defender GB The End

186296 views
1406 replies
1 rating 2 rating 3 rating 4 rating 5 rating
  • Member since
    July 2003
  • From: Bicester, England
Posted by KJ200 on Sunday, April 12, 2009 3:10 PM

Darren, great job on White 44, love the base.

Gary, that is one busy dio, looking really cool.

Frank, think I might need that extra month or so, as progress on the G14 is somewhat slow!

Karl

Currently on the bench: AZ Models 1/72 Mig 17PF

  • Member since
    April 2005
Posted by Thunderbolt379 on Sunday, April 12, 2009 6:35 PM

Frank -- that extension would be very much appreciated if it were to come along! All this time I've been laboring under a misconception -- the old date-order thing! My befuddled brain has been reading fifth of August as the end date, when it's really eighth of May!

The QB exhausts and canopy masks for my K-4 came in, and if I lighten my Humbrol 106 a touch I'll have a decent stand-in for RLM 75, so I should be able to do a mostly OOB on a decent kit in no time -- once I get to it. I have others in hand that are really pressing, a deadlined piece that needs to be done in a few days, and a tank for the Israeli GB which finishes on the 20th.

Can anyone recommend a page number in this thread with refs for the rear cockpit area of the K-4? The area up behind the seat? The Hasegawa kit has simply a raised blocky shape, but I'm sure some extra detail could be scrounged for that area, as it'll be visible.

Cheers,

Mike

http://worldinminiature.blogspot.com/

  • Member since
    December 2005
  • From: back seat of your car with duct tape streched out
Posted by soulcrusher on Sunday, April 12, 2009 7:29 PM

She looks great Darren. Extra points for such an unusual color scheme. The base is beautifull. It really sets it off. You should be proud.

                                                                                         SoulcrusherPirate [oX)]


  • Member since
    July 2004
  • From: Sonora Desert
Posted by stikpusher on Sunday, April 12, 2009 7:38 PM

Tango, your night 109 looks beautiful!

Wingzandthings, your diorama looks super. I saw that photo in a book and you have captured it so well!

I made some progress on my 109 this weekend. More detail painting was in order. Just a bit more touch up panting then it will be time for declas and more pics.


F is for FIRE, That burns down the whole town!

U is for URANIUM... BOMBS!

N is for NO SURVIVORS...

       - Plankton

LSM


  • Member since
    September 2003
  • From: South Central Wisconsin
Posted by Daywalker on Sunday, April 12, 2009 10:10 PM

Karl, Mike-

Glad to hear I won't be building alone!  I extended the deadline until July 1st, hope that helps.  Let me know if you would like some more time and I will happily oblige. Big Smile [:D]

Frank 


  • Member since
    November 2003
  • From: Nashville, TN area
Posted by bobbaily on Monday, April 13, 2009 6:18 AM

Darren & Guy-very nice builds.  They look great.  Guy, the dio adds a lot as does does your base Darren.  Bow [bow]

Thanks for the extension Frank.  Allows me to procrastinate that much longer....Whistling [:-^]...hopefully I'll be able to prime the G10 this week and maybe even get it painted....

Bob


  • Member since
    December 2002
  • From: A secret workshop somewhere in England
Posted by TANGO 1 on Monday, April 13, 2009 7:05 AM
Thanks for your kind words fella's-looks like it turned out OK in the end.Wink [;)]
Regards, Darren. C.A.G. FAA/USNFAW GB
  • Member since
    September 2003
  • From: South Central Wisconsin
Posted by Daywalker on Monday, April 13, 2009 11:08 PM

Mike,

The K-4 references photos from Stan are on page 8, and here's a couple of links to photos of a G-10 and a G-6, pretty close to the K-4.

G-10

G-10 #2

These following photos are of an Erla canopy equipped G-6, but there is some nice detail visible:

G-6 Erla canopy

G-6 Erla canopy #2

G-6 Erla canopy #3


Frank 


  • Member since
    December 2004
  • From: Yokosuka, Japan
Posted by luftwaffle on Tuesday, April 21, 2009 9:26 AM
 Daywalker wrote:

Karl, Mike-

Glad to hear I won't be building alone!  I extended the deadline until July 1st, hope that helps.  Let me know if you would like some more time and I will happily oblige. Big Smile [:D]

Extended the deadline, eh?  OK, Frank you lured my back in, I'm going for the hat trick! Party [party].  I'm going to do a FineMolds K-4, W.Nr. 334176 of 11./JG 3, flown by Uffz. Martin Deskau from Pasewalk, Deutschland in April of '45.

aka Mike, The Mikester My Website

"He has all the virtues I dislike and none of the vices I admire."   -Winston Churchill

  • Member since
    September 2003
  • From: South Central Wisconsin
Posted by Daywalker on Tuesday, April 21, 2009 7:21 PM
 luftwaffle wrote:

Frank you lured my back in...

Good man!  Glad to have you building here again Mike!  I just need to finsih masking the wheel wells, then I am ready to begin painting! Big Smile [:D]

Frank 


  • Member since
    September 2008
  • From: North Carolina
Posted by WarHammer25 on Wednesday, April 22, 2009 5:34 PM

Sorry about my absence from this GB folks. I have kept up with the GB but have failed to post anything. There is some very nice work going into this and everyone deserves a good job! Smile [:)] Well, after neglecting this long enough, I have started my 1/32 Hasegawa K-4. It is such a nice kit compared to my last build, a Dragon Do-335. Very nice detail and fit. The only other thing I am adding other than the decals to make Black 15 of JG-52 is an Eduard seatbelt set. Without any further delay, here are some progress pics:

Pic of the pit after paint and weathering:

Right sidewall:

Left sidewall:

And then the pit after final weathering and adding Eduard belts:

Here is were I am as of today:

And thanks for extending the end date Frank. Thought I was going to have to rush this one a little but now I can slow down some. Questions and comments are welcome.

The only easy day was yesterday - U.S. Navy Seals
  • Member since
    September 2003
  • From: South Central Wisconsin
Posted by Daywalker on Wednesday, April 22, 2009 6:40 PM
Glad to oblige Brendan!  Looks like you're off to a great start, hope to see more WIP pics soon. Thumbs Up [tup]

Frank 


  • Member since
    October 2004
  • From: League City, Texas
Posted by sfcmac on Saturday, April 25, 2009 11:44 PM

 My turn !  I just broke sprue on the Hasegawa G-10 Night Fighter which is very similar Brendan. 

 The pit differs in some details like the big yellow fuel line and such but the kit parts are pretty much the same I am thinking.  Actually I am betting the only diff between this kit and Frank's G-10 besides the decals and paint scheme is the addition of  a P-47 Thunderbolt drop tank.  No explaination is given why it is there. It's on the box art as well so there must be a history somewhere of it being used? 

 This kit comes with 2 schemes for the same aircraft,  simply says Flown by Hptm. Friedrich Karl Mueller. I/NJG 11,APR 1945 Marked as Black 3. The other option is for this aircraft as restored shown as Black 2  Going to make it in the 1945 look.  It has the Underwing cannons the odd Thunderbolt drop tank( sez so on the sprue) and a yellow hub cover.

This kit is great compared to my last build as well!  The details are great and I am rolling right along .

Frank gave me a heads up to be careful of the build sequence on joing the 4 part fuselage. Following the instructions can lead to an uneven step where they join together. Here are a few views and it looks smooth and right to me. Thank you Frank! Bow [bow]

 Clear parts are Future dipped and drying and everything is going smoothly and fits great! I dunno how to act? Dunce [D)] Only added a few details like clear sprue in the fuel line to represent the site glass. Holes in the foot pedals.  No straps or belts as I am using the pilot. I think he looks more like a Jo Hann though.

About my only worry is not to mix up the G and K parts as a lot from both are included. Props, wheels and stuff like that.

 Well thanks for looking and the earlier wonful tutorials on the 109 types!Thumbs Up [tup]


  • Member since
    September 2003
  • From: South Central Wisconsin
Posted by Daywalker on Sunday, April 26, 2009 12:03 AM

Aaron- How the L do you do that so fast?  Seriously, well done my friend.  Bet this build is a walk in the park after that Ventura. Smile,Wink, & Grin [swg]

I added this build to page one! Thumbs Up [tup]

Frank 


  • Member since
    December 2004
  • From: Yokosuka, Japan
Posted by luftwaffle on Sunday, April 26, 2009 10:11 AM
Aaron, I think there was a discussion about this one at Hypescale a while back, I can't recall all the details though.  The drop tank is unique and I've never seen a G-10 with MG 151's slung under the wings.  Should be interesting.

aka Mike, The Mikester My Website

"He has all the virtues I dislike and none of the vices I admire."   -Winston Churchill

  • Member since
    December 2005
  • From: back seat of your car with duct tape streched out
Posted by soulcrusher on Sunday, April 26, 2009 10:29 AM

Looks good so far there Aaron. I know what you mean about not knowing what to do when a kit just goes together. I am experiencing the same thing on the 1/48 Hasegawa 202 I'm build right now. After doing several short run kits and some sub-par kits you are left with no doubt as to which manufactors are the king of injection moulding. Tamagawa there is no substitute!

                                                                                                  SoulcrusherPirate [oX)]


  • Member since
    October 2004
  • From: League City, Texas
Posted by sfcmac on Sunday, April 26, 2009 4:33 PM

Ut Oh !  I got The Mikester and Soul Crusher looking in. So Much for a lazy mans recovery build Frank!  Before you know Stan, Scott, Guy and about 50 other Mikes will be looking in so I better post something worth while otherwise they might think ill O me? Shock [:O]

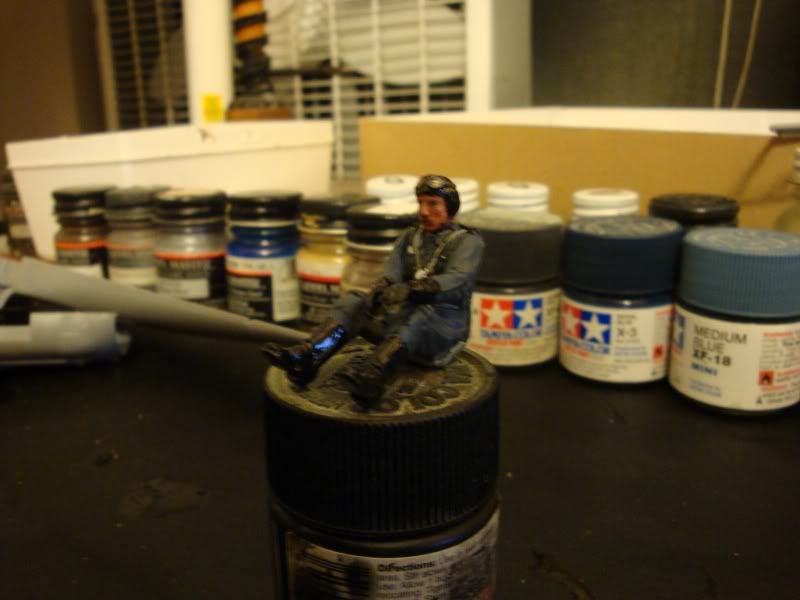
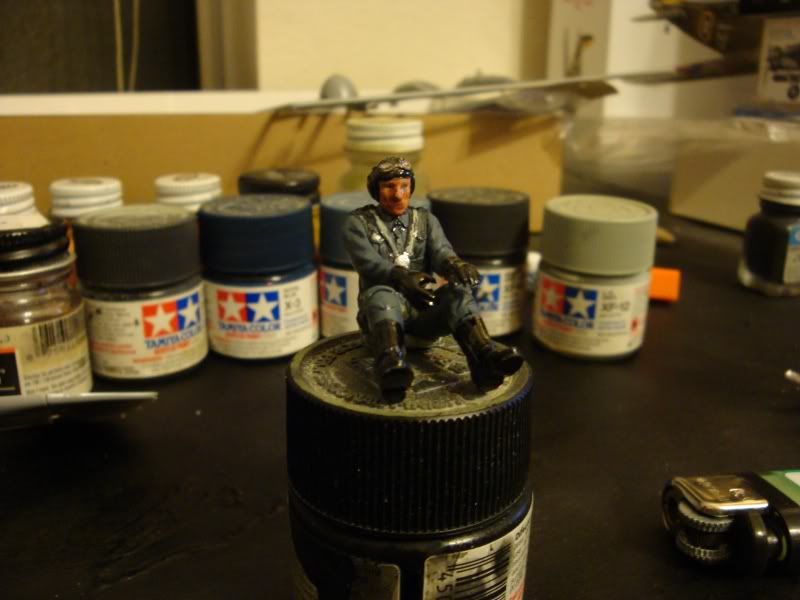
Gave Jo Hann a quick touchin up so he looks the part!
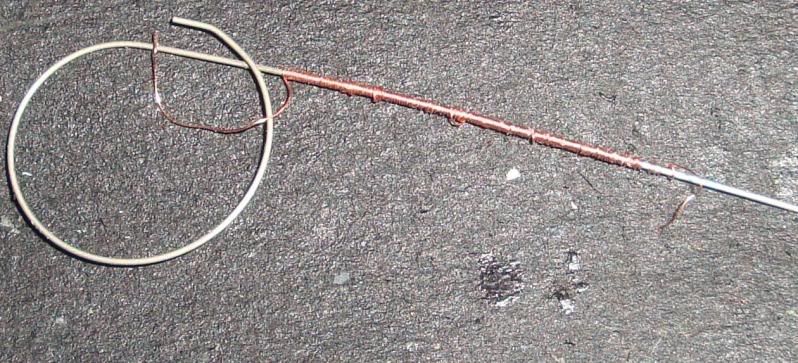
Then I was looking back at some saved pics on tips and tricks. I think it was Stan that started the rolling wire around a pin to get the coiled O2 hose so I did a quick one of those as well. Took the end of the wire and made a little cup with some white glue for the mask.
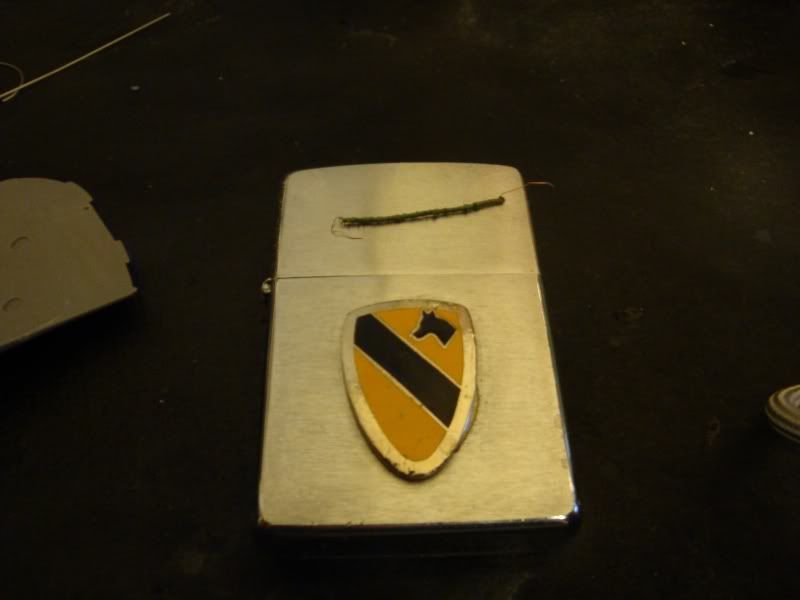
Did a search for this aircrafts story but came up dry... almost. I found a couple pics of the restored aircraft.
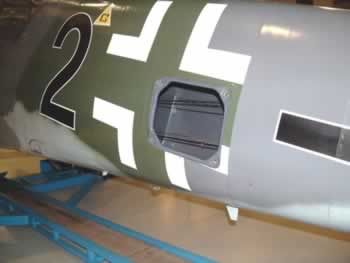
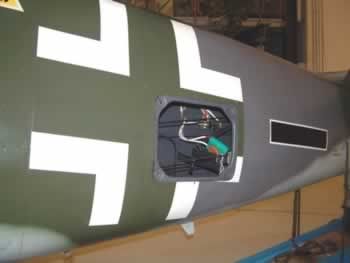
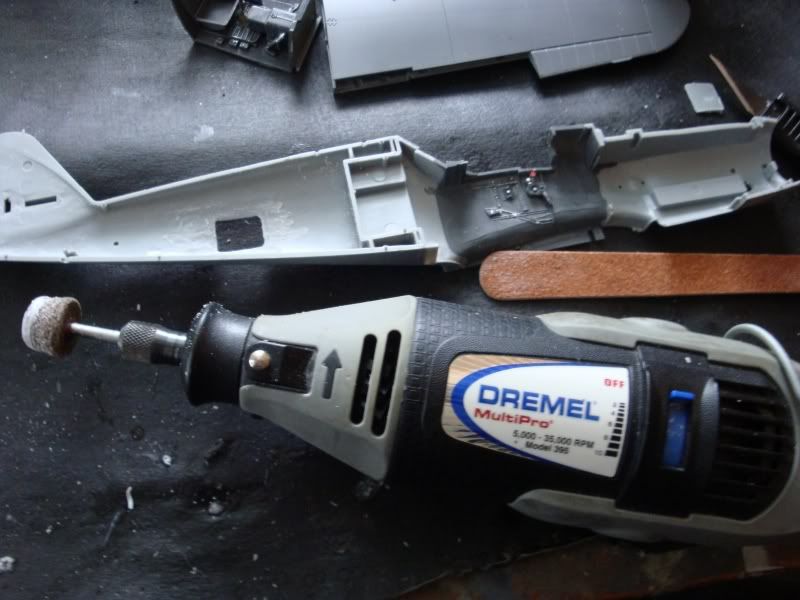
 Man there is a big hole in the side with stuff inside! Censored [censored]  Well time to get out the dremel!

That bit is good for superglue and lawn mower blade sharpening as well! Wink [;)]

 Now for something to see through the hole!
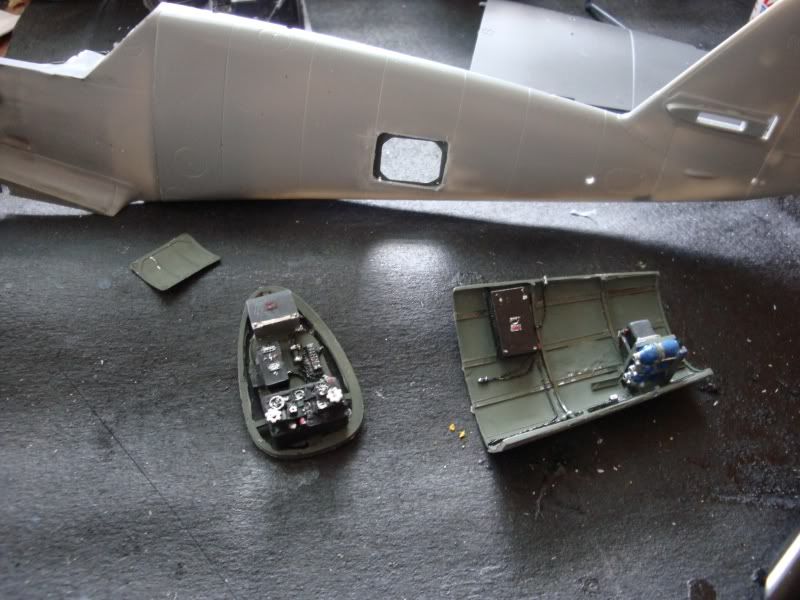
This is the Aires 109G late radio gear set. Sells for about $15 but I picked it up last Sept on sale for $5.  I'm kinda like Dave in how he will try just about anything for $5 Laugh [(-D]When I saw the pics of this 109 in the part review , Well I just had to give it a try!

 I looked briefly and have never seen one used before. Only 4 parts but a little tricky to paint and fit with the thinning of the sides and getting it to seat right. May be why I haven't seen it used. They make one for the 109K as well that has diff equipment and structural details.
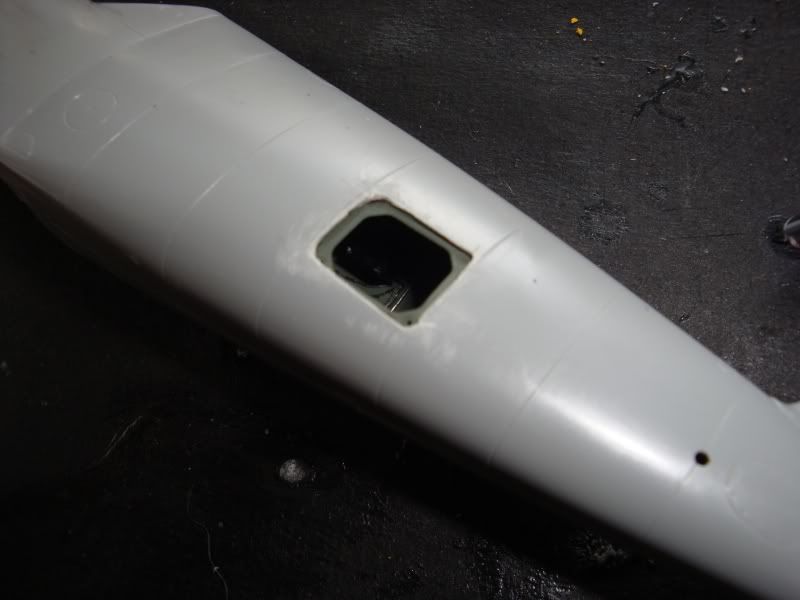
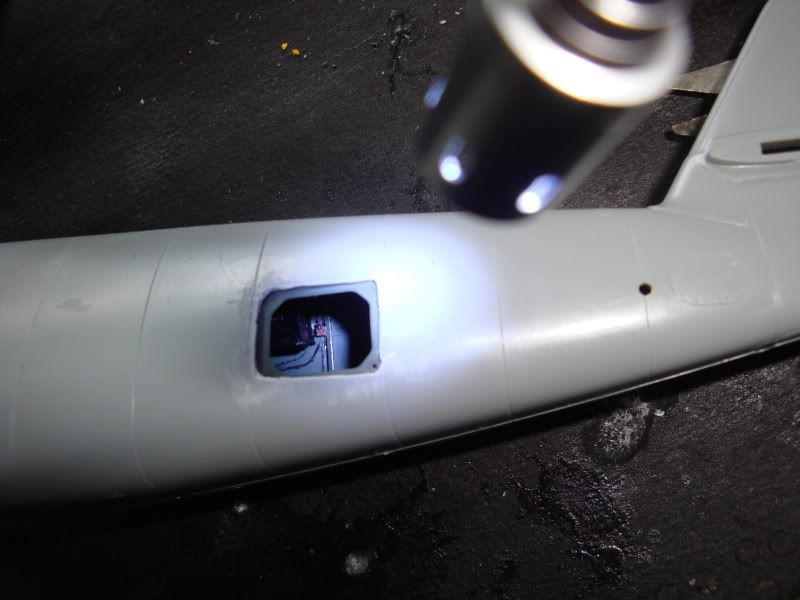
Hard to get pics to show the inside detail even with a pen light but like Ragu it is in there! Thumbs Up [tup]

Another tricky area is the acess door. Since it is Flat PE. It needs to be shaped to fit right. Just took the other side of the fuselage and laid it on top and burnished it ti shape using the fuselage as a shaping tool. Not quite a perfect fit but enough to where I can temporarily white glue it in place to get the outter paint treatment and it will mask the internal stuff.  When removed to show the opening the fit diff is un discernable. ( You can't tell by looking)
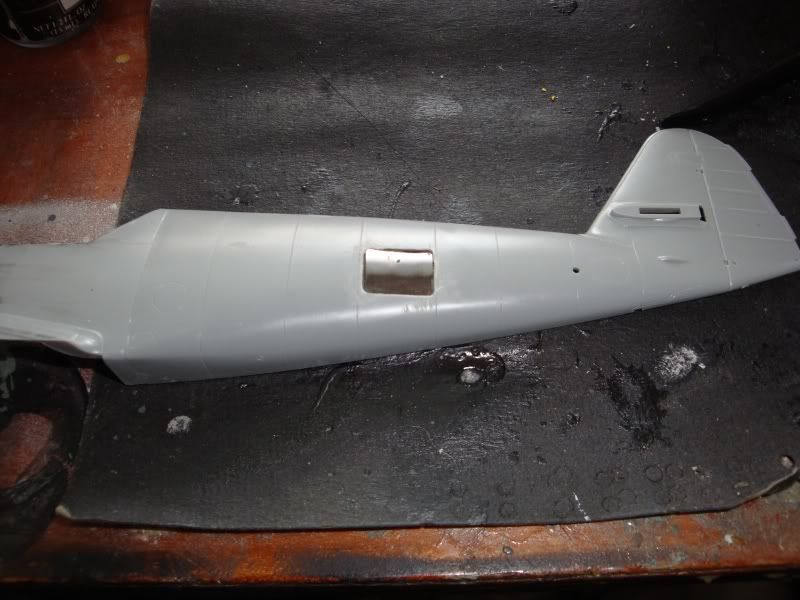
 Well just waiting for the IP to dry and put it all together and move on to the ext step.
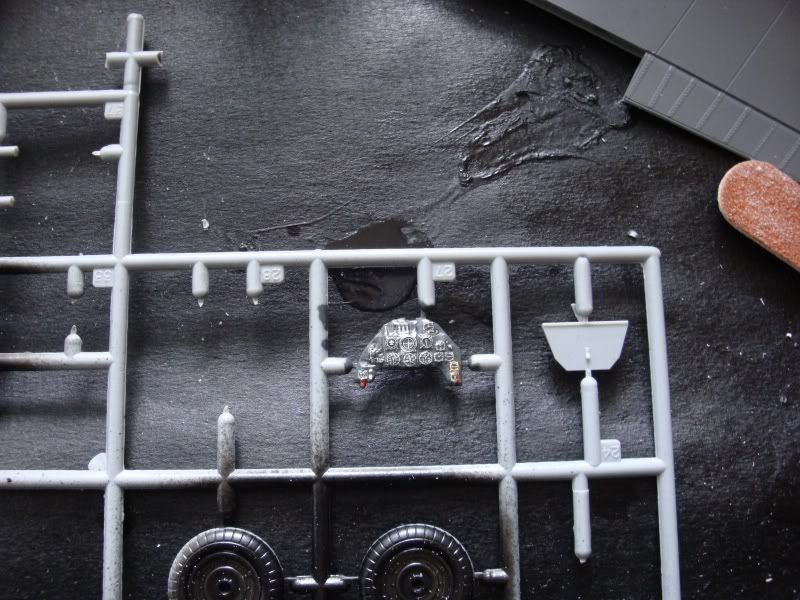
 Been abusing my propeller hub as well! Learned all that massacistic prop stuff from Frank! Whistling [:-^]

 Well time to see if the IP dried!  Thanks for looking and holler out things that need help!  I am still a 109 newbie!

  • Member since
    September 2003
  • From: South Central Wisconsin
Posted by Daywalker on Sunday, April 26, 2009 5:54 PM

Aaron- Some seriously stunning work here!  Your radio compartment looks just right, too bad you can't see more of it!  Well, at least the judges will have something to look at when they poke their little penlights in there!

If you don't mind me saying, this 109 of yours is already light years ahead of the first one you built here!  Do the gauges on the IP work?  They look real!  Well done.  

I worked on my 109 twins today, but nothing really photo worthy.  Gave them a smoothing with 1200 sandpaper, and an overall primer coat.  Just need to smooth that out then they are both ready for paint!  As soon as the paint shop frees up, that is. Wink [;)]

Frank 


  • Member since
    July 2004
  • From: Sonora Desert
Posted by stikpusher on Sunday, April 26, 2009 7:12 PM

Aaron, your 109 is coming along beautifully! I can wait to see the finished bird!

As of this afternoon, I am done with the major painting. All thats left now is glss coat, decalling, top coat and touch ups of detail parts..and oh yes, find a replacement hood. Mine has a molding imperfection...Disapprove [V]

Then it's final assembly and weathering... almost there...


F is for FIRE, That burns down the whole town!

U is for URANIUM... BOMBS!

N is for NO SURVIVORS...

       - Plankton

LSM


  • Member since
    February 2007
  • From: Bournemouth UK
Posted by Luftwoller on Monday, April 27, 2009 3:23 PM

Yippers Aaron. Im just in awe of you, my friend. You only just finished the Ventura. Most rational sane people would have to have a holiday to get over it, but not you. Was it yesty that you said youd broken sprue on a 109. Today your superdetailing a P47 wannabe. Bloody fine work though mate, i love the radio bay and your figure. Hes a damn fine looking fella . So if i check in tomorrow will i see paint on her?

Stikpusher, Im sorry ive not looked in in a while but your 109 is looking sweet fella. Great paint.

...Guy

..'Your an embarrassment to the human genus, makes me ashamed to call myself Homo'.
  • Member since
    October 2004
  • From: League City, Texas
Posted by sfcmac on Monday, April 27, 2009 3:43 PM

stikpusher that 109 is looking great in those colors!  Nice work!!! Bow [bow] Especially for a fellow who jumped outta perfectly good airplanes! Laugh [(-D] Gotta watch them retired military fellows! Mischief [:-,]

 Er Guy I am painting right now how'd you know?  Changed the assembly sequence around just a bit to ease masking and stuff but the airbrush is loaded!  Compressor humming! Thumbs Up [tup]

 Frank I think you are right. I really helps  having a good kit and accessories made for it!  The Arii kit looks ok on the wall but this seems to have all I added to it included in the kit! Too easy!

  • Member since
    December 2004
  • From: Yokosuka, Japan
Posted by luftwaffle on Monday, April 27, 2009 4:06 PM

Aaron- Some seriously nice work there.  Pilot really looks great!

Stikpusher- nice work on the paint! 


aka Mike, The Mikester My Website

"He has all the virtues I dislike and none of the vices I admire."   -Winston Churchill

  • Member since
    July 2004
  • From: Sonora Desert
Posted by stikpusher on Monday, April 27, 2009 5:27 PM

thanks guys... I was lagging on this thing and it is getting so close.. now I am at the point of wanting to finish it....

Aaron, there is no such thing as a perfectly good airplane! On my cherry blast, one of the engines of the C-130 I was on caught fire when they tried to start it... had to do an emergency egress while fully rigged... kinda hard to do with your body weight in gear strapped to you in unusual places... LOL! that jump is full of good tales... BTW, your 109 is looking great!!!


F is for FIRE, That burns down the whole town!

U is for URANIUM... BOMBS!

N is for NO SURVIVORS...

       - Plankton

LSM


  • Member since
    April 2005
Posted by Thunderbolt379 on Tuesday, April 28, 2009 12:50 AM
 soulcrusher wrote:

Looks good so far there Aaron. I know what you mean about not knowing what to do when a kit just goes together. I am experiencing the same thing on the 1/48 Hasegawa 202 I'm build right now. After doing several short run kits and some sub-par kits you are left with no doubt as to which manufactors are the king of injection moulding. Tamagawa there is no substitute!

                                                                                                  SoulcrusherPirate [oX)]

SC -- having just gone 15 rounds with Airfix's 1969 1:72nd scale Lunar Module, I am in complete agreement. I have never had a kit fight me at every stage, and right down to the last fitting, not like this. I think it rather smashed the rose-tinted glasses many modellers view the grand old British brand through. This is a kit that should be put out of its misery, or mine! Tamegawa 4 me 4 eva...

Mike

http://worldinminiature.blogspot.com/

  • Member since
    July 2003
  • From: Bicester, England
Posted by KJ200 on Tuesday, April 28, 2009 1:17 PM

Aaron, great work on the G-10.

The pit looks fantastic.

Stickpusher, is that a K your working on?

Looks top notch either way.

I have made some progress on the G-14AS, the fuselage is together and the resin engine cowling is attached.

Unfortunately the resin cowling is both narrower and shallower than the Hase fuselage, so I've spent the last few days fillering and sanding.

I'll post some pics soon.

Karl

Currently on the bench: AZ Models 1/72 Mig 17PF

  • Member since
    July 2004
  • From: Sonora Desert
Posted by stikpusher on Tuesday, April 28, 2009 2:30 PM
Thanks Karl. Yes it is the Hobbycraft 1/48 109K4 kit. the interior leaves a bit to be deisred, but the outside is very nicely rendered.


F is for FIRE, That burns down the whole town!

U is for URANIUM... BOMBS!

N is for NO SURVIVORS...

       - Plankton

LSM


  • Member since
    February 2007
  • From: Bournemouth UK
Posted by Luftwoller on Tuesday, April 28, 2009 3:12 PM

Talk about getting your freak on!! Aaron your a machine, fella. I love the dash. With the decals all snuggled down, they look as good as Edaurds sandwiched affair, i reckon.

Your figure does look excellently painted but is he a little shiney? Or is that my monitor.

...Guy

..'Your an embarrassment to the human genus, makes me ashamed to call myself Homo'.
  • Member since
    September 2003
  • From: South Central Wisconsin
Posted by Daywalker on Tuesday, April 28, 2009 10:01 PM

Carlos- I like!  Is that RLM84 on the fuse sides?  I like it.  Well done on the scalloped LE, looks just right. Approve [^]

Aaron- Is it finished yet?  Man, YOU'RE SLOW!!! Smile,Wink, & Grin [swg]

Frank 


  • Member since
    October 2004
  • From: League City, Texas
Posted by sfcmac on Tuesday, April 28, 2009 10:17 PM

 Getting my freak on? Last person who said that to me was a pimp outside a seedy motel in Dallas?  Shock [:O]

Well Thank ya everyone for the nice comments... even Guy! Laugh [(-D]

 I was planning on being like done by now but I believe I have found the achillies heel of this kit!

 The decals are really kinda a pain!  I mean nasty fellows! Where the smaller ones are managable the large ones want to fold under themselves while still on the backing!

 They turn loose from the backing after just a quick dip in water really fast and almost too easy but they will fold and are very thin. Painful to use and hard not to destroy with no extras and no second chances! Banged Head [banghead]Grumpy [|(]

Really have to do one at a time and let it dry before moving on as they are pretty intense and time consuming.  Almost have to really get them to lay flat some where close. I have yet to smoothly slide one off in place without it folding over somewhere. A corner or something then they are buggers to get straight again!  Slow and steady is the only way with water and dot brushes!   Decals like that spinner whirly doo dad!  very nasty! It came already as 4 separate decal pieces which eases placement better than attempting one giant curly snake but still each one was a battle. This took all day!

Thats all the pieces and what's left to do. Not a whole lot. I would have taken different angles but I am not touchin it again until those nasty decals dry.  Good thing is they are too thin to silver I think. They really act like the were dipped in pure solveset to get them off the backing. They are that mushy. I rubbed out the air bubbles repeatedly with a brand new clean soft paintbrush. Got the wrinkles out. Lotsa work! Banged Head [banghead]

 Has anyone else had issues with the Hasegawa decals like this? They dont disintigrate but fold under way to easy and melt and disolve like the setting solution is added right in!  Maybe I need to check my water for acid rain?

 Gotta go to bed. Early day tomorrow! Good Night all! Bow [bow]

  • Member since
    July 2004
  • From: Sonora Desert
Posted by stikpusher on Tuesday, April 28, 2009 10:34 PM
Thanks Frank- Good eye on the RLM 84. One LHS owner suggested RAF Sky and I went with Humbrol's shade of that color for the 84. Doing that leading edge was something of a bear freehand... I need to invest in some silly putty... LOL!


F is for FIRE, That burns down the whole town!

U is for URANIUM... BOMBS!

N is for NO SURVIVORS...

       - Plankton

LSM


JOIN OUR COMMUNITY!

Our community is FREE to join. To participate you must either login or register for an account.

SEARCH FORUMS
FREE NEWSLETTER
By signing up you may also receive reader surveys and occasional special offers. We do not sell, rent or trade our email lists. View our Privacy Policy.