SEARCH FINESCALE.COM

Enter keywords or a search phrase below:

Regia Aeronautica GB II (06/15/09 to 06/15/10)

261189 views
3232 replies
1 rating 2 rating 3 rating 4 rating 5 rating
  • Member since
    February 2007
  • From: Bournemouth UK
Posted by Luftwoller on Saturday, January 24, 2009 2:17 PM

I win....3 posts on the trot.

As for the pilots uniform colours, err, i think they were a little less strict than some other countries.

Great knees, dont ya think.

...Guy

..'Your an embarrassment to the human genus, makes me ashamed to call myself Homo'.
  • Member since
    December 2003
  • From: Indiana
Posted by hkshooter on Saturday, January 24, 2009 2:31 PM
I finally got the chance to order my kit today. Sprue Bros was outBanged Head [banghead] so I had to order it from Roll Models. I hope it arrives before the deadline! I've been lurking here in the meanwhile and see some nice stuff going on. I hope to join the fun soon.
  • Member since
    October 2007
  • From: Inland Northwest
Posted by Summit on Saturday, January 24, 2009 3:04 PM
 sfcmac wrote:


 Sean has inspired me to try to do another grass roots build. To achieve the full effect I think I have chosen one of the most horrible kits so it should be fun!


 Wowzers and that cowling! Three pieces! Cut right in half through all the blisters!  Very considerate as they don't line up anyways. I did not realize that the MA 200 had off set blisters on the cowling.  Well it doesn't get any better than this! Let me tell you! Thanks Sean! Thumbs Up [tup]


Big Smile [:D] Wow, am I ever excited to see this come out of the Secret Vault ! One of the first kits I built when I got back to modeling had a cowl like that. An old Esci Henschel 123

Henschel HS. 123 A small round needle file , putty,and lots of sandpaper rolled into little tubes spiffed them right up.

Sean "I've reached nearly fifty years of age with my system." Weekend GB 2008
  • Member since
    September 2004
  • From: Vernon, BC, Canada
Posted by razordws on Saturday, January 24, 2009 3:10 PM

Wow, was up till 2:00 am supervising my 13 year old daughters sleep over.  Then they woke me up again at 3:30 with all their racket.  Disapprove [V]  Then I come on here and find that Aaron is blaming me for everything - though it's ultimately Guy's fault for starting this whole thing.  That's okay though, I've got big shoulders.  Man I need a nap. Zzz [zzz]

Anyway, while staying up late managed to get some stuff done on the G55S.  It's a 1/72 scale Supermodel like Sean's so not much detail.  Just lots of clean up and trying to get parts to fit.  Still got to putty the seams and I need to knock down the raised panel lines a little more.

Hope this next pic doesn't give some of you nightmares.  Nice little gull wing to this one.

Sean, I'm just going with the instructions on painting the figure.  Brown suit, black boots and white life vest.  The instruction on my Italeri Ca 311 say pretty much the same thing except leather boots.  I'll see if I can dig anything else up.

Dave

  • Member since
    September 2003
  • From: South Central Wisconsin
Posted by Daywalker on Saturday, January 24, 2009 3:14 PM
 razordws wrote:

Hope this next pic doesn't give some of you nightmares.  Nice little gull wing to this one.

Thanks a lot Dave. Sigh [sigh]

LOL

Nice looking little Fiat you have there!  Bethcha the filler will double the weight of the kit.  Better invest in some steel LG. Smile,Wink, & Grin [swg]

Frank 


  • Member since
    October 2007
  • From: Inland Northwest
Posted by Summit on Saturday, January 24, 2009 3:22 PM

Dave - He he , we hosted a few Birthday Sleepovers for my Daughter. My hair is all silver now. My instructions are in Italian and has nothing on the pilot except an arrow showing where to put him in the pit (?) I guess thats so no one sits him on the wing  hmmm what a great idea for my other Macchi...

I dont know how you can attach the guns and antenna so early. I always have bad results when I try that. 

Sean "I've reached nearly fifty years of age with my system." Weekend GB 2008
  • Member since
    September 2004
  • From: Vernon, BC, Canada
Posted by razordws on Saturday, January 24, 2009 3:26 PM
 Summit wrote:

Dave - He he , we hosted a few Birthday Sleepovers for my Daughter. My hair is all silver now. My instructions are in Italian and has nothing on the pilot except an arrow showing where to put him in the pit (?) I guess thats so no one sits him on the wing  hmmm what a great idea for my other Macchi...

I dont know how you can attach the guns and antenna so early. I always have bad results when I try that. 

Guns and Antenna were molded on as was the pitot tube which is no longer there! Disapprove [V]Sigh [sigh]

Dave

  • Member since
    September 2003
  • From: South Central Wisconsin
Posted by Daywalker on Saturday, January 24, 2009 3:33 PM
 sfcmac wrote:

Anybody got any good ref pics of the pit and engine on one of these babys?  Frank? Don't you have a PC kit of this?  Hope yours is as detailed!

LOL, think mine has a little bit more detail than that. Smile,Wink, & Grin [swg]

These are about the only MC.200 pics I have found.  HTH! Thumbs Up [tup]

Stormo! MC.200 Walk Around

Frank 


  • Member since
    October 2004
  • From: League City, Texas
Posted by sfcmac on Saturday, January 24, 2009 3:46 PM

Hot dam!  It's a plastic horror story! I love it!  Lets play who can build the worst kit in the stash!

Great tip on the cowling Sean! I'll be using it! Fer sure! Fer Sure like OMG! Gag me with a spoon!

 That's that Canadian talk.... Yep Dave's fault. Laugh [(-D]Pirate [oX)]

You fellows got to be pretty dern good to even attempt those in 1/72. At least I can hold mine without tweasers.  But really that gull wing on that G-55? I did not know that. It looks really cool!  Lots of work and tender care going on with those kits Sean and Dave,  Well SC isn't using the most current kit either but his is a little larger like mine.  Going to be a great representation  of the RA like SC said earlier!

Then we got some lurker that likes to shoot HK rifles. Just a good time all round!

 Guy you must be busy with the Missus I haven't seen an in progress pic from you in at least 30 minutes!  Figured you'd be about done!

As far as my fun project I didn't see wasting all that good plastic flash. So I cut some kidney shaped foot pedals and stretched a bit of sprue. While I was at it I noticed all this painted masking tape squares stuck all over my table. So I took my knife and cut out some harness straps for the pilot!

What was the consensus there? Brown suit white life vest , boots boot colored.

Thanks Frank I'll check er out right now!

  • Member since
    February 2007
  • From: Bournemouth UK
Posted by Luftwoller on Saturday, January 24, 2009 3:51 PM

Nice work so far Dave. I cant believe that they molded the guns and pitot on the wing LOL. What happened to the pitot then? Eh? Aaron was right, its all your fault for sure. And trying to turn the blame onto me. I feel lines coming on LOL.

...Guy

..'Your an embarrassment to the human genus, makes me ashamed to call myself Homo'.
  • Member since
    September 2015
  • From: The Redwood Empire
Posted by Aaronw on Saturday, January 24, 2009 3:56 PM
 sfcmac wrote:

  Frank it will look all the better for it I am certain! Thumbs Up [tup]

 Aaron ( luv that name btw) Guy did some work with those here is what I stole from his post a few pages back.

Yeah, quite I've noticed quite a bunch of us lately, Aarons are taking over the forums. Evil [}:)] 

Thanks, I think I'll try to make up some decals and see what happens, can't be worse than leaving them half done in a box for another 3 or 4 years. If this works I may be joining you guys with a bomber, I picked up several 2 and 3 engine Italian bombers a few years ago but after getting stalled on the fighters I put them way in the back.

  • Member since
    October 2007
  • From: Inland Northwest
Posted by Summit on Saturday, January 24, 2009 5:08 PM

Rolling along , oh wait I dont have the gear down as I have one of these Really Cool Stands.

Chi 5I almost forgot about it. I had to mark and cut the 2mm x 6mm slot for the tab. 

Sean "I've reached nearly fifty years of age with my system." Weekend GB 2008
  • Member since
    September 2004
  • From: Vernon, BC, Canada
Posted by razordws on Saturday, January 24, 2009 5:45 PM
Looking good Sean, I thought about using the stand for an inflight display but someone put a torpedo in the way of the slot on mine.  Dunce [D)]Laugh [(-D]

Dave

  • Member since
    October 2004
  • From: League City, Texas
Posted by sfcmac on Saturday, January 24, 2009 5:51 PM

 Wow Sean!  Your moving right along!  Looks bigger than 1/72 in the pics but your getting a good clean build out of it! It is going to look pretty cool when painted!

I got one of those cool stands as well!  Mark of true greatness to include your own stand in the kit!

 I been piddiling around. Added some simple details out of scrap that was laying around the table.  Flash pedals and some panels. Stretched sprue ribs, Tape harnesses and a square cut piece of PE fret for the leather seat backing on the harness.  Nothing to big.

Used your advice and with cone rolled sandpaper got rid of the seams in the cowling. The mis alignment was tough. Basically had to recarve em so the are not offset. Covered the whole thing with Mr Surfacer and it looks as good as Franks kit part. ( yeah right) but much better.

It is slowly evolving!

  • Member since
    October 2007
  • From: Inland Northwest
Posted by Summit on Saturday, January 24, 2009 6:08 PM

Dave - Still do it, just mark a spot back behind the torpedo and cut it out. Mine had no slot. I found the center of the plane, drew a line with a pencil went 1mm on each side with another line. Drilled out the marked area and trimmed it true with the hobby knife.

Chi 6

Sean "I've reached nearly fifty years of age with my system." Weekend GB 2008
  • Member since
    September 2003
  • From: South Central Wisconsin
Posted by Daywalker on Saturday, January 24, 2009 6:51 PM

Some great work here fellas!  I like that clear stand, sure looks better than toothpicks and styro! Dunce [D)] LOL...

Great idea using the flash for rudder pedals Aaron, you get a gold star for that one. Approve [^]

Haven't done much on the 109 today, as Wingus has kept my hands busy all day! Shock [:O]

Frank 


  • Member since
    October 2004
  • From: League City, Texas
Posted by sfcmac on Saturday, January 24, 2009 7:43 PM

Frank busy hands? Shoveling snow?  Hmmmm Always liked my hands getting good and cold then reaching up her shirt back just to hear a reaction! Censored [censored]

I think Sean is in it nose deep! he is on a roll! Looks almost ready to paint to me.

Dave is getting close as well and now SC has no hope for a new AB until Monday! Banged Head [banghead]

You guys are probably sick of my lousy pics but I finished doing all I am going to to the pit of a $5 model that is as old as we are easy!

I wanted to post some pics if that is ok before I paint er up!

No more plain Jane walls and this thing didn't even come with a control yoke! Disapprove [V]

Going to eat some dinner. Lasagna and Garlic bread. No kidding? Must be what put me in the mood for Italian! Make a Toast [#toast]

  • Member since
    October 2007
  • From: Inland Northwest
Posted by Summit on Saturday, January 24, 2009 7:53 PM

Aaron - Speaking of busy hands , take a look at your pilot Shock [:O] Laugh [(-D] must of seen Winnie !

I cant believe how Fast and Far you have gotten with your kit. Wow Thumbs Up [tup]  I dont get sick of your progress pics as I get new ideas everytime I see them.

Old Kits are my Favorite Big Smile [:D]

Dinner sounds Good Dinner [dinner] I have been wanting Italian since Bondo showed his pics and there even wasnt food on the table yet.

You are right, I am checking every sq mm twice before I primer. (I hope I have something to use for primer)

Sean "I've reached nearly fifty years of age with my system." Weekend GB 2008
  • Member since
    December 2005
  • From: back seat of your car with duct tape streched out
Posted by soulcrusher on Saturday, January 24, 2009 8:22 PM
 Summit wrote:

SC- How did you apply your future coat ? Did you brush it on ? I have read and seen where a lot of guys over in the UK do this and it looks great. (UAMF forum) I myself cant brush paint worth a hoot.

I am with you on Frank's part, which ever one fits the best with less headache. Taped Shut [XX]

Sean I like to brush it on with a nice medium size soft brush. It takes a couple of tries to get the hang of it. Make sure the model is dust free first. Then make sure the brush is dust free by washing it first. I apply two thin coats instead of one heavy coat. Less runs that way. I always get small imperfections  but the disapper under the final dullcoat usally. It is the only way to get decals to on properly and it is much easier to move them around over the gloss coat to position them correctly. Try it out on a small model first. It is a skill that will greatly improve the look of you model.

                                                                                  SoulcrusherPirate [oX)]


  • Member since
    December 2005
  • From: back seat of your car with duct tape streched out
Posted by soulcrusher on Saturday, January 24, 2009 8:31 PM

McNeal what have you gotten into now? I take a little nap and your off agian. Well I'm headed to the bench because its decal time. Hopefull there will be some pics posted tonoght if not tomorrow. Now where did Wingus get off to? She was right here a minute ago. Oh well first thngs first!Big Smile [:D]

                                                                                         SoulcrusherPirate [oX)]


  • Member since
    September 2003
  • From: South Central Wisconsin
Posted by Daywalker on Saturday, January 24, 2009 9:59 PM
 sfcmac wrote:

Going to eat some dinner. Lasagna and Garlic bread. No kidding? Must be what put me in the mood for Italian! Make a Toast [#toast]

Me too!  I had pizza for dinner so I am in the mood for some Italian building too. Approve [^]

Looking VERY good Aaron!  Is it done yet?  Is it done yet? Tongue [:P]

Here's a couple of photos showing the resin and kit 109 cowl.  

Quite a difference isn't there. Wink [;)]

Frank 


  • Member since
    October 2007
  • From: Inland Northwest
Posted by Summit on Saturday, January 24, 2009 11:01 PM

Hmmph - I wont even tell you what I had for dinner. Dead [xx(]

Well here is Guy ready for his Macchi !

Guy

Sean "I've reached nearly fifty years of age with my system." Weekend GB 2008
  • Member since
    December 2005
  • From: back seat of your car with duct tape streched out
Posted by soulcrusher on Saturday, January 24, 2009 11:16 PM

Wow that fit is pretty ugly Frank. So what have you decided.

On another note you remember the previosly mentioned Airbrush problems I created for myself. I decided to order a new 200 series because I found one cheap at dixie art supplies. I have been waiting for the new one. The 200NH as you suggested. Well I woke from my afternoon nap and wondered were it might be so I check the tracking number. To my delight it read left at door no signature requsted. Well I jumped up and ran down two flights of stairs and opened the front door to find a nice little box. Ran back up two flights of stairs and grabbed the hobby knife to find a nice little box inside. I open op the lid and my heart sank. Inside was a model 200NH alright but it was the model with the "slotted cup:?! I was confused where was the paint supposed to go. After some research apparentlly the tiny 1/2 once hole in the top of the brush is where the paint is stored while brushing. I missed the fine print in the decsription. I was obssed about purchasing it with the fine needle I ended up with the one with the tiny hole in the top of the airbrush as the only way to load it with paintBanged Head [banghead]! It was a $45.00 dollar AB and it cost $10.00 bucks to ship it. It wll probally cost another $10.00 to send it backCensored [censored]Censored [censored]. So now I am no better of than I was a week ago. I found the Orings that are in the body of the two airbrushes that I have but for the life of me I can not figure out how to disasemble them to replace them. Looks like I will be another coupe of weeks without an airbrush besides the old 350. Iy just has not been my month. I just can't win! I have no idea the turn around tme from Badger to replace the ruined o rings and ger them back to me. seriously thinking about kust wastng the money and buying to more airbrushed just so I do not have to wait. I am so impatient! Sorry just needed to do some major venting. I guess I could use the new airbrush just would have to keep refilling ot every couplre of seconds. AAAAAHHHH!!!Banged Head [banghead]Banged Head [banghead]> Anyway thanks for listing to my rant. I feel beter now.

                                                                                SoulcrusherPirate [oX)]


  • Member since
    September 2003
  • From: South Central Wisconsin
Posted by Daywalker on Saturday, January 24, 2009 11:27 PM

Sean- So glad to see you didn't paint paint Little Guy in a bikini, that would have been crossing a line. Dead [xx(] LOL...

SC- Oh, man!  That is awful news.  When I first started reading your post I was so excited to hear your new AB arrived.  What a total bummer about the itty bitty paint cup!  Hang in there buddy, when it's all sorted out you're gonna be so glad.  I feel for you, I really do. Approve [^]

On a side note, I thought more about the cowl.  If I use the kit supplied one (for a G-6) I really should add the front part of the gun bulges as the G-6 had those present.   Might look a little odd with only half of the bulge present, but then again- might make for an interesting detail.  Perhaps cutting the bulges along the cowl line and hollowing them out, so it looks like a G-6 cowl on a G-4.  Whaddya think?

Frank 


  • Member since
    October 2004
  • From: League City, Texas
Posted by sfcmac on Saturday, January 24, 2009 11:35 PM

 Tofu and peanut butter? Whatever it is it must be working cuz that little guy is tiny and he has features!  What did you do break out the micro scope? Wow !  WHen you gonna paint mine? Heck in 1/48 you could paint him with a mustach probably!  Very well done!  I like figures even the model ones. Tongue [:P]

Not done just yet Frank. That's funny. Got the family here today so gotta do those daddy/ husband things.  Why doesn't the world just leave us alone eh? Grumpy [|(]Make a Toast [#toast]

I did get things painted up a little. I took some liberties and brighted things up a little although I saw those colors on the engine pics on that link you sent. I test closed it up to see what could be seen and it looks pretty convincing looking down the open top.

SC?You t your AB but it is't what you wanted? Well I'll be a monkeys uncle! I bet that's Dave's fault too! He's been kinda ornery with his lack of sleep an all. Not too much you can do but regroup and reorganize. Guy needs a chance to ketchup anyways. Not sure but he seemed really on the go today!

Well here are my last pics for the night. Tomorrow I'll figure out what to do about that huge hole where the wheel wells should be.  Odd you can look right through the bottom and see out the top.


Where is that wine Gum?Cool [8D]

  • Member since
    December 2005
  • From: Germany
Posted by jeff on Sunday, January 25, 2009 1:30 AM
That's some awesome work all around, guys!  Sorry for being AWOL, I haven't forgot about this build, just trying to finish a couple of stragglers from last year.  Finished one yesterday and hope to finish the last one in the next week or so.  I did get the MC202 out and dry fit some of the parts.  Fit was actually pretty good, looking forward to getting started.
"Congratulations, gentlemen! You're everything we've come to expect from years of government training." Zed (Men in Black) [IMG]
  • Member since
    February 2007
  • From: Bournemouth UK
Posted by Luftwoller on Sunday, January 25, 2009 4:18 AM

Its me again, The man with the light in his eyes.....pom pom pom. Aaron your right. I just cant seem to get any bench time. Too many chores it seems and its bumming me out. Ive not even got any time to play Naked twister with Wingus and Dingus, Boooo.

 Im loving coming to the GB though. Everyone is really kicking some butt with the builds, its all excellent. Your scratchbuilding work is awesome and Seans figure painting is cracking as well. Frank, IMHO, id go with the kit part, the resin looks too iffy for my likeing.

Dave, your inflight should be great. Are you going to add a prop blur? Perhaps fabricate somthing out of acetate?

Aaronw and Jeff, (Not another Aaron, Geez. Cant be as nutso as ours though) Nice to see you lads. Theres no rush, keep looking in. Im sure we'll all be here waiting for you.LOL.

...Guy

EDIT. Oops i didnt post he bits i wanted to show you LOL. Heres where im at,

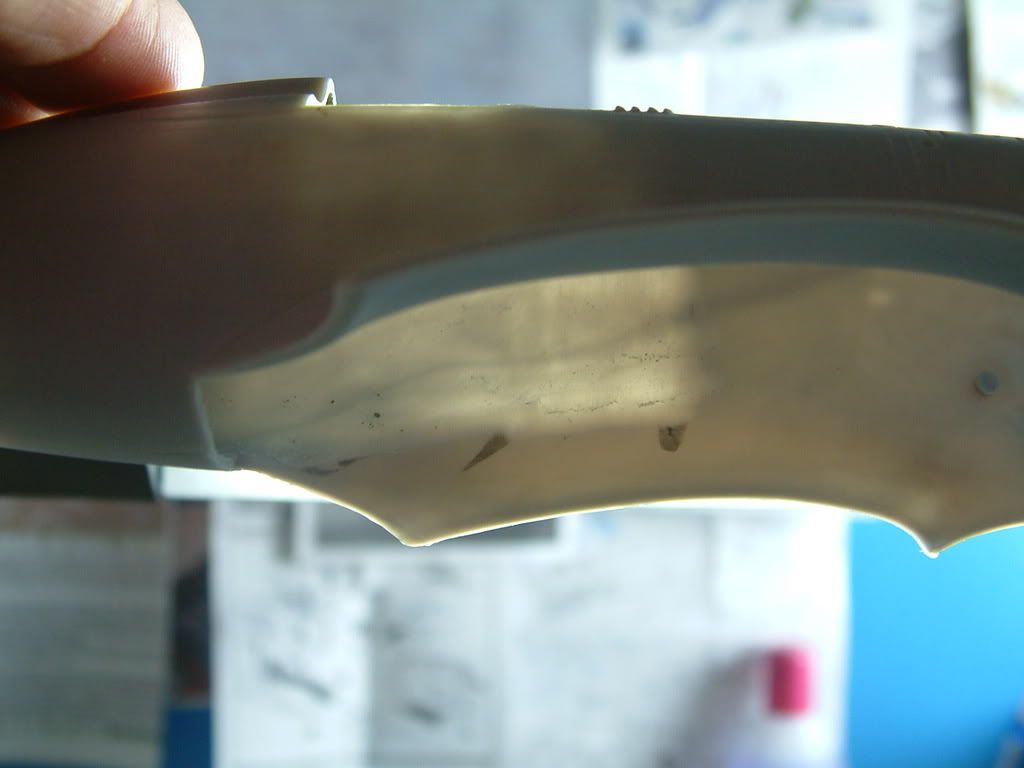
In this one you can see how much i had to thin the sidewalls down,
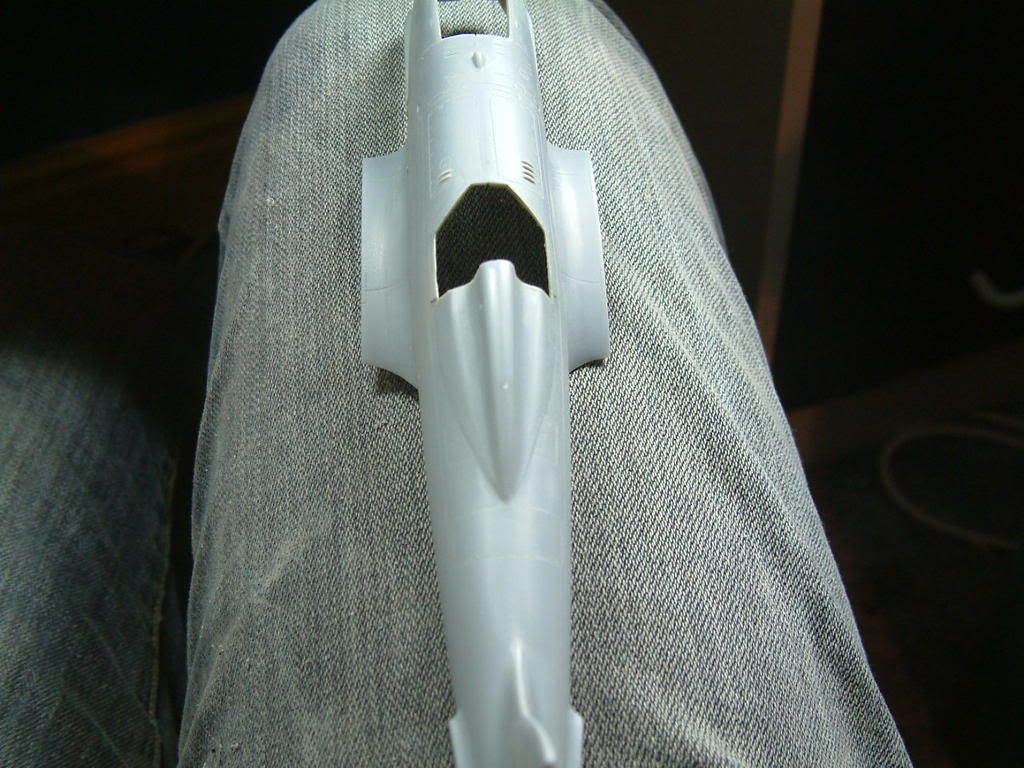
after working out that i can get the pit in afterwards i proceded sorting the fuz seam out, so far no filler,
I was a bit concerned about how the fit of the fuz to the wing was going to go but was pleasantly surprised. Once the U/C wheel bays were thinned right down, it was spot on,
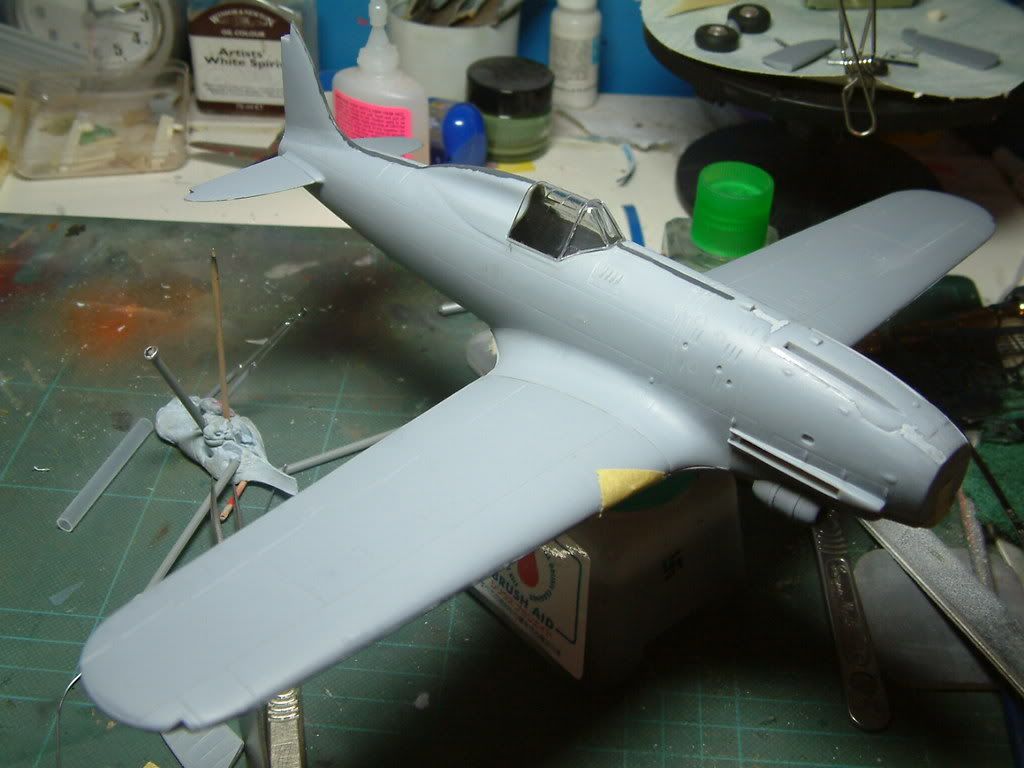
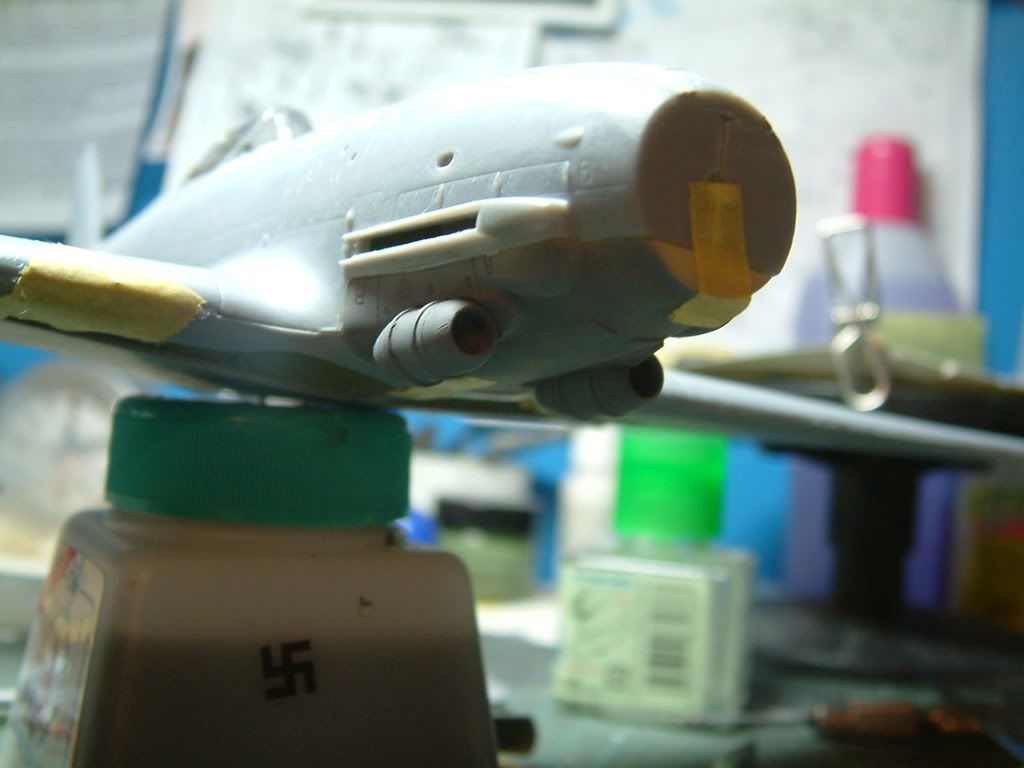
Even the glasswork looks promising. Heres the Oil coolers all sanded and primered, Looking a lot better and more Macchi like, Woo hoo. The black line you can see is how i do my seams. I hand paint on a contrasting colour and, when dry i sand it down. Any low points show up a treat. Also the nose section is a bit like Franks 109, A piece let in afterwards. This wasnt a bad fit but a smear of Mr Surfacer will beautify the old girl.
Hopefully, i might be able to get some bench time later. I have to work tonight, 6 through till midnight, Boooooo.

...Guy

..'Your an embarrassment to the human genus, makes me ashamed to call myself Homo'.
  • Member since
    October 2004
  • From: League City, Texas
Posted by sfcmac on Sunday, January 25, 2009 8:57 AM

 Wow Guy ! I thought you didn't get any time? Looks like it is almost together! That fit of the pit is a shame but looks like you have escaped most of the headaches I experienced.  Probably just cuz your a lot better at it!

Bow [bow]

Did you get all those tiny PE Mumble jumbo sorted? I can't believe all the tiny little reenforcing plates you have to add to the wings and fuselage area.

Going to peep at mine this AM.Tongue [:P] Nekid twister? I like to jello wrestle with them. Of course you think it is jam.

  • Member since
    September 2003
  • From: South Central Wisconsin
Posted by Daywalker on Sunday, January 25, 2009 9:11 AM

Aaron- Nice work!  That is some very convincing work there.  I like your paint stand too, is that a champagne bottle top left from the party with Wingus and Dingus? Evil [}:)]

Guy- You maniac you!  You say you don't get any benchtime in, and yet you almost have ANOTHER one finished!  How the heck do you guys do it? Confused [%-)]

Frank 


  • Member since
    October 2004
  • From: League City, Texas
Posted by sfcmac on Sunday, January 25, 2009 10:16 AM

I dunno how he does it? Must be something in the Tea?  Do you think he takes them to work? I can just see him driving that huge wheeled monster on the wrong side of the street. Hobby Knife in one hand MA 205 in the other while steering with his feet! Then trying to explain to the Bobby that he thought he was in Texas.  Yippie KI Yeh!

Thanks for the comments fellows. I am really trying to keep it simple. I was going to ask of anyone had a decent kit instruction of the MC 200 to try to copy some details but between Frank's link and looking at the 202 which is supposed to be a reengined 200. I figure I can get ball park enough for a kit that had nodda!  Probably more fun that way.  You notice it also has molded on antenna and pitot( 2 of them) tubes.

Working on the wheel bay area. Kinda complex wasn't it?


JOIN OUR COMMUNITY!

Our community is FREE to join. To participate you must either login or register for an account.

SEARCH FORUMS
FREE NEWSLETTER
By signing up you may also receive reader surveys and occasional special offers. We do not sell, rent or trade our email lists. View our Privacy Policy.