SEARCH FINESCALE.COM

Enter keywords or a search phrase below:

Regia Aeronautica GB II (06/15/09 to 06/15/10)

261189 views
3232 replies
1 rating 2 rating 3 rating 4 rating 5 rating
  • Member since
    October 2004
  • From: League City, Texas
Posted by sfcmac on Wednesday, January 21, 2009 2:48 PM

 Hey Guy I was going to say in comparison. The view is so restricted and the opening angle small and narrow I would think your repair would not even be noticable.  Nothing beyond your facinating capabilities.  Actually I am looking forward to any pics or glaring errors as they are very helpful in the learning process!

 The joing of the fuselage and fit of the pit, exhaust and tail wheel are all very tricky! Someone here I think always repeated the word test fit!  That is going to be key! Don't attached any walls or anything together permanently especially on the pit. I used white glue as a hold together option and was very glad I did.  You almost have to rebuild it inside the fuselage from the bottom or a trap will be sprung!  I am Imagining it will be the same on your 205 and the 202 I have yet to tackle!

So far everything has taken a bit of figity work but that was expected!

  • Member since
    February 2007
  • From: Bournemouth UK
Posted by Luftwoller on Wednesday, January 21, 2009 2:33 PM

Wow, Steve and Aaron, you guys rock. Your steaming away with your builds. I just hope your both going to build another or 2. Aaron, the detailing is fantastic and i promise i wont mention any glaring mistakes LOL, that i see in the book.

Anyhoo, i made a monumentous decision, well hardly but ive repaired the cracked sidewall.

1stly i left the part in a cup of boiling water, this amazingly straightened out the bend in the broken piece, without any help from myself, pre-boiling water pic,

then i ground away the rear of the crack to 45 deg angle, superglued together and filled the crack with superglue,

after scraping the front of the crack smooth i painted Mr Surfacer over the crack to level it all out,

Heres what the rest looks like so far,

I added the seat cushion after looking in my Squadron book. There are a few other things that i still may modify, the seat belt being one of them. The square backing is made of leather! The Eduard piece just looks too stiff compared to the pictures. Heres a few, if theres anything else you want to see, let me know,

Something i noticed from the pics, is a glaring ommision from the resin sets are the lack of starting handle on the floor. Scratchbuilding i fear LOL.

...Guy

..'Your an embarrassment to the human genus, makes me ashamed to call myself Homo'.
  • Member since
    October 2004
  • From: League City, Texas
Posted by sfcmac on Wednesday, January 21, 2009 12:35 PM

 Ha what a joke! Me showing anyone up? That's rich! Laugh [(-D] I just enjoy it and have fun!

Figures I finish the pit and Guy gets a new book to show me where things are wrong!  Do you fellows think he does that on purpose?Mischief [:-,]

One good point you made SC is what will be seen. This is a vary narrow 109 like pit with a small opening and pretty small canopy. Still I just keep adding things and following the suggestions for the sheer insanity and fun of it!  Not in a race here just want to make some good interesting fun stuff!  Here are some angles to give everyone an idea of what I mean now that the sun has returned.

 Got my site reflector scratched and the sight mounted. Still think it looks like a soup bowel.

 Got the test fitting and fixing of the  fuse and wing join complete to where it is workable.  Be warned it is a bit challeneging on this kit. It occassionally reveals it's short run kit nature! Evil [}:)]

Painting on a few things as others dry. I am about outta parts to fool with! Guess I can mask the canopy!

PS.Guy, Thanks for the spell check there  and I hope your missus is getting around a bit better. Sorry bout the funeral. Nothing too cheery there!


  • Member since
    December 2005
  • From: back seat of your car with duct tape streched out
Posted by soulcrusher on Wednesday, January 21, 2009 11:41 AM

Looking great there Steve. What top camo colors are you planning.

Aaron that is some superdetailing you have going on there. It is a shame the camera can not pic it up. I hope at least it will be seen when it is dropped in between the fuselage halves. 

I am mired in all of the slow tedious parts of my build. Masking the canopy painting the I.D. band and then waiting forr them to dry so I can mask over them and paint the top color. I attached all of the seperate tiny little resin bumps on the fuselage. I also managed to give the cowl a nice coat of bright red paint. Still nothing worth posting pics over yet. Waiting on my new Badger 200 airbrush to arrive as the old one has picked up some nasty habits. After switching needles, tips and a good cleaning it continues to act up. A new one is only $45.00 dollars so it was a no brainer that the old one had to go. I was tired of stripping and repainting.

Guy time to get crackin my freind! MacNeal is making you look bad. Time to show him how its done. You know you want to start that 205.

                                                                              SoulcrusherPirate [oX)]


  • Member since
    February 2007
  • From: Bournemouth UK
Posted by Luftwoller on Wednesday, January 21, 2009 6:07 AM

Steve, wow man, you are really kicking butz on this build. Your on the homestretch arnt you? What final markings are you going for? Also, how does the decal work as a mask? I cant get my head around that one. Surely it would be a *** to get the decal off afterwards..or do you leave it on the backing? Inquiring minds need to know these things.

 sfcmac wrote:

Added and painted the details recommended by our esteemed collegs and Guy..

Oi. Dont think that slipped by unnoticed Macneal.. its spelt colleagues!!!....HEY!!

Your work on the pit is amazing man. Your really doing some cracking work. Kudos on the alterations as well.

I just got through the post the Squadron Signal Walkaround book on the 205 and its awesome. There are more colour cockpit pics than a superdetailer could ever wish for. The one main thing that seems to be ommitted from all the available kits, that i can see is te starter handle on the floor to the right of th stick. A pretty obvious miss by the manufaturers as it would be very obvious to anyone gauping in the cockpit. Im going to scratch build one for mine. Another thing is i wanted to see what the seat belts look like and theres a few good uns in there. The square bit under the shoulder straps looks like its made of leather and the PE parts just dont do it any justice a all. More scratching i feel. I can post some pics up later if you like. It will have to be photographed as my scanner is on the fritz (His names Erwin and hes a beligerant Fecker).

Anyhoo, today is my day off yet ive got chores all day, including taking SWMBO'ed's Ma to a funeral. Aah well, fun and games for sure. I might even try to do some more modelling. LOL.

Pics later.

...Guy 

..'Your an embarrassment to the human genus, makes me ashamed to call myself Homo'.
  • Member since
    February 2007
  • From: Bournemouth UK
Posted by Luftwoller on Wednesday, January 21, 2009 6:06 AM

Steve, wow man, you are really kicking butz on this build. Your on the homestretch arnt you? What final markings are you going for? Also, how does the decal work as a mask? I cant get my head around that one. Surely it would be a *** to get the decal off afterwards..or do you leave it on the backing? Inquiring minds need to know these things.

 sfcmac wrote:

Added and painted the details recommended by our esteemed collegs and Guy..

Oi. Dont think that slipped by unnoticed Macneal.. its spelt colleagues!!!....HEY!!

Your work on the pit is amazing man. Your really doing some cracking work. Kudos on the alterations as well.

I just got through the post the Squadron Signal Walkaround book on the 205 and its awesome. There are more colour cockpit pics than a superdetailer could ever wish for. The one main thing that seems to be ommitted from all the available kits, that i can see is te starter handle on the floor to the right of th stick. A pretty obvious miss by the manufaturers as it would be very obvious to anyone gauping in the cockpit. Im going to scratch build one for mine. Another thing is i wanted to see what the seat belts look like and theres a few good uns in there. The square bit under the shoulder straps looks like its made of leather and the PE parts just dont do it any justice a all. More scratching i feel. I can post some pics up later if you like. It will have to be photographed as my scanner is on the fritz (His names Erwin and hes a beligerant Fecker).

Anyhoo, today is my day off yet ive got chores all day, including taking SWMBO'ed's Ma to a funeral. Aah well, fun and games for sure. I might even try to do some more modelling. LOL.

Pics later.

...Guy 

..'Your an embarrassment to the human genus, makes me ashamed to call myself Homo'.
  • Member since
    October 2004
  • From: League City, Texas
Posted by sfcmac on Wednesday, January 21, 2009 2:41 AM

Well I suppose I better update before Guy awakes and thinks me gone to bed . Don't wanna be a slacker!  Especially with Steve hard at work! That looks like Brain Surgery Steve!  All manors of technical tools of torture on that poor fighter! Really cool!

 I have always pondered the idea of using decals as a mask. Especially for more complex painted designs.  Anxious to see the results!  Yep nothing more exciting than watching paint dry! Confused [%-)]

Man can't see the levers very well at all and switches. Painted the knobs white an yellow and the camera still has a time finding them. They are there though. Can you see the blue O2 lines I added?  Hmmmmmm. Oh well they are there as well. 

Need to make a proper round reflector for the gun site then I think I have added all I can think of? Maybe? Mischief [:-,] This is were a punch set would come in handy!  

Added and painted the details recommended by our esteemed collegs and Guy.. Painted them all blue as pointed out and added a little to the tanks to kinda match up with the pics Alex posted!  A few data plates in open bland areas such as are in the said photos and added the Guy squiggles for lettering. Actually got pretty good at writing very small.  If you look close you can read , Guy is in the closet smelling dirty socks!" Written on them. Make a Toast [#toast]Laugh [(-D]Pirate [oX)]

  • Member since
    July 2003
  • From: waynesboro va, via Ireland
Posted by sidure on Wednesday, January 21, 2009 12:28 AM

Great work Aaron its going to be a stunner.

Guy, hope you get it all sorted out.

On my front I am at the same stage as others. Either waiting for paint or parts to dry. So I finally got to throw some paint on it tonight and hopefully get this build moving again. All the other parts are done and waiting for final asembly. A before and after shot for ya. I placed the fuselage band on top of white paint and then the rlm 79. The decal is being used as a mask.

Back to waiting for paint to dry. I have been working on other GB's in between stages here.

Steve

  • Member since
    September 2003
  • From: South Central Wisconsin
Posted by Daywalker on Tuesday, January 20, 2009 10:26 PM

Guy- Bummer about that resin piece, hopefully PCM can get you a replacement FAST.  I say go for it on the 205!  Nothing like MANY WIP's on the bench at one time! Whistling [:-^]

Aaron- FANTASTIC WORK!!!  Your cockpit is looking quite spectacular indeed.  As Dave said, great idea on the wire-guided missles levers.  Also gonna file that technique away for the future.  Seriously, that is some damned fine work there. Bow [bow]

Oh, yeah... like the "Reggae Aeronautica" GB badge. Clown [:o)] LOL

Frank 


  • Member since
    October 2004
  • From: League City, Texas
Posted by sfcmac on Tuesday, January 20, 2009 6:54 PM

   Well gonna take a wee break again. Sadly I don't think there is much photo worthy to add to the thread. Future dipped the Clear parts. THere on a paper towel covered for dust. That's exciting. Other than that I am watching paint and glue dry.  I Attacked the remaining parts with paint and have reached an impass until things are dry enough to proceed.

Thank you for all the encouraging comments and the blue o2 stuff! It was listed to be painted silver but apparently not! I put a little blue line from the tanks to the regulator. Won't show but it's there.  Really happy with how the little knobs turned out. Dark now I'd never get them to show up.  Oh well. Guess I can see what everyone else is doing?  Thanks again fellows!

  • Member since
    December 2005
  • From: back seat of your car with duct tape streched out
Posted by soulcrusher on Tuesday, January 20, 2009 6:24 PM

Wow Aaron you are really making some great progress on that kit with Guy like speed. FYI Guy is correct all of the parts that make up the oxygen system are blue to identify them as such.

Guy hope those struts arrive soon. I found a source for them here in the states though the online company that has them is known for their slow delivery and showing things in stock that they do not actually have. I am in no hurry on my Cr 42 so I will just wait until they arrive.

                                                                                  SoulcrusherPirate [oX)]


  • Member since
    September 2004
  • From: Vernon, BC, Canada
Posted by razordws on Tuesday, January 20, 2009 5:05 PM

Fantastic work on the pit there Aaron.  I like your technique on the miniscule levers.  I'll have to file that one away for future reference. 

Not sure we can see the end of your sig so not sure what you are refering to.  Knowing you, probably best to keep it that way Wink [;)]

Dave

  • Member since
    October 2004
  • From: League City, Texas
Posted by sfcmac on Tuesday, January 20, 2009 4:00 PM

 I'm a post hog!  Where are the busy bee's? All kinds of post then I start and Y'all run off! I must need some new deoderant. Dead [xx(]

Lotta time eating stuff here but not a lot to show up? The PE stuff is tiny and how to get clear glue or even future to hold them. Well time for innovation. I have no doubt that most of you could do this the right way but since my dexterity is limited to scatching my behind I am using some hair thin wire and my home made precision gluers to attach the wire to the pe prior to cutting from the fret. I then use it to guide my part to the target much like a wire guided missile. Mischief [:-,] Het it works and when dry I simple snip the wire even with the part and it adds a depth to an otherwise flat part and gives it more surface to stick. Not to your fingers if your lucky!

i can't even get the smaller levers and such to show up in the sunshine but the one on the white paper has enough contrast as it is yet unpainted.

I don't have that little googly part for the gunsite like Guy uses so I settled for an old fashioned round drop of clear glue. A little diff from the german gunsites. This one looks like a compass or ashtray. Round with a round reflector to create.  Wonder if it had the power cable?

Oh yeah the O2 thingie is blue like in the 109's now! You had better be right or , or ... or I suppose we would both be wrong now wouldn't we?  Oh well none of these are around today so prove it! Laugh [(-D]

Squeezing in little items for the paintshop. The Radiator is there and a few tidbits. Painting wheels , exhaust and the last little stuff while I wait for all to dry!

Thanks for giving a look and keeping me company..... Whistling [:-^] Make a Toast [#toast] Pretty slow going  but the elves are out back sunbathing! Make a Toast [#toast]Wink [;)]

PS, Do you fellows like my adaptation to the GB at the end of my sig?  Not to worry Frank I shall use your real deal when and if I earn it! Pirate [oX)]

  • Member since
    October 2004
  • From: League City, Texas
Posted by sfcmac on Tuesday, January 20, 2009 2:01 PM

 Hey Steve! That is the 1/32 scale Pacific Coast RE 2005 (delux kit) Why is it delux? I dunno? Marketing I guess! 1/32 so now you really know how thin them wings are eh?

 Guy I was thinking it was the same O2 regulator as on the 109's the instructions call foe aluminum? I dunno the light blue would add a splash of color. What should I do? Hmmm !

Working on the Control panel now! Really nedd some of Guy's patience and skill with gunsights! You should see these tiny switches! Smaller than the attachment points to the fret. Somebody has gone a little wild here!

Time for some lunch!


  • Member since
    February 2007
  • From: Bournemouth UK
Posted by Luftwoller on Tuesday, January 20, 2009 1:42 PM

Aaron, that is some awesome detail mate. Seriously top shelf stuff. On the R/H sidewall, that round snail looking thing is the oxygen regulator, as used on German stuff. I know you already know that its painted light blue so im not going to even tell you that Wink [;)]. Another thing that you could do is run a pipe from one of the cylinders to the regulator. Just a thought, Sir. I doubt youll be able to see it, but we'll know its there LOL.

Im just attacking everything else in the kit, Painting the wheels, prop, exhausts etc, trying to work out what to do. I just couldnt contemplate starting a third kit. The guy who sold the contrail strut thingys for the CR.42 reckoned they would be with me today. There not! But they might arrive tomorrow. You never know.

...Guy

..'Your an embarrassment to the human genus, makes me ashamed to call myself Homo'.
  • Member since
    July 2003
  • From: waynesboro va, via Ireland
Posted by sidure on Tuesday, January 20, 2009 1:29 PM

Very nice looking pit photos Aaron. Looks very simular to my 202 but with more detail. That is the Hasegawa kit right?.

Steve

  • Member since
    October 2004
  • From: League City, Texas
Posted by sfcmac on Tuesday, January 20, 2009 12:06 PM

 I put on my Army gas mask. Works pretty well!

Hey  did Guy say he is stalled on 2 builds? Never thought I'd see the day. Sigh [sigh]

Well I must be in lick as Wingus and Dingus are enjoying some tropical Texas weather. Been doing the microchip repair that is the resin and PE pit on this thing, Need a coffee break so I took a pic or 3 of where I am with it. The silver tanks were originally molded into the side wall of a solid resin piece. Found out you had to carve them outand insert them through the back wall. Kinda hides them but what's a modeler to do? Tha was a lot of work. I just realize I have left a big blister on my index finger from all the carving and such. Must be getting soft huh?

Amazingly none of this was shown on the instructions. Wow pretty big omission if you ask me. Like figuring out a puzzle if you will.

Doing my usual painting tricks. The contol yoke is just busy with detail. I used 14 separate colors on it alone.

I'll get my coffee and start on the PE. Next should look purdy cool! Has the tiniest parts. not just levers but little switches and pull handles that look like a fruit fly leg.  Fun Fun!

BTW has anyone sen my PE shears? I hate cleaning up and organizing! Can't find a thing afterwords! Angry [:(!]

  • Member since
    December 2005
  • From: back seat of your car with duct tape streched out
Posted by soulcrusher on Tuesday, January 20, 2009 11:43 AM

Aaron welcome to the dark side of resin wheel well inserts. I have never heard of any resin wheel well insert fitting in the wing of any model. Not even the OOB resin wheel wells fit. If the wings are thick enough you can sand a little off the inside of them to free up some space to like I did on my Classic Airframes Re 2000. If it is at all warm outside I like to bring my resin bits outside with my dremel and let nature carry away the mess. Saves on alot of dusting afterwards too.

Snow! To the depths of Davey Jones locker to the next soul who utters that vile word. If you live in Southwestern Conn. you will agree with me. It has snowed about six times in the last two weeks. I'm tired of cleaning off the darn car every morning before I can go to work. Thank God for Subaru otherwise I would have ended up in a ditch by now.  Do'nt even say it MacNeal! I know it is probally 70 and sunny down in Texas.

Guy why not have three models started? The Hasegawa 205 is a honey of a kit and goes together like a charm. Just what you need to get you back on track and posting your great work agian. Wigus and Dingus innocent? Innocent of what? I mean come on man look at those pics. They look pretty playfull to me. Of course this is all speculation on my part Whistling [:-^].

                                                                                   SoulcrusherPirate [oX)]


  • Member since
    February 2007
  • From: Bournemouth UK
Posted by Luftwoller on Tuesday, January 20, 2009 11:00 AM

Well, i Emailled PCM and got this response from them. Ive replied for a rough timescale, but im not holding my breath.

'We have asked MPM for some replacement pieces.  If we can get them,
we will inform you.  We don't have any resin spares left in our
warehouse.  Thanks and

Best Regards,

Ken Lawrence
Pacific Coast Models, Inc.

Aaron. those wheel well inserts look great. They are always Sods to do, they leave such large pour stubs on the things. Do you remember my Do335 i did? The wheel wells on that thing still give me nightmares.

Im a bit bummed at the mo. Both my entries so far have hit a bit of a stumbling block. Woe is me LOL. Ive still got the 1/48th 205. It seems a little wrong to start a 3rd model with 2 boogered on the bench.

As for Wingus and Dingus, they are both wearing fishnet body suits that bear a striking resemblance to Aarons stockings. Just remember you lot. Play nice, theyre innocent young things, Yeah Right LOL.

...Guy

..'Your an embarrassment to the human genus, makes me ashamed to call myself Homo'.
  • Member since
    October 2007
  • From: Inland Northwest
Posted by Summit on Tuesday, January 20, 2009 10:23 AM

 razordws wrote:
Aaron, I've been told that the resin stuff is extremely toxic so I hope you were wearing your respirator for all of that. 

Sign - Ditto [#ditto] Use a real filtered one, not one of those cheap paper chimp mask. Trust me on this one.

Aaron- I can see that you are going to set the Bar very high again, makes me think I need to move to the Lego forum Laugh [(-D]

Sean "I've reached nearly fifty years of age with my system." Weekend GB 2008
  • Member since
    September 2004
  • From: Vernon, BC, Canada
Posted by razordws on Tuesday, January 20, 2009 9:43 AM
Aaron, I've been told that the resin stuff is extremely toxic so I hope you were wearing your respirator for all of that. 

Dave

  • Member since
    September 2003
  • From: South Central Wisconsin
Posted by Daywalker on Tuesday, January 20, 2009 7:29 AM
 sfcmac wrote:

Stuff would make good fake snow for a winter scene. Sign - Oops [#oops] Sorry Frank. 

( Said the "S" word) Black Eye [B)]

ACK!  Bite your tongue Man!  Cursing like that shall bring Charlene's wrath upon you! Shock [:O]  Looking very good Aaron!  That resin dust is a PITA.  I use a vacuum (not the one for vacuuming the house or Dee will whoop your Censored [censored]!) and prop it up near the dremel.  Sucks in all of that dust, though be careful- tiny parts can be sucked in as well (don't ask me how I know this! Shock [:O])!

Frank 


  • Member since
    October 2004
  • From: League City, Texas
Posted by sfcmac on Tuesday, January 20, 2009 1:51 AM

Ah well fellows I don't think it is your skills at all! It is that darn fishnet curse that Guy has brought down apon us!Dead [xx(]

When I said I was breaking sprue I should have said cleaning resin bits!  Very touchy stuff as they are as detailed as an Aires item but far more brittle. I was hoping that since mine were of a gray as oppossed to the cream color that they would be more hospitable but alas this was not the case. A reenforced cutting disc on the dremel had a time getting thru the thick hard resin molding blocks and the results were scary! The vibration from the cutting tended to crumble and crack the resin. On my first part it almost fell apart in my hand. Banged Head [banghead]

 Now just to make things interesting the wings are also very very thin. The slightest bit of molding boot left unremoved on the wheel wells will result in the wings being spread apart and not fitting. There is a groove cut around them that I used as a measurement on how far to sand them down.
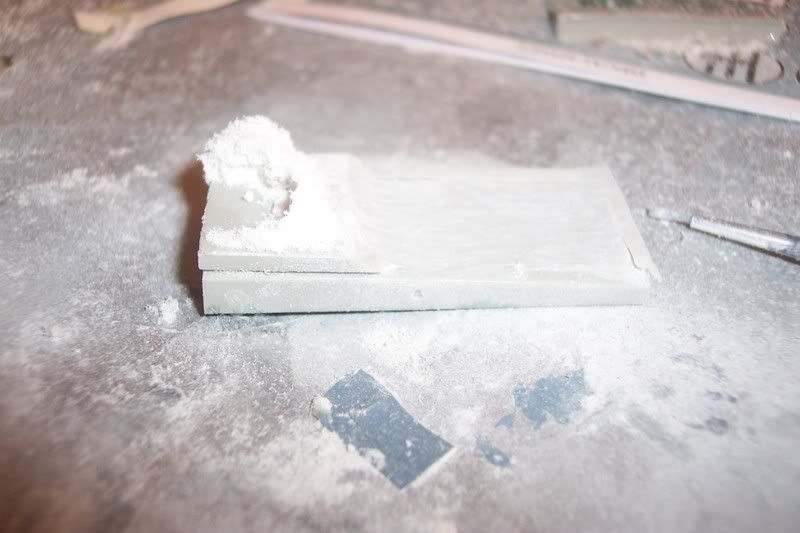
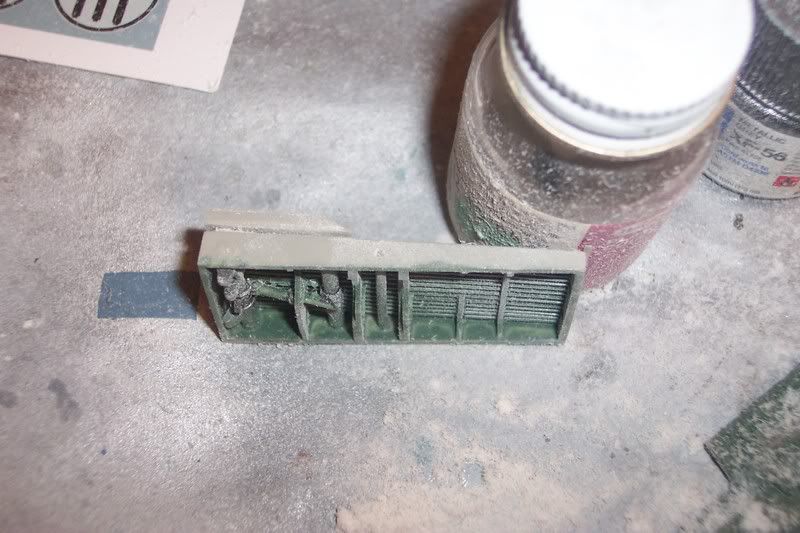
this results in the floor of the wheel well being thin as an onion skin on that brittle resin so you can imagine how slow and careful you must sand and grind to prevent destroying it altogether. If your nerves can survive it all the resulting weakness of the part is nullified simply by glueing the wing halves together. The fit still being very tight and the wing top becomes the new strong back to the wheel well.
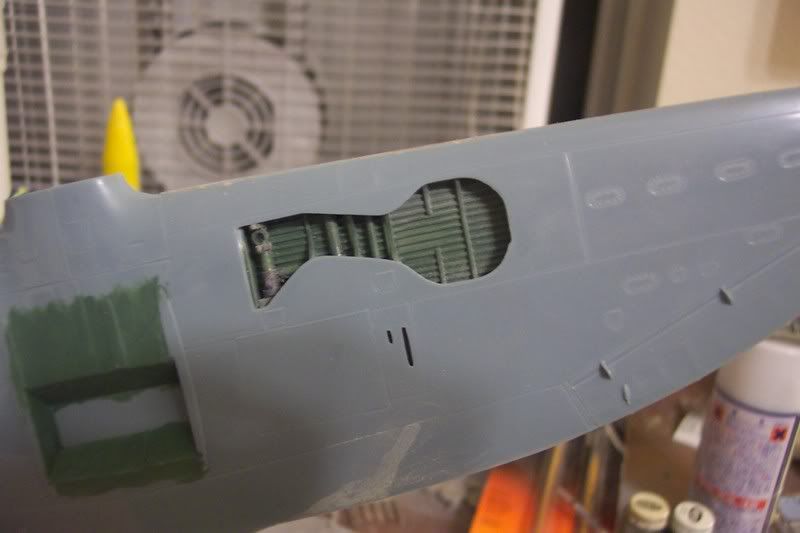
An angle to show the thiness of the wing.
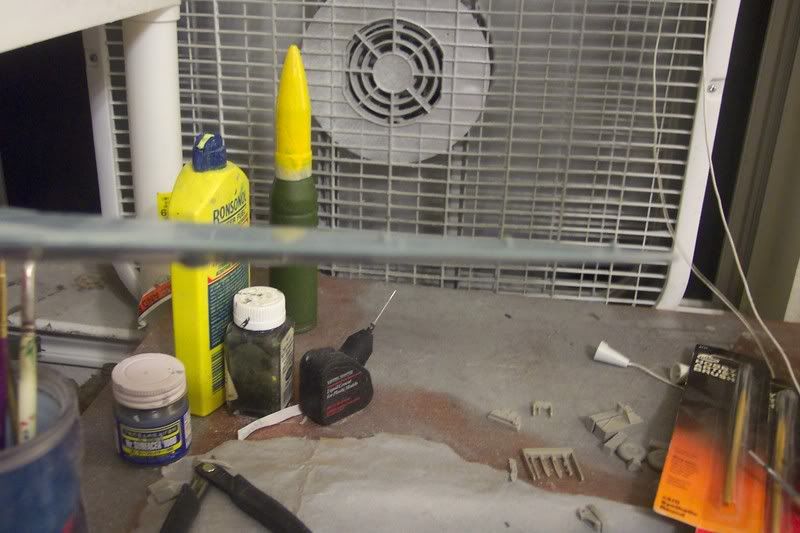
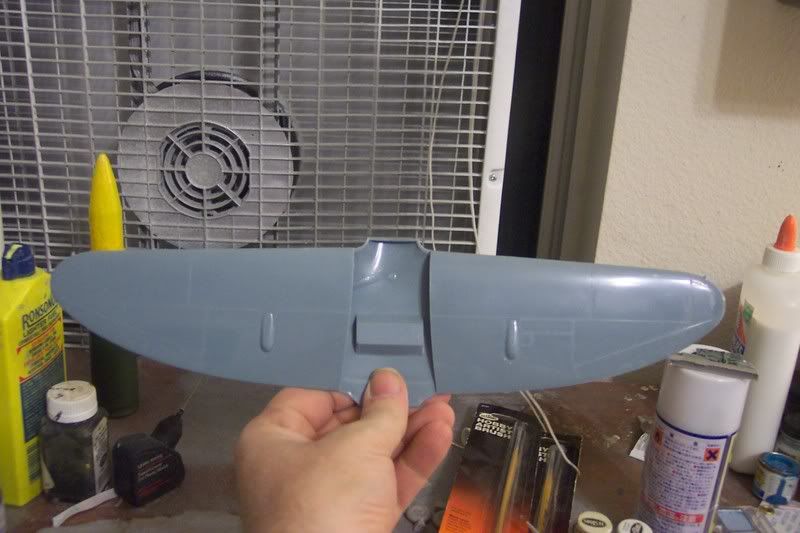
I was able to Super Glue them in place and breath much easier.

More resin clean up especially on some tiny parts took a lot of time and was very messy!
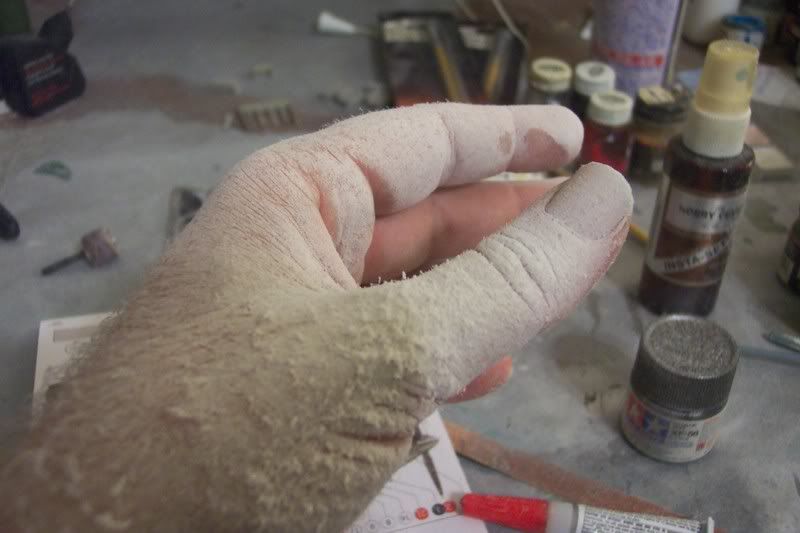
Stuff would make good fake snow for a winter scene. Sign - Oops [#oops] Sorry Frank. 

( Said the "S" word) Black Eye [B)]

 I had the fan blowing full force and still this stuff got all over everything!  Holding my breath and respirating was a must!  Still the wife ask me what was that white stuff I had all over my face! Blush [:I] Yes it was dust!  Plueeeze!!!! Taped Shut [XX]

Anyhow it reminded me of how the fine talcum like sand of the desert got in an all over everything and it gave me an idea of how to clean it up. Using my trusty future spraying Airbrush I simply turned on the compressor and without paint blew off all the dust from everything and the fan sucked it right out the window to fly through the atomosphere and eventually land on everyones bench. Sharing the wealth there!
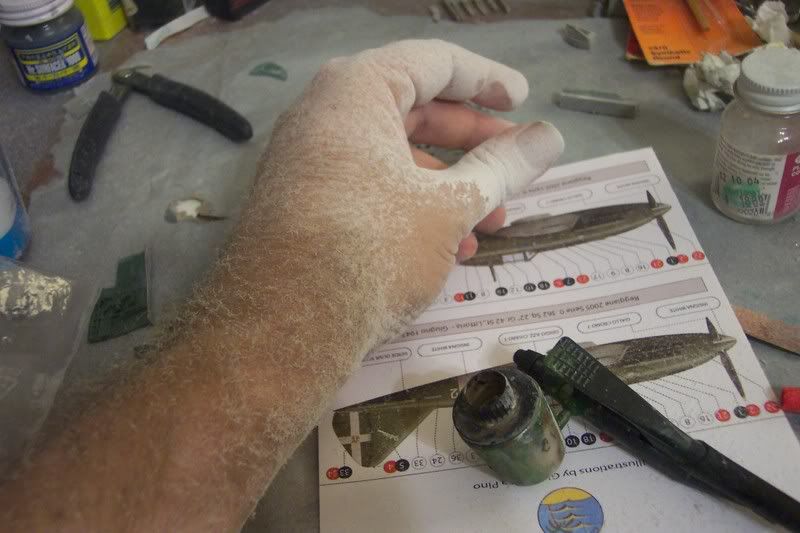
Got the fuselage all cleaned up and dry fitted to the wings. Looks promising. Working on a very detailed pit with the tiniest little PE levers and pulls.

Guy your talking about adding to this?  Building OOB just kills ya don't it? Chef [C=:-)]

Hopefully the worst is over and things progress a little quicker!  Keep on plugging there fellows! Thumbs Up [tup]


  • Member since
    December 2005
  • From: back seat of your car with duct tape streched out
Posted by soulcrusher on Monday, January 19, 2009 5:49 PM

Guy  I feel you pain. I have been screwing up everything I touched for the last month until I pulled of that Piaggio powerplant. Pacific Coast Models is indeed on the Pacific Coast here in the states. Santa Rosa, California to be exact. Here is their website. There is a lnk you can click on and if you give them your info you can ask then directly whether they will replace the warped piece and they will email you an answer. http://www.pacmodels.com/ This is a warning though. This sight is filled with all sorts of goodies and could lead to many impulse purchases to those who love the planes of the Regia Aeronuatica.


If you think Aaron has kidnapped Wingus and Dingus from you there is a simple was to find out if they are imposters. Check Wingus's right inner thigh for a mole. I can not tell you how I came upon this info due to the fact this is a family web sight but this information is gold I guarentee.

                                                                                     SoulcrusherPirate [oX)]


  • Member since
    September 2004
  • From: Vernon, BC, Canada
Posted by razordws on Monday, January 19, 2009 2:56 PM
Hmmm... Guy, you might want to run a DNA scan on wingus and dingus.  It sounds like Aaron kept the originals and sent you the inferior clones when he borrowed them for the PBY!  I'm sure you'll figure out a solution for the damaged piece. 

Dave

  • Member since
    October 2004
  • From: League City, Texas
Posted by sfcmac on Monday, January 19, 2009 2:49 PM
 Luftwoller wrote:

Waaaaaaaa, great photos btw, waaaaaaa, your skills are back on trak but mine are taking a serious nosedive. The left hand sidewall was slightly warped and in trying to restraighten it.......guess what happened.. NOOOOOOOOO, snapski. Dont know what to do, would PCM send out a new bit? Where are they based? So many questions, Waaaaaaaaa.

...Guy

Stand to villian! It has become apparent that your more than mortal powers are on the fritz! Could this be due to the fishnet curse placed apon you by a certain photograph that of who's name we dare not speak?  Have Wingus and Digus forsaken their master in favor of one more talented and endowed with superior staying power?  Well perhaps or maybe it was just a bad day?

 My build is truckin right along!  Everything fits perfect and have all the perfect paints and refs I need! Only a tail remains intact as the soul surviving piece of an existing 2005. Hard to prove me wrong if I got the tail right is my philosophie?  I may even be finished by the morrow at this rate if I can keep them elves from flirting with me all night?

Glue it back together! Paint it! And tomorrow will be better! You shall see!

 Good golly They got some cold fingers! Giggle Giggle! Mischief [:-,]

  • Member since
    February 2007
  • From: Bournemouth UK
Posted by Luftwoller on Monday, January 19, 2009 1:38 PM

Waaaaaaaa, great photos btw, waaaaaaa, your skills are back on trak but mine are taking a serious nosedive. The left hand sidewall was slightly warped and in trying to restraighten it.......guess what happened.. NOOOOOOOOO, snapski. Dont know what to do, would PCM send out a new bit? Where are they based? So many questions, Waaaaaaaaa.

...Guy

..'Your an embarrassment to the human genus, makes me ashamed to call myself Homo'.
  • Member since
    December 2005
  • From: back seat of your car with duct tape streched out
Posted by soulcrusher on Monday, January 19, 2009 11:34 AM

Glad to have to back your Guyness! Thanks for the kind words. That engine is the first complicated thing I have done latlely that I have not screwed up on so I am felling much better about my modeling skills. I was really getting bummed out there for a while. There just is not alot of resource material anywhere on the 202/205 series. They were never built in any great numbers and came into service so late in the war for Italy. As a testement to the quality of the planes the Germans confiscated all of them before Italy turned sides and pressed them into service agianst the Allied side. Here are some pics of a 202 cockpit. All three pics are not of the same plane so I do not know how much help they will be but the photos are pretty clear. Do I get out of homework detail too?!

                                                                           SoulcrusherPirate [oX)]


  • Member since
    February 2007
  • From: Bournemouth UK
Posted by Luftwoller on Monday, January 19, 2009 10:17 AM

Yo Mortals, it is 'I' your illustrious leader. Sorry about the Tardiness (Watching you Macneal), but i actually had to do some work. Frightening i know. Its ok, i just took it out on the blue rinsed biddies on me bus.

1st order of busines, Crusher, that engine is the bomb, my friend. Ready to be strapped into the P47..I mean P43, err Re2000

If youve not seen it, you should take a look at Aarons PBY, It looks the biz, for something from the other side, Whistling [:-^] That kit looks great, i reckon it must be the next gen from mine, sort of thing.

Cardshark, those pics are great, and duley saved LOL. Im a bit shocked at the lack of pics of the 205 and 202's interiors for that matter. Such an influential plane. There are a few in museums, why no detailed cockpit shots?

Ive just ordered the Squadron walkaround book on the 205, hopefully that will have a few in it. I also ordered those contrail strts mentioned earlier. He reckons ill get em tomorrow. Cool. 

Glad to see Aaron has broken sprue. Good man. The only probs i think we may encounter is the thinning down of the fuzz wall to get the cockpit tub in. No sweat to a man of your callibre, big boy. Ive continued detailing the pit of mine and thats my plan tonight, armed with Cardsharks pics.....after ive had a my chinese takeout that ive not ordered yet.

As Cardshark found those great pics he can set the homework. Good man.

...Guy

..'Your an embarrassment to the human genus, makes me ashamed to call myself Homo'.
  • Member since
    October 2007
  • From: Inland Northwest
Posted by Summit on Monday, January 19, 2009 9:29 AM
 cardshark_14 wrote:


I too have a dentist appointment on Tuesday...hopefully they give out free Model Master...Big Smile [:D]

Cheers,
Alex

You might be a wee disapointed as I went to the Hobby Shop before seeing the dentist. Whistling [:-^]

Sean "I've reached nearly fifty years of age with my system." Weekend GB 2008
JOIN OUR COMMUNITY!

Our community is FREE to join. To participate you must either login or register for an account.

SEARCH FORUMS
FREE NEWSLETTER
By signing up you may also receive reader surveys and occasional special offers. We do not sell, rent or trade our email lists. View our Privacy Policy.