SEARCH FINESCALE.COM

Enter keywords or a search phrase below:

Dive Bomber Group Build (May 1 - Dec 31 2009)

38952 views
160 replies
1 rating 2 rating 3 rating 4 rating 5 rating
  • Member since
    September 2008
  • From: World Champions! Not anymore..
Posted by swingr1121 on Thursday, December 31, 2009 3:08 PM

Ok, I'm going to call this one complete at the deadline. 

While trying to finish this one up, everything seemed like it was acting against me.  The weathering didn't go as I had planned.  Apparently a tube of white acrylic got mixed in with my oils and I started doing a pinwash with it.  Then I wondered why the mineral spirits wouldn't work on the white..  That was fun.  Then as I was getting everything all ready and applying the dull coat, I accidentally oversprayed the canopy.  After that I decided I was going to open it up so you could at least see inside.  Anyway, here's the A-36 that was fun to build, and a bit different.  Don't worry, the HS decals have been applied to the prop, I just don't have a photo of it yet...


  • Member since
    June 2008
Posted by lewbud on Monday, December 28, 2009 12:22 AM

Steven,

A change in kits is in order if I'm to bang this one out before the deadline, the new kit is the Revell Germany Vultee Vengeance Mk. II.  Having trouble deciphering the paint call outs, but it looks like Dk Earth, Dk Green over Sky.  Would this be correct for an aircraft serving in India 1943?  Any help mucho appreciated.

Buddy- Those who say there are no stupid questions have never worked in customer service.

  • Member since
    July 2005
  • From: Dayton, Ohio
Posted by warhorse3 on Thursday, December 24, 2009 4:39 PM

Merry Christmas to all. Finally finished my SBD-3 last week, that's the good news. The bad news is that I'm having problems loading the pics into Photobucket. I've noticed other members saying that they have had problems also. Hopefully I'll be able to get this resolved in the next few days. The Apache looks great and the Hs-123is no slouch eitherYes.

Regards, Bill
  • Member since
    July 2004
  • From: Sonora Desert
Posted by stikpusher on Sunday, December 13, 2009 9:48 PM

I installed a scope/sight taken from an old Monogram TBD kit and also installed the instrument panel I made. I also dipped the canopy pieces in future during the week. Almost ready for main painting.


F is for FIRE, That burns down the whole town!

U is for URANIUM... BOMBS!

N is for NO SURVIVORS...

       - Plankton

LSM


  • Member since
    November 2007
  • From: Potomac Falls, VA
Posted by darth_trader on Tuesday, December 8, 2009 10:35 PM

I finished Accurate Miniatures SBD-3 Dauntless a few weeks ago, but hadn't gotten around to taking some photos...until today.  This is a beautifully detailed kit.  The cockpit required alot of care & patience.  I liked the kit so much that I picked up AM's TBM Avenger on eBay.

This kit represents the plane flown on 8 May 1942 by Ensign John Leppla and ARM3c John Liska during the Battle of the Coral Sea. Leppla was credited with four kills over a two-day period, while Liska claimed three. It is perhaps the best known and documented of all Dauntlesses to be flown during The Coral Sea action - 2-S-12 (BuNo 4547) of VS-2, USS Lexington (CV-2) during the Spring of 1942.

  • Member since
    July 2004
  • From: Sonora Desert
Posted by stikpusher on Sunday, December 6, 2009 7:47 PM

This weekend I borrowed a twin .30 flex mount from a Hasegawa A-24 (gonna put in a single    .30 instead) and built it up. I then installed several other "borrowed" interior details- radios, top decking between pilot/gunner, DF homing loop on top of top decking. Here is how the cockpit is coming along to this point.


F is for FIRE, That burns down the whole town!

U is for URANIUM... BOMBS!

N is for NO SURVIVORS...

       - Plankton

LSM


  • Member since
    September 2008
  • From: World Champions! Not anymore..
Posted by swingr1121 on Friday, December 4, 2009 6:53 PM

The Apache is now waiting for some weathering.  She's armed and sits on her own landing gear now..


Just a little bit of paint to shoot on the canopy and windscreen, and a bit of weathering.  I'm particularly worried about that part as I don't think that I've weathered an aircraft before.  In fact, this is the first build that I'll complete in probably 18 years or so.  And back then, I was just helping my dad.  I guess we'll see what happens.  


Mike

  • Member since
    January 2015
  • From: Katy, TX
Posted by Aggieman on Wednesday, December 2, 2009 9:20 PM
That's a good looking Hs123.  You made it well before the deadline!
  • Member since
    May 2009
  • From: Hobart, Tasmania
Posted by Konigwolf13 on Wednesday, December 2, 2009 8:32 AM

Well calling this one a wrap, SWMBO says not to bother with the weathering, she doesnt want the nice paint job looking dirty. On the plus side shes donated a large bottle of gloss laquer to me as long as I get some and thinner and seal it for her.

Did have one small problem at the end, one of the decals tore and disintegrated.

So here's the pics

  • Member since
    May 2009
  • From: Hobart, Tasmania
Posted by Konigwolf13 on Tuesday, December 1, 2009 12:54 AM

Well first of December here, one month to go and about 90% done on painting.

I have to touch up a few parts where the oaint came off with the masking tape, where it wasnt a 100% perfect job with the eastern front strip and the inside of the engine cowling/engine highlights. After that its just adding the final bits and decals. May or may not weather it as SWMBO has lay'd claim to it(shes wanted a biplane for a while), LOL. Not to worried about the time limit


  • Member since
    January 2015
  • From: Katy, TX
Posted by Aggieman on Tuesday, November 24, 2009 7:55 PM
Mike, the Apache looks great!
  • Member since
    September 2008
  • From: World Champions! Not anymore..
Posted by swingr1121 on Monday, November 23, 2009 7:45 PM

Time for a bump.....with pictures!

I haven't forgotten about this GB, just have some family stuffs going on.  Anyway, without further adieu, here's where I sit with my A-36..  Just some fiddly parts and some weathering and I may just call it complete.


Hope you enjoy.


Mike

  • Member since
    May 2009
  • From: Hobart, Tasmania
Posted by Konigwolf13 on Tuesday, November 17, 2009 6:19 AM

Hs-123 update, What a truly borked build...

But I'm still going

Well, I must say for my first resin experience, it was, I think somewhat successful. I only broke the control stick at both ends, bottom end while trying to trim the control handle, the control hand while trying to glue the stick to the floor, very fragile isnt it?

Aftergetting the fusaluge together I have to fill and sand a few small seam problems, and end up taking off some of the raised panel lines. So time to try panel engraving (for the first time). I must agree with most of what I read, should be done BEFORE joining aircraft parts together, didnt do a great job there, but no doubt could of been worse.

 Then I decided to build the unspated version, shave off the bulges for attaching the spats and then find the unspated leg frame has gone westSign - With Stupid [#wstupid]. So build up the spats, all together and milliputted the shaved bulges back in, along with a few other gaps on the wings and struts

Pics below are before the milliputing of spats and wheels, lets just say been a learning curve. (also engine cowling is no fixed on yet...
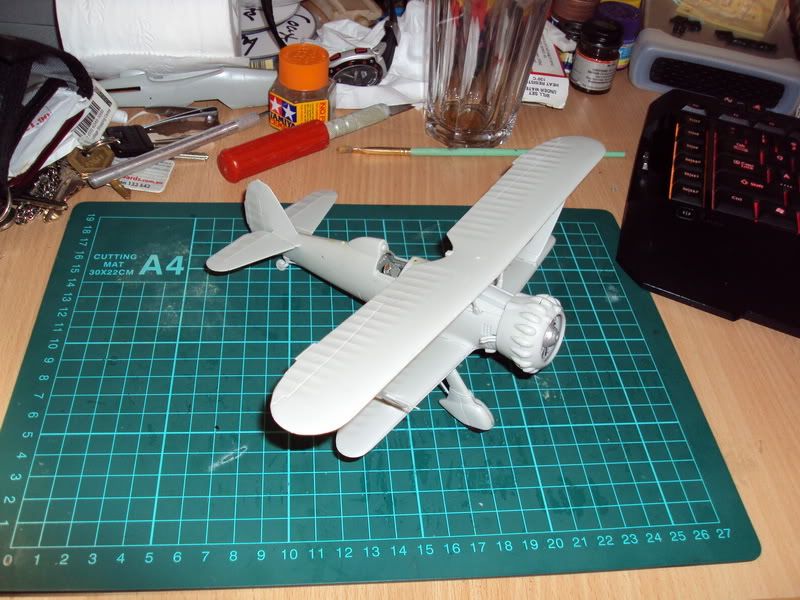
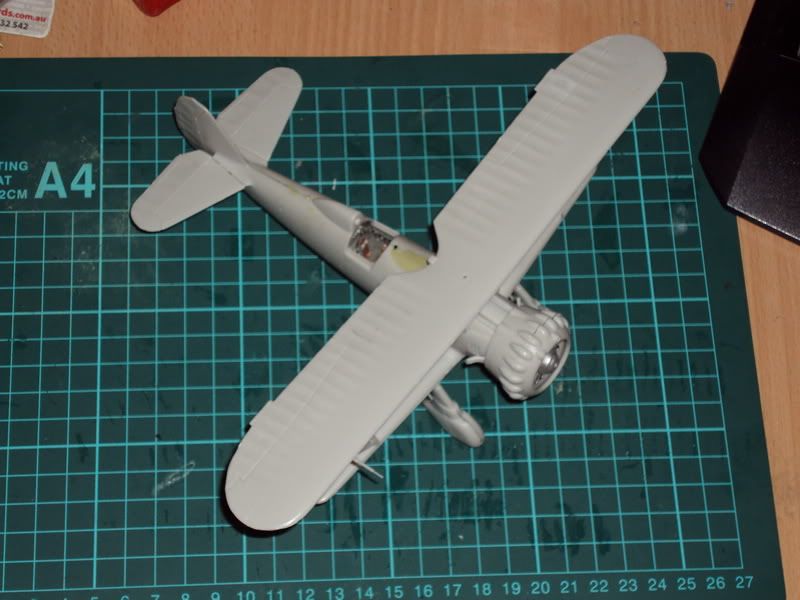
 

I must say, since getting back in modeling with real intent, it has been a huge learning curve since building kits as a kid and older teen OOB and brush only


Andrew

  • Member since
    November 2007
  • From: Potomac Falls, VA
Posted by darth_trader on Wednesday, November 4, 2009 10:15 AM

Dirk,

Excellent job on your Dauntless, I love the battle damage!  You definitely got your money's worth, display her with pride!

Swede was indeed a true hero, I saw a bio of him on the Military Channel.  In one hop, he took on 3 Zeros in his Dauntless. 


  • Member since
    July 2005
  • From: Dayton, Ohio
Posted by warhorse3 on Sunday, November 1, 2009 2:23 PM
I know it's been awhile since my last post here, but the last two months have left me very little benchtime. Apparently my kit had some incorrectly molded dive flap actuators that I've had to correct and the bomb crutch is too weak to suspend the bomb at full extension so I'm making a new one out of brass rod. Hopefully I'll be finished with this build by the deadline and get the time to figure out how to post the pics I've taken. Yeah I know it's not quantum physics but for me to get a half hour or longer a week online for the past three months has been difficult.
Regards, Bill
  • Member since
    March 2008
  • From: New Jersey
Posted by Dirkpitt289 on Monday, October 26, 2009 10:24 PM

 Hi everyone

I just finished this Testors 1/72 SBD Dauntless for the the "War in the Pacific Group Build." I'm not usually a fan of one plane for multiple GB's but since this easly fits the requirements I thought I'd at least show you guys. Its Lt Stanley W. "Swede" Vejtasa's SBD Dautless as I believe it may have looked as he brought it back to the USS Yorktown that fateful day back on 08 May 1942.


This kit was a staggering $7 and has been dubed "El-Cheap-O POS Testors kit" because of its lack of detail. Detail like A COCKPIT!!!! I would never sugest this kit to anyone, but I have to admit I got my moneys worth when you consider how long it kept me occupied. It also was a good test bed for some scratch building, PE application and weathering techniques.

Thanks for taking the time to look.

Dirk

On The Bench:

B-17F "Old 666" [1/72]

JU-52/53 Minesweeper [1/72]

Twin Me 262's [1/72] Nightfighter and Big Cannon

  • Member since
    September 2008
  • From: World Champions! Not anymore..
Posted by swingr1121 on Sunday, October 25, 2009 4:44 PM

Alright.  I guess I have to prove that I'm actually working on the A-36.  It's coming along, slowly, but surely.  I installed the pit and closed her up.  Wings have been installed.  Then I got the idea to cut out the molded in dive flaps and install some PE ones.  Lucky me.  Figured I'd challenge myself. 

As you can see, things have also been painted.  I filled some gaps, sanded said gaps, primed it all up, and started the painting process.  I'm still doing some work on the landing gear, but here is how she sits right now, waiting for some touching up.  The yellow ID bands are painted on.  I figured I needed another challenge.

Hopefully by the end of the day I'll have a coat of future on it waiting for decals.

Enjoy

Mike

  • Member since
    January 2015
  • From: Katy, TX
Posted by Aggieman on Saturday, October 24, 2009 10:34 PM
Bish, it's fine to finish whenever you can.  Be sure to post pictures when you are able to finish.  Sorry to hear about the frustrating loss of parts, that really stinks when that happens.
  • Member since
    December 2002
  • From: Bury St Edmunds, Suffolk, England
Posted by Bish on Saturday, October 24, 2009 10:33 AM
Aggieman Afraid i am going to have to drop out of this. I have been able to get most of the painting done, but then found out i have lost a couple of parts. I have been trying to get them replaced but with no success, and now its a bit late and theres no way i will be able to finish in time. I do hope to get it finished some time next year, have been wanting to build this for years. Sorry about that.

I am a Norfolk man and i glory in being so


On the bench: Airfix 1/72nd Harrier GR.3/Fujimi 1/72nd Ju 87D-3

  • Member since
    May 2009
  • From: Hobart, Tasmania
Posted by Konigwolf13 on Saturday, October 24, 2009 7:07 AM

Well got some time to work on my Hs-123 today and gotta say, what a failure Oops [oops].

 My first go with resins and it was messy to say the least, but it was a good learning curve, so thast at least one positive.

See pics Blush [:I]

well cockpits about 90% painted, Have put the fuselage together,will do the rest of the cockpit, and clean up as much error from out side, as its pretty roomy in the areas I need access to. 

  • Member since
    May 2009
  • From: Hobart, Tasmania
Posted by Konigwolf13 on Saturday, October 17, 2009 6:42 AM

Well long time, no post. I got my Hs-123 cockpit painted, ready to start getting really serious, when things had to be packed up ready for a big move, 4-5 months later, its not going to happen Sigh [sigh]. So have unpacked all my stuff again, heres where I'm up to. Have to pick up a couple of replacement airbrush tips next week then shall be off and racing again, till then I have the cockpit finish off etc.


Andrew

  • Member since
    January 2015
  • From: Katy, TX
Posted by Aggieman on Tuesday, October 6, 2009 4:52 PM
Darth, your Dauntless looks good.  Looking forward to seeing the finished result.
  • Member since
    November 2007
  • From: Potomac Falls, VA
Posted by darth_trader on Monday, October 5, 2009 9:36 PM

Fellow Dive Bombers,

I've been making progress here & there.  Whenever I walk past the workbench, I try to get something glued or painted or sanded.  Almost ready for the clearcote & some weathering.


  • Member since
    September 2008
  • From: World Champions! Not anymore..
Posted by swingr1121 on Sunday, September 13, 2009 7:52 PM

Still plugging away on the A-36.  Not too much progress to report on.  The pit is installed, the fuselage is together.  It looks like an early mustang.  Doing some filling and sanding on it and that's about it.  Will put some pics up soon.

Max, if I need some help I'll be sure to give you a shout.  I remembered that you like the Allison Mustangs.  The Wildcat is next up!


Mike

  • Member since
    February 2005
  • From: Cleveland, OH
Posted by RadMax8 on Sunday, September 6, 2009 9:50 PM
One of my absoulute favorite planes. Be careful on fitting the rear radiator scoop thingy. It's really difficult to understand in the instructions. If you need help I'll try to post pictures of how it's supposed to go in!
  • Member since
    September 2008
  • From: World Champions! Not anymore..
Posted by swingr1121 on Sunday, September 6, 2009 10:51 AM

I have finally gotten some bench time.  Haven't finished my "man cave" yet but decided I needed to do some modelling.  I ended up choosing the A-36 over the A-24.  I'm just about to close up the fuselage and snapped a couple of photos. 

This is the Accurate Miniatures kit.  I picked it up at a show and it came with some PE that I'm attempting to use (first for me).  There are also some white metal parts too that may or may not be used.  We'll see.  Anyhow, how bout a couple of pics?


In the second pic you can see that I decided to add some wire to liven that area up a bit.  Enjoy.


Mike

  • Member since
    October 2006
  • From: Rochester, NY
Posted by silentmodeler on Monday, August 31, 2009 4:19 AM
aww!!  i just finished my SBD dive bomber and didnt realized abt this gb!  dang!!!  i might dont have the time to other one now til dec since i have serveral of dive bombers to build.  Hopefully in the future.
"Do, do not, theres no try" ~Yoda
  • Member since
    July 2005
  • From: Dayton, Ohio
Posted by warhorse3 on Sunday, August 30, 2009 2:28 PM
I feel your pain. NH. It's been a busy summer for me, not much time at the bench. I've gotten the base ready for final paint after test fitting my SBD. I still have some final assembly work plus decals and weathering to do.     Nice dio raider.    Regards, Bill
Regards, Bill
  • Member since
    December 2008
  • From: Goffstown, NH
Posted by New Hampshire on Saturday, August 29, 2009 8:48 PM

Just wanted to drop in and say I have not forgotten this GB.  I have started the Val and already have the fuselage buttoned up (I forgot to take pics of the cockpit building.....you'll just have to take my word it looks decent Big Smile [:D] ).  I will try and get some pics of current build status if I remember (an iffy proposition with my memory Blush [:I]

Brian

JOIN OUR COMMUNITY!

Our community is FREE to join. To participate you must either login or register for an account.

SEARCH FORUMS
FREE NEWSLETTER
By signing up you may also receive reader surveys and occasional special offers. We do not sell, rent or trade our email lists. View our Privacy Policy.