SEARCH FINESCALE.COM

Enter keywords or a search phrase below:

FW-190 Reich Defender III 5/10-2/11

437476 views
1810 replies
1 rating 2 rating 3 rating 4 rating 5 rating
  • Member since
    July 2003
  • From: waynesboro va, via Ireland
Posted by sidure on Tuesday, June 1, 2010 1:58 PM

Yea, I plan on leaving it wide open in the engine/gun area to show off all the detail. I put the engine mounts in last  and the top brace fit but the two side ones never reached the mount so I bombarded it with superglue at the bottom where there is a notch in the wheel wells for it to fit into. Its a little off ( Big Surprise) but I think it will come out ok in the end. Going to put the front cowl on and leave the pannels off.

Quick question for the experts, behind the engine and mounts there is a big cavity before the firewall/gun mounts. Should there be anything in there?????. There is only the engine mounts in there now

Steve

  • Member since
    December 2005
  • From: back seat of your car with duct tape streched out
Posted by soulcrusher on Tuesday, June 1, 2010 1:50 PM

Clebode you have done an excellent job so far on an not so easy to build kit. To have your GB badges rotate you need to create a GIF files. There are alot of different programs that can do this but I use one called GIF Animator.

Steve looks like you are whipping that Eduard kit into shape. The more posts I see on these kits the more afraid I am to build one of the ones I have in the Royal Class kit I have of the F-8.

Frank good to see you making progress. Any spinner pics yet!

I hyave everyting sealed under a dullcoat and the vertical guppe bar oversprayed in lightblue. I'm going to work on the landing gear tonight.

Soulcrusher:op:


  • Member since
    March 2006
Posted by simpilot34 on Tuesday, June 1, 2010 11:42 AM

Julez72

Looking good fellas, great work one and allYes

Ditto Julez!!!! Some amazing work going on!!! I am possibly looking at getting a 1/32 Hase A-8 but if not then I still have my 3 1/72s. As one sig says, so many kits, so little time.

Cheers, Lt. Cmdr. Richie "To be prepared for war, is one of the most effectual means of preserving the peace."-George Washington
  • Member since
    April 2005
Posted by Thunderbolt379 on Tuesday, June 1, 2010 8:31 AM

Clebode -- that cockpit shot will come in very handy! I'm hoping to paint the details tomorrow. I had hoped to find some photoetched harnesses to add to the seat, but couldn't spot anything at Squadron. They had Eduard's set for the F-8 but that featured a lot of stuff that I wasn't planning to use on this build -- maybe later, there are four great decal options in this kit and I will no doubt be back for more when I can track down kits on eBay, since, for some reason, this item is currently OOP. So sadly, the only detail that would be really visible under that nice, clear canopy, the harness, is the one thing that will be pointedly missing!

I got the wing together last night as planned, and painted the engine in a mixed dark metallic enamel. I was planning to drybrush with silver and add a black wash, but, you know... Studying wartime photos and everyone's build-up shots, the engine seems to be essentially invisible behind that fan and the close hug of the cowl ring. Just how much can be seen, guys? I'm loathe to spend time on details that will be invisible -- same with the interior of the cowl, I was going to paint it black, but it seems there is no direct line of sight to the interior at all.

I have an order in for Eduard's mask set, which will hopefully be with me in a few weeks, so when she's ready for paint I'll set her aside and get back to a few other builds in the meantime. That'll also give me a chance to agonise over which scheme to go for -- they're all good!

Cheers, M/TB379

http://worldinminiature.blogspot.com/

  • Member since
    July 2004
  • From: Northern KY
Posted by mucker on Tuesday, June 1, 2010 8:16 AM

xradio81

This is 4 weeks of work on this pro modeler 1/48 g-2, g-3 variant. I am building the g-3 bomber variant in later  war configuration, I think. This is my first German plane since the 60's and this kit is hard to build, even with the enhanced instructions. I got this model for free, so its alot more fun. This is after primer so I can see areas that need work.
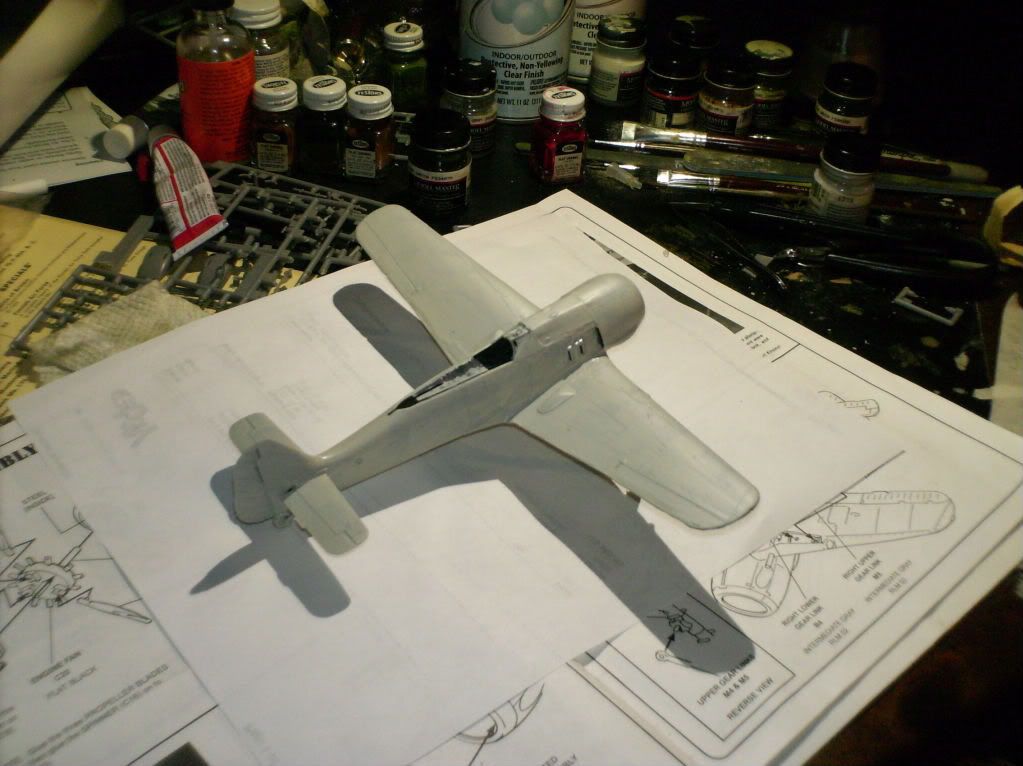
http://i742.photobucket.com/albums/xx67/kaminski148/fw190%20g3%20groupbuild/007-1.jpg?t=1275359779


xradio, I'm working on the ProModeller kit, as well. I hear this is the Dragon kit, re-boxed. How did you find the fit of the fuselage into the wing-spar?

I've not yet attached the cowl, but I can see a lot of putty and sanding in the seam areas.

While mine wasn't free I got it for cheap and it has been fun so far. I'll have to post some WIP's.


  • Member since
    January 2007
  • From: Cleveland, OH
Posted by Clebode on Tuesday, June 1, 2010 6:53 AM

Steve---thanks for the comment.  Your bird looks great.  Love the powerplant!  Are you going to leave it open?

Frank, I am glad to see our fearless leader is moving right along.  Your build looks very crisp indeed! 

I have a question about how some have their GB badges cycling in one space.  Since I plan to do many more of these, can someone tell me how that is done?

Hugh

  • Member since
    September 2003
  • From: South Central Wisconsin
Posted by Daywalker on Monday, May 31, 2010 10:50 PM

I CAN HARDLY BELIEVE IT!!!  Pages worth of WIP pics.  A lot of you guys are either ready to paint or dang close.  My hat's off to you all!  Looks like there has been some serious building going on over the weekend.

I worked on my F-8 a bit today, finishing up the wing to fuselage joint, and rescribing the area too.  I also attached the gun hood, and after I get that cleaned up in the next couple of days I will be able to attach the engine and cowl.  After that, a few bits to sort out then finally some paint!  Finally, a couple of photos to show where I am at:

I see at Hannants today, they have the Eduard 1/48 FW-190D-11/D-13 kit in stock (did you hear that Guy? Whistling)

Eduard 1/48 FW-190D-11/D-13


Frank 


  • Member since
    December 2009
  • From: Weirton, West Virginia
Posted by xradio81 on Monday, May 31, 2010 9:39 PM

This is 4 weeks of work on this pro modeler 1/48 g-2, g-3 variant. I am building the g-3 bomber variant in later  war configuration, I think. This is my first German plane since the 60's and this kit is hard to build, even with the enhanced instructions. I got this model for free, so its alot more fun. This is after primer so I can see areas that need work.

007-1.jpg picture by kaminski148


  • Member since
    March 2010
  • From: Brisbane
Posted by Julez72 on Monday, May 31, 2010 9:23 PM

Looking good fellas, great work one and allYes


  • Member since
    July 2003
  • From: waynesboro va, via Ireland
Posted by sidure on Monday, May 31, 2010 8:58 PM

Clebode, that is some fine progress work she looking good.

I have been away for work and then the holiday weekend so I did not get much work done but I am making progress and I am further along than these pics

fw-9.jpg picture by sidure

fw-9-1.jpg picture by sidure

I have a change in strategy for this one and may go to paint soon

Steve

  • Member since
    January 2007
  • From: Cleveland, OH
Posted by Clebode on Monday, May 31, 2010 6:14 PM

Raptor, Tbolt and Jeremy glad you are all getting started.  I was begining to where all the other entrants were.  Nice office Jeremy.  I wish mine looked as good.  I am looking forward to your WIP photos. 

Tbolt, I posted a very detailed photo of the F-8 IP a feww pages back.  There were some interesting features shown if you are interested.

Coach Crusher, I finally have all the big pieces together on my Ta152.  I would never have made it without your sage and calming advice.  Whistling  What a mother it has been to get this far.

Attaching the outer wing halves and getting the RLM76 on took all day today.  Opening the cowl flaps took most of Saturday.  On both phases it was three steps forward and two steps back the whole way.  Ick!  I really stretched myself with the resin upgrade going on a limited run kit.  It is not flawless but it is going to do.  The LG is also built up and dry fitted to get the proper angles.  Next, the dark colors go on.

Hugh

  • Member since
    March 2006
Posted by simpilot34 on Monday, May 31, 2010 1:27 PM

Awesome work guys!!!!!!!! Crushlikins that is awesome!!! I know how it feels to gloos a build and sit through sometimes days of decal apps, then finally get to dull it and return it to a military finish, set back and just say WOW!!! WELL DONE mate!!

Cheers, Lt. Cmdr. Richie "To be prepared for war, is one of the most effectual means of preserving the peace."-George Washington
  • Member since
    April 2005
Posted by Thunderbolt379 on Monday, May 31, 2010 6:55 AM

SC -- awesome work! It's models like the ones being built here that remind me what this hobby is all about -- engineering in miniature and a three dimensional canvas for good artwork!

Okay, here's the mandatory boxtop shot of my build:


I sprayed the main gear bay last night, so my job tonight is to clean up the mating surfaces and put the wing together. I also sprayed the cockpit but I think I'll wait for daylight to do the instruments, I need better light and, let's face it, glasses. I haven't done bad getting to my age without them, but when your comfortable minimum focal distance has exceeded twelve inches, it's time to face up to reality!

Okay, to the bench...

Cheers, Mike/TB379

http://worldinminiature.blogspot.com/

  • Member since
    July 2003
  • From: Bicester, England
Posted by KJ200 on Monday, May 31, 2010 4:31 AM

SC, the combination of NMF & painted surfaces looks cool.Cool

Thanks for the explanation on the wire wrap.

Guy, the surface detail was what impressed me about the Eduard D-9, however having heard the horror stories around the A & F series builds and the additional detail, which knowing me I wouldn't use any way, your tale put me off a bit.

Maybe one day though as I fancy doing a dio of the crash landed D-9 at Rhein Main, which the Eddy kit would be spot on for.

Karl


Currently on the bench: AZ Models 1/72 Mig 17PF

  • Member since
    July 2008
  • From: USA California
Posted by vetteman42 on Monday, May 31, 2010 2:06 AM

Soulcrusher I have been waiting for these pictures and have to say it has been very well worth the wait she is, well you out do yourself with each build I see from you. I love her and cant wait to see her finished. Tis gonna be a show stopper for sure. Bow DownToast

Randy So many to build.......So little time

  • Member since
    December 2005
  • From: back seat of your car with duct tape streched out
Posted by soulcrusher on Sunday, May 30, 2010 9:37 PM

More progress. I got the final dullcoat sprayed and i could finally unmask the NMF to see how the bottom looked with the combonation of NMF and paint. Of course I managed to get a small fingerprint in it somewhere along the line. Believe it or not I still have more masking and airbrushing to do! Because the underwing crosses cover both the NMF and painted area it left me with no other choice but to paint them on. I also have to duplicate a field repair by overspraying the verticle gruppe bar with some lightblue. Thought you might like to see her bottom!

Michael:drive:


  • Member since
    July 2004
  • From: Northern KY
Posted by mucker on Sunday, May 30, 2010 2:11 PM
SC, Jeremy, Andrew...nice pics so far! Looking good!

  • Member since
    October 2009
  • From: SURREY ,B.C.
Posted by krow113 on Sunday, May 30, 2010 12:44 PM

Scrusher- That would be great. The rifle will be a center piece on the figure. 4-5 shots of all elevations would suffice. The Firing Line accy kits are well detailed so it would be nice to see clean shots. The figure and base will be all in mud ,but the rifle will be spotless. Please send a pm when you are able.

Thank you ,Krow113

  • Member since
    December 2005
  • From: back seat of your car with duct tape streched out
Posted by soulcrusher on Sunday, May 30, 2010 12:17 PM

Ritchie and Karl. The rifle stocks were wraped in copper wire at the armory level to strengthen them for use as grenade launchiing rifles. The No1 MkIII Enfields did not have a cross bolt through the stock and were prone to spliting right in half when used as grenade launchers. They also drilled the stocks and installed a crossbolt. I am restoring the one and to do so you have to remove the wire but I am keeping the other one just the way it is.

Today I plan on doing a panel wash and a final dullcoat on the 190. Then its time for all of the fiddly bits and landing gear. Wow! I can't believe how fast this one is going! I really appreciate all the great compliments everyone and I am glad everyone things the color scheme is a cool as I thought it was.

Guy you are surprised I remembered your birthday? You forgot I know everything. I even know what Frank had for dinner last night! Your birthday present hmmm.... How about when you manage to swim over to this side of the pond you are allowed to shoot any of the rifles from my collection as long as you want. Somehow I get the feeling you'll pick one of the Enfields. I wonder why?:AR15firing:

Know if you want close ups pictures of any particular rirfle let me know. I would be happy to take a bunch of picture for you. No Thompson's though, not allowed to own them because they are full auto only but I do have at least one of every WWII long rifle used. Ler me know.

Soulcrusher:buttkick:


  • Member since
    September 2006
  • From: From Vernal UT OH YEA!!
Posted by raptordriver on Sunday, May 30, 2010 10:52 AM

Wow! Some of you are really fast! The Fw-190D's are looking great!

Here is mine, its not much but we are supposed to post WIP right?

H7-1.jpg Fw-190 picture by Raptor94

I am going to try a few new techniques:

1. Preshading

2. Properly masking the canopy with Tamiya tape

3. Fill wing gap seams

4. Try to do a good job mottling

5. Probably something else.

I just started yesterday after I finished the Helldiver. Like I said, its not much, but its a start. Smile

Andrew


  • Member since
    September 2003
  • From: South Central Wisconsin
Posted by Daywalker on Sunday, May 30, 2010 9:41 AM

Right on Mike, list updated! Propeller

Glued the wings on my F-8 the other night.  I have built a number of Tamiya 190's in the past, and all of them when completed leaned slightly to the right.  I made sure everything was square on this one before I glued them on, hoping that operator error was the culprit on the other ones.  Took the clamps and tape off this morning, and guess what...

Smile Dots

Leans a bit to the right again.  Bummer.

Frank 


  • Member since
    April 2005
Posted by Thunderbolt379 on Sunday, May 30, 2010 9:08 AM

Hi Frank,

I can finally confirm what my build will be -- Tamiya 1:48 Fw 190 F-8. I can confirm this because this evening, with a few hours to kill, I grabbed it off the shelf and dived in! Prepainting is more than half done (the 02 and 66 areas are done, I'll try to get the satin black bits done tomorrow, along with doing the cockpit detail painting and maybe the engine too). Preliminary construction is underway, and it looks like it'll fall together.

I'm not sure which marking option I'll go with yet -- I've always wanted to do the North Africa scheme, but White 7 of I/SG2, based in Hungary as late as '45 is firmly in the spirit of the Reich Defenders concept; this is a 74/75/76 standard scheme, with SG2's 04 tailband. I'm even considering using the recommended mixing ratios to derive the camo colours from Tamiya acrylics, so I can paint indoors at any hour of the day, especially as we're heading into winter here. Not sure about this yet, but it's a possibility.

Cheers, glad to finally be active in this GB!

Mike/TB379

http://worldinminiature.blogspot.com/

  • Member since
    February 2007
  • From: Bournemouth UK
Posted by Luftwoller on Sunday, May 30, 2010 9:07 AM

Karl, dont look away from Eddies D, It really is a great kit and warrants a build. Just watch the Main spar and the instructions. Im definately going to get another...or 2 (D-11/ D-13 combo) and build it properly that time round. The surface detail on the things is just sublime,

...Guy

..'Your an embarrassment to the human genus, makes me ashamed to call myself Homo'.
  • Member since
    February 2007
  • From: Bournemouth UK
Posted by Luftwoller on Sunday, May 30, 2010 4:51 AM

Great looking paint Jezza, you whipper snapper you. Looks like RLM66 to me.

Crushlikins, The stickers look spot on. I love the paint scheme more every time i look at it....and yuppers, that is my birthday, so everyone take note and send me lots of pressies. Nothing cheap though! ok? Whistling

...Guy

..'Your an embarrassment to the human genus, makes me ashamed to call myself Homo'.
  • Member since
    July 2003
  • From: Bicester, England
Posted by KJ200 on Sunday, May 30, 2010 3:37 AM

SC, great job on the stickers, and lovin' the yellow tail.

Question on the guns: Why are they wrapped in copper wire?

Jeremy, the pit looks spot on, and harnesses add a touch of class.

Guy, good save on the landing gear.

I was looking at the Eduard D in my LHS the other week, but think I'll stick with my Tamiya D and NDC upgrades given your experience.

No movement on my mini 190 as the bench is dominated by large chunks of 262 at the moment,

Karl


Currently on the bench: AZ Models 1/72 Mig 17PF

  • Member since
    March 2006
Posted by simpilot34 on Sunday, May 30, 2010 2:41 AM

soulcrusher

Thanks Nomad. I always go for the craziest paint schemes I can find then complain about what PIA it is to airbrush!

Ritchie thanks buddy. I promise I'll get you some pictures of the Enfiled soon. Right now I have it completely broken down to reblue all of the steel. Here is a picture of both No1's bofore I tore the one closest down.

SoulcrusherPirate

LOL yeah I would fit in that category Crushlikins. The only reason my German, Italian, and some Japanese aircraft have grown in numbers is simply that reason of the paint schemes!! I am itchin' to do hand sprayed smoke rings, mottle and spotted dog camo on them since I figured out the trick to getting fine paint demarcation. I am even going to attempt a Swedish lozenge on a viggen one day. I really kick myself for building so slow sometimes when I have all these ambitious projects in my head!!Bang Head BACK TO THE BENCH WITH ME!!!!!Whistling

Yes the Enfiled in the forground does need rebluing. Just out of curiosity, what is the wire wrap for???

Cheers, Lt. Cmdr. Richie "To be prepared for war, is one of the most effectual means of preserving the peace."-George Washington
  • Member since
    March 2010
  • From: Brisbane
Posted by Julez72 on Sunday, May 30, 2010 1:31 AM

WOWWoweverytime i click on this GB more pics....

Jeremy, Crusher..Excellent work all round guys, well doneYesYes


  • Member since
    October 2009
  • From: SURREY ,B.C.
Posted by krow113 on Sunday, May 30, 2010 12:23 AM

Coool pix of the rifle -I would like to see more as well, for my WW1 Tommy wip .I have w/m rifles from DP 's 1/16 scale accy kit, but close ups and breakdown shots would be excellent. Oh yeah, the 190's all look great, I am itchin' to get back to mine.

Thank you ,Krow113

  • Member since
    December 2005
  • From: back seat of your car with duct tape streched out
Posted by soulcrusher on Sunday, May 30, 2010 12:07 AM

Thanks Nomad. I always go for the craziest paint schemes I can find then complain about what PIA it is to airbrush!

Ritchie thanks buddy. I promise I'll get you some pictures of the Enfiled soon. Right now I have it completely broken down to reblue all of the steel. Here is a picture of both No1's bofore I tore the one closest down.

SoulcrusherPirate


  • Member since
    March 2006
Posted by simpilot34 on Saturday, May 29, 2010 11:37 PM

Jeremy the office is looking superb!!!!!! Those PE belts look like they have behaved nicely to me!!! Well done!!!Toast

Crush she is a stunner mate!!!! Bow DownToast

Cheers, Lt. Cmdr. Richie "To be prepared for war, is one of the most effectual means of preserving the peace."-George Washington
JOIN OUR COMMUNITY!

Our community is FREE to join. To participate you must either login or register for an account.

SEARCH FORUMS
FREE NEWSLETTER
By signing up you may also receive reader surveys and occasional special offers. We do not sell, rent or trade our email lists. View our Privacy Policy.