SEARCH FINESCALE.COM

Enter keywords or a search phrase below:

FW-190 Reich Defender III 5/10-2/11

437475 views
1810 replies
1 rating 2 rating 3 rating 4 rating 5 rating
  • Member since
    December 2005
  • From: back seat of your car with duct tape streched out
Posted by soulcrusher on Thursday, May 20, 2010 10:48 PM

Frank Guy is cheating agian! No way he got that much done without using Wingus and Dingus! I still have not seen either Wingus or Dingus as promised! :twak:

Steve looks like you are winning the battle of the sanding sticks there. I am going to the bench in a bit to do some sanding of the filler I needed at the front wing root area and mabye have a go at applying the dreaded spinner spiral!

Soulcrusher:burnout:


  • Member since
    October 2007
  • From: Rhode Island
Posted by jmabx on Thursday, May 20, 2010 7:38 PM

Guy - You're such a tease... show us more!!!

Sidure - Sucks that you had to do all that work but it's looking like it should from here. Yes

Jeremy    Propeller


  • Member since
    July 2003
  • From: waynesboro va, via Ireland
Posted by sidure on Thursday, May 20, 2010 7:15 PM

Wow Guy has flung paint aready, looking good mate. I really like those wheels by the way worth the investment.

Heres some updates on last nights progress. Fuselage is together and thankfully the surgery cannot be seen.

Then the underside where all the action took place. You can see that I have sanded the gun bays almost completely off. Also up front there used to be two what I think were ammo boxes had to be completely cut off from the cowl guns. I have no clue why they were so long and if installed would hang under the wing?????. Finally a chunk of sprue as a spreadder to close the gap at the wing to fuselage joint which worked almost perfectly

So with the wing hacked up and the under fuselage chopped it went together. Brought out the old tape from wingtip to wingtip trick to close the remaining gap and it worked pretty good. The seam only has a small gap to fill now and the step has mostly gone away.

The engine was just for show. Which is the one step from looking at the directions I have been dreding. I have already lost one of the engine mount holes to sanding to get the fuselage together. That comes in a few days though as I am off to a wedding this weekend.


  • Member since
    February 2007
  • From: Bournemouth UK
Posted by Luftwoller on Thursday, May 20, 2010 6:23 PM

Hey Frank, i put the MDC wheels up against the Eduard wheels and they appear to be a fraction smaller in diameter. Im not sure if this is right or wrong but im pretty sure theyre close to right....if that helps? Probably not LOL. I do get the choice of smooth or ribbed for my pleasure though. The inserts for the hubs are fantastically intricate though,

Oh and heres a sneaky peeky of where im at,

...Guy

..'Your an embarrassment to the human genus, makes me ashamed to call myself Homo'.
  • Member since
    February 2007
  • From: Bournemouth UK
Posted by Luftwoller on Thursday, May 20, 2010 6:22 PM

Hey Frank, i put the MDC wheels up against the Eduard wheels and they appear to be a fraction smaller in diameter. Im not sure if this is right or wrong but im pretty sure theyre close to right....if that helps? Probably not LOL. I do get the choice of smooth or ribbed for my pleasure though. The inserts for the hubs are fantastically intricate though,

Oh and heres a sneaky peeky of where im at,

...Guy

..'Your an embarrassment to the human genus, makes me ashamed to call myself Homo'.
  • Member since
    December 2005
  • From: back seat of your car with duct tape streched out
Posted by soulcrusher on Thursday, May 20, 2010 2:40 PM

vetteman42

Hummmm looks like it may be smart on my part to stay away from those Trumpeter kits Indifferent

Be afraid. Be very afraid. Extremelyy overpriced Chinese junk! Do'nt waste you money. But the kit that is being discussed is the Eduard kit in the last couple of pages and my Hasegawa 1/32 D-9.

Soulcrusher:1244:


  • Member since
    July 2008
  • From: USA California
Posted by vetteman42 on Thursday, May 20, 2010 1:51 PM

Hummmm looks like it may be smart on my part to stay away from those Trumpeter kits Indifferent

Randy So many to build.......So little time

  • Member since
    December 2005
  • From: back seat of your car with duct tape streched out
Posted by soulcrusher on Thursday, May 20, 2010 11:46 AM

Luftwoller

Great work Crusher. Wingus and Dingus are on thier way to you. Wingus took some butter and his latex catsuit! Whats that all about young man?

...Guy

Guy Wingus probally took the cat suit for protection from this.

He weights in around 20 pounds and has been known to eat small dogs and anything else that wander into the yard. He likes butter to so Wingus is just bringing offerings and trying to proctect himself with the cat suit! Dingus might be in trouble thought! Obvioulsy Wingus is the smarter of the two!

Soulcrusher:wizard:


  • Member since
    December 2005
  • From: back seat of your car with duct tape streched out
Posted by soulcrusher on Thursday, May 20, 2010 11:35 AM

Man Steve all of this talk about the Eduard A-8 makes me think my Royal Class A-8 kit is going to be sitting  in the closet for a long time. You build review is right on point with all of the reviews I have read also. I have had similar problems with the new Hasegawa 1/32 D-9 but not quite as bad. Mabye because the parts are bigger and easier to work with too. I could not sleep at all last night so I stayed up till about 3:30 am working on the kit and got alot done.

Soulcrusher:swordfight:


  • Member since
    July 2003
  • From: waynesboro va, via Ireland
Posted by sidure on Thursday, May 20, 2010 10:08 AM

Hey Jules, in regard to the problems you hear us talking about in the Eduard kits wing. I think Guy said it best a few posts above, the lower wing has a main spar that sets the dihederal that must be placed exactly correctly. There are sub assemblies that come off that spar like the ribs of the wheel wells that connect to the spar and the leading edge of the wing on the inside. Then there is some parts behind the spar that will set the position of the main wheeel well that goes on top of the whole assembly boxing everything in. I took my time with all this work but when you try to put the tops of the wings on they dont even come close to fitting or closing up. You now find yourself sanding and cutting away the tops of the spars and roof of the wheel well and in my case enlarging the holes where the ribs mate and the holes for the gun barrells.

The same problems show up with all the detail of the fuselage, cockpit, gun bay and firewall prevent the fuselage from joining. So guess what back to cutting and sanding. These must pate perfectly as when you join the fuselage to wings the interion interlock with the wing. So guess what cutting and sanding again to get it to seat properly. At this stage I have sanded the wheel bay to paper thin and the spar and supports are sanded way down as well as the gun bay in the wing and fuselage. I ended putting a spreader in the fuselage to get the wing joint gap to close up and taped the wing tip to wing tip to pull it tighter and I still have a noticable step in the wing to fuselage. I did the same as SC and set the leading edge and trailing edge and will have to use filler on the rest.

Sorry for the long winded response but those are the issues I had. In a nutshell you have to get everything set perfectly and even then I think you will still be sanding. And there is no way to check your progress as you go.

Steve

  • Member since
    September 2007
  • From: Truro Nova Scotia, Canada
Posted by SuppressionFire on Thursday, May 20, 2010 5:28 AM

Great work everyone!

Sounds like 'General thinner' needs to address the gun covers. Yes it is a shame to build the interior details without showing them off. Something I will consider when I get to my  Edward F-8. Projected start date sometime in June.

http://i6.photobucket.com/albums/y211/razordws/GB%20Badges/WMIIIGBsmall.jpg


  • Member since
    February 2007
  • From: Bournemouth UK
Posted by Luftwoller on Thursday, May 20, 2010 4:13 AM

Great work Crusher. Wingus and Dingus are on thier way to you. Wingus took some butter and his latex catsuit! Whats that all about young man?

Steve the wing joint on the Eduard kits can be a mare. There isnt any locating pins. The whole wings allignment is dependant on the spar and its several inserts being ABSOLUTELY SQUARE. I cant reitterate this enough. Even slightly off it will cause you no end of trouble. Dont ask me how i know LOL. The main problem with all of the other 190 kits is that the gun cover is not molded separately, and theres nothing worse than seeing a fantastically finished kit with a seam line down the centre of the gun cover. In its favour the Eduard kits mold this part separately, though its a s0d to get it to fit neatly,

...Guy

..'Your an embarrassment to the human genus, makes me ashamed to call myself Homo'.
  • Member since
    December 2005
  • From: back seat of your car with duct tape streched out
Posted by soulcrusher on Thursday, May 20, 2010 2:26 AM

Steve I never did get my wing joint perfect but I made sure it looked good in the most noticable spots like the leading edge and the rear of the wing where it jions the fuselage. It took a nice blob of puttly on both front wing roots to fill it all in. Its drying right now so I can san it all into shape tomorrow.

Soulcrusher:wiggle:


  • Member since
    March 2010
  • From: Brisbane
Posted by Julez72 on Thursday, May 20, 2010 1:26 AM

Luftwoller

I hear you on these Eduard kits. Especially my D9. The kit, I believe, is supposed to be built with all the knobs and whistles open and displayed. If , like me, you intend to build it all closed up you have a hellish time getting the 'open' panels fit. My inner gun covers were sods. I had to trim them all over in order to get them any where near right. I know this sounds strange, but if i wanted to build a closed up D9, id probably buy the dragon or Tamiya kit and do the fixes. A lot less work than this beast LOL,

...Guy

Thanfully i chose the Eduard A-5 because i wanted to open her up....

You guys building these Eduard 190's have my certainly have my attentionYes

So what is the issue with the wing join? A heads up will certainly be helpfull....


  • Member since
    July 2003
  • From: waynesboro va, via Ireland
Posted by sidure on Thursday, May 20, 2010 12:15 AM

SC, I hear ya on that.  But hey you got it together and its looking good from here mate. Way to beat it into submission. I did a lot of sanding to try get the fuselage into the wings but I need a little bit more work to reduce the step in the joint. Its slowly getting there.

Steve

  • Member since
    December 2005
  • From: back seat of your car with duct tape streched out
Posted by soulcrusher on Wednesday, May 19, 2010 11:18 PM

Moving right along! I have everything glued up now. Tomorrow I am going to have to do some work on the front wing root area where it meets the fuselage. The parts break down is weird and it is going to need some putty to smotth it up a bit. I'm getting ready for this crazy paint job next. This should be interesting!

Soulcrusher:chairfall:


  • Member since
    March 2006
Posted by simpilot34 on Wednesday, May 19, 2010 10:06 PM

Sidure she is coming along nicely!!!! Looking forward to more!!!!Toast

Cheers, Lt. Cmdr. Richie "To be prepared for war, is one of the most effectual means of preserving the peace."-George Washington
  • Member since
    December 2005
  • From: back seat of your car with duct tape streched out
Posted by soulcrusher on Wednesday, May 19, 2010 6:00 PM

Luftwoller

 soulcrusher:

Many reviews of the Eduard kit are in agreement that if you want to button her up you will be doing alot of grinding on the wing cannons and engine. This is not ay type of mis alignment problem just the way the kit is made. I still have the Eduard Royal Class with the two A-8 R-2 kits in the box and 8 choices for markings plus all of the other goodies like the masks and the Knights Cross replica and the little scrap of alluminum supposively from a crashed 190. I do'nt know if I want to tackle it hearing about all of these fussy fitting parts.

SoulcrusherPirate


Well Crushlikins, as a mate ill take them off your hands for nothing. Im such a good mate to you, arnt I?

Steve, looking real fine, my friend,

...Guy

Sure just bring back that towel you borowed last year and never brought back and we'll call it even!:bad:

Besides you already got my OOP 1/48 Classic Airframes Cr 32. I have to think now do I want Wingus or Dingus to square us up now?:biglaugh:

Steve I am going at my kit agian with the sanding stick tonight. This time to fit the panel that covers the center area of the wheel wells that fits way to tight I can't even push it into place. Looks like were are building the same kit even though we are not!

Soulcrusher:buttkick:


  • Member since
    February 2007
  • From: Bournemouth UK
Posted by Luftwoller on Wednesday, May 19, 2010 3:41 PM

soulcrusher

Many reviews of the Eduard kit are in agreement that if you want to button her up you will be doing alot of grinding on the wing cannons and engine. This is not ay type of mis alignment problem just the way the kit is made. I still have the Eduard Royal Class with the two A-8 R-2 kits in the box and 8 choices for markings plus all of the other goodies like the masks and the Knights Cross replica and the little scrap of alluminum supposively from a crashed 190. I do'nt know if I want to tackle it hearing about all of these fussy fitting parts.

SoulcrusherPirate

Well Crushlikins, as a mate ill take them off your hands for nothing. Im such a good mate to you, arnt I?

Steve, looking real fine, my friend,

...Guy

..'Your an embarrassment to the human genus, makes me ashamed to call myself Homo'.
  • Member since
    July 2003
  • From: waynesboro va, via Ireland
Posted by sidure on Wednesday, May 19, 2010 2:06 PM

After much sanding, cutting and filing and some choice words the fuselage is closed up with everything inside. I did loose some PE that shot off to who knows where but it was stuff you cant see anyway. Here it is before closing

Then a pic of the wings put together. You cant see any of the surgery that went into it. My camera died before I got a pic of the wheel wells so that will be in a later post

I have most of the work to get the fuselage to mate with the wings done, just have to tweek it a bit more tonight. I had to put a sprue spreadder into the fuselage to fill a gap at the wing roots and had to sand down the gun bays  and wheel wells to paper thin but it looks good and I only sanded through the bays once so no biggie

Steve

  • Member since
    December 2005
  • From: back seat of your car with duct tape streched out
Posted by soulcrusher on Wednesday, May 19, 2010 10:56 AM

Many reviews of the Eduard kit are in agreement that if you want to button her up you will be doing alot of grinding on the wing cannons and engine. This is not ay type of mis alignment problem just the way the kit is made. I still have the Eduard Royal Class with the two A-8 R-2 kits in the box and 8 choices for markings plus all of the other goodies like the masks and the Knights Cross replica and the little scrap of alluminum supposively from a crashed 190. I do'nt know if I want to tackle it hearing about all of these fussy fitting parts.

SoulcrusherPirate


  • Member since
    February 2007
  • From: Bournemouth UK
Posted by Luftwoller on Wednesday, May 19, 2010 9:31 AM

I hear you on these Eduard kits. Especially my D9. The kit, I believe, is supposed to be built with all the knobs and whistles open and displayed. If , like me, you intend to build it all closed up you have a hellish time getting the 'open' panels fit. My inner gun covers were sods. I had to trim them all over in order to get them any where near right. I know this sounds strange, but if i wanted to build a closed up D9, id probably buy the dragon or Tamiya kit and do the fixes. A lot less work than this beast LOL,

...Guy

..'Your an embarrassment to the human genus, makes me ashamed to call myself Homo'.
  • Member since
    March 2006
Posted by simpilot34 on Tuesday, May 18, 2010 9:49 PM

Guy, I'm loving that spinner and prop!!!! Really looking forward to seeing more!!!Toast

Steve the office is looking great!!!! Toast

Cheers, Lt. Cmdr. Richie "To be prepared for war, is one of the most effectual means of preserving the peace."-George Washington
  • Member since
    July 2003
  • From: waynesboro va, via Ireland
Posted by sidure on Tuesday, May 18, 2010 9:32 PM

Thanks for the comments guys. The kit details are great and like SC said a hair off on the placement of some items and im in trouble. I almost sanded all the way through the upper wings and filled the main spar down a ton and had to cut out the placement in the wheel wells to get the wings on. That couldent be all my fault i think. Just spent this evenings work sanding the sides of all the interior components to get the fuselage together. All the parts were lined up with their tabs and still it was way off. Now I just found out I sanded off the engine mount area on the firewall so the engine placement will be a hoot. Still enjoying the kit though and it should be a good looking model

Steve

  • Member since
    January 2009
  • From: Springfield, MA
Posted by sk3tch on Tuesday, May 18, 2010 8:59 PM

Sidure...Isn't it ironic that Eduard has all this great detail...yet they stop short at the engine components?  I'm pretty sure the fit issues aren't all your fault...After dry fitting that kit a ton of times I still have a spinner a tad out from the engine cowl.

Great work by all, by the way!  I haven't gotten to a stage to show pictures...  But this thread is great motivation.

  • Member since
    December 2005
  • From: back seat of your car with duct tape streched out
Posted by soulcrusher on Tuesday, May 18, 2010 4:43 PM

Guy stunning work as always. Glad t see you back at the bench building where you belong. It's just not the same without you mate.

Steve I am battleing the same issues with my Hasegawa 1/32 D-9. Like the Eduard kit is has alot of sub-assemblies that are glues in the fusel;age and wing spars. If they are off just a hair you have a hard time getting the big parts to play nice. I have read numerious reviews of complaints about the fit of the Eduard kit. It is not a bad kit just a kit that requires that evey part be precisely located otherwise you are in trouble

Frank a little doi would be cool buddy. I build several back in the day and I enjoyed them. They really set a model off.


Soulcrusher:outtahere:


  • Member since
    September 2003
  • From: South Central Wisconsin
Posted by Daywalker on Tuesday, May 18, 2010 4:20 PM

Thanks fellas!  Not sure yet if it will be a dio (I have never done one Embarrassed) or simply a base with the cart and figures.  Sure was a lot of fun just painting it all up.

Great to see you Steve, and some excellent progress pics to boot!  Cockpit looks very good, and the previous build is simply stunning!  Well done.  I updated page one for you as well! Yes

Guy- As always, you make the difficult look easy!  And done at a lightning pace to boot.  Would you mind terribly measuring the diameter of those MDC wheels?  The Tamiya ones are a bit undersized, so I went out and bought some Aires ones intended for the Eduard kit.  They are the exact same diameter as the Tamiya wheels! Bang Head

Frank 


  • Member since
    July 2003
  • From: waynesboro va, via Ireland
Posted by sidure on Tuesday, May 18, 2010 3:40 PM

Hey Guy, its great to see ya back building over here again, you were missed greatly. Hope to see Sarge back some day. That looks like the same kit im building, the Eduard A-8. The wing is identical to mine. I had to spend a whole evening sanding the main spar and some of the supports to get the wings together, sounds like you had the same problem. Makes me feel better to know I am not alone with this issue. Great tutorial on the spinner, ive never had a problem doing spinners but I like the masking method and may have to try it some day.

Steve

  • Member since
    February 2007
  • From: Bournemouth UK
Posted by Luftwoller on Tuesday, May 18, 2010 3:18 PM

Great looking work Steve. Love the motor.

Ive been battling mine today.

Heres the MDC set that arrived today,

I also had in my stash some Eduard spiral masks!! These things rule. As anyone who knows me, kjnows i hate spinner spiral decals with a loathing that is immeasurable,

Heres how easy they are to work with. 1st Spray the spinner white,

..apply spiral mask,

...spray black,
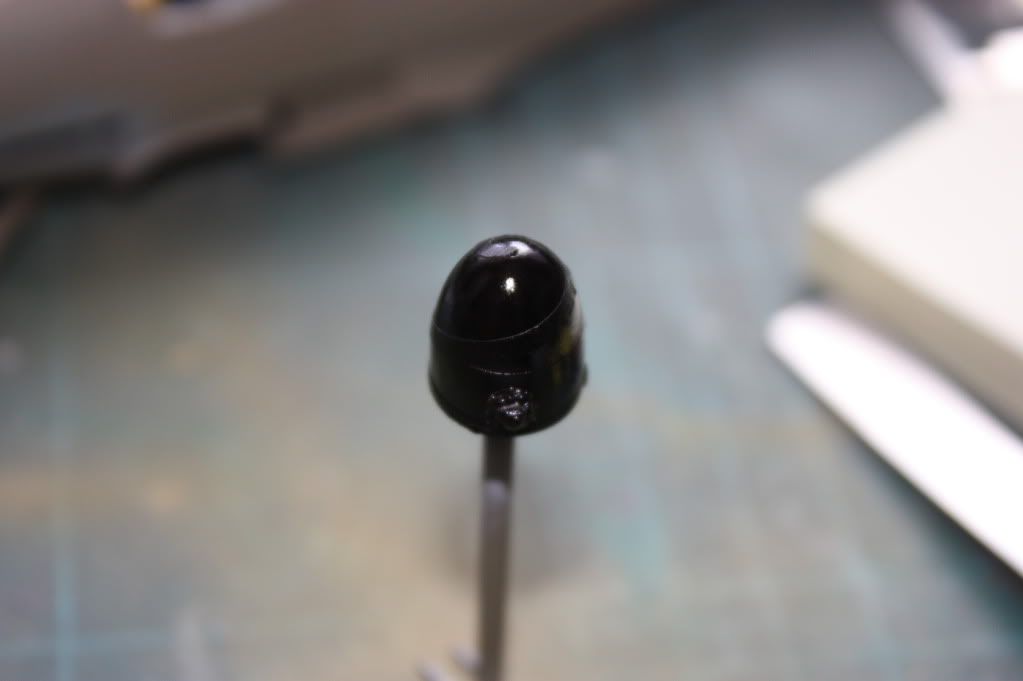
...then remove mask,

Ta daa. In the MDC set you get the prop collars as well which makes painting the whole thing fantastically easy. Heres the finished prop,

Next up i attacked the IP coaming. There is a leather cushion on the front edge that isnt represented in the kit. I replicated this with some CA applied with a cocktail stick,

sprayed the whole thing RLM66 then started on the top IP. This is another Eduard wonder. Married them all together,
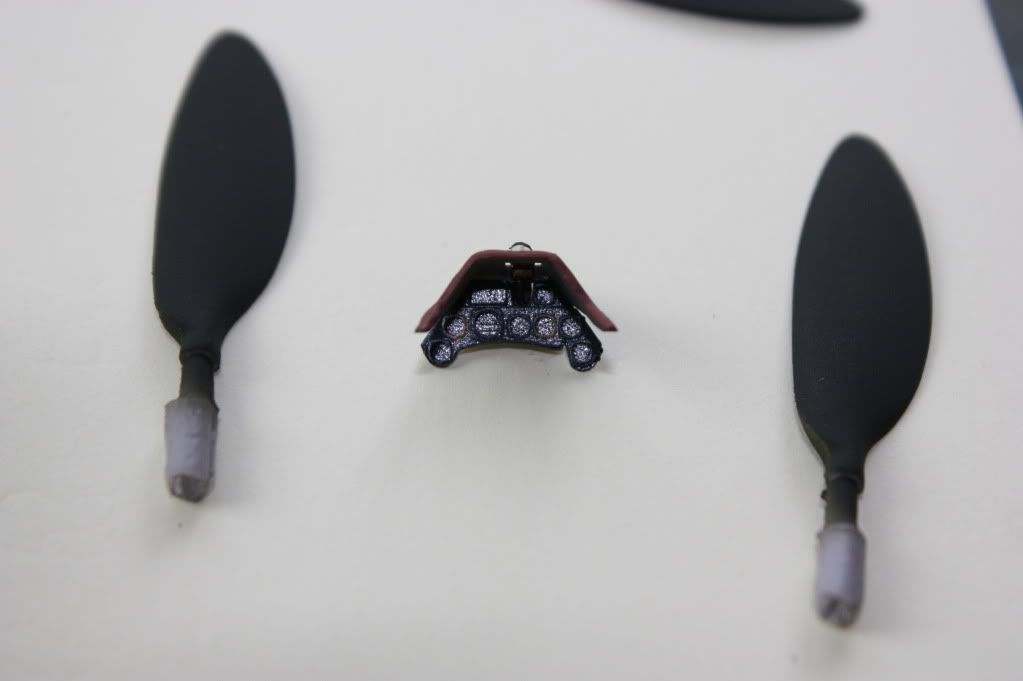
Next up i started on the flap boxes, Eduard handilly recessed the lower wing, ready for you to cut them out,

The flaps themselves come from a huge Verlinden set,

there is a fair bit of wing thinning in order to get the wing halves together but got there in the end,

More soon,

...Guy

..'Your an embarrassment to the human genus, makes me ashamed to call myself Homo'.
  • Member since
    July 2003
  • From: waynesboro va, via Ireland
Posted by sidure on Tuesday, May 18, 2010 1:30 PM

Heres my progress pics of the engine, pit and ip. Lots of nice PE from Eduard.

Great detail all over this kit. Still need to figure out if the fit issues are my fault

Steve

JOIN OUR COMMUNITY!

Our community is FREE to join. To participate you must either login or register for an account.

SEARCH FORUMS
FREE NEWSLETTER
By signing up you may also receive reader surveys and occasional special offers. We do not sell, rent or trade our email lists. View our Privacy Policy.