SEARCH FINESCALE.COM

Enter keywords or a search phrase below:

Falklands/Malvinas War 30th Anniversary GB

244166 views
1492 replies
1 rating 2 rating 3 rating 4 rating 5 rating
  • Member since
    April 2005
Posted by Thunderbolt379 on Saturday, February 18, 2012 2:25 AM

At least you have the respirator... For most of my life  painted with enamels and used nothing. Not I'm super aware of the toxicity of them, and have phased out almost all enamel spraying -- I lug my entire settup outside in good weather if I absolutely must use enamels. I miss painting with MM enamels, their lustrre and colour matches were pretty good -- much better than the equivalents in their Acryl range.

M/TB379

http://worldinminiature.blogspot.com/

  • Member since
    October 2008
  • From: italy
Posted by bsyamato on Saturday, February 18, 2012 6:11 AM

Great updates Casper and Bish.

xtracolor are avaible out of the uk and by long time, i've painted my flanker and a first gulf war buccaneer with dedicated xtracolor paints in early 90. Also last supplies i get a dark blue to paint my "frecce tricolori" set.

Must admit that i hate glossy enamels for the thickness and because i shading my works with drybrush , and with glossy color is too hard to do. But xtracolor enamels are an exception because are really tiny even with brush and don't cover details. Also work good withouth thinnig Indifferent but guys , they have the ugliest smells between colors.


  • Member since
    December 2002
  • From: Bury St Edmunds, Suffolk, England
Posted by Bish on Saturday, February 18, 2012 6:29 AM

I guess i didn't think they were avalable outside the UK because you don't see many people useing them, and you don't see them in the shops much here, so asumed it would be the same elsewhere.

I love them because they are match to the sibjects i do the most and the gloss finish means one less thing to do before decaling. Though with armour i still have to add future to do an oil wash, but not really a problem with aircraft. And after useing them for over 20 years, i gfuess i am more than used to the smell.

I am a Norfolk man and i glory in being so


On the bench: Airfix 1/72nd Harrier GR.3/Fujimi 1/72nd Ju 87D-3

  • Member since
    July 2004
  • From: Sonora Desert
Posted by stikpusher on Tuesday, February 21, 2012 12:39 AM

I have used Xtracolour Enamels on a few of my builds. But they are no longer carried by any LHS where I live so aside from what I already have, that's it. My last kit completed with them was a Mirage 2000 which came out very nicely! I enjoy the gloss finish, but they sure do seem to take an extra long time to dry, even for enamel. But is does shortcut the finishing process in not having to gloss coat before decalling.

Tonite I finally began construction on my ESCI 1/48 Mirage IIIEA. I had picked up a resin seat for it on my days off last week, so no more excuses for delay. I only did a bit of construction tonite, basic cockpit and a few other odds and ends, but its a simple kit so should not be too long before taqking shape. I will have some pics up of my progress hopefully tomorrow, but by Thursday at the absolute latest...Whistling


F is for FIRE, That burns down the whole town!

U is for URANIUM... BOMBS!

N is for NO SURVIVORS...

       - Plankton

LSM


  • Member since
    February 2003
  • From: Rothesay, NB Canada
Posted by VanceCrozier on Tuesday, February 21, 2012 7:04 AM

Hey stikpusher - how does the ESCI Mirage look? I'll soon be finishing up my ESCI Hs129. Low parts count & lacking in the cockpit/undercarriage, but what's there does build up nicely.

On the bench: Airfix 1/72 Wildcat; Airfix 1/72 Vampire T11; Airfix 1/72 Fouga Magister

  • Member since
    February 2003
  • From: Rothesay, NB Canada
Posted by VanceCrozier on Tuesday, February 21, 2012 7:32 AM

ps - CBC Radio morning show "The Current" has a feature on the Falklands/Malvinas today. Available streaming on their website today; or via podcast: http://www.cbc.ca/podcasting/index.html?newsandcurrent#thecurrent

On the bench: Airfix 1/72 Wildcat; Airfix 1/72 Vampire T11; Airfix 1/72 Fouga Magister

  • Member since
    July 2004
  • From: Sonora Desert
Posted by stikpusher on Tuesday, February 21, 2012 4:35 PM

VanceCrozier

Hey stikpusher - how does the ESCI Mirage look? I'll soon be finishing up my ESCI Hs129. Low parts count & lacking in the cockpit/undercarriage, but what's there does build up nicely.

Vance, this Mirage IIIE is about the same as you describe the Hs 129. I had started one of those for another GB here, but sidelined it after losing interest. This year I plan to complete it... Whistling Of the old Mirage III kits out in 1/48- Esci, Fujimi/Academy clone, Heller- this one is certainly the best of the three. The new Italeri issues are just overpriced re-boxes of the 30+ year old ESCI kits. But it is certainly left in the dust by the new Eduard and Hobbyboss kits, which are nearly but not quite identical. I have both and yes, I do like Mirages! I do wish either one of them would tackle the IIIE and V.

anyways here are my first WIP pics

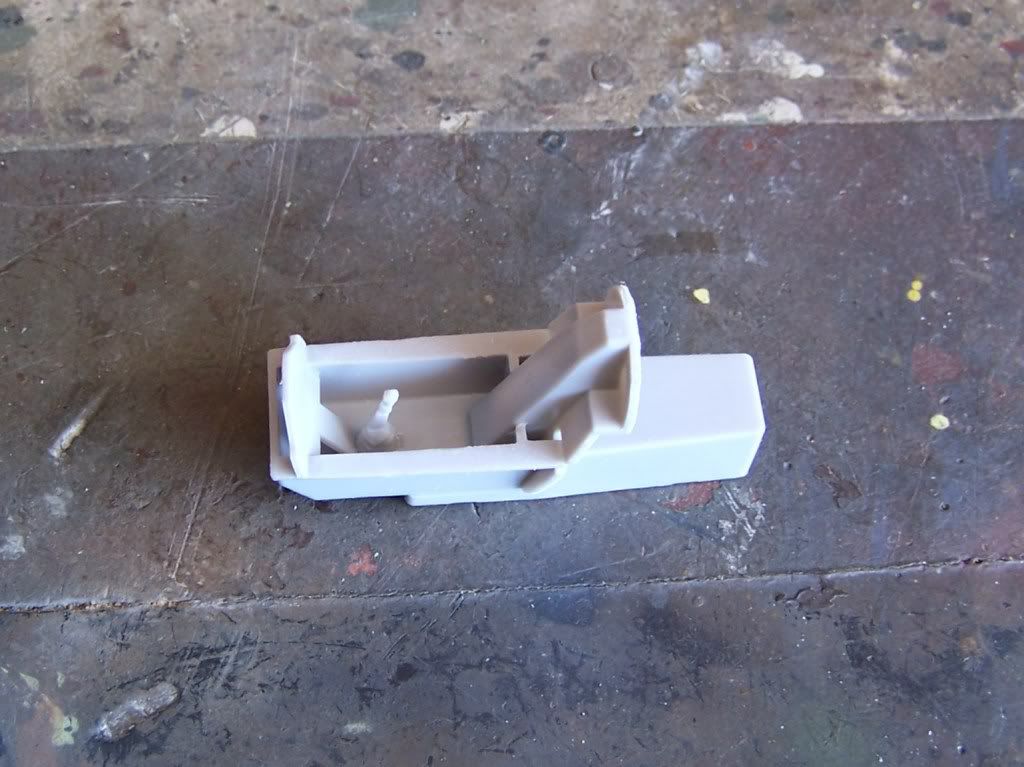
last night I just built the cockpit tub- exceptionally basic as you can see, but workable and a great clean canvas to add upon.

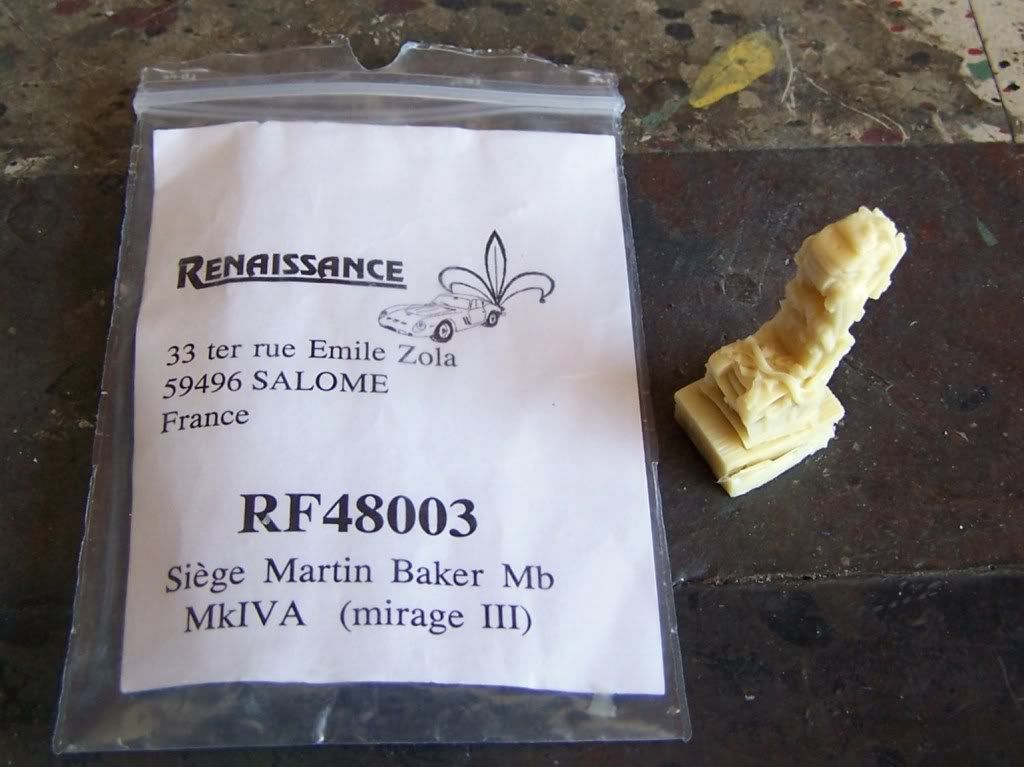
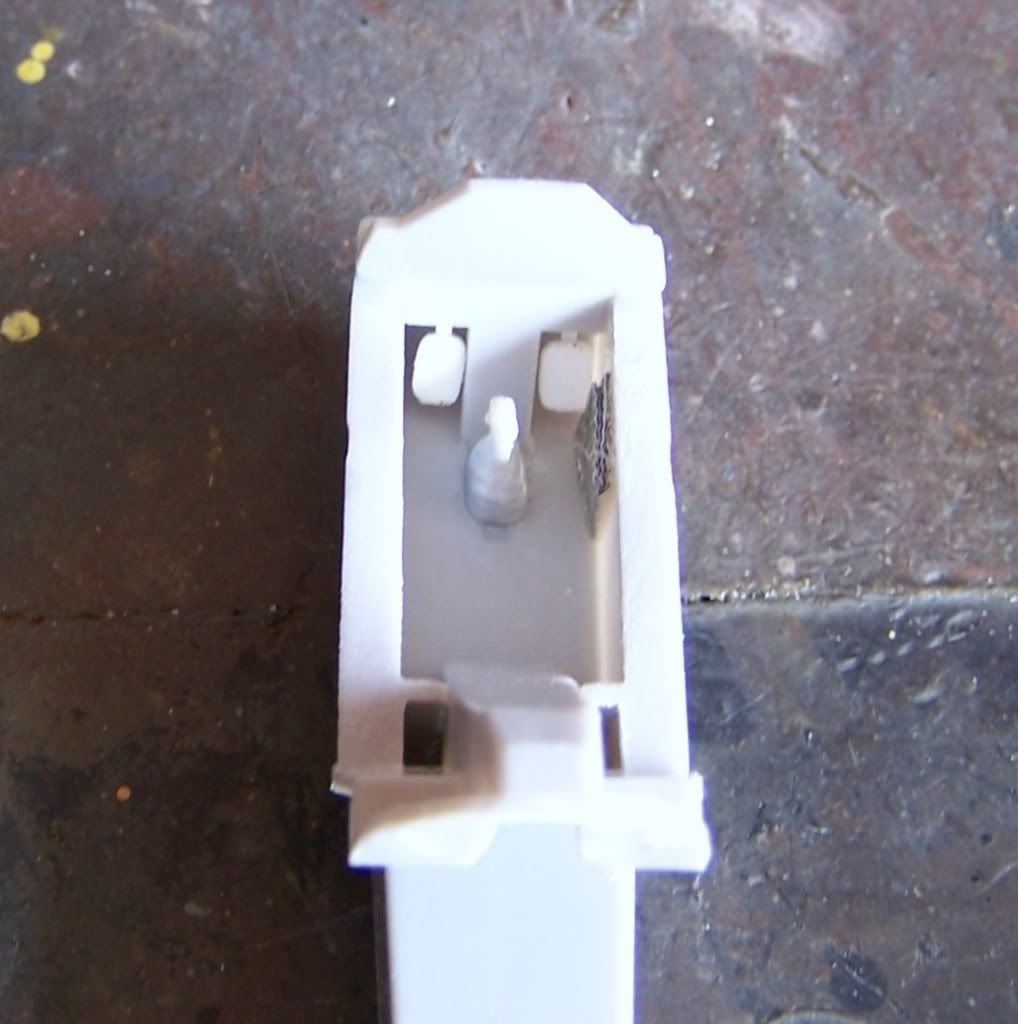
The kit bang seat is pretty weak. Not as bad a Tamiya's Sea Harrier, but shows its age. Fortunately a LHS carries this line of French resin AM stuff that just so happens to make the seats needed for various French fast movers in 1/48 (I have more and need them all!).I suspect this company has the ESCI and Heller various Mirages & Jaguars in mind. So here is the replacement seat. I just need to add the actuator handle ring.

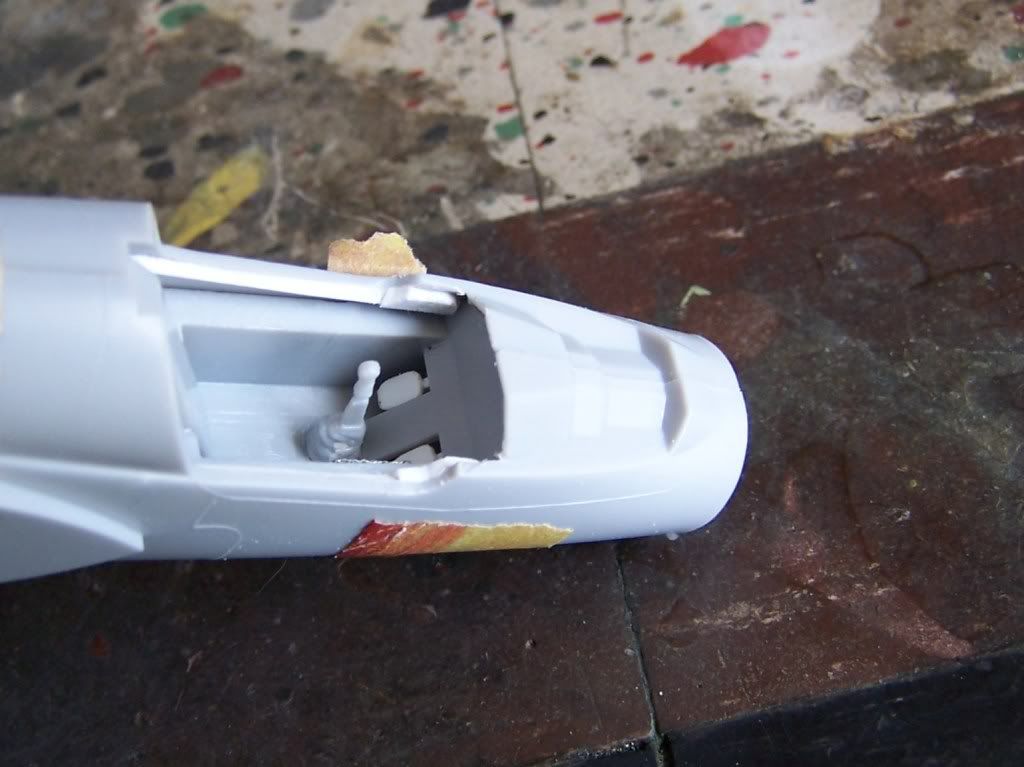
then based upon some walk around photos of the IIIE I found I am dressing up the cockpit a bit. I added some railings and stuff under the canopy sill and scratch built some rudder pedals.No they are not exact, but the kit has none, and at least now there is something is there that looks about right.

The large pieces of strip styrene behind the rear of the canopy opening are to assist in sitting the cockpit tub in place. Without those there was a lot of play- not anymore...Wink

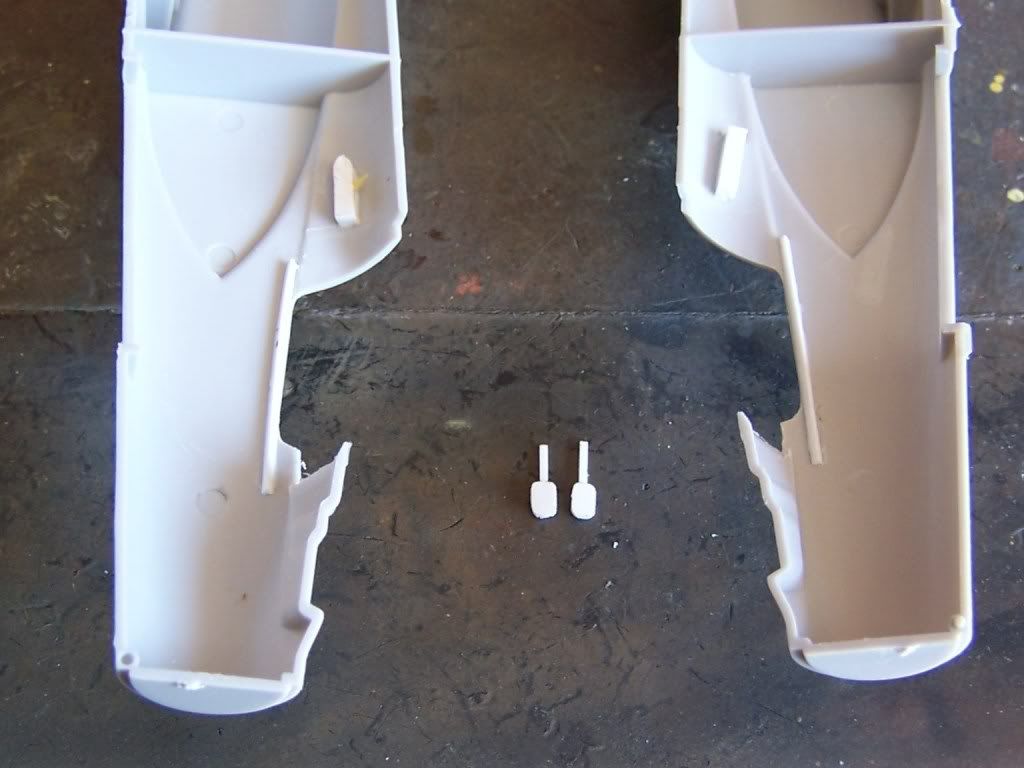
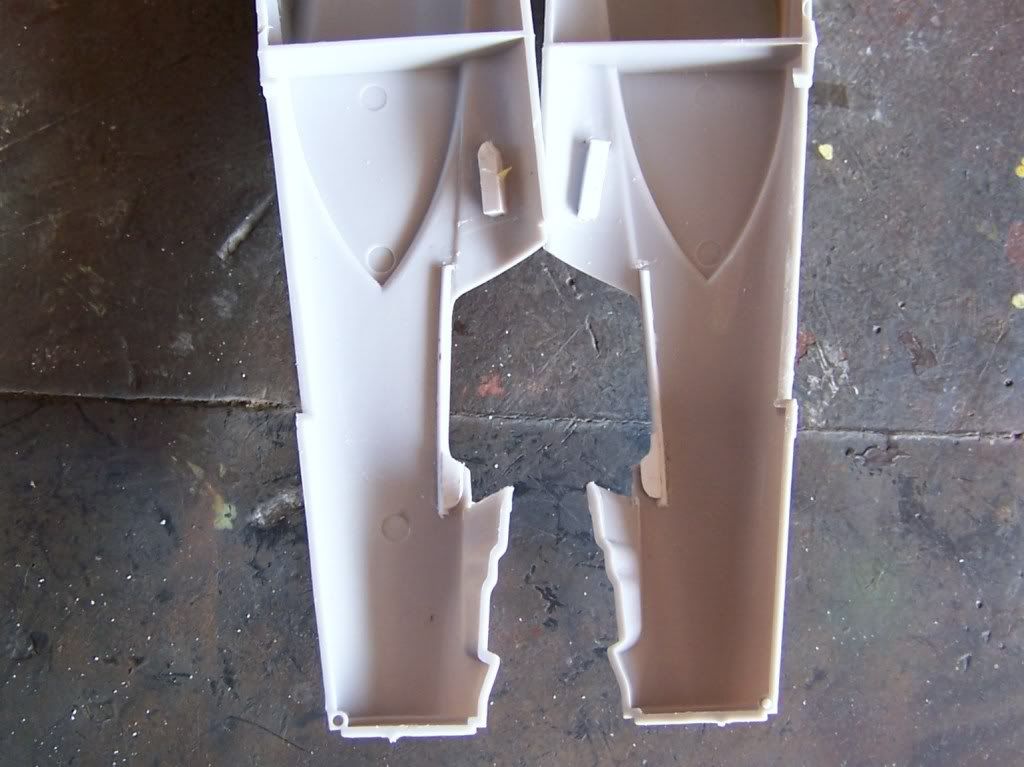
here are the rudder pedals glued onto the rear of the IP

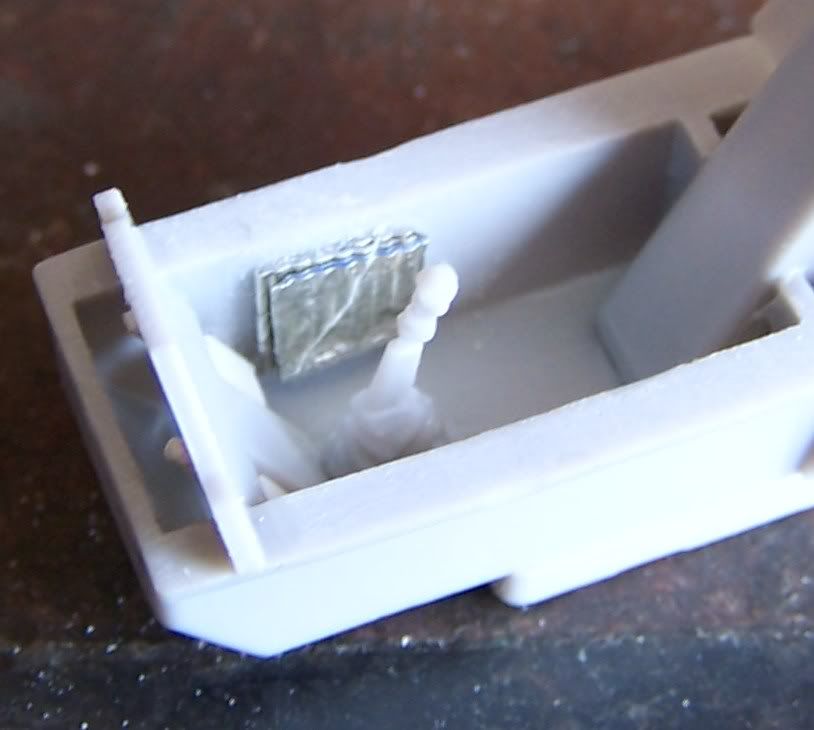
and then I created a map holder out of folded lead foil and textured with some pliers (again based off the cockpit photos) for the tub sidewall.

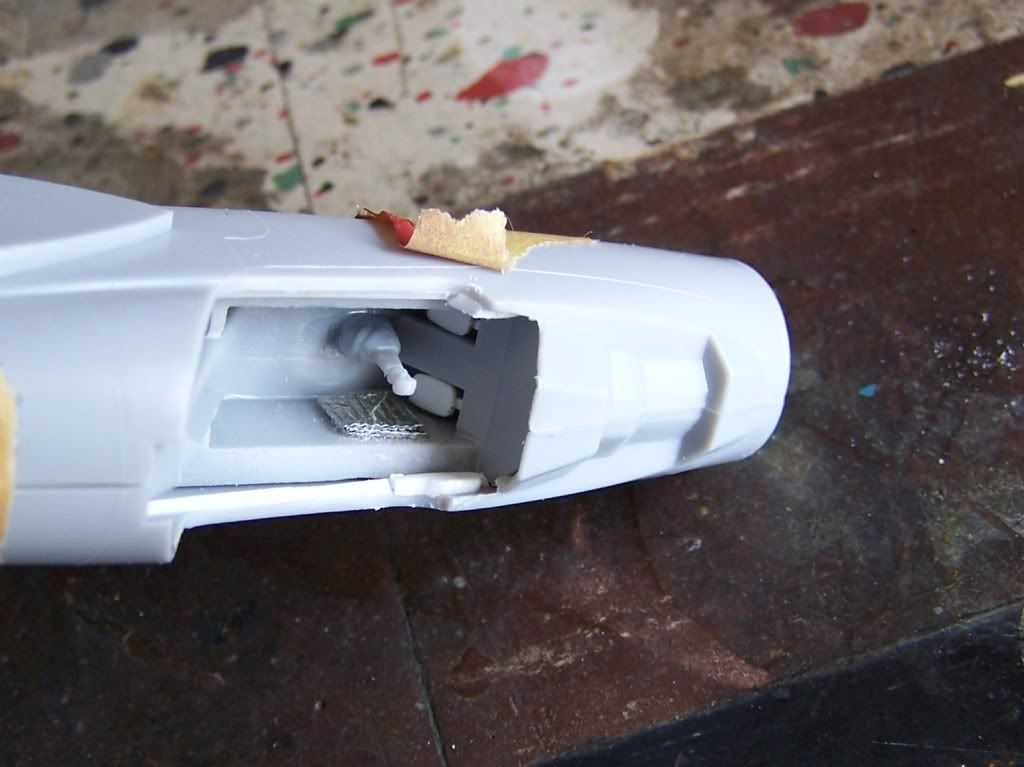
and then I put it in the fuselage halves taped together to get an idea of how it will look.

More to follow...Stick out tongue


F is for FIRE, That burns down the whole town!

U is for URANIUM... BOMBS!

N is for NO SURVIVORS...

       - Plankton

LSM


  • Member since
    July 2004
  • From: Sonora Desert
Posted by stikpusher on Tuesday, February 21, 2012 7:11 PM

More progress- bang seat and tub primed with Humbrol Primer

then I added a few more scratch built details to the cockpit sidewalls- levers, lights, and a control box

unfortuntely the close up pic for the other side came out very blurry.


F is for FIRE, That burns down the whole town!

U is for URANIUM... BOMBS!

N is for NO SURVIVORS...

       - Plankton

LSM


  • Member since
    July 2004
  • From: Sonora Desert
Posted by stikpusher on Wednesday, February 22, 2012 7:09 PM

Boy, it's awfully quiet in here. I know I started late but...Indifferent

Anyways, here is todays update. First up I airbrushed on a base coat of Humbrol Matt Black on the fuselage interior sides. Then I airbrushed the interior sidewalls and cockpit tub with Model Master Aircraft Interior Black, which is just a tad more dull than generic black. And I airbrushed the ejection seat with Humbrol Satin Black to give some visual contrast.

Cockpit tub

interior sidewalls

ejection seat

all cockpit components

and placed together

I will start detail painting over the next few days so I can get the fuselage assembled on my days off next week, Its back to work for me tomorrow...Tongue Tied


F is for FIRE, That burns down the whole town!

U is for URANIUM... BOMBS!

N is for NO SURVIVORS...

       - Plankton

LSM


  • Member since
    October 2008
  • From: italy
Posted by bsyamato on Thursday, February 23, 2012 4:43 AM

Great work Stik Yes you start late but with intention to finish the mirage soon Toast

  • Member since
    February 2003
  • From: Rothesay, NB Canada
Posted by VanceCrozier on Thursday, February 23, 2012 7:53 AM

stikpusher

Boy, it's awfully quiet in here. I know I started late but...Indifferent

Well I'm in between components right now, the Sea Harrier wrapped up, Pucara in a holding pattern until I get some other items finished up. I'd like to think I'm actually able to prioritize my projects & schedule build times really well. To be honest, it kinda comes down to "I work on the kitchen table so I can't have too much going on at the same time". Embarrassed Hoping to have a Hs-129 mostly finished up by the end of this weekend.

On the bench: Airfix 1/72 Wildcat; Airfix 1/72 Vampire T11; Airfix 1/72 Fouga Magister

  • Member since
    December 2002
  • From: Bury St Edmunds, Suffolk, England
Posted by Bish on Thursday, February 23, 2012 11:50 AM

Ye, it has been a bit quite in here, but i think thats common with longer GB's. I have had real issues getting on line during the week, which means i have to do all my catching up at weekends.

Nice progress there Stik, that seat looks very well detailed.

I am a Norfolk man and i glory in being so


On the bench: Airfix 1/72nd Harrier GR.3/Fujimi 1/72nd Ju 87D-3

  • Member since
    October 2008
  • From: italy
Posted by bsyamato on Friday, February 24, 2012 5:31 AM

LOL the pain to not finish my builds before end date makes me finish them too fast Embarrassed

  • Member since
    July 2004
  • From: Sonora Desert
Posted by stikpusher on Friday, February 24, 2012 3:07 PM

Bish

Nice progress there Stik, that seat looks very well detailed.

Thank you Bish.That seat is a real gem. I hope my painting skills are up to making it shine. There is SO much detail on it. Once I got the seat, I had to add detail in to the cockpit as well.


F is for FIRE, That burns down the whole town!

U is for URANIUM... BOMBS!

N is for NO SURVIVORS...

       - Plankton

LSM


  • Member since
    October 2010
  • From: Hobart, Australia
Posted by Casper the Chihuahua on Friday, February 24, 2012 7:58 PM

Haven't got much done this week. It has been a bit of a rough week here. One of our chihuahua's, Lychie, died this week. He was very old, 16 but much loved and will be truly missed.

Got some work done on the intake doors. This is tough work but the PE fits nicely and when painted should give a very realistic look to the plane.

Cheers

PS. My avatar will be changed to honor Lychie for the time being.

On the bench: A-4F 1/32 Hasegawa

Just deployed: F6F-5N Hellcat Nightfighter 1/48 Eduard

Up next: A6-E Intruder 1/48 Revell

  • Member since
    February 2003
  • From: Rothesay, NB Canada
Posted by VanceCrozier on Saturday, February 25, 2012 3:01 PM

Casper - the PE is really dressing that up, nicely done. A shame about Lychie, they really are part of the family.

On the bench: Airfix 1/72 Wildcat; Airfix 1/72 Vampire T11; Airfix 1/72 Fouga Magister

  • Member since
    January 2003
Posted by el_jere on Saturday, February 25, 2012 4:27 PM

Hello everybody!

It´s nice to see all he progress you guys made in the last weeks, I hope to post a few pictures as well soon, the Learjt is still in pause, today I pulled it out and painted silver al the main parts to spot the places that need more filling/sanding work. I will try to prime it tomorrow and pot  few pics.

Casper: that offiice looks awesome!!!! it looks like you can climb on it LOL.

Bish: th chopper is looking fine, I like th colours you choose. what weathering are you planning?

Stikpusher: the Mirage is looking great too!  l am not much of  fan of jet planes, but The Mirage is one of my favourites aricrafts. The seat detail is awesome!

best regards


Jeremias

Res non verba

  • Member since
    January 2003
Posted by el_jere on Sunday, February 26, 2012 7:13 PM

Hi ther!

Just a little progress today.

I painted all th main prts with silver to spot the places that need a little more work.

wich were a lot LOL

Now th model i ainted again silvr and I think it´s reay for th primr. Tomorrow I will prim it using mr surfacer 500.

Best regards to all

Jere

Res non verba

  • Member since
    October 2010
  • From: Hobart, Australia
Posted by Casper the Chihuahua on Sunday, February 26, 2012 11:14 PM

Some more work on the Harrier. Fusing the cockpit section onto the rest of the fuselage. This is being glued only on the starboard at the moment but it's necessary to temporarily tape and hold the port side so it makes a better match. There are many gaps in this kit already Super Angry

Cheers

On the bench: A-4F 1/32 Hasegawa

Just deployed: F6F-5N Hellcat Nightfighter 1/48 Eduard

Up next: A6-E Intruder 1/48 Revell

  • Member since
    December 2002
  • From: Bury St Edmunds, Suffolk, England
Posted by Bish on Monday, February 27, 2012 6:40 AM

el_jere

Bish: th chopper is looking fine, I like th colours you choose. what weathering are you planning?


Thanks, the colours i used were xtracolours Dark Sea Grey and Dark Green. And they seem to match the photos i have pretty well. As for weathering, i don't plan on doing to much. Again, going off photos of BN in the Falklands, it shows the aircraft failry clean. There isn't much dust thrown around down there. And the RAF only brought the Chinook into service in 1981 so they were stiull fairly new. I will have some worn paint on the rear ramp, and do the panel lines and not much more than that.

I have just started on the decals, so they should be on as well as a flat coat by the end of this week. I have just ordered a base, i usually make my own but i am not doing my normal Diorama for this one. So with any luck, this should be finished soon.

I am a Norfolk man and i glory in being so


On the bench: Airfix 1/72nd Harrier GR.3/Fujimi 1/72nd Ju 87D-3

  • Member since
    December 2002
  • From: Bury St Edmunds, Suffolk, England
Posted by Bish on Wednesday, February 29, 2012 4:39 PM

Finally its up date time again for the Chinook. I have finishged getting all the decals on. These were not the best decals i have worked with. But being Matchbox, i wasn't expecting them to be perfect. And given how some of my kits have been stored in the last 9 years, there are in better condition than i expected.

So next step is to get the flat coat on. The base arrived today. That has been stained and has had its first coat of gloss varnish.


And here you get an idea of the end result.

I am a Norfolk man and i glory in being so


On the bench: Airfix 1/72nd Harrier GR.3/Fujimi 1/72nd Ju 87D-3

  • Member since
    December 2002
  • From: Bury St Edmunds, Suffolk, England
Posted by Bish on Wednesday, February 29, 2012 5:11 PM

casper, you have deffinatly given your self a challenge there. But its paying off. I am sure the end reslut will be worth it. And thats deffinatly one big kit.

I am a Norfolk man and i glory in being so


On the bench: Airfix 1/72nd Harrier GR.3/Fujimi 1/72nd Ju 87D-3

  • Member since
    October 2008
  • From: italy
Posted by bsyamato on Thursday, March 1, 2012 12:57 PM

Good updates guys

Bish the chinoock looks great , wishing to see more about the basement Stick out tongue

  • Member since
    December 2002
  • From: Bury St Edmunds, Suffolk, England
Posted by Bish on Thursday, March 1, 2012 2:33 PM

Thanks. Its just going to be a small patch of terrain under the chinook, useing Celluclay, with the Chinook sunk into it slightly. And a couple of patchs at the front.

I am a Norfolk man and i glory in being so


On the bench: Airfix 1/72nd Harrier GR.3/Fujimi 1/72nd Ju 87D-3

  • Member since
    October 2010
  • From: Hobart, Australia
Posted by Casper the Chihuahua on Friday, March 2, 2012 11:00 PM

My first exhaust nozzle with PE. 1 down, 3 to go. A bit fiddly but worth the effort

Got the engine fitted inside and glued the fuselage together. Quite a nasty seam underside as you can see Tongue Tied

Cheers

On the bench: A-4F 1/32 Hasegawa

Just deployed: F6F-5N Hellcat Nightfighter 1/48 Eduard

Up next: A6-E Intruder 1/48 Revell

  • Member since
    January 2003
Posted by el_jere on Saturday, March 3, 2012 1:26 PM

Looking good Bish!

You are almost there. I have to start with bases for my models some day, a simple base adds a lot to the whole thing.

My lear is in painting stage, I used mr surfacer 500 as a primer, a littl sanding and thn white acrylic for the base colour and tamiya for the red.

I droped the model yesterday and some joints were damaged but notting to bad.

I just finished with the red and there are many spots that need corrections, both red and withe, but is looking good so far.

I will have to start with the decals in a few dys, I have to print my own so I have to look for a fount.

best regards to all


Jere


ps: casper, maybe a little styrene on the oint will help as a base for a layer of putty

Res non verba

  • Member since
    October 2010
  • From: Hobart, Australia
Posted by Casper the Chihuahua on Saturday, March 3, 2012 9:38 PM

Slow progress but slowly coming together.

Cheers

On the bench: A-4F 1/32 Hasegawa

Just deployed: F6F-5N Hellcat Nightfighter 1/48 Eduard

Up next: A6-E Intruder 1/48 Revell

  • Member since
    December 2002
  • From: Bury St Edmunds, Suffolk, England
Posted by Bish on Sunday, March 4, 2012 4:44 AM

Thanks Jere, i am hopeing i can get this done this week as i am then away for 2 weeks, and i really want to finish this. I normally do full on Diorama's for my builds, so this one is a bit toned down to my usual.

Thats come along nicely, i like the look of the red. Don't you just hate it when you drop or knock a model during the build.

What were these used for.

I am a Norfolk man and i glory in being so


On the bench: Airfix 1/72nd Harrier GR.3/Fujimi 1/72nd Ju 87D-3

  • Member since
    January 2003
Posted by el_jere on Sunday, March 4, 2012 9:14 AM

Thanks Bish,

The red is tamiya x-7 and th white is from polly scale, both acrylics.

I really like the tamiya´s red.

Wile I was checking picturs of the real aircraft I realize that I can count LOL, the model is one window short on each side! So I had to do what no modeler want to do, to do a major modification on an almost finished kit.

Of course it came out poorly, but at least I got the numbr of windows right LOL.

bst ragrds

Jere

Res non verba

  • Member since
    October 2008
  • From: italy
Posted by bsyamato on Sunday, March 4, 2012 11:44 AM

El_Jere first time i see a similar subject Yes nice work with the white!!!

JOIN OUR COMMUNITY!

Our community is FREE to join. To participate you must either login or register for an account.

SEARCH FORUMS
FREE NEWSLETTER
By signing up you may also receive reader surveys and occasional special offers. We do not sell, rent or trade our email lists. View our Privacy Policy.