SEARCH FINESCALE.COM

Enter keywords or a search phrase below:

One Year War GB 2011-2012 !Extended time! 30sept 2012

93137 views
696 replies
1 rating 2 rating 3 rating 4 rating 5 rating
  • Member since
    May 2011
  • From: Honolulu, Hawaii
Posted by Real G on Friday, January 6, 2012 6:05 PM

Bsyamato,

The Gog's monoeye guard is the kit part.  I drilled out a hole, super glued in a clear sprue, and polished the outside to a shiny finish.  I then masked off the eye using the kit's foil sticker and painted the outside glossy black.  I spray painted three coats of Mr. Super Clear, with polishing in between, to get a glossy finish.  Here you can see the surface is not perfect yet, but another coat of Mr Super Clear and some polishing will fix that.

HGUC Gog-Monoeye-1

From the underside, you can see the clear disc set in place.  I used thinned Tamiya transparent red to tint the eye that Zeon pink.  The diameter of the eye was larger than any clear sprue I had, so I used a short piece of brass tubing set on a piece of glass as a mold, and squashed in the tip of a heated piece of clear sprue.  I then used a razor saw to cut off what I needed, glued it in place, then sanded it until it was flush with the kit part.

HGUC Gog-Monoeye-2

To increase the intensity of the monoeye color, I will probably add some kind of backing, shaped like a car headlight reflector, painted white.

HGUC Gog-Body-2

Mmmmmmmm, sausages...  Stick out tongue

“Ya ya ya, unicorn papoi!”

  • Member since
    October 2008
  • From: italy
Posted by bsyamato on Friday, January 6, 2012 5:34 PM

Thanx Doctor,  waiting also for more of your gundam arts Toast as you not see nothing about gundams (if i right remember ) you're totally free of preconceptions and your gundam builds are really original Cool

RealG this gogg looks great anyway and i have too the same problem with the shoulder armor Tongue Tied even if i use enamel instead of acrylics. Don't remember how, but i resolved this problem on my previous pucca gogg Crying

Unfortunately don't take progression pictures but probably i sanded a few portion of the inside part of the armor ,so the piece had the only rotation contact with the joint rod washers that you show in the above picture.

Even if the MG have a good detail level i feel more free when i mod am hguc, the same gogg, even if are a relative simple kit have lots of possible easy improves. Get back with some updates Real Yes what you used for the monoeye, it seems not the original piece.

some minor updates and some picture i forget to take:

on the gogg change mind about the arms pieces and added some red detail

the zimmad signature on the hands Big Smile

Gouf details

the backpack i forget to take pictures

the shield id almost done, left onnly the damaged part to be painted to simulate the crack 

the unwanted armor damage Dead

basically i need only to scratch the monoeye to really complete the gouf Tongue Tied i admit the rails on the monoeye are not between my best works , two shots before take complete pictures with the nude skeleton 

sorry for the horrible gouf poses but under alcool effects after family reunion to manage pigs meat processing Stick out tongue at the end of the process lots of pure south italy typical sausage will be avaible Bow Down


  • Member since
    October 2009
Posted by DrShrinker on Friday, January 6, 2012 2:05 PM

Love the scratch work and mods you are doing Bsyamato. Great weathering too, looking forward to its completion.

  • Member since
    May 2011
  • From: Honolulu, Hawaii
Posted by Real G on Friday, January 6, 2012 12:54 PM

Although not part of the GB, I thought I'd post some photos of my HGUC Gog to complement Bsyamato's fabulous build.  My model has sat like this for months now, so there really was no progress.  Embarrassed   It is my hope that I can embarass myself enough to get off my lazy butt and start working on stuff again.

HGUC Gog-Parts

HGUC Gog-Back Pack

Digital photography is a funny thing, as this photo shows the truer color of the back pack.  I used RLM-02 instead of the recommended  light blue.  The red ink on the Satellite decal sheet seems to be somewhat translucent.  Also note that the "23" is off white compared to the Zeon insignia and stenciling.  I didn't notice that until just now.

HGUC Gog-Paint Chipping

Now here is a problem that I did not anticipate.  I used Tamiya acrylics for most of the model, and found out the hard way that the paint tends to stick between movable parts and scratches off quite easily.  I repainted the shoulder joint area twice, but still got the chipping.  I primed under the Tamiya acrylic with a lacquer (Gunze or Tamiya) so I didn't think there would be any trouble.  Looks like I will have to keep the Testors enamels around.

Anyway, keep up the good work guys, and hope to post some progress photos soon!

“Ya ya ya, unicorn papoi!”

  • Member since
    October 2008
  • From: italy
Posted by bsyamato on Wednesday, January 4, 2012 6:43 PM

thanx Badlanguage, in reality the new finger is a little narrow than original finger Embarrassed

a shoot of the head, not working too munch ion the gouf today

added the rail details

on the googdates

backpack mods, added a bulkead, a cover for back holes and started to modelling the engines

final base color for the brown, added some red drops to the previous brown 

as seen in picture painted the new finger too 

the other pieces almost finished

that's all for tonight Black Eye


  • Member since
    April 2011
  • From: Silver Spring, MD
Posted by badlanguage on Wednesday, January 4, 2012 9:34 AM

I'm liking the work on the Gouf. Good work on the lost finger scratchbuild, looks like the original. Very nice weathering, if I haven't said that before.

  • Member since
    October 2008
  • From: italy
Posted by bsyamato on Wednesday, January 4, 2012 6:17 AM

Real G hope you get back soon LOL lots of troubles there Cool

About decals i used baremetal decals clear and white sheets for inkjet printer. Sealed with supercale microfilm. I scanned the adhesive sheets from mg's and retouched or redraw in photoshop, printed lots in 1/100 and 1/144.

I'm lucky to have a professional printer for a better resolution Stick out tongue

Some mistake i had about because the microfilm liquid is too old, the some silvering comes sometime.

The white decals are the original dry transfers. 

If you want i like to add an msv variant of the dra-c with a oyw looking, if you use a recce zaku the thing can be possible as a Dra-C prototype or old version. You now what is needed to match the GB requirements Toast

is too restrictive but an only MSV GB was a great dream Surprise


On the gouf some update and some mistake...

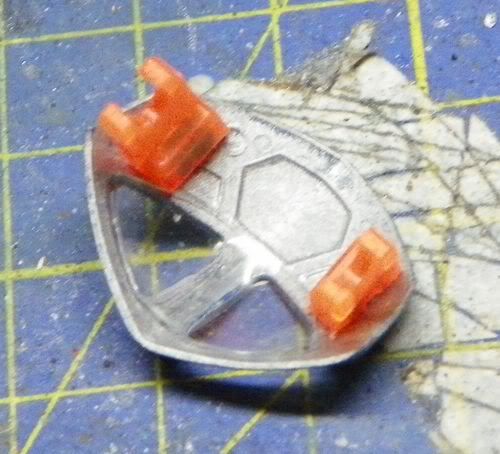
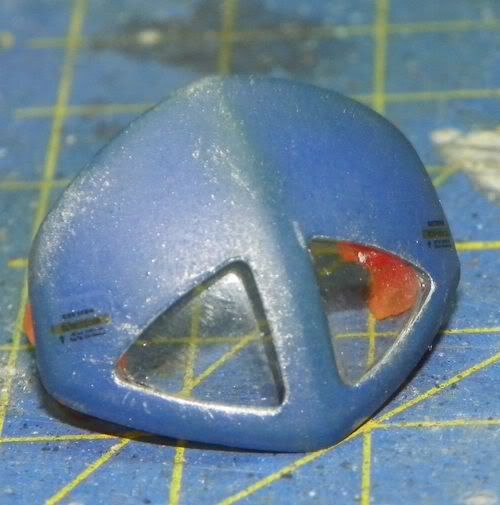
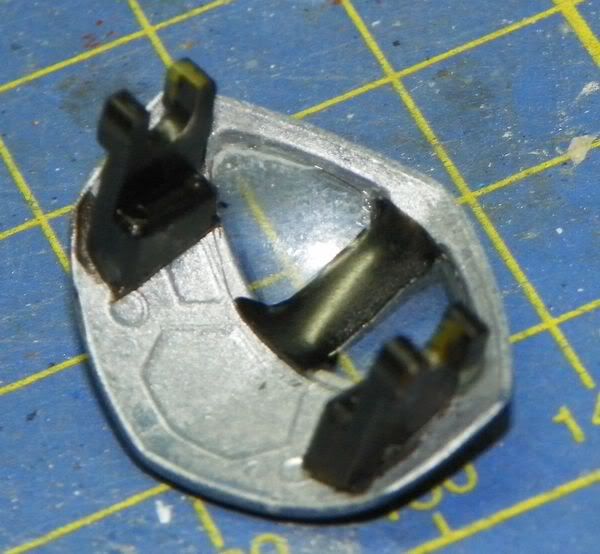
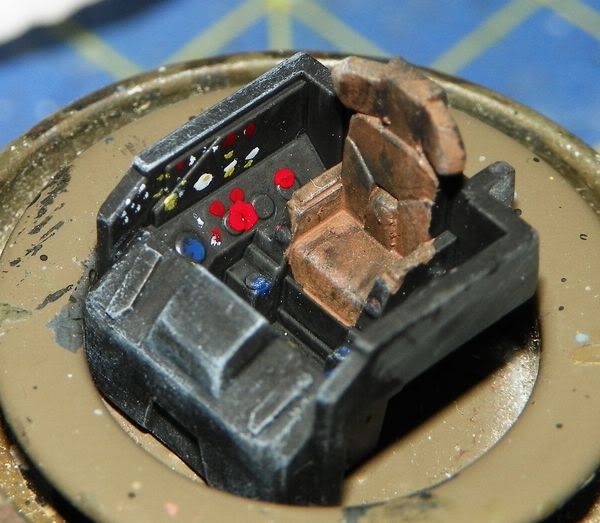
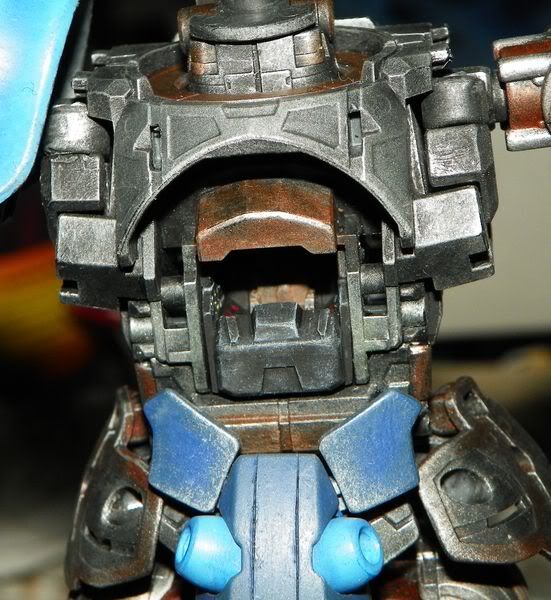
Added the new clear screen on the cockpit door, will guive a clear color after

the cockpit finished Huh? i admit not one of my best cockpit painting

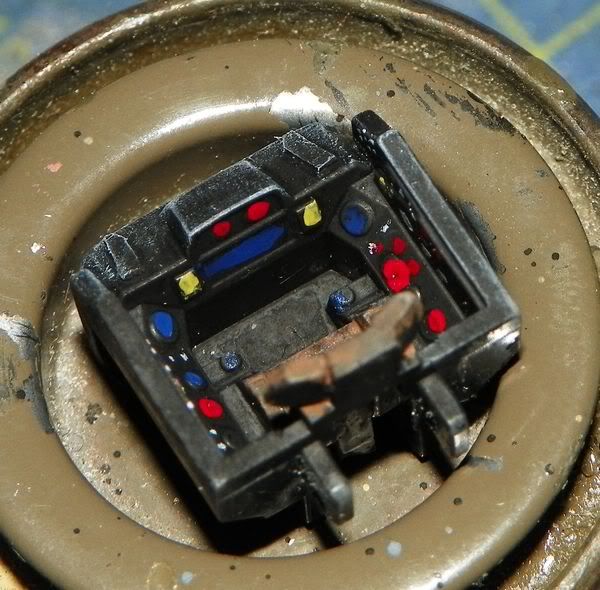
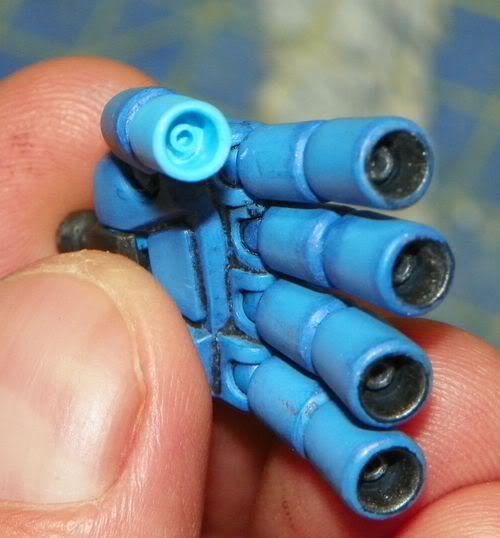
replaced the lost finger with 3 differents evergreen tubes and rods

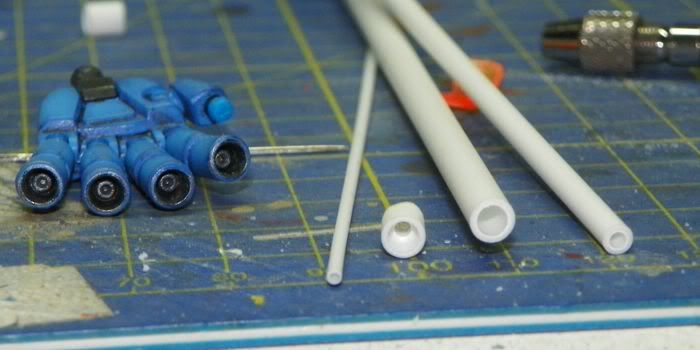
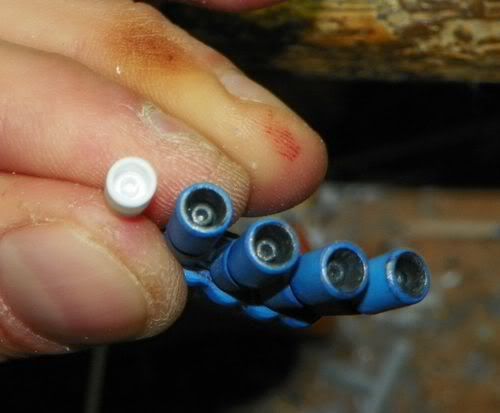
primed with unmixed light blue

so add more pieces to the skeleton and .... Bang HeadBang Head break the rear knee cover, glued with CA but a little seam is again visible

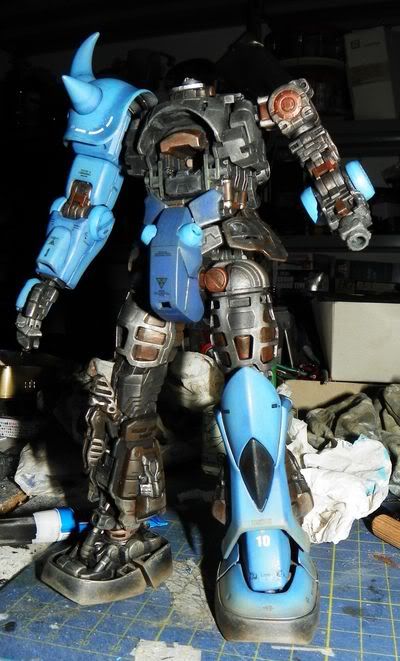
some more dirt is needed on the middle cover Surprise

now reamains to resolve the joint break of front skirt armour, probably wil use the same sprue plastic to replace.

have nice day Headphones


  • Member since
    May 2011
  • From: Honolulu, Hawaii
Posted by Real G on Tuesday, January 3, 2012 9:01 PM

Happy New Year all!

I was on vacation all last week, washing the windows and screens on the house for four whole days!  My arms (and the rest of me) were too tired to build anything.  The mock orange hedges in my yard went crazy with flowers (third time this year - what the heck is going on?), and as a result I had a constant allergy headache to go with the window washing.  Just lovely.

I'm just now catching up on the activity here on the OYW GB.  That Gouf is looking great Bsyamato!  How did you make your own decals?  Do you use an inkjet, laser, or wax emulsion type printer?

Santa brought me an ICM Tu-144 "Concordski", and I got myself an HGUC Dra-C which according to the instructions is a lash-up of Zaku, Gattle fighter-bomber, and other miscellaneous parts.  A really wacky looking mobile suit for sure.  I don't particularly like the hooded "face" nor the built-in arm gun.  I might trim away some of the fairing from the head and make a Zaku-esque "nozzle nose", and use the regular arm included in the kit.  I had no idea what the Dra-C was supposed to be used for (they flashed by only briefly in the 0083 OVA), so I was thinking of making a camera gun similar to the MSV Zaku Recon:   http://www.1999.co.jp/eng/10005629

Anyway, I should be getting back to building stuff, so I hope to post progress piccies soon.


“Ya ya ya, unicorn papoi!”

  • Member since
    October 2008
  • From: italy
Posted by bsyamato on Tuesday, January 3, 2012 10:51 AM

again the gouf

last lap on matt finish , at the end complete layers involved on the armour was a grey base, two color layers ,three glossy and two matt Dead 8 layers !!! withouth counting drybrush..

wheathering the lower parts

lower armour too

cannot resist to try how look nìone of arms complete Stick out tongue

monoeye milliput putting

when dry will draw the rail details

  • Member since
    October 2008
  • From: italy
Posted by bsyamato on Sunday, January 1, 2012 5:19 PM

Don't fear smeagol, again 4 whole months to the GB end, just i decided to put a boost on my two ms, actually working only on these kits.

Also if i able to soon finish it, will try to put another one, probably the hguc kaempfer ,so i remains on blue colors Big Smile or another hguc; list of unfinished kits is long on my stash Toast

Please post some tank progress if you can

  • Member since
    April 2008
  • From: Philadelphia PA
Posted by smeagol the vile on Sunday, January 1, 2012 3:06 PM

Time left till this GB is over?  this GB isn't over till I say its over!  That is... I'm still working on my kit slowly, 1/144 scale indie tracks are heck and I am in no rush to do them asap.


  • Member since
    October 2008
  • From: italy
Posted by bsyamato on Sunday, January 1, 2012 1:20 PM

New year updates ,good and bad Dead

the gogg

washing panel lines on glossy pieces

primed the brown parts

home made decals on the gouf

sealed after cure with superscale liquids with another gloss layer (3rd)

pane lines after whash and part of pieces ready for final matt coat

.............................................................Bang Head.....................................

break the joint of the left front armor skirt !!! and lost one of vulcan fingers Bang Head x5

new

that's all , hope to fix the problem soon Surprise


  • Member since
    October 2008
  • From: italy
Posted by bsyamato on Thursday, December 29, 2011 5:57 PM

don't fear ,take your time for good zaku pictures Klik ,you have time till the end of GB .

nice scores guys

here the gogg updates i forget to post, just tonight glued the two fans to the intakes

used the whole day to put decals on the gouf, tomorrow will cure it and take some pictures , temptation to snap the armor is high but need to resist Dead


  • Member since
    January 2010
Posted by Klik on Thursday, December 29, 2011 10:51 AM

Ok, been out of town,

Got Three (Four) kits for Christmas:

1/72 Hasegawa B-24D Liberator

1/72 Hasegawa F-4B/N Phantom

and

1/100 GN-X (from Gundam 00)

also got for myself a 1/144 GPB-06F "Super Custom Zaku F2000", which I've assembled but not yet painted.


Saw that Y'all wanted me to post some pics of the Zaku, so I'll get to that when I can. (Busy weekend ahead).

Klik

oneyearwar1

The hardest part of flying isn't flying...it's landing.

  • Member since
    October 2008
  • From: italy
Posted by bsyamato on Thursday, December 29, 2011 5:20 AM

nothing.. just received supplies before holydays 

a p-47 razorback academy 1/72 and a little junkers f13 from revell 1/72

and just a month ago a breguet 693 smer, the new airfix zero, amodel ki-32 short run, and a zil-157 truck from icm,, all 1/72 scale.

my gunpla  already counting again more than 20 unfinished kits, included 3 MG

counting to get some new gunpla during the year, probably some new hguc as the gouf custom , geara zulu

A dream is the Sazabi and the giant Kshatriya Angel 

  • Member since
    April 2008
  • From: Philadelphia PA
Posted by smeagol the vile on Wednesday, December 28, 2011 9:22 PM

Ones that you bought yourself count!

This is what I got


1/72nd ESCI halftrack w/pac 40

matchbox krupp protz in 1/72nd for me to build

1/1 scale Pyro French Wheellock pistol kit

Gummy the Toothless Gator: Airfix  54mm Bengal Lancer kit

a really old kit from Ideal Toy Corperation, two in one, spirit of st. louis and the wright flyer 2 in one, though the wrigh flyer was started and part is missing the spirit is still sealed in the bag

Hasegawa 1/72nd mercedes benz G4

gunze woodpecker kit 1/1

tamiya 1/35th scale Chasmosaurus

Lastly I got TWO Ma.k kits, a Melusine and a Ketzer in 1/20


  • Member since
    April 2011
  • From: Silver Spring, MD
Posted by badlanguage on Wednesday, December 28, 2011 8:40 PM

Do the ones I bought for myself count? I got a HG Char's Zaku II and a HG Gelgoog Jager. I love the Zeon mobile suits. Can't wait to tear into the Zaku!

Anybody else?


  • Member since
    April 2008
  • From: Philadelphia PA
Posted by smeagol the vile on Wednesday, December 28, 2011 7:20 PM

How did the holidays treat everyone?  Did anyone get any kits?


  • Member since
    October 2008
  • From: italy
Posted by bsyamato on Wednesday, December 28, 2011 5:24 PM

Thanx guys Bow Down trying to boost the finish of the gouf.

today second glossy layer on all armour pieces... tomorrow decals!

  • Member since
    October 2009
Posted by DrShrinker on Wednesday, December 28, 2011 2:38 PM

Very cool. Looking forward to seeing it complete.

  • Member since
    April 2011
  • From: Silver Spring, MD
Posted by badlanguage on Tuesday, December 27, 2011 10:19 PM

The Gouf is looking awesome! I can't wait to see it finished. Good work so far!

  • Member since
    October 2008
  • From: italy
Posted by bsyamato on Tuesday, December 27, 2011 7:16 PM

Workbench session was long today Stick out tongue

Started the glossy session during night:

first stock of pieces... too many clips was needed and was not enough Sad

then... after an hour and half  the second stock

also to break glossy session time i used some extra and improbable parts holder

and the same gouf Embarrassed

I hope he don't want to shoot me this night...

Guys we have exceeded 15.000 views !!!! Toast

A great result here, i think , for a gundam GB!! thanx to all Bow DownBow DownBow Down

  • Member since
    October 2008
  • From: italy
Posted by bsyamato on Tuesday, December 27, 2011 11:36 AM

Here more updates, finished almost all armour dry-brush and plus èut on few dry transfers:


not in pictures but even the medium blue armour is ready for the glossy stage Embarrassed

started the monoeye mod

after will fill the rails with milliput 

changed mind about the cockpit, wil only improve the original instead to full scratch Whistling i'll leave unglued for future changing

front chest dry transfers

Also backpack, power conductors and minor last pieces going for the finishing stage

that's all, this night will place last few drytransfers and tomorrow ready to mega-gloss stage for decals Toast

  • Member since
    October 2008
  • From: italy
Posted by bsyamato on Friday, December 23, 2011 6:54 PM

intresting trick Real G, but hope not need to use it Tongue Tied actually only tamiya glue on the bench .

Smeagoal put some progress picture Wink

Here more update on the gouf, near to finish the skeleton

After i almost finished the drybrush stage i preferred to snap all possible pieces to prevent losting pieces (whit drybrush don't need to waith normal dry time of enamels)

strike some pose !!!

that's all for now ,holyday duties will come on the next two days

Happy holydays to the GB members Toast

  • Member since
    May 2011
  • From: Honolulu, Hawaii
Posted by Real G on Friday, December 23, 2011 4:46 PM

Smeagol,

I first painted the track joints with Testors liquid cement (glass bottle) then slid them together.  The cement slightly softens the plastic, allowing the tracks to be pressed together.  The Testors glue isn't really "hot" compared to Tenax or Mr. Cement, so you'll have some time to get things lined up before the glue sets.  I built the track sections into upper and lower runs.  After the first coat of glue dried, I removed the tracks from the running gear, then applied Mr. Cement to the joints to reinforce them.  I fitted the tracks back onto the running gear to make sure the tracks set correctly.  Where the upper and lower tracks join, I scraped the mating surfaces a little beforehand.  As they come, the fit is a little tight.

Other than that, I can only say to close your eyes, breathe deeply, and clear your mind.  It's only a hobby.  It's only a hobby.  It's only a hobby...

“Ya ya ya, unicorn papoi!”

  • Member since
    April 2008
  • From: Philadelphia PA
Posted by smeagol the vile on Friday, December 23, 2011 3:44 PM

I know they needed to be fitted before you can do anything but when the #$%^ing things wont stay together so I can get them to freaking fit what are you suposto do?!


  • Member since
    May 2011
  • From: Honolulu, Hawaii
Posted by Real G on Friday, December 23, 2011 3:30 PM

Smeagol,

The tracks and wheels need to be painted before test fitting and assembling them.  I fitted them up in sections before painting, and found that hard way that the coat of paint will add just a hair of thickness to the parts, which will cause the track links to not close.  I feel your pain - I think this is the first model that I continously used an optivisor while building.

Happy holidays fellow OYW group builders!  And don't shoot yer out out!


“Ya ya ya, unicorn papoi!”

  • Member since
    April 2008
  • From: Philadelphia PA
Posted by smeagol the vile on Friday, December 23, 2011 3:23 PM

I got supplies and am TRYING to get to work on this Magella attack tank...

the thing has freaking indie link tracks, they are less then a cm wide and I have never NEVER EVER wanted to take a hammer and just turn a kit into ^%$@ing scrap plastic more


  • Member since
    October 2008
  • From: italy
Posted by bsyamato on Friday, December 23, 2011 7:09 AM

Nice work after the cables too klik Yes i'll post this picture on the wall but upload more for the zaku own gallery, i'll update the link when you done. Just as a tip for better picture you need to try turn the subject to the light direction, the looking of the zaku seems really good but the picture don't give it justice Toast 

Thanx for coments guys about the gouf will post more during the holidays

  • Member since
    April 2011
  • From: Silver Spring, MD
Posted by badlanguage on Thursday, December 22, 2011 10:34 PM

I like the Zaku, love to see some more pics of it. I also can't wait to see more of the Gouf, bsyamato, so far it looks fantastic!

JOIN OUR COMMUNITY!

Our community is FREE to join. To participate you must either login or register for an account.

SEARCH FORUMS
FREE NEWSLETTER
By signing up you may also receive reader surveys and occasional special offers. We do not sell, rent or trade our email lists. View our Privacy Policy.