SEARCH FINESCALE.COM

Enter keywords or a search phrase below:

Japanese GB 2011-2012

204594 views
2250 replies
1 rating 2 rating 3 rating 4 rating 5 rating
  • Member since
    October 2008
  • From: italy
Posted by bsyamato on Wednesday, November 16, 2011 6:02 PM

the new arrives:

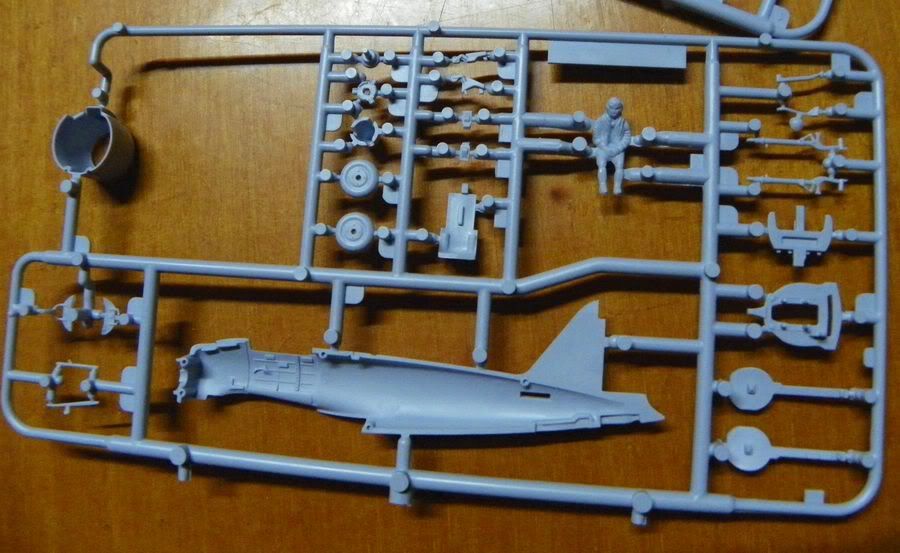
as never seen a review of the new airfix zero ,posting some extra sprue picture about it

here the little almost jewel
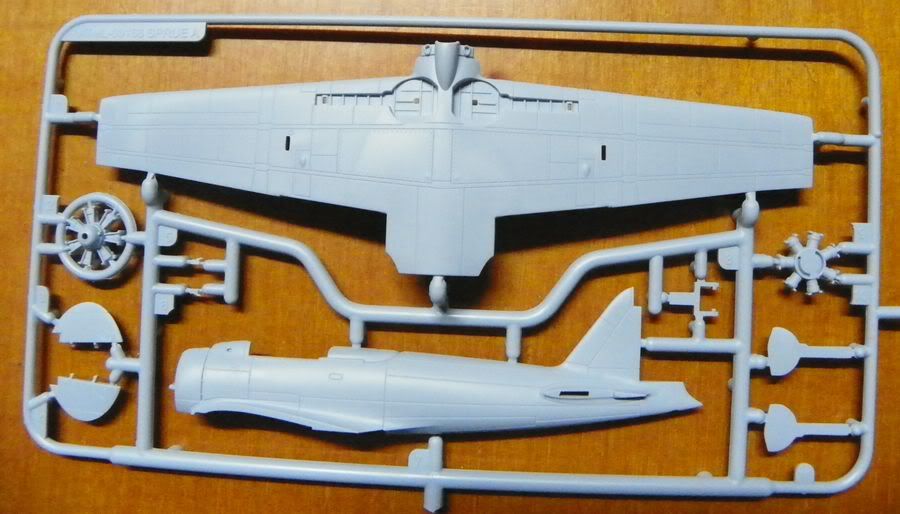
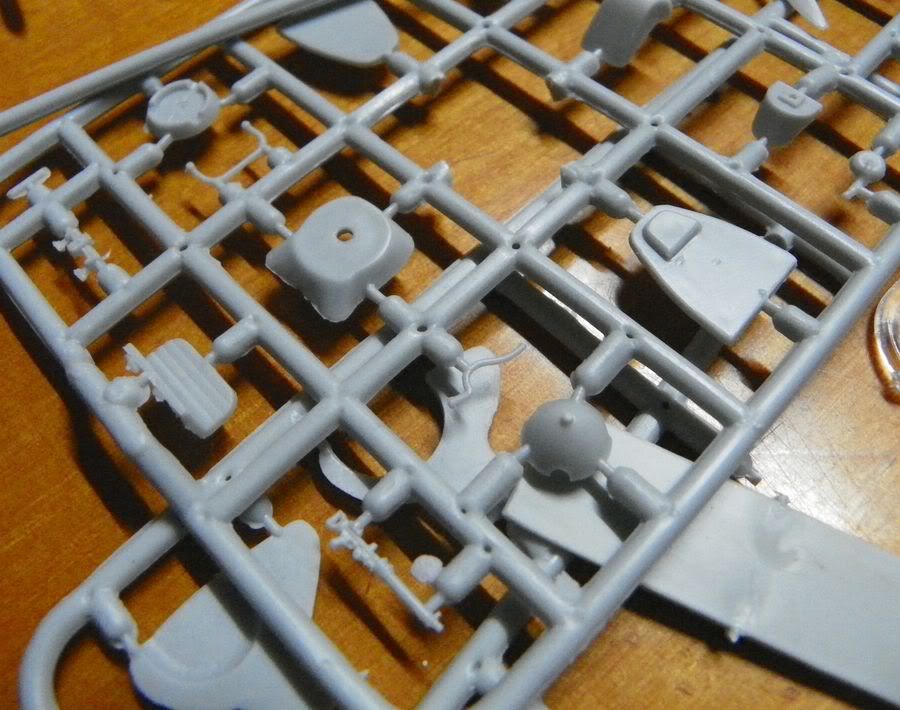
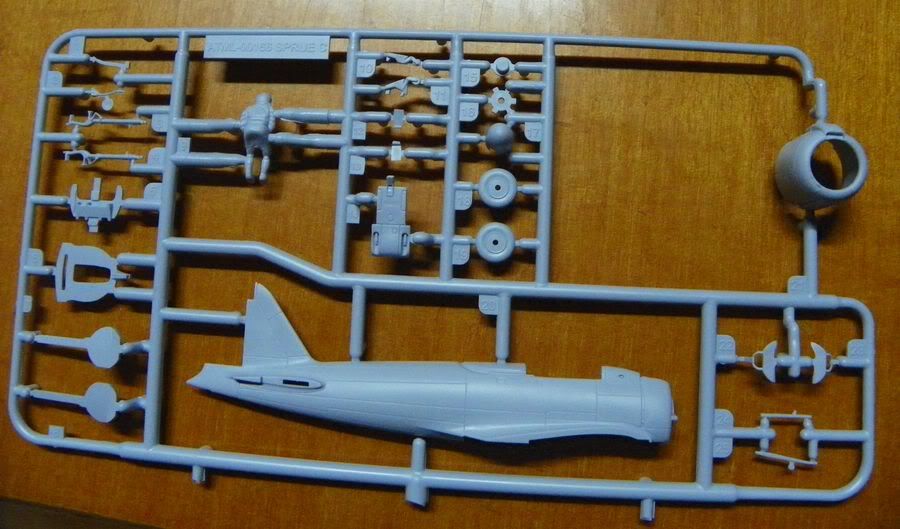
rear of above sprue:
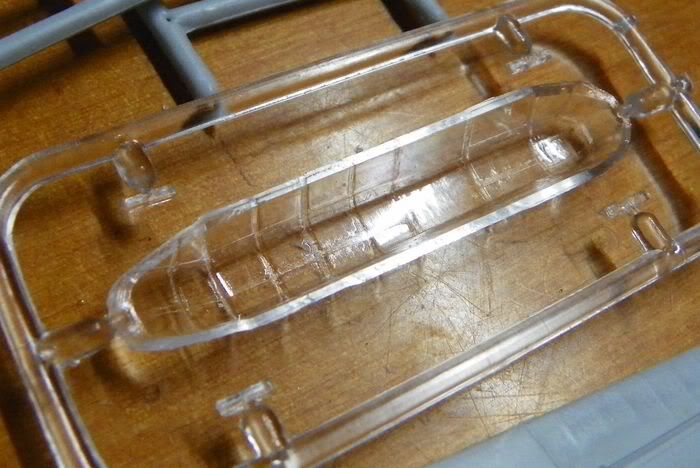
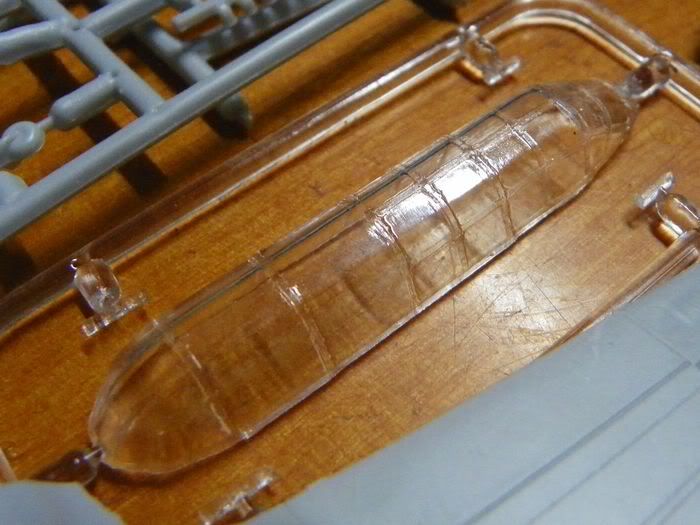
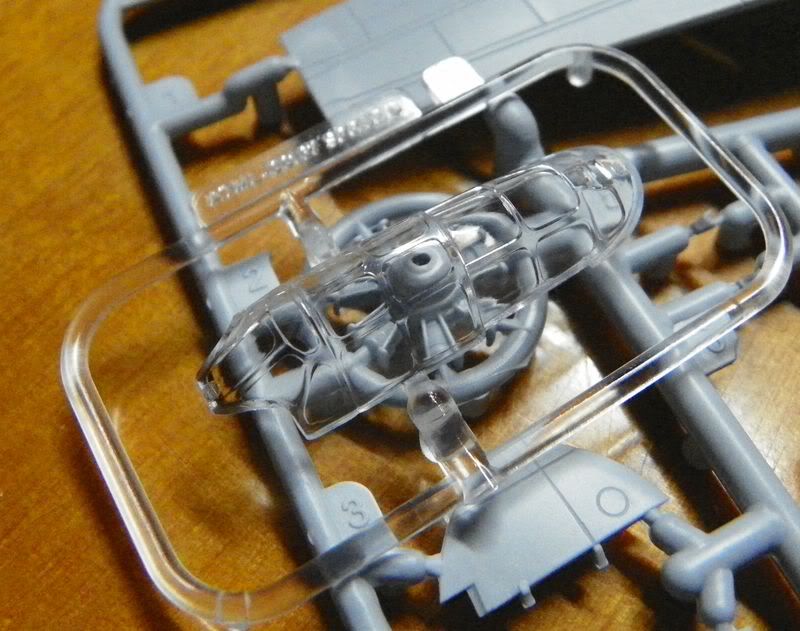
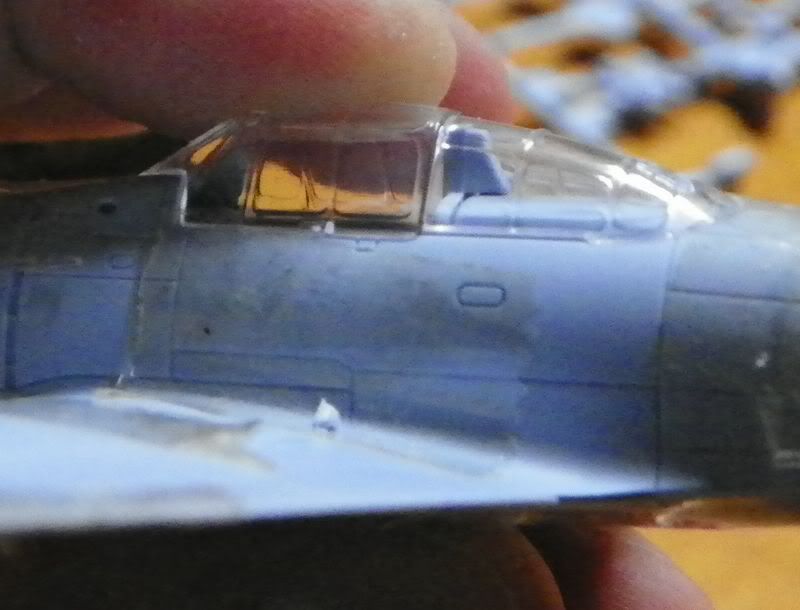
canopy really good but in single piece
engraved details , wells good but as the 90% of kits, too few dept
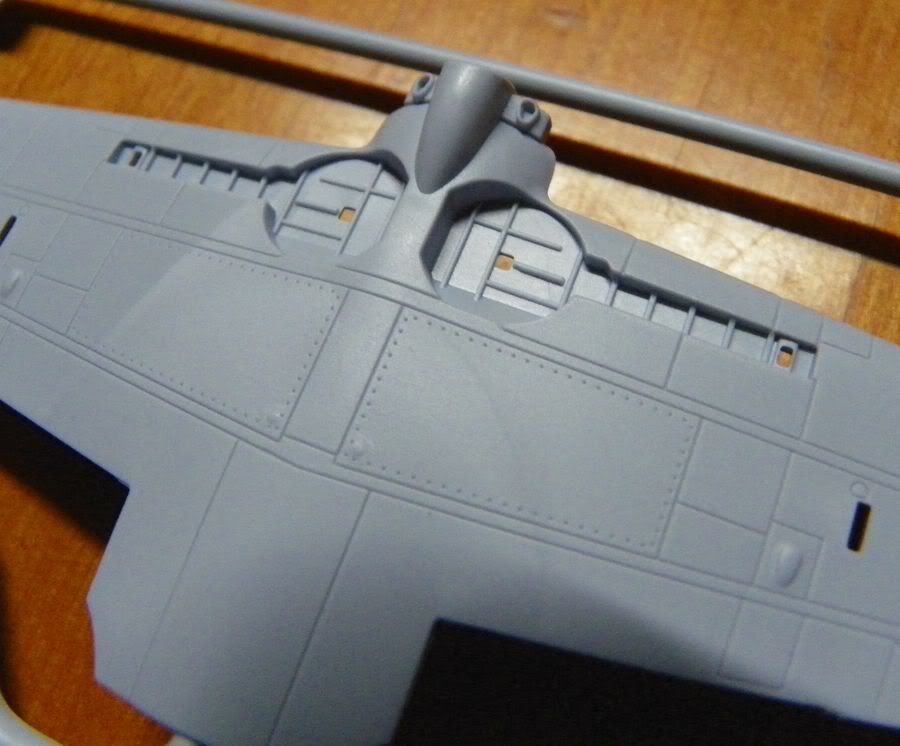
 

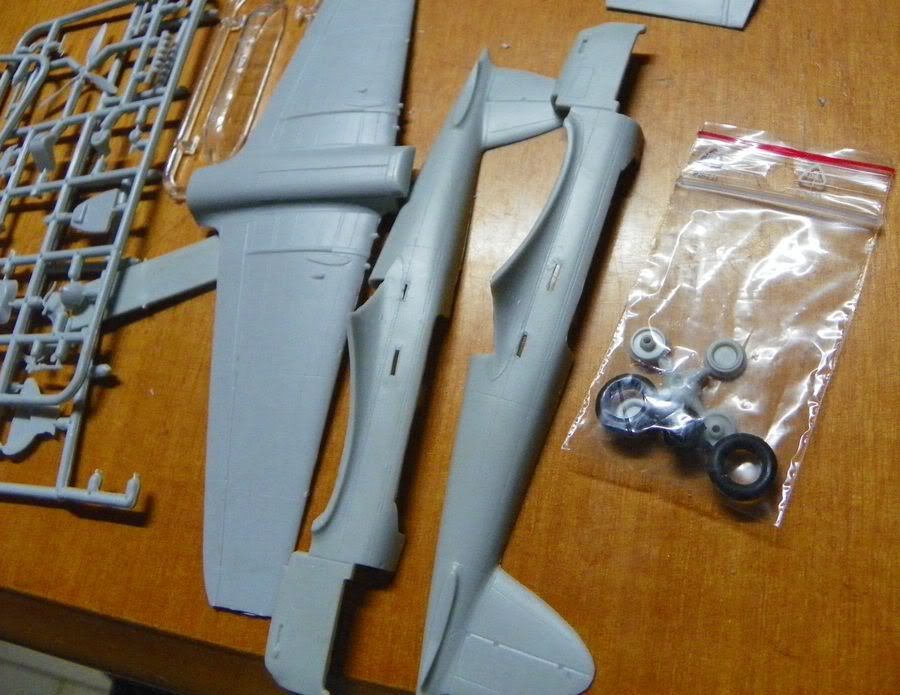
test fitting looks really good, rudder are oob detached (kit also include wings tip for carrier storge)

aand the Mary Dead

not same easy things here:

the strange option of rubber molded pneumatics Bang Head i hate rubber in scale kits!

the canopy is too thick and need to be replaced (already glued on a rod to use as mold for a new one and just failed the first 4 attempt with heat-forming Sad )

Drammatic test fitting compared to the Zero ... the prelude of an huge work to obtain something acceptable.

Also the ki-32 is huge for a single motor plane (just compared with an avenger, almost same dimensions)
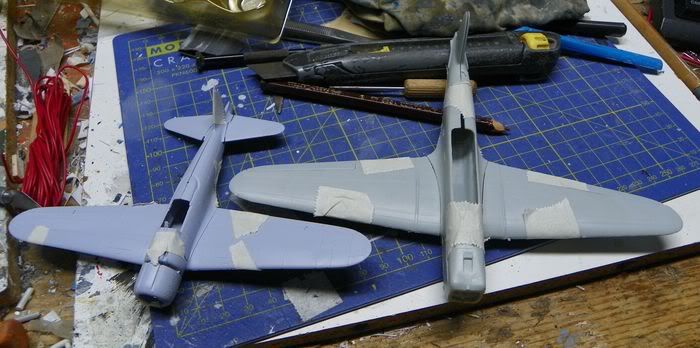
At the next for real updates

  • Member since
    October 2008
  • From: italy
Posted by bsyamato on Tuesday, November 15, 2011 3:37 AM

Magnific paint Trey Stick out tongue and nice shuriken launher on wings board (no ninja face between smiles to put here)

  • Member since
    August 2009
  • From: Borlando Fla home of the rat
Posted by TREYZX10R on Monday, November 14, 2011 6:30 PM

Bsyamato thanks ! Looking forward to your experiment

I'm onto the decals after rubbung on some oil base wash

  • Member since
    September 2009
  • From: Spring Branch, TX
Posted by satch_ip on Monday, November 14, 2011 5:53 PM

Is there a Vallejo paint for Mitsubishi interiors?


  • Member since
    October 2008
  • From: italy
Posted by bsyamato on Sunday, November 13, 2011 5:46 AM

As usual magnific chipping Trey Yes

Last night i read an article about an hayate on an old modelling magazine: a new (old) tip learned without using salt tecnique Stick out tongue

this is the sequence:

light primer, metal finish, protective gloss coat , camouflage , then stripping a tape on to remove and break upper paint . I will try on a test plane.

  • Member since
    August 2009
  • From: Borlando Fla home of the rat
Posted by TREYZX10R on Saturday, November 12, 2011 1:46 PM

]

I zoomed in close on the pic and some salt was needed after all .The cockpit entrance has some real good chipping so figured the walk areas and ammo panels on the tops of the wing were probably pretty beat up as well.

[IMG]http://img.photobucket.com/albums/v710/treyzx10r/KI100GOSHIKI/goshiki4001.jpg[/IMG

  • Member since
    August 2009
  • From: Borlando Fla home of the rat
Posted by TREYZX10R on Friday, November 11, 2011 8:10 PM

Len I've not forgot about you,I'll be mailing the instructions out this weekend!

Cliff have a great vacation!

I decided to go with the aircraft in the background #296 as the kit supplied decals match. The paint seems to have adhered quite well on this example so no salt on this build.

It does show some slight chipping here and there so it still gets a base of ts-30 .The bottom got a coat of Japanese grey

artist rendering of same aircraft with different number

  • Member since
    November 2009
  • From: SW Virginia
Posted by Gamera on Friday, November 11, 2011 9:43 AM

Bsyamato: Yeah, somewhat the same here - I have tests I need to set up at work and then wait a few hours for the results. So I can go on the forum, read a book, take a walk, etc while I'm waiting around. Sometimes it gets much more busy but I normally have at least some time to post.

BTW: Nice autopilot! But if he deflates you guys are going to have to deal with it Stick out tongue

"I dream in fire but work in clay." -Arthur Machen


  • Member since
    October 2008
  • From: italy
Posted by bsyamato on Friday, November 11, 2011 8:51 AM

i'm even connected from the work Whistling i'm lucky none controlling me ,need just to respect endline on work .

autopilot ready!

Captain

waiting for judy! Stick out tongue

  • Member since
    November 2009
  • From: SW Virginia
Posted by Gamera on Friday, November 11, 2011 8:43 AM

Len: HAH, you think he's nuttier than me? Tongue Tied (We need a straitjacket smilie)

Bsyamato: Just joking with you friend, you seem to be around most of the time and you seem to be a really good guy so I thought I'd joke around with you.  Clown The GB will run itself on autopilot when I'm gone. The only thing I really need to do is update the front page and the build roster which I will do when I get back.

I'll put the Mary and the Zero down.


I should have posted a photo of the Suisei/Judy- decals and panel lines are done. And I put the landing gear on too, they don't fit very well, I glued them down good but I'm afraid they may still be woobly. Only bad thing about the kit so far.

"I dream in fire but work in clay." -Arthur Machen


  • Member since
    October 2008
  • From: italy
Posted by bsyamato on Friday, November 11, 2011 5:11 AM

Thanx AZ for the clearness Yes

The point that the supercharger seems really the same as the p-38 type or others usa planes, probably they captured on and copy the supercharger imho Hmm

Gamera in which sense i'm on charge Huh? ?

btw i finished the bargaining with my vendor about the kits , at the end i'm waiting for the amodel ( Angel yes amodel short run) ki-32 mary and... before to close the order i notice the new tooling zero was on!!!

then you can put for me the amodel ki-32 mary and the airfix A6M2b zero (both 1/72) before you leave the pacific theater Propeller 

  • Member since
    July 2007
  • From: Southern New Jersey
Posted by troublemaker66 on Thursday, November 10, 2011 4:33 PM

Gamera

Baron: Sounds fine to me.

BTW guys again, I'm going on vacation/holiday this weekend and will be gone for about two weeks. If you have anything you need me to change etc please let me know by Friday evening or it'll have to wait.

I'm leaving Bsyamato in charge while I'm gone so be good Angel

Uh oh...a nut`s running the madhouse now? We`re doomed...Wink Stick out tongueBig Smile

Len Pytlewski

  • Member since
    November 2009
  • From: SW Virginia
Posted by Gamera on Thursday, November 10, 2011 2:54 PM

Baron: Sounds fine to me.

BTW guys again, I'm going on vacation/holiday this weekend and will be gone for about two weeks. If you have anything you need me to change etc please let me know by Friday evening or it'll have to wait.

I'm leaving Bsyamato in charge while I'm gone so be good Angel

"I dream in fire but work in clay." -Arthur Machen


  • Member since
    February 2011
  • From: Sedona AZ
Posted by AZKevin on Thursday, November 10, 2011 2:41 PM

AZKevin

bsyamato -

I'm not sure about this but I think the Ki-94-II was the first Japanese airplane to incorporate the supercharger.  I don't think they considered a high altitude defensive fighter until the beginning of the B-29 raids over the home islands.  I do know, from what I've read, that the Ki-94-II was specifically developed to quickly gain altitude and engage the B-29's.  I'm not sure but the breakdown of the kit (especially the cockpit) makes me wonder if it also incorporated a pressurized cockpit.  Guess I'll have to do some more reading!!

OK a brief wikipedia article states that the Ki-94-II did have a pressurized cockpit.

Should also have added that the Nakajima Ki-87 also had a supercharger - this on placed on the starboard side between the cockpit and engine cowling.  Not sure if this one ever flew either.

Kevin A. Lawton

Dept. of History

Dept. of Quaternary Sciences

Northern Arizona University

Flagstaff, AZ

  • Member since
    February 2011
  • From: Launceston, Australia
Posted by the real red baron on Thursday, November 10, 2011 2:35 PM

Gamera - I'm thinking of pulling the zero out and leaving it for the Pearl Harbour GB. And making a KI-61 Hien Tony. I've just got too find one.

Its not a confirmed change but I would like to pick up a Tony.


  • Member since
    February 2011
  • From: Sedona AZ
Posted by AZKevin on Thursday, November 10, 2011 2:33 PM

bsyamato -

I'm not sure about this but I think the Ki-94-II was the first Japanese airplane to incorporate the supercharger.  I don't think they considered a high altitude defensive fighter until the beginning of the B-29 raids over the home islands.  I do know, from what I've read, that the Ki-94-II was specifically developed to quickly gain altitude and engage the B-29's.  I'm not sure but the breakdown of the kit (especially the cockpit) makes me wonder if it also incorporated a pressurized cockpit.  Guess I'll have to do some more reading!!

Kevin A. Lawton

Dept. of History

Dept. of Quaternary Sciences

Northern Arizona University

Flagstaff, AZ

  • Member since
    November 2009
  • From: SW Virginia
Posted by Gamera on Thursday, November 10, 2011 8:22 AM

Kevin: Thanks for the additional photos, yeah the supercharger in the belly is interesting. I first thought about the ones on the top of the P-38, and the Ki-94 is reversed with them in the belly.

I'd love to see the resin kit if you decide to build it, I love experimental stuff like this and the Ki-94 was such a beautiful aircraft.

"I dream in fire but work in clay." -Arthur Machen


  • Member since
    October 2008
  • From: italy
Posted by bsyamato on Thursday, November 10, 2011 4:33 AM

Kevin even the bottom is perfect , with panel lines he will become magnific Yes but the supercharger is non jap made? don't remember to see one similar on others jap planes.

TREYZX10R

Bsyamato you do'nt need to be able to reach inside the canopy as foam safe(odorless) ca does'nt fog clear at all! Give it a try works great for me and it comes in thick and thin.

to clean the scout canopy i used a piece of paper cloth with water and placed on a stick to clear fog , that the motivation to reach the inside.

BTW now i removed even the side original windows on it (first i also removed the pilots doors). 


  • Member since
    February 2011
  • From: Sedona AZ
Posted by AZKevin on Thursday, November 10, 2011 12:47 AM

troublemaker66

 TREYZX10R:

 troublemaker66:

Certainly worth the wait Kevin. What color is that anyway? And that supercharger looks very familiar...maybe a reverse engineered copy of a captured U.S. type?


was thinking the same Len


....great minds think alike my friend...Wink That supercharger looks like the one they used on the B-17`s. By the way, thanks for the kind words regarding the Nell. Did you ever get a chance to copy the Otaki Ki-100 instruction sheet for me ?

Len


The orange color is Floquil CN Orange.  I think the CN stands for Canadian Northern since Floquil makes mostly railroad colors (wish they made Japanese colors - their paints spray beautifully!).  Reefer orange is another very close match.

It would not surprise me one bit if the turbo-supercharger was a reverse engineered American model.  The Japanese certainly captured and flew B-17's, as well as many other American planes.  I've seen photos of a B-17 in Japanese markings, but I don't think I've seen any evidence of a captured P-47 (which was my other thought for the turbo-suercharger).  Maybe the guys over at J-aircraft.com know something?

Not that it necessaarily means anything, but the other version included in the instructions shows a long pipe leading from the front intake all the way back to the turbo-supercharger.  Might have to build taht version as well Big Smile

Kevin A. Lawton

Dept. of History

Dept. of Quaternary Sciences

Northern Arizona University

Flagstaff, AZ

  • Member since
    July 2007
  • From: Southern New Jersey
Posted by troublemaker66 on Wednesday, November 9, 2011 8:49 PM

TREYZX10R

 troublemaker66:

Certainly worth the wait Kevin. What color is that anyway? And that supercharger looks very familiar...maybe a reverse engineered copy of a captured U.S. type?


was thinking the same Len

....great minds think alike my friend...Wink That supercharger looks like the one they used on the B-17`s. By the way, thanks for the kind words regarding the Nell. Did you ever get a chance to copy the Otaki Ki-100 instruction sheet for me ?

Len

Len Pytlewski

  • Member since
    August 2009
  • From: Borlando Fla home of the rat
Posted by TREYZX10R on Wednesday, November 9, 2011 8:05 PM

troublemaker66

Certainly worth the wait Kevin. What color is that anyway? And that supercharger looks very familiar...maybe a reverse engineered copy of a captured U.S. type?

was thinking the same Len

  • Member since
    July 2007
  • From: Southern New Jersey
Posted by troublemaker66 on Wednesday, November 9, 2011 7:39 PM

Certainly worth the wait Kevin. What color is that anyway? And that supercharger looks very familiar...maybe a reverse engineered copy of a captured U.S. type?

Len Pytlewski

  • Member since
    February 2011
  • From: Sedona AZ
Posted by AZKevin on Wednesday, November 9, 2011 7:20 PM

Almost forgot - When it's further along I'll post a photo or two of the Ki-94-II alongside the Ki-78 'Ken'.  The Ki-94-II was a huge! airplane - maybe comparable to the P-47.

Span: 46 feet (14m), Length 39.3 feet (12m), Height 15.25 feet (4.65m)  Don't know the diameter of the prop

Kevin A. Lawton

Dept. of History

Dept. of Quaternary Sciences

Northern Arizona University

Flagstaff, AZ

  • Member since
    August 2009
  • From: Borlando Fla home of the rat
Posted by TREYZX10R on Wednesday, November 9, 2011 7:14 PM

Great looking KI-94 Kevin ,super clean build nicely done! The supercharger is uniquely placed never noticed that before very cool!

Thanks Cliff ,still scratch'n my head on a scheme tho and yes the Tenax is hot so I use a real fine brush and do little areas at a time

Bsyamato you do'nt need to be able to reach inside the canopy as foam safe(odorless) ca does'nt fog clear at all! Give it a try works great for me and it comes in thick and thin.

  • Member since
    February 2011
  • From: Sedona AZ
Posted by AZKevin on Wednesday, November 9, 2011 6:46 PM

Thank you everyone for the comments!  This has been an enjoyable if somewhat frustrating build.  AND last night I found a resin kit of the Ki-94-I.  So I might just add this one to my list - as soon as I can afford the kit + shipping!  I have not built an all resin kit yet (however I do have a few), so this might just be the ticket to try something new.


In the meantime, here are a few shots of the underside of the Ki-94-II for troublemaker66 and others!

A few things look like they might be out of line, but I think that it is the angle of my camera and some shadows (I hope).  Anyway I will post more pictures when I get the panel line highlighting done and add some exhaust stains, etc.

Kevin A. Lawton

Dept. of History

Dept. of Quaternary Sciences

Northern Arizona University

Flagstaff, AZ

  • Member since
    July 2007
  • From: Southern New Jersey
Posted by troublemaker66 on Wednesday, November 9, 2011 4:30 PM

Nice work Kevin! How `bout a couple pics of the underside...I`m diggin` the color...Big Smile

Len Pytlewski

  • Member since
    March 2003
  • From: Rain USA, Vancouver WA
Posted by tigerman on Wednesday, November 9, 2011 12:55 PM

Kevin, that's cool. Never seen one of those before. It's refreshing seeing odd-ball planes like that.

   http://i7.photobucket.com/albums/y269/wing_nut_5o/PANZERJAGERGB.jpg

 Eric 

  • Member since
    October 2008
  • From: italy
Posted by bsyamato on Wednesday, November 9, 2011 3:48 AM

Kevin perfect finished 94 Bow Down really nice the propeller!

Trey good updates there Yes ka-18 canopy was glued with white glue, the scout one was glued with CA Surprise the tip is that you can use CA if you have the opportunity to reach the inner fog parts to clear after Yes

no news about my next jap Crying aargh!!

  • Member since
    November 2009
  • From: SW Virginia
Posted by Gamera on Wednesday, November 9, 2011 12:01 AM

Trey: Nice, more of your usual superlative work. To be honest Tenex is so 'hot' I'm a little afraid of using the stuff after melting some areas on a model with it years ago. 

Baron: No problem at all, several people have cross-overs going on here. Noah is posting his Tojo over on the Natural Metal III GB as well. I'll put you down on the roster.

Kevin: She looks fantastic! Love the gigantic six-bladed prop.

"I dream in fire but work in clay." -Arthur Machen


  • Member since
    February 2011
  • From: Sedona AZ
KI-94-II progress
Posted by AZKevin on Tuesday, November 8, 2011 11:15 PM

Made some more progress on the RS Models Ki-94-II, not quite finished yet but here are a few more photos.

Applied Tamiya IJN Green, a coat of Future, then kit decals, and finally Testors Semi-gloss.

I'm quite happy with the way the canopy turned out. Dipped it in Future then masked  along the frames with thin stripes of Tamiya tape and then filled in the rest of the glass area with Micro-Mask (liquid mask).

I broke one of the kit gun barrels while trying to drill it out.  Glued it up, sanded it smooth and promptly broke it again trying to drill it out.  So out went the kit gun barrels and in came the hypodemic needle barrels.  So it's no longer entirely out of the box.

The kit decals worked very well.

Next up a little highlighting of panel lines, radio antenna and radio wire - then maybe call if finished.

I'll try and get some clearer pictures as well.

Kevin

Kevin A. Lawton

Dept. of History

Dept. of Quaternary Sciences

Northern Arizona University

Flagstaff, AZ

JOIN OUR COMMUNITY!

Our community is FREE to join. To participate you must either login or register for an account.

SEARCH FORUMS
FREE NEWSLETTER
By signing up you may also receive reader surveys and occasional special offers. We do not sell, rent or trade our email lists. View our Privacy Policy.