SEARCH FINESCALE.COM

Enter keywords or a search phrase below:

Weekend Madness 2013- Completed!!!

27448 views
234 replies
1 rating 2 rating 3 rating 4 rating 5 rating
  • Member since
    April 2006
  • From: Denver, Colorado
Posted by waynec on Thursday, December 5, 2013 1:32 PM

WTH be good to try a fast build. i have a 1/72 zhengdefu motorized 1/72 T072M which i will demotorize. big cheat build as it has rubber band tracks and side skirts so don't have to worry about track sag, single color. may try some oil wash filtering and probably continue with pastels for weathering since i ccan make my own dust and dirt. i will start it saturday (my birthday) at 0930MST at my monthly model ship workshop.

Никто не Забыт    (No one is Forgotten)
Ничто не Забыто  (Nothing is Forgotten)


  • Member since
    April 2005
  • From: Australia
Posted by taxtp on Wednesday, December 4, 2013 11:08 PM

Doesn't matter Lew. just get it done. I feel like I'm on the edge of blowing out right through these builds, just needs an extra visitor or family duty, or a medium sized problem with the build.

Cheers

Tony

I'm just taking it one GB at a time.

  • Member since
    July 2004
  • From: Sonora Desert
Posted by stikpusher on Wednesday, December 4, 2013 10:55 AM

Yes, time management is the real challenge with this type of build. Looking forward to those photos lew.


F is for FIRE, That burns down the whole town!

U is for URANIUM... BOMBS!

N is for NO SURVIVORS...

       - Plankton

LSM


  • Member since
    June 2008
Posted by lewbud on Tuesday, December 3, 2013 11:36 PM

My build expired at 0900 this morning in a state of failure.  Rather than overreaching, I was a victim of poor time management.  In the process of masking off the anti-glare panel and the walk area on the wing.  Not real thrilled with the paint job as it's real pebbly, but it was my first time shooting gloss paint with my airbrush.  Will post pics when she's done.

Buddy- Those who say there are no stupid questions have never worked in customer service.

  • Member since
    June 2008
Posted by lewbud on Monday, December 2, 2013 1:18 AM

Calling it a night.  She looks like an airplane now.  Tail is primer white.  Slurry tank is primer white.  Nacelles are semi-gloss black.  Plan is to get some painting done before leaving for work and then finish up tomorrow evening.

Buddy- Those who say there are no stupid questions have never worked in customer service.

  • Member since
    February 2011
  • From: Ontario, Canada
Posted by gunner_chris on Sunday, December 1, 2013 10:05 PM

I was away for the weekend but just got caught up.  Well done everyone, looks like another successful weekend of time crunched modelling!

Thanks again stik for organizing this!

  • Member since
    June 2008
Posted by lewbud on Sunday, December 1, 2013 5:23 PM

Congrats AJ and Ed!  After taking care of some domestic.chores and a supply run to the hobby shop, I'm back at it.  All putty has been sanded smooth and hopefully enough weight has been added to the nose (there's not a whole lot of room there).  Still nothing pic worthy, but she should start to look like an airplane by the next update.  Will find a computer somewhere and get some pics up before.I retire for the evening.  Keep at it Greg.

Buddy- Those who say there are no stupid questions have never worked in customer service.

  • Member since
    October 2013
Posted by ajd3530 on Sunday, December 1, 2013 4:12 PM

Hey you're the man running show, I'll get a few like that for you tomorrow when I can get some daylight instead of the floresant. And thanks! This was my first time weathering that heavily, and I wasn't sure how it would turn out.

  • Member since
    July 2004
  • From: Sonora Desert
Posted by stikpusher on Sunday, December 1, 2013 3:06 PM

Those are nice shots there aj, but what I really like are front high angle 3/4 views if possible. Yes those are much better qualiity photos. I do like the heavy weathering you achieved there.


F is for FIRE, That burns down the whole town!

U is for URANIUM... BOMBS!

N is for NO SURVIVORS...

       - Plankton

LSM


  • Member since
    October 2013
Posted by ajd3530 on Sunday, December 1, 2013 2:49 PM
Here are a couple of better pictures in better lighting with the wifes camera; you can see the dirt and grime better.. I have to be honest, at first I thought I went too far with it. But she's really begining to grow on me! I think this 1st one here will make a perfect completed build picture stick.


  • Member since
    July 2004
  • From: Sonora Desert
Posted by stikpusher on Sunday, December 1, 2013 2:36 PM

All right!!! Outstanding work there Buffle, ajd, and 68. Those builds look beautiful. Especially when you factor in the speed build aspect. Enough to make any Calvin proud. all your builds are posted on the front page gents. Go take you badges and post them proudly!

Who is next?


F is for FIRE, That burns down the whole town!

U is for URANIUM... BOMBS!

N is for NO SURVIVORS...

       - Plankton

LSM


  • Member since
    June 2008
Posted by lewbud on Sunday, December 1, 2013 11:24 AM

Nice job Ernest!  Two hours into the build, nothing really pic worthy but progress is being made.  Found the missing parts, but one of the props is missing a blade.  Gun ports in the nose have been puttied over and the centerline drop tank removed.  The wings are together, the rocket launcher and bomb racks have been removed and the gun ports have been filled and puttied over.  Don't have to worry about a pit because it's a pilot on a stick.  Slurry tank has been cleaned up and is soaking in bleach.  See y'all in a couple of hours.

Buddy- Those who say there are no stupid questions have never worked in customer service.

  • Member since
    July 2006
  • From: San Francisco Bay Area
Posted by bufflehead on Sunday, December 1, 2013 11:12 AM

68GT

bufflehead
 

68GT - Indy link tracks can sometimes be no problem and sometimes they can be downright maddening!!  Once I figured out the right way to install them, these turned out quite nice!  BTW, your Skyraider looks awesome in blue!  But why are the red stripes on the decals separate?

Thanks,

EagleStrike did this a lot.  It must have been cheaper and easier for them to do the colors separate and not have to worry about register.  The red stripes fit perfectly and require no trimming.

I was up and around at 6AM so against my better judgment I sprayed the Skyraider with some clear.

Ah!  That makes sense about the red stripes!  Never encountered that with armor decals!  Thanks for the info 68GT!

The completed Skyraider looks great!  The gloss coat did the trick!  Congrats on the finished build!

Ernest

Last Armor Build - 1/35 Dragon M-26A1, 1/35 Emhar Mk.IV Female


Last Aircraft Builds - Hobby Boss 1/72 F4F Wildcat & FW-190A8


  • Member since
    February 2010
  • From: New Jersey
Posted by 68GT on Sunday, December 1, 2013 9:45 AM

All done!  I whish I didn't have to rush this and could have been neater but that's all in the GB.

Can't wait till next year! 


On Ed's bench, ???


  • Member since
    June 2008
Posted by lewbud on Sunday, December 1, 2013 9:37 AM

Well, it's time I got started.  My build officially commenced at  0900, but I've spent the last thirty minutes trying to upload the spruce shot on my phone with no success.  Upon looking at the parts, it seems a couple are missing but fortunately I have a spare to rob from.  This build is not starting well.  Will get to the local library and post pics later.

Buddy- Those who say there are no stupid questions have never worked in customer service.

  • Member since
    February 2010
  • From: New Jersey
Posted by 68GT on Sunday, December 1, 2013 6:43 AM

bufflehead
 

68GT - Indy link tracks can sometimes be no problem and sometimes they can be downright maddening!!  Once I figured out the right way to install them, these turned out quite nice!  BTW, your Skyraider looks awesome in blue!  But why are the red stripes on the decals separate?

Thanks,

EagleStrike did this a lot.  It must have been cheaper and easier for them to do the colors separate and not have to worry about register.  The red stripes fit perfectly and require no trimming.

I was up and around at 6AM so against my better judgment I sprayed the Skyraider with some clear.

On Ed's bench, ???


  • Member since
    May 2009
  • From: Hobart, Tasmania
Posted by Konigwolf13 on Sunday, December 1, 2013 3:14 AM

Some excellent builds there peeps. Stik what ended up as the worst part on T-80 (when I think back) was the turret ERA blocks getting them aligned. I'll be starting on Trumpeters before the years out now that its release date has be set (woot!)

  • Member since
    July 2006
  • From: San Francisco Bay Area
Posted by bufflehead on Sunday, December 1, 2013 12:36 AM

Sorry to post and run, but after my build was done I had SOO much to do before I go back to work tomorrow.

Anyway, chores and errands are now done and before I retire to bed I want to leave some comments:

ajd3530 - That I-16 looks pretty sweet!  From what I can see I like the weathering, after all most Soviet equipment during the war didn't see a lot of TLC!  Love those huge red stars!  You made it to the finish line...YAY!

68GT - Indy link tracks can sometimes be no problem and sometimes they can be downright maddening!!  Once I figured out the right way to install them, these turned out quite nice!  BTW, your Skyraider looks awesome in blue!  But why are the red stripes on the decals separate?

Greg - I've never built the old Tamiya Sd.Kfz.251.  It looks like 48 hrs is quite achievable, but 20+ road wheels is a daunting task!! Tongue Tied I need to get me some of those Archer Transfers for the dashboard!

Ernest

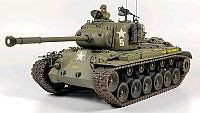
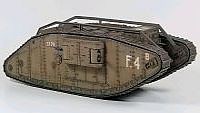
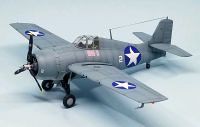
Last Armor Build - 1/35 Dragon M-26A1, 1/35 Emhar Mk.IV Female


Last Aircraft Builds - Hobby Boss 1/72 F4F Wildcat & FW-190A8


  • Member since
    October 2013
Posted by ajd3530 on Sunday, December 1, 2013 12:10 AM
Calling it. About 1 AM. This was my first time using washes or weathering. As far as the wash, I have a lot to learn. As for the weathering, I read once that when weathering a model, it looks great, and then even better, and then... BOOM. You've crossed a line and it just looks over the top. I believe I crossed that line. You can't see as much on the pictures, but I'll try to get some more tomorrow in better light. I am satisfied with the cipping affect though. Just wish I had a finer brush.. anyway, here she is.


  • Member since
    July 2006
  • From: San Francisco Bay Area
Posted by bufflehead on Saturday, November 30, 2013 8:29 PM

COMPLETE!!  Finished at 6 PM, 20 minutes to take photos and post on Photobucket, 10 minutes to post this!

Here she is, DML's 1/35 Soviet BMP-1 Infantry Fighting Vehicle:

 I'm pretty happy with the results!  I debated whether to put a wash on it using some Pro Modelers (Flory) wash, but decided against it due to the time constraint.  Markings are from a Verlinden Soviet Numbers dry transfer sheet.  Searchlights are not MV Lenses.  They were made by punching disks of some adhesive backed chrome film  that I have and then adding some plastic lenses that I got from the railroad section of my LHS.  The black headlights are made from black electric tape punched using my hole puncher!

The only part I messed up on is the rocket.  I painted with acrylic, and later added a enamel wash, but the thinner ate through the acrylic paint...oops!!  Maybe I'll repaint that later......maybe! Whistling

BTW, I switched to a white background because the blue was playing havoc with the color balance on my camera.  The colors and contrast you see here are much more accurate.....live and learn!

Its been a BLAST and even though my back is killing me after 2 straight days hunched over the bench, I'm eagerly awaiting next year's Madness! 

Stik, pick any photo for the front page and THANK YOU for hosting this year's WM GB!! Bow Down

Ernest

Last Armor Build - 1/35 Dragon M-26A1, 1/35 Emhar Mk.IV Female
     

Last Aircraft Builds - Hobby Boss 1/72 F4F Wildcat & FW-190A8


  • Member since
    February 2010
  • From: New Jersey
Posted by 68GT on Saturday, November 30, 2013 6:18 PM

Unbelievable progress Earnest.  I'm also amazed of how quick you built those tracks.  I never built one of those but it looks fiddly.

Love the I-16 also ajd!

I was staring at the Skyraider once I removed the mask and couldn't wait.  I started applying some decals.  I was thinking that If I finish the decals tonight I might be able to apply a clear coat on the bird.


On Ed's bench, ???


  • Member since
    July 2004
  • From: Sonora Desert
Posted by stikpusher on Saturday, November 30, 2013 4:18 PM


F is for FIRE, That burns down the whole town!

U is for URANIUM... BOMBS!

N is for NO SURVIVORS...

       - Plankton

LSM


  • Member since
    November 2010
  • From: Florida-West Central
Posted by Eagle90 on Saturday, November 30, 2013 4:13 PM

Great work everyone!  The second round looks as good as the first!  Great GB stik!

Eagle90


  • Member since
    October 2013
Posted by ajd3530 on Saturday, November 30, 2013 4:13 PM
Well I've heard horror stories about some Hobbycraft decals, and I lived one today. One half of the sheet went on great, but then it seemed the carrier film on the other half was super thing. Ended up having a few tear up beyond repair. So "White 43" quickly had to be turned into "Yellow 28" out of necessity. Here she is, still need to seal up the decals and do alittle weathering. 8 1/2 hours left.


  • Member since
    July 2006
  • From: San Francisco Bay Area
Posted by bufflehead on Saturday, November 30, 2013 3:43 PM

5.5 hrs to go and a quick update!

Tracks done:

Base painting of upper hull done:

Need to join them up and finish the painting.  Fortunately there's not much in the way of details....a shovel, a pry par.  I've got some ideas for quickly getting all the lights done.


Ernest

Last Armor Build - 1/35 Dragon M-26A1, 1/35 Emhar Mk.IV Female
     

Last Aircraft Builds - Hobby Boss 1/72 F4F Wildcat & FW-190A8
     

  • Member since
    July 2004
  • From: Sonora Desert
Posted by stikpusher on Saturday, November 30, 2013 11:42 AM

ajd, very nice work there. Yes Tamiya accrylic paint does airbrush wonderfully. As far as a step ahead, thats all part of the planning her eif you know you are going to be decaling. Eliminate the time of extra steps. I did that this year with semi gloss paint (good enough for decal work), and a couple of years ago in a different manner- I added Future to Tamiya flat paint- enough to get it semi gloss and skip the gloss coat prior to decals. It works.

Ernest, that looks great to me. I can believe that you went and puttied all the track link sinkholes... you are one bold soul! But you are doing great there. Dry transfers are another great idea. No gloss coat needed.

68, youre almost there too. The AD looks good in all it various paint schemes,  but it really seems to look best on overall Sea Blue, her original guise. I look forward to the next photos with markings on!


F is for FIRE, That burns down the whole town!

U is for URANIUM... BOMBS!

N is for NO SURVIVORS...

       - Plankton

LSM


  • Member since
    February 2010
  • From: New Jersey
Posted by 68GT on Saturday, November 30, 2013 8:50 AM

OK, I got that worked out!

Here are some progress photos from yesterday.  I was able to get pretty much everything glued together.

This morning I shot the plane with MM dark sea blue.  I had to use the enamel I had cause I couldn't find any acrylic in that color locally.  I hope everything works out when I put the decals on.


On Ed's bench, ???


  • Member since
    February 2010
  • From: New Jersey
Posted by 68GT on Saturday, November 30, 2013 7:53 AM

No numbers at all.

Anybody having Photobucket problems today?  Seemed a bit off yesterday but this morning I cant upload anything.  It causes IE to lock and shut down.

On Ed's bench, ???


  • Member since
    December 2002
  • From: Bury St Edmunds, Suffolk, England
Posted by Bish on Saturday, November 30, 2013 7:12 AM

Greg, nice start.

Not sure how accurate you want this to be. But if you want to be as close as possible, that drum between the two front seats should be removed. It a water container and was only fitted to the /8 variants.

I am a Norfolk man and i glory in being so


On the bench: Airfix 1/72nd Harrier GR.3/Fujimi 1/72nd Ju 87D-3

  • Member since
    May 2005
Posted by pyrman64 on Saturday, November 30, 2013 5:45 AM

Ernest: I'm impressed it only took you 6 hours on the tracks...would of taken me 6 months!

aj: nice job on the I-16, looks great so far.

Greg H

"There is many a boy here today who looks on war as all glory, but, boys, it is all hell." Gen. Wm T. Sherman (11 April 1880, Columbus, Ohio)

JOIN OUR COMMUNITY!

Our community is FREE to join. To participate you must either login or register for an account.

SEARCH FORUMS
FREE NEWSLETTER
By signing up you may also receive reader surveys and occasional special offers. We do not sell, rent or trade our email lists. View our Privacy Policy.