SEARCH FINESCALE.COM

Enter keywords or a search phrase below:

1944 Group Build

132346 views
1959 replies
1 rating 2 rating 3 rating 4 rating 5 rating
  • Member since
    August 2009
  • From: MOAB, UTAH
Posted by JOE RIX on Monday, March 3, 2014 6:50 PM

Ooooh, It's getting better there Doug buddy.

"Not only do I not know what's going on, I wouldn't know what to do about it if I did". George Carlin

  • Member since
    January 2013
Posted by jibber on Monday, March 3, 2014 7:19 PM

Doug at first I thought there may have been a lot of scratching and chipping, but after seeing it painted up, it looks like its been through an island war in the Pacific. Those line chiefs just tried to keep them running at all costs. Nice job.

  • Member since
    October 2008
  • From: Georgia
Posted by Rigidrider on Monday, March 3, 2014 8:16 PM

Thank you guys... Yeah having served time in the Pacific ,The Philippines and Okinawa in 1971 and 72 as a Fleet Marine, Ive seen the effects of salt and sand on finishes, and during that time (WWII) it had to be a thousand times worse. I've been told by some WWII vets that it was (Other then the gross disrespect from the old line chief) much like the show BaBa Blacksheep, as far as maintainence went. You had to beg borrow and yes... "steal" at times to keep your guys flying. From what I;ve read on this squadron about the only time these birds were not running was during maintainance periods, sometimes having 2 pilots per aircraft.

When Life Hands You A Bucket Of Lemons...

Make Lemonade!

Then Sell It Back At $2 Bucks A Glass...

  • Member since
    January 2014
  • From: Toronto
Posted by Rob S. on Tuesday, March 4, 2014 12:01 PM

Well, I am ready to start posting progress pics of my Airfix 1:72 Lancaster B.II, but, of course, I can't get into Photobucket!!! Funny, just used it last week, and this week, can't log in. Working on the problem. Anyway, got the bomb bay, side spars, cockpit and radio operator station completed and mounted in the left side fuselage (pretty much page 1 and 2 in the 21 page instruction book).

______________________________________________________________________________


On the Bench: Nothing on the go ATM

  • Member since
    August 2009
  • From: MOAB, UTAH
Posted by JOE RIX on Tuesday, March 4, 2014 12:34 PM

Hey Rob, I do hope you get the Photobucket issue resolved because I'm dying to see some pics of your Lancaster.

"Not only do I not know what's going on, I wouldn't know what to do about it if I did". George Carlin

  • Member since
    January 2014
  • From: Toronto
Posted by Rob S. on Tuesday, March 4, 2014 1:48 PM

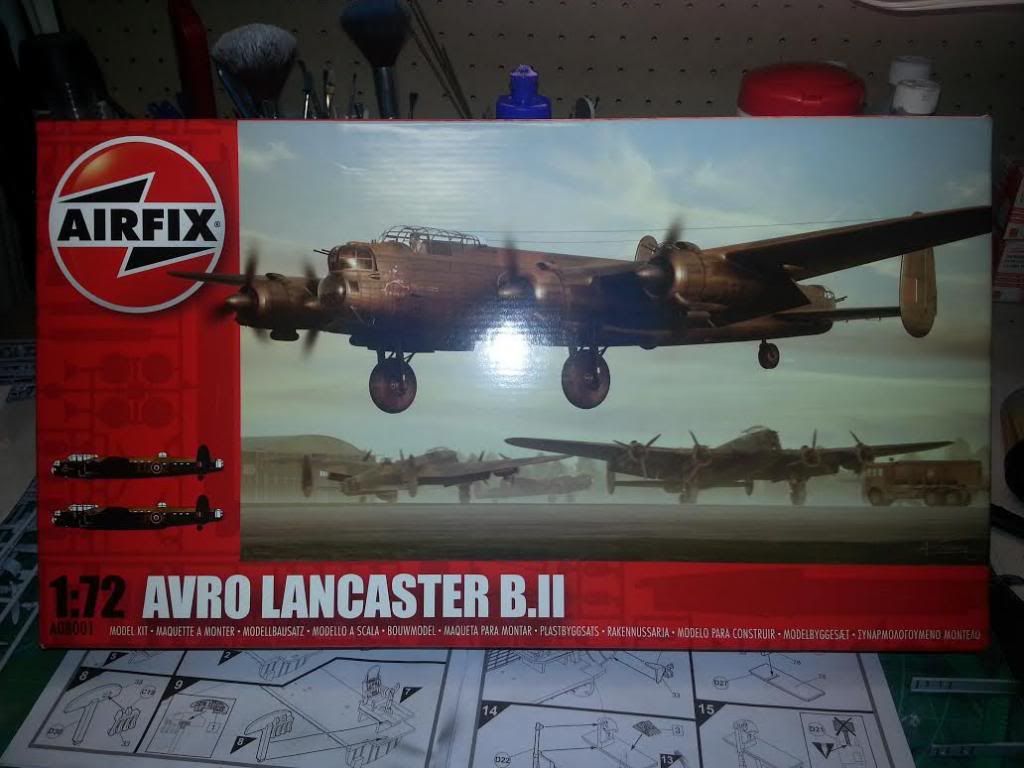
To heck with it, started up a new Photobucket while I wait. Anyway, as previously mentioned I got underway on the big Lanc on the weekend and progressed through the first couple pages. BIG instruction book. I decided to do the A model as it's a RCAF bird. I really wanted to do that rear facing belly gun on the RAF version, but, I really wanted to pay tribute to my country history. Anyway, here's the boxtop:
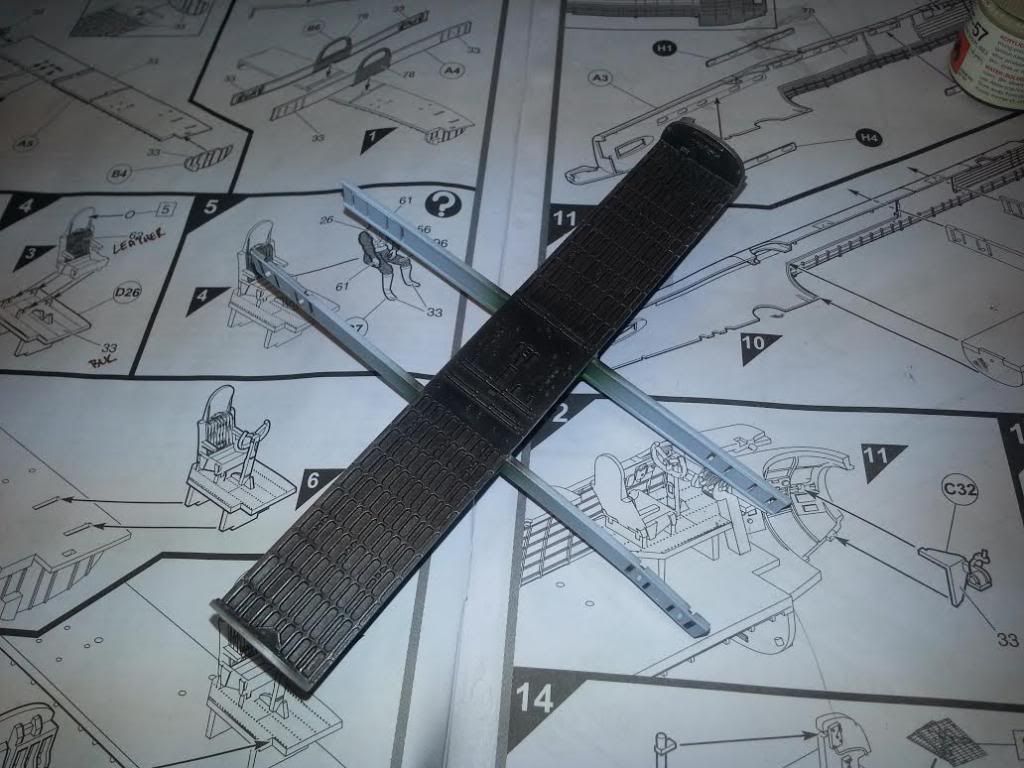
Most of you know, I'm sure, these usually start off with the bomb bay as the core construction prior to fusing the fuselage halfes. My poor lighting, as usual, cannot show the black contour washes and very light steel drybrush to just bring up some high and lows (had to hand-write in the Humbrol colours on the instructions Embarrassed):

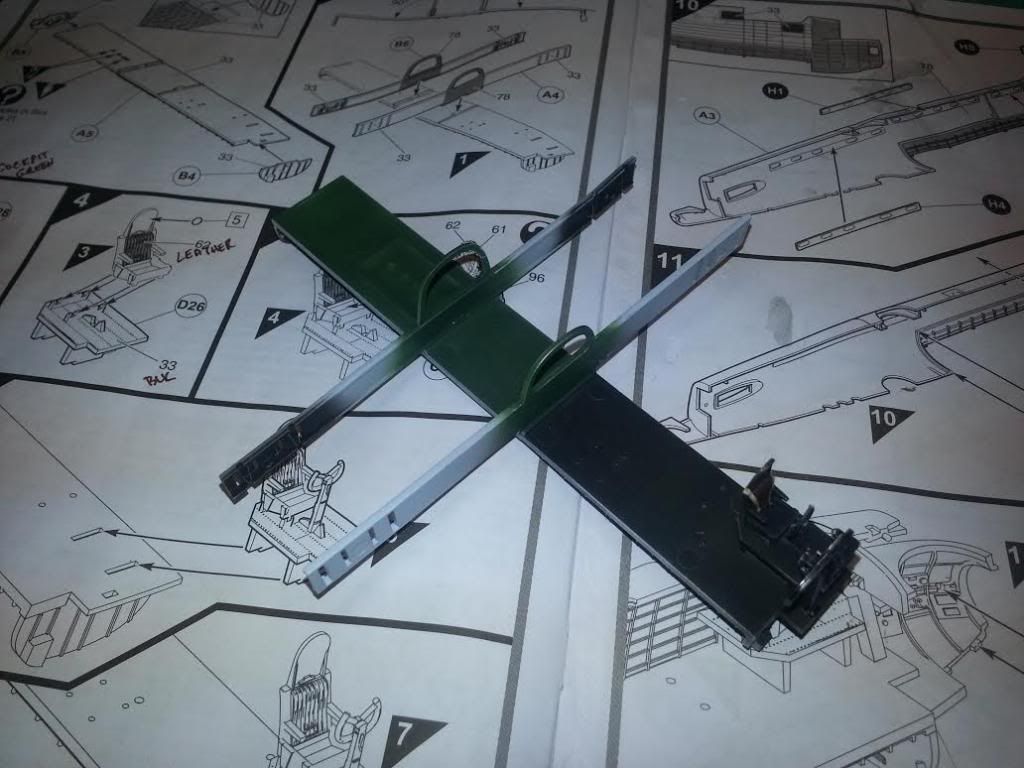
Right side up showing cockpit installed with pilot seat, elevated base and instrument panel. Unlike the Revell version I recently completed, Airfix provides these spars to extend out and start the framing for the wheel wells. Very nice feature compared to Revell (I may throw out a few side by side comparasins as the memory is fresh).
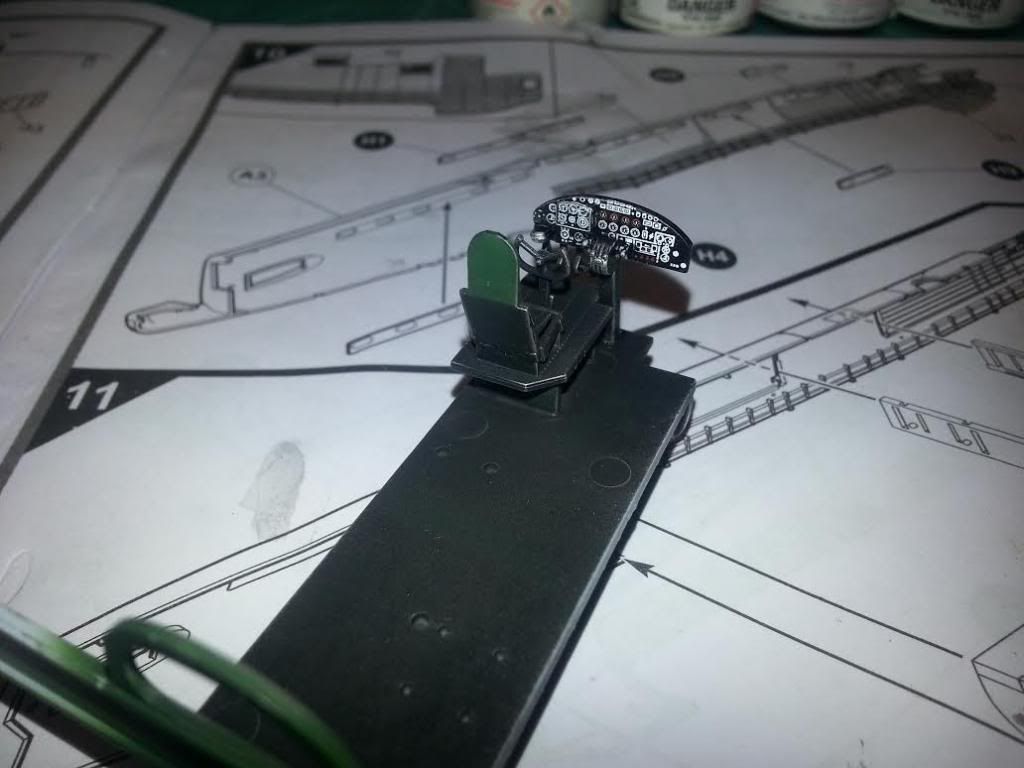
A bit of a closeup of the instrumentation. Decal, of course, but, it's sharp and well defined with some colour, which, is a plus. The downside: NOT ever going to be visible again once the greenhouse is on (just a blurry splotch through the thick plastic canopy.
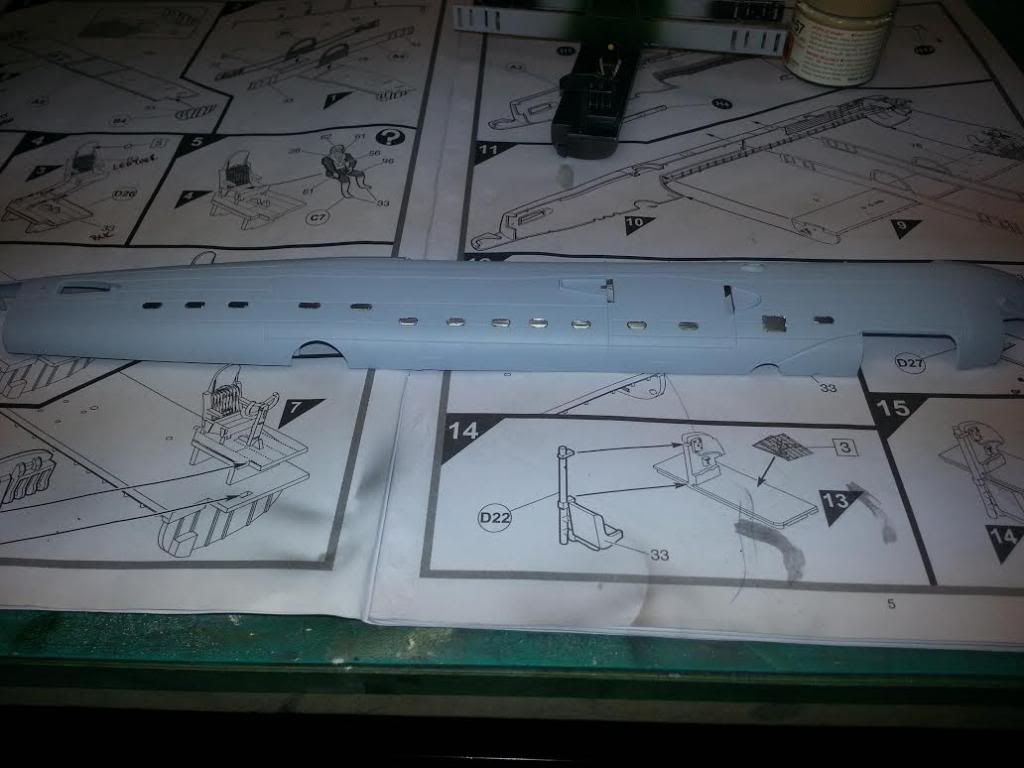
Here's the fuselage half, masked with bare metal foil. PROBLEM: the ceiling 'port-holes' are not cut out like on the Revell version. Don't know how I'm going to get a piece of round clear plastic in to fill these windows? Any ideas? Does that liquid window making stuff really work? The Revell version had these cut out and a clear plastic round window for each window.
The whole assembly dry fit into the left fuselage. All windows masked with bare metal foil. The nav and radio table is installed with maps on the table top. Cute, but, again, won't be well seen again. I left the bomb site unpainted as I wanted to look at references to see what sort of colours: black. Oh well, in 1/72, there's really not much to see, but, as it will be visible through the front bubble, I thought a bit more would have made it pop. Will lightly drybrush it to try to give a bit of depth. Added bare metal foil harness as the harness was fixed to the pilot whom I will not use.
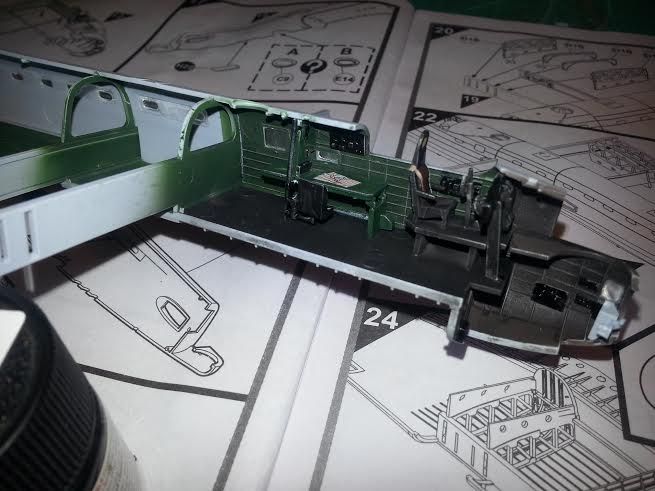
That's it for now. Interesting that you guys were talking about colour match earlier in this thread. I have limited access to a LHS, so, I gotta make due. Thus, my Interior Green is not out of the bottle. A bit of Tamiya dark green darkened slightly. The interior, as you can see above, is not stark black. I used dark iron, darkened slightly, to offer a contrast to the black insrtumentation and overall black finish. So, on the bench is the right fuselage half which I need to mask and paint the interior. More to follow. Thanks for lookin' thus far.

______________________________________________________________________________


On the Bench: Nothing on the go ATM

  • Member since
    November 2003
  • From: Naples, FL
Posted by tempestjohnny on Tuesday, March 4, 2014 2:50 PM

Very nice Rob


  • Member since
    December 2002
  • From: Bury St Edmunds, Suffolk, England
Posted by Bish on Tuesday, March 4, 2014 3:36 PM

That's nice work Rob.

I am a Norfolk man and i glory in being so


On the bench: Airfix 1/72nd Harrier GR.3/Fujimi 1/72nd Ju 87D-3

  • Member since
    October 2008
  • From: Georgia
Posted by Rigidrider on Tuesday, March 4, 2014 4:10 PM

I do like the old Lancaster! Looking forward to more pics! By the by... I call them Photo Blunder... real quality site... when it works that is!(LOL)

When Life Hands You A Bucket Of Lemons...

Make Lemonade!

Then Sell It Back At $2 Bucks A Glass...

  • Member since
    December 2002
  • From: Bury St Edmunds, Suffolk, England
Posted by Bish on Tuesday, March 4, 2014 4:22 PM

Doug, really looking good there.

I am a Norfolk man and i glory in being so


On the bench: Airfix 1/72nd Harrier GR.3/Fujimi 1/72nd Ju 87D-3

  • Member since
    January 2014
  • From: Toronto
Posted by Rob S. on Tuesday, March 4, 2014 6:02 PM
Rigidrider

I do like the old Lancaster! Looking forward to more pics! By the by... I call them Photo Blunder... real quality site... when it works that is!(LOL)

Yeah..dunno what happened. Posted DH2 pics about a bout a week ago and can't login today !!

______________________________________________________________________________


On the Bench: Nothing on the go ATM

  • Member since
    December 2013
Posted by schmidty on Tuesday, March 4, 2014 9:17 PM

Wow Rob.  It's looking great so far!

--Mike

On the Bench: 1:72 Academy P-51B

On Deck: 1:72 Hobby Craft DHC-3 (U-1A) & 1:72 Academy Ju 87G-1

  • Member since
    August 2009
  • From: MOAB, UTAH
Posted by JOE RIX on Tuesday, March 4, 2014 11:11 PM

Rob, Your cockpit is looking great. Really nice work so far. Something caught me upon seeing your cockpit paint work. I'm not overly familiar with the details of British, oops, sorry, RCAF bombers. More precisely cockpit colors. I've built a Spitfire and a Hawker Typhoon and they each had the British interior "minty" green for the cockpit. Are RCAF bomber cockpits actually a different color as you have depicted? I'm not saying it's wrong, just curious. I guess I'm just used to the fact nearly all American aircraft are chromate green and Luftwaffe in RLM 66. Did Avro use a different cockpit color as opposed to Hawker and Supermarine? I'm always interested in learning something new and this simply perked my interest.

"Not only do I not know what's going on, I wouldn't know what to do about it if I did". George Carlin

  • Member since
    April 2006
  • From: ON, Canada
Posted by jgeratic on Wednesday, March 5, 2014 1:19 AM

Guys, great looking works happening here.

Rob - regarding your question about the liquid to create clear lenses, windows etc., yes it does work.  It looks milky when you first apply it, but does dry clear.  The process is similar to when you were kids and made bubbles with dish soap.  The edge has to be completely covered with the stuff, and once a skin is formed, carefully withdraw your paintbrush (or whatever tool you are using to apply the special liquid).

As for the canopy obstructing the view of that instrument panel decal - if you think it would be still visible angle wise, you can thin the clear plastic from the inside with sandpaper, gradually working up to a fine grit.  Then dip it in future, and once dried it should be much clearer to view through.

regards,

Jack

  • Member since
    January 2014
  • From: Toronto
Posted by Rob S. on Wednesday, March 5, 2014 7:04 AM

Joe: The interior colour, to be honest, is based on the instructions. It seems to be mixing black and interior green. Strangely, there is an inconsistency with what it's supposed to be: The left fuselage is mix black green and the right side is solid black. I really don't imagine the entire bomber's interior was as black as the plan calls for. Really surprising for Airfix, eh? But, in the end,  I'm not a big 'researcher' so I take the plan for what it is. I did google Lanc's and really, the interior green is definitely more prominent than black for sure.

Jack: Thanks for that. I really want to have those holes 'glassed'. The obstruction of the instrument panel comment is based on the last Lanc I did from Revell. Airfix really likes their thick clear plastic. Thin it out, eh? Interesting to try, but, never have done before...I'd be worried that I'd wreck the thing!!

______________________________________________________________________________


On the Bench: Nothing on the go ATM

  • Member since
    April 2013
Posted by SchattenSpartan on Wednesday, March 5, 2014 7:15 AM

Mike: Looking very good. I'm with Bish on the oil wash being a bit on the light side.

Doug: Wow, that's one impressive weathering job! She really looks like she saw some action.

Rob: Nice looking work on that cockpit!

  • Member since
    October 2008
  • From: Georgia
Posted by Rigidrider on Wednesday, March 5, 2014 12:27 PM

Hey Rob... yeah the thicker clear is unfortunately in part due to the clear cycolac being much more brittle then the regular opaque styrene and secondly the scale tends to make them smaller and harder to extract from the molds, again increasing the risk of cracking and breakage. Good tip from Jack... I will file that away and try when  need be.

Doug

When Life Hands You A Bucket Of Lemons...

Make Lemonade!

Then Sell It Back At $2 Bucks A Glass...

  • Member since
    December 2002
  • From: Bury St Edmunds, Suffolk, England
Posted by Bish on Wednesday, March 5, 2014 12:31 PM

Rob, all of the front end of the Lanc interior was black and from the pit back it was green. I was lucky enough to climb inside the BBMF Lanc a few years back. But yours looks good and the green should hopefully help things show up a bit more once its all closed up.

I am a Norfolk man and i glory in being so


On the bench: Airfix 1/72nd Harrier GR.3/Fujimi 1/72nd Ju 87D-3

  • Member since
    August 2009
  • From: MOAB, UTAH
Posted by JOE RIX on Wednesday, March 5, 2014 12:42 PM

Bish, I Thank You for that clarification on the cockpit colors. So, are you savvy if this was the case with all British bombers say like the Wellington, Sterling etc.. And if the "minty" green interior color was specific to their fighters and fighter/bombers.

"Not only do I not know what's going on, I wouldn't know what to do about it if I did". George Carlin

  • Member since
    December 2002
  • From: Bury St Edmunds, Suffolk, England
Posted by Bish on Wednesday, March 5, 2014 12:55 PM

Joe, RAF aircraft are not my forte, I was just lucky enough to get a visit to the BBMF thanks to one of the RAF WO's at my unit also being the Load master on the BBMF's C-47. But at a guess, I would say yes, at least after the RAF switched to night bombing. And I say that only because it seems to make sense to have a cockpit that's as dark as possible at night, not only to stop it being seen by the enemy, but I think it would also make it easier for the pilot to see in the dark if he didn't have anything bright around.

But its just a guess.

I am a Norfolk man and i glory in being so


On the bench: Airfix 1/72nd Harrier GR.3/Fujimi 1/72nd Ju 87D-3

  • Member since
    February 2010
  • From: Berkeley CA/St. Paul MN
Posted by EBergerud on Wednesday, March 5, 2014 4:24 PM

Tamiya 1/48 P-51 MKIII (RAF)

Paints: Tamiya acrylics for base; stripes and interior Golden Fluid Acrylics

Weathering: Iwata Com.Art acrylics

I did this for the Finescale D-Day Group Build, so I guess it fits here too. This was my first late 90s vintage Tamiya kit so I don't have many build pics because the plane more or less built itself. There was a nasty seam on the bottom but I'd say that was simply a bad mold or bad luck. Overall the fit was terrific. I did some work on what kind of colors were applied to RAF planes built in the US and think I got it pretty close.

But of course we wanted stripes. This called for a odd contrast. I failed to take pics of the pre-stripe plane, and the stripes absolutely dominate the kit visually. As you can see below, stripes dominate the look of a US 51B.

Applying the stripes was done at the very last minute for security reasons, and thus on June 4th there were ground crew all over the UK furiously slopping on black and white paints of whatever was available. (One RAF pilot described as “glop, but not really paint.”) Here's a pic of a Spitfire getting prepped:

I masked the wings with tape, but hand painted it with Golden Fluid carbon black and titanium white. For my money these are the two most opaque paints on the planet in their respective colors and show the exceptional quality of Golden pigments. With a little Flow Aid, Golden hand paints as well or better than Vallejo Model Color or Citadel. I used a pretty small brush which took some time, but I didn't want the brush strokes to be too large. There was a little over-paint which I fixed by hand to given the stripes the kind of irregular surface seen on the real articles.

In the spirit of D-Day I wanted to tip my hat to one of the smaller allies that helped greatly in the formidable task of turning Hitler's Reich into rubble. In this case we have a P-51 MKIII flown by the crack RAF 315 Squadron made up of Polish pilots. It says something that of the very small allotment of P-51Bs to the RAF, that two Polish squadrons were so equipped. They arrived early in 1944 and spent several months in the very nasty air war the RAF ran against German shipping and air bases in Norway, a task well suited to the P-51s “long legs.” But when D-Day came, more or less everything that could fly was delegated to direct support of the landings. People think of Jugs or Typhoons when they think of allied Jabo, and for good reason. The P-51, water cooled engine and all, was an excellent ground attack aircraft because of its ability to take care of unwanted problems. It was also, like all US planes, very rugged. Although elite fighter groups of 8th AF made their reputation destroying the Luftwaffe in combat, Mustangs were widely used with great effect for ground attack – after all, if you weren't flying to Berlin all that weight going to fuel tanks could go to bombs and rockets. (Both the P-51 and Corsair were widely used for ground attack during Korea when their day as premier fighters was over.)

That's about it: more pics below taken with my ancient Canon Sure Shot which lives in St. Paul.

Eric


A model boat is much cheaper than a real one and won't sink with you in it.

  • Member since
    February 2010
  • From: Berkeley CA/St. Paul MN
Posted by EBergerud on Wednesday, March 5, 2014 4:39 PM

Revell 1/48 JU-52

Paints: Vallejo & Tamiya

Weathering: True Earth Whitewash; Iawa Com.Art Acrylics

This is my build of Revell's rendition of the redoubtable JU-52 transport that was as important to the Wehrmacht as C-47s were to the allies: very. The first thing that strikes you is that “Tante” (auntie) Ju-52 was a good sized plane: at 1/48 scale it's much the larges aircraft model I've built. (I'm very glad now that I've bought a B-17, Sunderland and Lancaster in 1/72: I'm not sure where I'm going to put this one.) The part count is moderate, but the detail is very impressive especially when you consider the $25 cost.

In general I found the fit excellent, however the complex “double wing” was attached to seven points on each side with the parts fitting into grooves. Unfortunately I only had five connectors in proper condition – the other nine were broken off. A real pain but I scratch built replacements of a sort. And I stepped on the canopy within a half hour of opening the box and broke it in three parts. All things considered, the canopy (glued with MicroScale clear cement) looked ok at the end. Consider it battle damage. Things were made easier with EZ Masks which I like a lot.

Painting:

I get a kick out of paint mixing. I wasn't pleased with anything I had that represented RLM2 for the interior, so I made my own brew that looked pretty good I think. I was behind schedule for the D-Day Group Build and decided not to embellish in that way. So, I painted on the seat belts and only I would know if I didn't photograph it:

I also made a nice mix for RLM 71 out of three shades of Vallejo Model Color. I made it a little light because I wanted it to contrast a little more than proper with the RLM 70 which Vallejo Model Air fit perfectly. There was a lot of masking, and a lot of painting. Model Color has a perfect fit for RLM 65.

Because of the corrugated surface I applied decals in wet pools of Pledge. Things were looking pretty good with the decals on and I was very tempted to give the aircraft a summer uniform and be done with it. But I've never winterized a model before, and decided from the outset that this model cried for it. JU-52s were busy 24 X 7 in every theater of the war, but it's hard not to think of these aircraft supplying German units trapped or nearly trapped in pockets on the Eastern Front. Stalingrad gets all the press, but after the collapse of the Kursk offensive, the Wehrmacht was on a mad dash westward trying to avoid a general collapse. Some brilliant generalship and the Wehrmacht's traditional fighting skill, kept the front more or less in tact until the summer of 1944 catastrophe. But it was nip and tuck in the winter of 43-44 with large German units in jeopardy all across the front. The Korsun pocket was the largest but not alone. In any case, the LW transport wing helped keep the FeldHeer alive in that period.

In the winter the LW applied whitewash to their transports. (I think some might have received a more formal winter camo scheme.) This would have gone over the RLM 65/70/71 splinter scheme. With these aircraft being flown into the ground there was no time for cosmetics – a condition shown in a blizzard of photos of Ju-52s flying in this period. So the white wash was wearing off and the plane was taking an overall pounding. And then there was the oil. I watched a nice old episode of the “Wings” series on the Ju-52 and the narrator noted that the plane burned so much oil that under the best of circumstances it was covered with an oily film that made things tough on ground crew. When under furious use the photo evidence is very clear that huge oil/carbon deposits came from each of the three engines. Add to the general wear and tear of non-stop use and heavy weathering was certainly in order.

I used a whitewash paint from True Earth. It's an acrylic resin that comes off gradually and evenly with a wet brush. I wasn't looking for big streaks that you'd get with hairspray or one of the AK substitutes. I wanted something that would come off gradually – giving the impression of wearing down instead of ripping off. Here's how it looked:

Rest of the weathering was done with Com.Art. First I used their transparant smoke and finely painted the major lines of rivets. I used transparent black for major panel lines – a time consuming task. I then put on a kind of gray/brown filter and it evened out the panel lines and left a very nice look and texture of grime. I used Com.Art old oil and blue-smoke to color the carbon deposits on the wings. Some old oil and clear was used on places where I'd guess lubrication stains would show – including all the along the control surfaces both wing and tail. I wanted the whitewash to be in the final stages of dissolution so the other RLM 70 & 71 were faintly visible and they are.

It took a long time. I made things harder than needed. But overall, I'm pretty happy. Just not sure where I'm going to put this monster.,

More Ju-52 pics below:

Eric


A model boat is much cheaper than a real one and won't sink with you in it.

  • Member since
    December 2013
Posted by schmidty on Wednesday, March 5, 2014 6:57 PM

Eric: Both are very nice, but I REALLY like what you did with that Junker.  Outstanding!

--Mike

On the Bench: 1:72 Academy P-51B

On Deck: 1:72 Hobby Craft DHC-3 (U-1A) & 1:72 Academy Ju 87G-1

  • Member since
    June 2013
  • From: Jax, FL
Posted by Viejo on Wednesday, March 5, 2014 8:55 PM

The seams are about gone, and itty-bitty parts are starting to come together.

The launch supports are glued to the ring, the rocket is just sitting there.

http://i1300.photobucket.com/albums/ag99/billh7/IMG_6902_zps13e9d692.jpg

Same situation, but the fins are fitted (not glued) just to see how it fits.  Same with the ring support platform.

http://i1300.photobucket.com/albums/ag99/billh7/IMG_6908_zps08b4b480.jpg


Sorry about the focus, macro is still a challenge......

  • Member since
    January 2014
  • From: Toronto
Posted by Rob S. on Wednesday, March 5, 2014 10:00 PM

JOE RIX

Bish, I Thank You for that clarification on the cockpit colors. So, are you savvy if this was the case with all British bombers say like the Wellington, Sterling etc.. And if the "minty" green interior color was specific to their fighters and fighter/bombers.

Yes, I echo the thanks! One of the reasons I am so happy to be here!

______________________________________________________________________________


On the Bench: Nothing on the go ATM

  • Member since
    January 2014
  • From: Toronto
Posted by Rob S. on Wednesday, March 5, 2014 10:05 PM

Eric: VERY excellent Ju 52!! One question, applying decals on wet Pledge, I've recently read about this but never tried it, is there anything you need to know about this technique to get it right, or, is it pretty straight forward? Thanks!

______________________________________________________________________________


On the Bench: Nothing on the go ATM

  • Member since
    February 2010
  • From: Berkeley CA/St. Paul MN
Posted by EBergerud on Thursday, March 6, 2014 12:41 AM

You want to put a lot of pledge on - a puddle, not a coating. It's only needed on the area where the decal sits - you could use this technique on a matte surface. Put the Pledge on immediately before applying the decal because Pledge starts to dry fast and then moving the decals is tough. Once set correctly gently draw a damp brush over the decal and push it into the Pledge where it will kind of glue to the surface. I find using lots of water is more forgiving on a normal surface, but if there's something irregular Pledge does work well. Like any new technique you might want to try it on a spare model. It could very well be that a top quality decal will serve better than a lower grade variety regardless of how you put it on. Anyway, this does work.

Eric


A model boat is much cheaper than a real one and won't sink with you in it.

  • Member since
    January 2014
  • From: Toronto
Posted by Rob S. on Thursday, March 6, 2014 6:07 AM

Awesome, thanks

______________________________________________________________________________


On the Bench: Nothing on the go ATM

  • Member since
    December 2002
  • From: Bury St Edmunds, Suffolk, England
Posted by Bish on Thursday, March 6, 2014 12:56 PM

Eric, sweet looking builds there, but I have to say I love the Ju.

Rob, no problem, I was just lucky to be in the right place at the right time.

I am a Norfolk man and i glory in being so


On the bench: Airfix 1/72nd Harrier GR.3/Fujimi 1/72nd Ju 87D-3

  • Member since
    January 2013
Posted by jibber on Thursday, March 6, 2014 1:36 PM

Eric great weathering and the decals look awesome. A very nice build.

JOIN OUR COMMUNITY!

Our community is FREE to join. To participate you must either login or register for an account.

SEARCH FORUMS
FREE NEWSLETTER
By signing up you may also receive reader surveys and occasional special offers. We do not sell, rent or trade our email lists. View our Privacy Policy.