SEARCH FINESCALE.COM

Enter keywords or a search phrase below:

PACIFIC CARRIER AVIATION GROUP BUILD

90836 views
1294 replies
1 rating 2 rating 3 rating 4 rating 5 rating
  • Member since
    December 2012
Posted by flyerduke on Thursday, October 16, 2014 10:56 PM

Prop question.  What color?  Flat or semi-glass? (for my Hellcat)

Also, I bought some Testors rubber color.  Will that work for the tires?

  • Member since
    July 2014
  • From: Franklin Wi
Posted by Bakster on Thursday, October 16, 2014 10:55 PM

Thanks Flyerduke.  I appreciate all of your support.  Joe...you are correct.  That will dress things up more.  I have a pilot to paint and fit as well.  The pilot has the belt molded on.

Steve

  • Member since
    December 2012
Posted by flyerduke on Thursday, October 16, 2014 10:29 PM

Steve- Looks sharp.  I really like the weathering of the black box gear.

Mustang- Looking forward to your Hellcat build.  I'm sure I will wish I started mine after you.  I'm  working with some small stuff this evening.  It's really aggravating.  I've lost 3 or 4 PE parts to the carpet so far.  I'd like to meet the guy at Eduard who builds their PE cockpits and such for the web photos.

Craig

  • Member since
    August 2009
  • From: MOAB, UTAH
Posted by JOE RIX on Thursday, October 16, 2014 10:22 PM

Joe: Very cool. That will be a sweet addition to your Hellcat. I've eyeballed the same detail set for my SB2C Helldiver. I will be quite interested to see how it goes together.

Steve: The only suggestion I have for you would to add seat harnesses. Unless, of course, you were already planning to add them.

"Not only do I not know what's going on, I wouldn't know what to do about it if I did". George Carlin

  • Member since
    July 2014
  • From: Franklin Wi
Posted by Bakster on Thursday, October 16, 2014 9:44 PM

Thanks Joe and Mustang.  If you guys have any advice of what I could do better, feel free to say. 

Mustang... This is an Academy TBM kit.  I have been told that it is the same mold as was used on the Accurate kit.

  • Member since
    March 2012
  • From: Corpus Christi, Tx
Posted by mustang1989 on Thursday, October 16, 2014 8:20 PM

The obsession with the Hellcat begins............................

Picked up one of these bad boys today!


 Forum | Modelers Social Club Forum (proboards.com) 

  • Member since
    August 2009
  • From: MOAB, UTAH
Posted by JOE RIX on Thursday, October 16, 2014 8:11 PM

Very impressive work Steve. Your office looks great with the nice detailing and weathering you've done. I do believe you are getting the hang of this aircraft modeling quite nicely.

"Not only do I not know what's going on, I wouldn't know what to do about it if I did". George Carlin

  • Member since
    March 2012
  • From: Corpus Christi, Tx
Posted by mustang1989 on Thursday, October 16, 2014 8:00 PM

Man there's lots of detail in there. Say........is that an Accurate Miniatures TBM?


 Forum | Modelers Social Club Forum (proboards.com) 

  • Member since
    July 2014
  • From: Franklin Wi
Posted by Bakster on Thursday, October 16, 2014 5:51 PM

Joe--

Your plane is looking good.

I finally have some work done that I can post.  The flight deck is coming along, at last.   PE is on, and I made my first attempt at weathering.  I have a few more things to do before I can button up the fuselage but that is not that far off now. Maybe another two weeks if all goes well.  Maybe--just maybe--I will get this done by December.  Confused

Steve

  • Member since
    March 2012
  • From: Corpus Christi, Tx
Posted by mustang1989 on Thursday, October 16, 2014 4:32 AM

Dammit Joe!  I went and got me this yesterday!!

I now need a Weekend Edition of this kit but can't find one that's around the 20 dollar mark with free shipping in order to get the folding wing AM kit to fold one wing back. I got plans.......

And thankfully it aint involving the Revell version!! lol


 Forum | Modelers Social Club Forum (proboards.com) 

  • Member since
    August 2009
  • From: MOAB, UTAH
Posted by JOE RIX on Wednesday, October 15, 2014 9:47 PM

Thank Joe and Craig.

Glad to hear you're hanging in there along with me. I'm also anxious to see some pics from your Hellcat.

"Not only do I not know what's going on, I wouldn't know what to do about it if I did". George Carlin

  • Member since
    March 2012
  • From: Corpus Christi, Tx
Posted by mustang1989 on Wednesday, October 15, 2014 8:55 PM

Thanks Craig! Let's see some pics man.


 Forum | Modelers Social Club Forum (proboards.com) 

  • Member since
    December 2012
Posted by flyerduke on Wednesday, October 15, 2014 8:40 PM

Both those planes are looking good guys.  I'm not too far behind you Joe.  I'm at a point where I need to primer the plane and paint the landing gear.

Craig

  • Member since
    March 2012
  • From: Corpus Christi, Tx
Posted by mustang1989 on Wednesday, October 15, 2014 6:33 PM

Thanks for the kudos Joe and your Hellcat is looking great...........and I do trust you..........it's white!


 Forum | Modelers Social Club Forum (proboards.com) 

  • Member since
    August 2009
  • From: MOAB, UTAH
Posted by JOE RIX on Wednesday, October 15, 2014 5:29 PM

Okay, I've got the MM white on the underside and on the landing gear and gear doors. Sorry about the poor light but, trust me, it's white. Next up will be to mask with some silly putty sausages and shoot the intermediate blue on the sides and tail.

"Not only do I not know what's going on, I wouldn't know what to do about it if I did". George Carlin

  • Member since
    August 2009
  • From: MOAB, UTAH
Posted by JOE RIX on Tuesday, October 14, 2014 8:06 PM

Aw Heck Joe, you've got that sucker looking sharp. Great work on the rivets and panel line. The engine is looking right nice too.

"Not only do I not know what's going on, I wouldn't know what to do about it if I did". George Carlin

  • Member since
    March 2012
  • From: Corpus Christi, Tx
Posted by mustang1989 on Tuesday, October 14, 2014 7:46 PM

Ok gang. I've got the lower center wing section installed and have a whole new set of gaps to fill. lol . I installed the nose section and painted her up to make sure I've got the right color and it looks like we are on. I'll mask the engine assy with silly putty when I paint the whole bird. Her she is so far..............


 Forum | Modelers Social Club Forum (proboards.com) 

  • Member since
    March 2012
  • From: Corpus Christi, Tx
Posted by mustang1989 on Tuesday, October 14, 2014 5:00 PM

Thanks Jim! I could really do more but have put the cart BEFORE the horse yet once again. I should have drawn lines or etched a line for the panel line/sprue first and applied the rivets on both sides. Applying them now would result in me removing the panel line by sanding and I aint prepared to do that. I'm just glad this aint one of my more detailed builds........................wait a minute! If this WERE to be a detailed build I would be building a Tamiya version instead and I wouldn't be having these issues. This is actually a good thing because it's giving me practice on something that I'm weak in while being between those detailed builds.....dealing with seam issues.


 Forum | Modelers Social Club Forum (proboards.com) 

  • Member since
    February 2014
  • From: Michigan
Posted by silentbob33 on Tuesday, October 14, 2014 4:24 PM

Looks pretty good to me Joe, I always sand as carefully as I can because I'm so afraid of destroying the raised details. I don't know if I have the ability to pull it off like you did. Great job

On my bench: Academy 1/35 UH-60L Black Hawk

  • Member since
    March 2012
  • From: Corpus Christi, Tx
Posted by mustang1989 on Tuesday, October 14, 2014 1:10 PM

checkmatking:Thanks man! This is taking alot of time and patience and since it's not that detailed of a build for me I'm holding back the horses on rushing this thing.

TAD:Thanks Dave! The rivets are made out of tiny drops of super glue applied with a needle with the very tip of the point cut off.


 Forum | Modelers Social Club Forum (proboards.com) 

  • Member since
    January 2011
  • From: Commonwealth of Virginia
Posted by Tal Afar Dave on Tuesday, October 14, 2014 11:59 AM

Mustang; looks pretty convincing.  What are you making your rivets out of???

TAD

2022 New Year's Resolution:  Enter 1 group build and COMPLETE a build this year!!  Why Photobucket did you rob me of my one Group Build Badge???  Must be part of the strong anti-Monogram cartel!!!

 ]

  • Member since
    September 2003
  • From: AandF in the Badger State
Posted by checkmateking02 on Monday, October 13, 2014 9:57 PM

Looks good, mustang, and with a coat of paint over the rivets, things'll probably look even better.


  • Member since
    March 2012
  • From: Corpus Christi, Tx
Posted by mustang1989 on Monday, October 13, 2014 4:54 PM

Guys I think I'm getting ready to quit while I'm ahead here. Here's the few panel lines that I "erased" during the sanding process and most of the rivets are in place.

Here's before panel lines:

and after installation of panel lines. It's my first attempt ever so go easy on me.


 Forum | Modelers Social Club Forum (proboards.com) 

  • Member since
    March 2012
  • From: Corpus Christi, Tx
Posted by mustang1989 on Monday, October 13, 2014 4:03 PM

I appreciate the vote of confidence fellas. I've got a long way to go up here in the cowling area.


 Forum | Modelers Social Club Forum (proboards.com) 

  • Member since
    July 2014
  • From: Franklin Wi
Posted by Bakster on Monday, October 13, 2014 9:36 AM

Mustang--thanks for taking the time to take photos and share what you are doing.  As some of you know, I am new to some of this and its great to see how you guys are tackling some of these problems. You are doing an awesome job!

  • Member since
    August 2009
  • From: MOAB, UTAH
Posted by JOE RIX on Monday, October 13, 2014 6:53 AM

Very very well done Joe. Man, Those look great.

"Not only do I not know what's going on, I wouldn't know what to do about it if I did". George Carlin

  • Member since
    March 2012
  • From: Corpus Christi, Tx
Posted by mustang1989 on Monday, October 13, 2014 5:08 AM

Ok fellas. My attempt at rivets..............
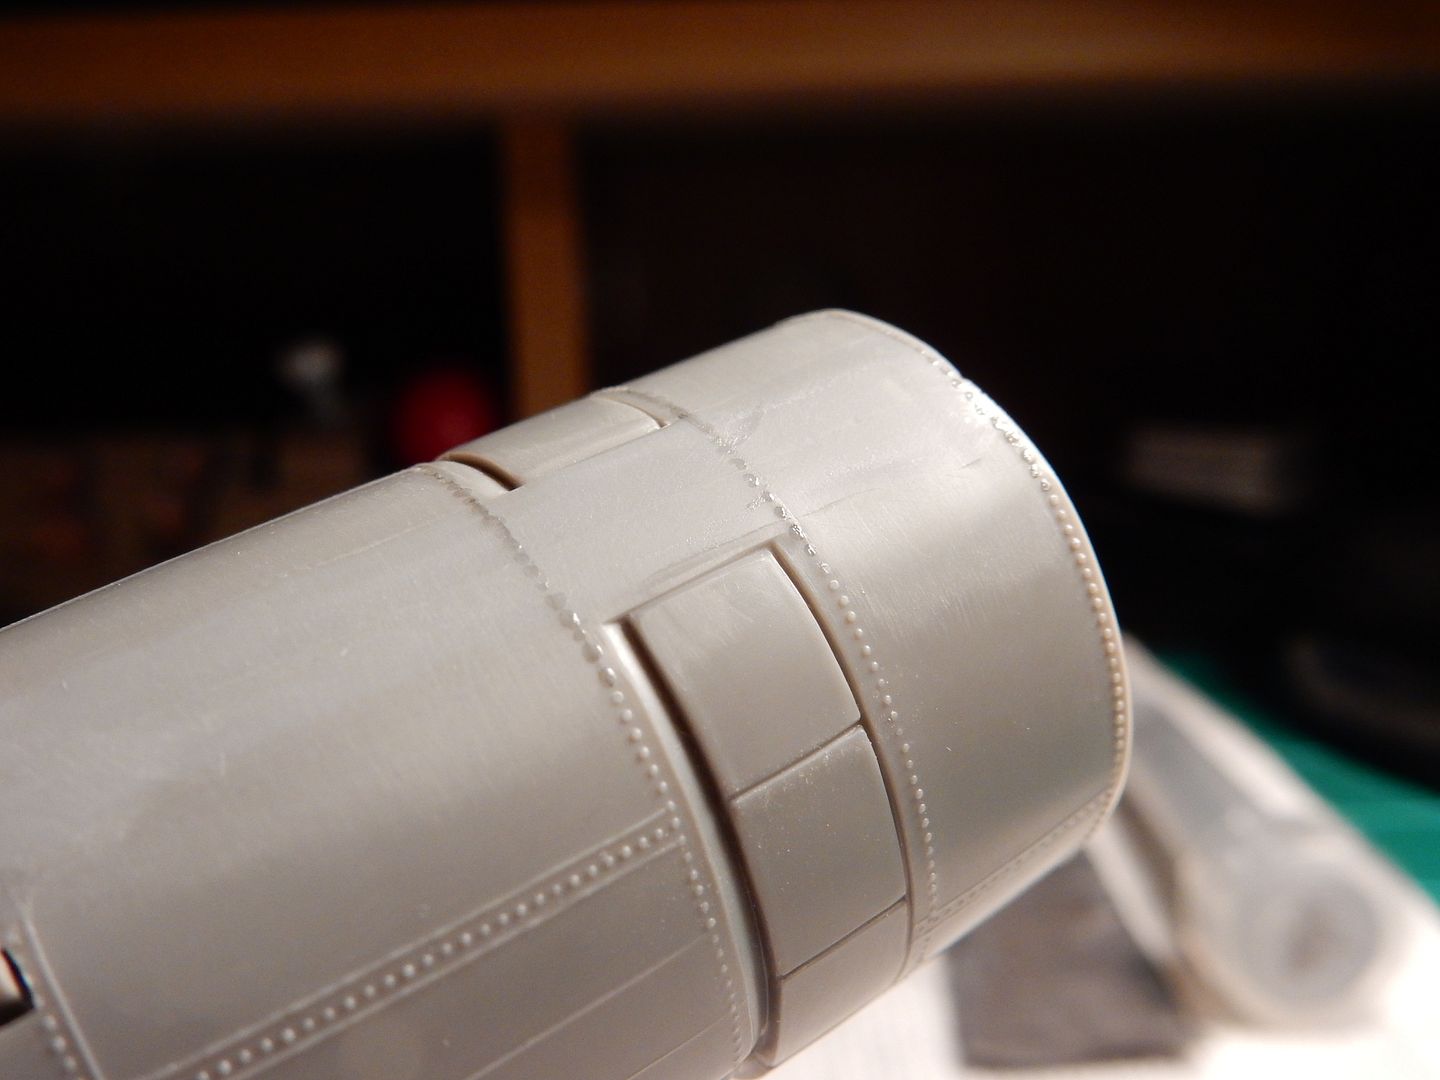
I made some pretty clost to the windscreen that aren't in the photo here that didn't turn out too good and will have to "re-rivet " those.

Here are the future panel lines from stretched sprue:
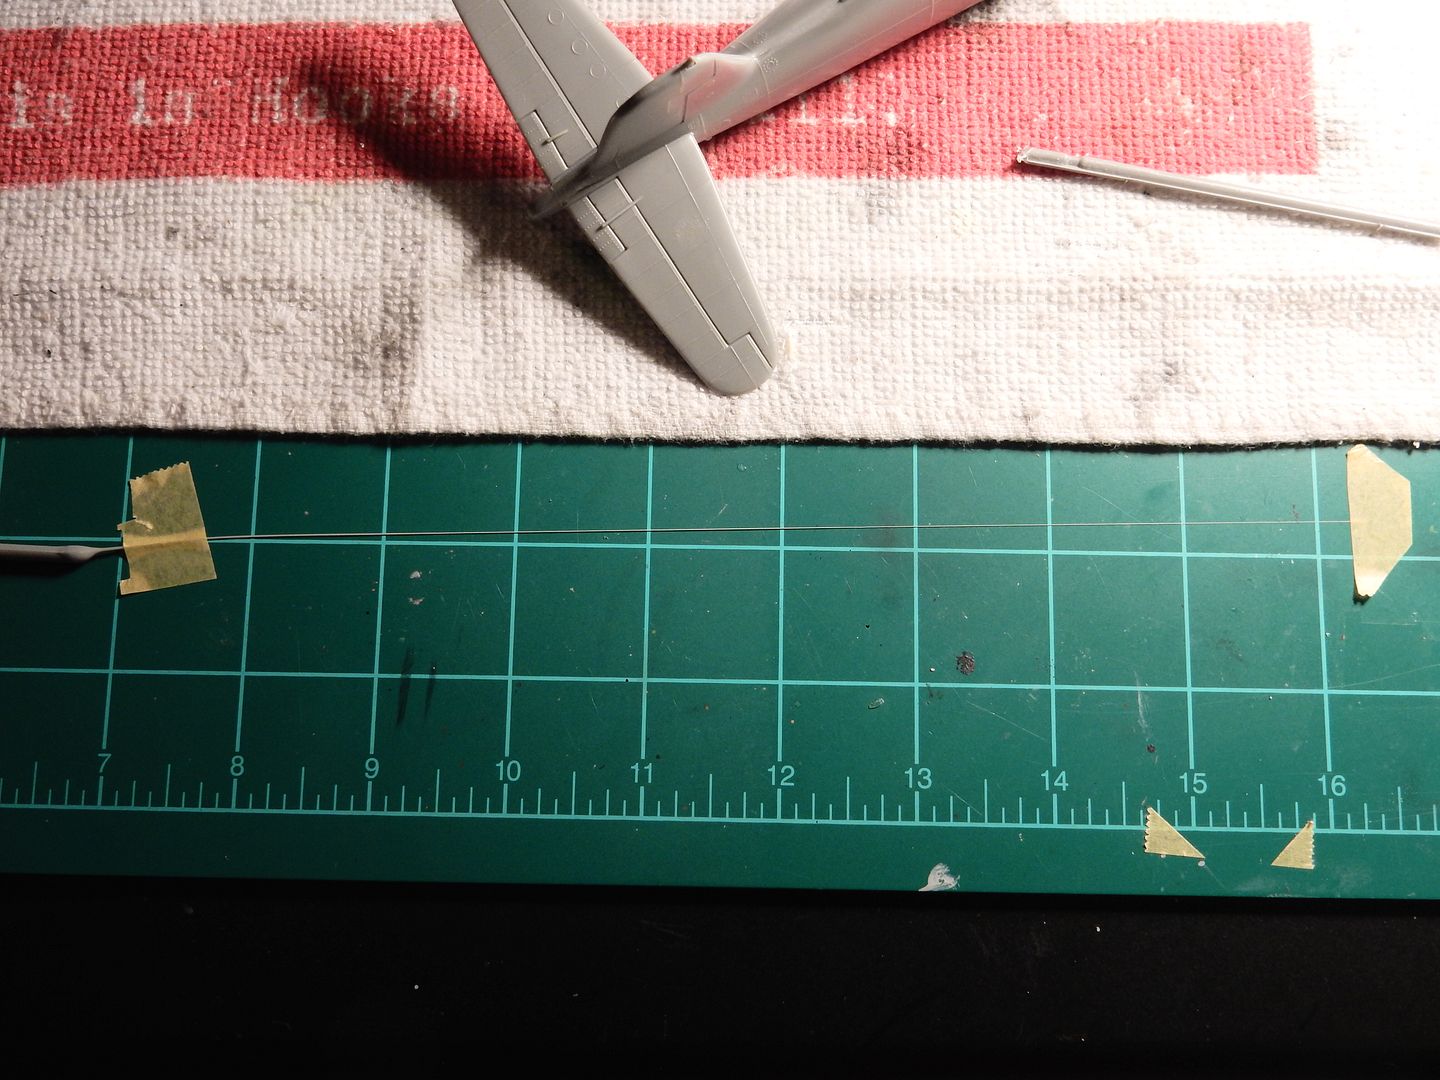
I've got tension on the stretched sprue so it'll be straight later:

We'll see how it  goes from here folks.


 Forum | Modelers Social Club Forum (proboards.com) 

  • Member since
    March 2012
  • From: Corpus Christi, Tx
Posted by mustang1989 on Monday, October 13, 2014 3:22 AM

Thanks for the encouragement guys. I got about 3/4  of the "rivets" done yesterday. Sloooooow process and it aint perfect but its a helluva lot better than what I started out with. Pics coming soon.


 Forum | Modelers Social Club Forum (proboards.com) 

  • Member since
    August 2014
Posted by avipond on Sunday, October 12, 2014 8:41 PM

Thanks for the kind words everyone!  Looking forward to seeing how the panel details will look mustang.

-Drew

  • Member since
    February 2014
  • From: Michigan
Posted by silentbob33 on Sunday, October 12, 2014 4:08 PM

That's a pretty nasty seam there Joe, I can't wait to see the new details you're putting on.

On my bench: Academy 1/35 UH-60L Black Hawk

JOIN OUR COMMUNITY!

Our community is FREE to join. To participate you must either login or register for an account.

SEARCH FORUMS
FREE NEWSLETTER
By signing up you may also receive reader surveys and occasional special offers. We do not sell, rent or trade our email lists. View our Privacy Policy.