SEARCH FINESCALE.COM

Enter keywords or a search phrase below:

100th Anniversary of WWI GB

75881 views
879 replies
1 rating 2 rating 3 rating 4 rating 5 rating
  • Member since
    February 2005
  • From: Proctor. MN
Posted by 65ss on Tuesday, October 28, 2014 7:01 PM

Marc, that looks awesome!

Dale

  • Member since
    April 2005
  • From: Piscataway, NJ!
Posted by wing_nut on Tuesday, October 28, 2014 7:14 PM

Thanks a lot fellas

Marc  

  • Member since
    January 2014
  • From: Toronto
Posted by Rob S. on Wednesday, October 29, 2014 4:16 AM

Marc, fantastic and very inspirational!

______________________________________________________________________________


On the Bench: Nothing on the go ATM

  • Member since
    April 2005
  • From: Piscataway, NJ!
Posted by wing_nut on Thursday, October 30, 2014 11:08 AM

Thanks Rob.

Marc  

  • Member since
    February 2005
  • From: Proctor. MN
Posted by 65ss on Saturday, November 1, 2014 8:45 PM

I have a little more progress. I sprayed the bogies, drive sprocket, large idler wheel, and the inside of the suspension pieces, before putting them together. The arm that the idler wheel snaps into has kind of a sloppy fit where it glues into the suspension. So after everything else dries, I'm going to wrap a length of track I have made around the suspension and use that to line up the idler wheel while I glue the wheel, and arm into place.

I also have the sides sort of glued onto the body, but there is a lot to line up so thats going in stages.

Dale

  • Member since
    October 2013
Posted by Big Blue on Saturday, November 1, 2014 10:35 PM

Looks great Dale!  I am looking forward to seeing your progress.

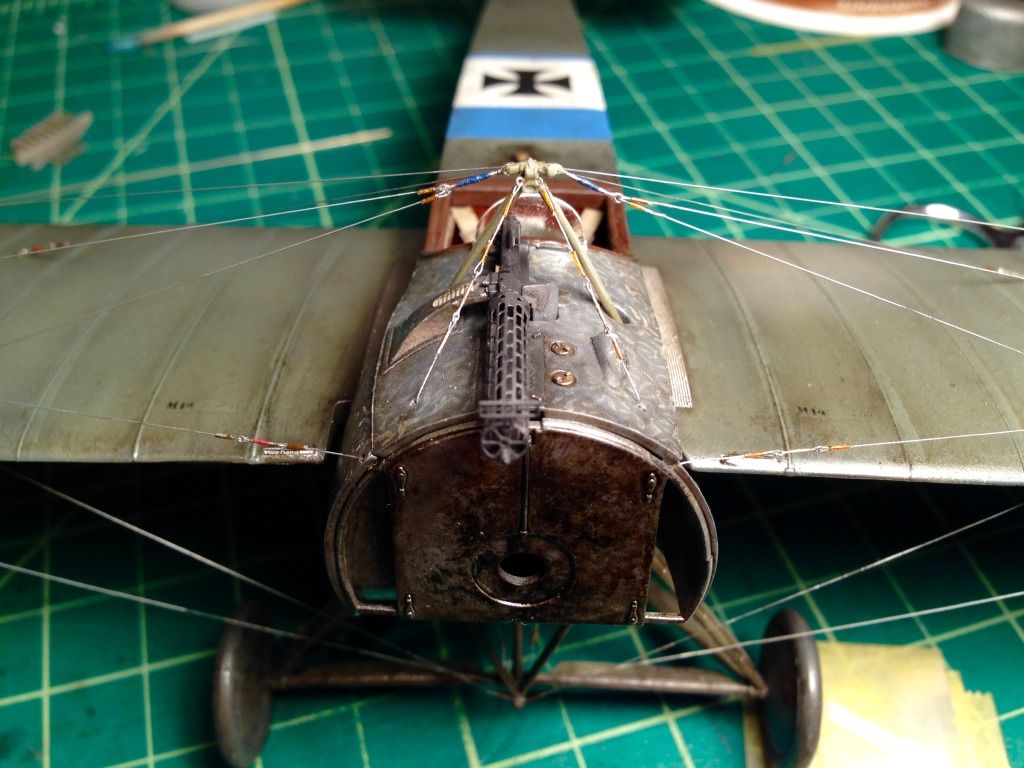
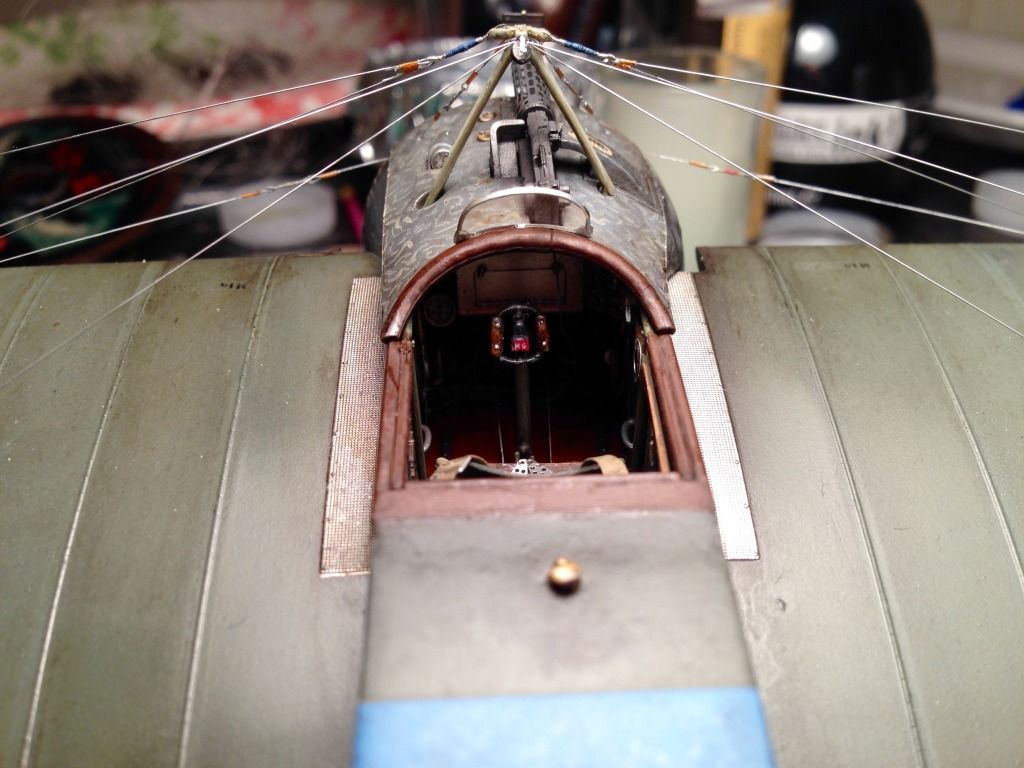
Well, my Eindecker is complete.  Picking up from my last update, I next undertook the upper rigging.  First some setup, the wing warping pylon:
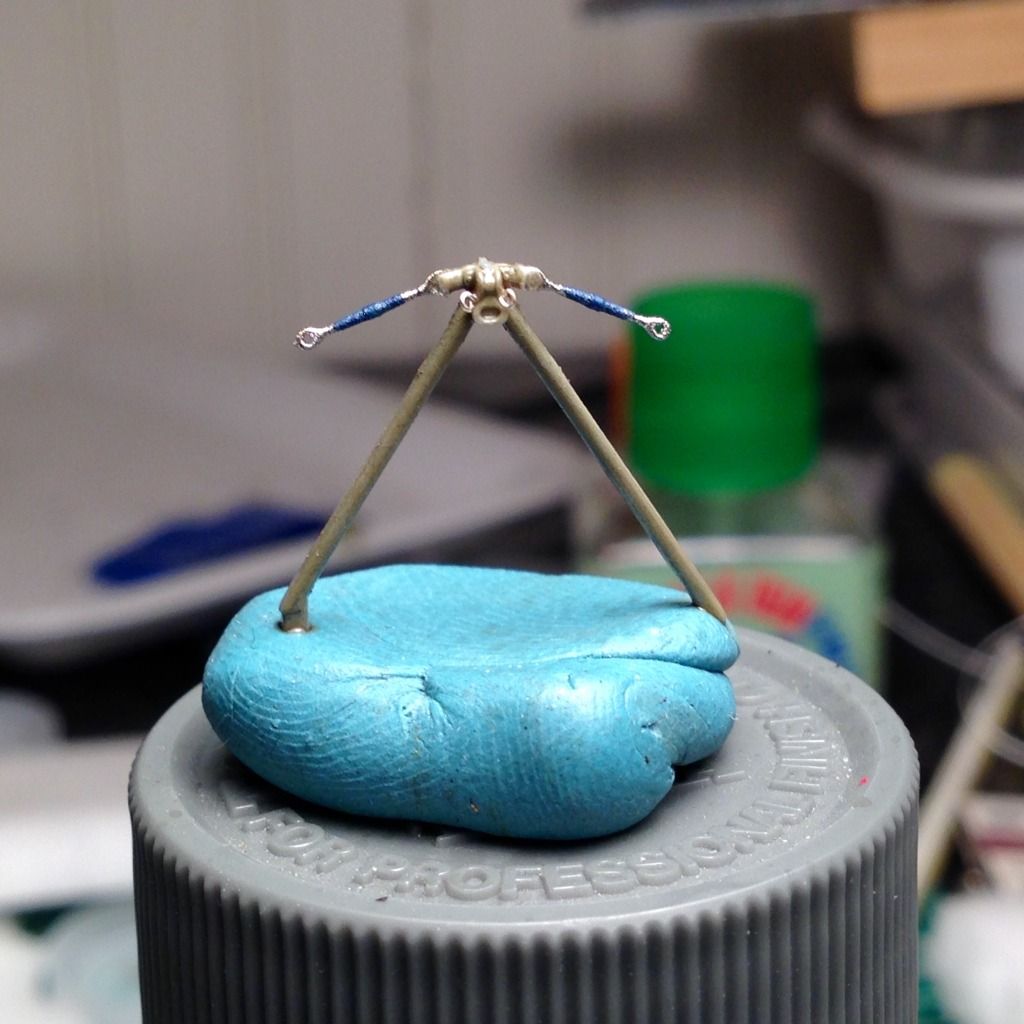
I removed the molded plastic arms and replaced them with 1/32 Gasptach turnbuckles.  I also drilled a pair of holes in the back and mounted eyelets for the rigging lines that run to the cowling.  The Eindecker's turnbuckles were color coded, with blue for the center rigging.

The upper rigging is not as complicated as the lower rigging was, so I did not take as many set up pictures.  Here is one I took while in progress:
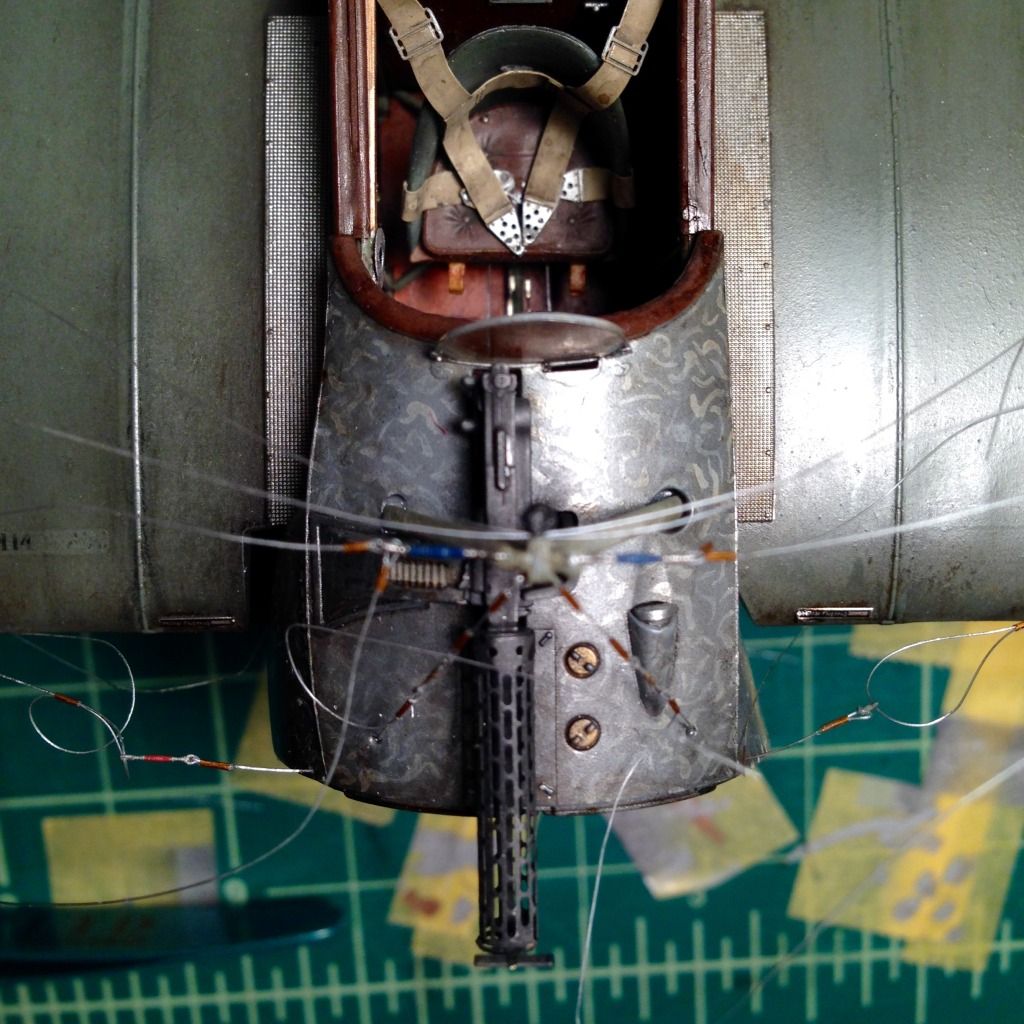
You can see the basic process: mono run through the turnbuckles, and clinched with Polyimide tubing.  I left everything loose until the rigging was complete, and then tightened it all together.  

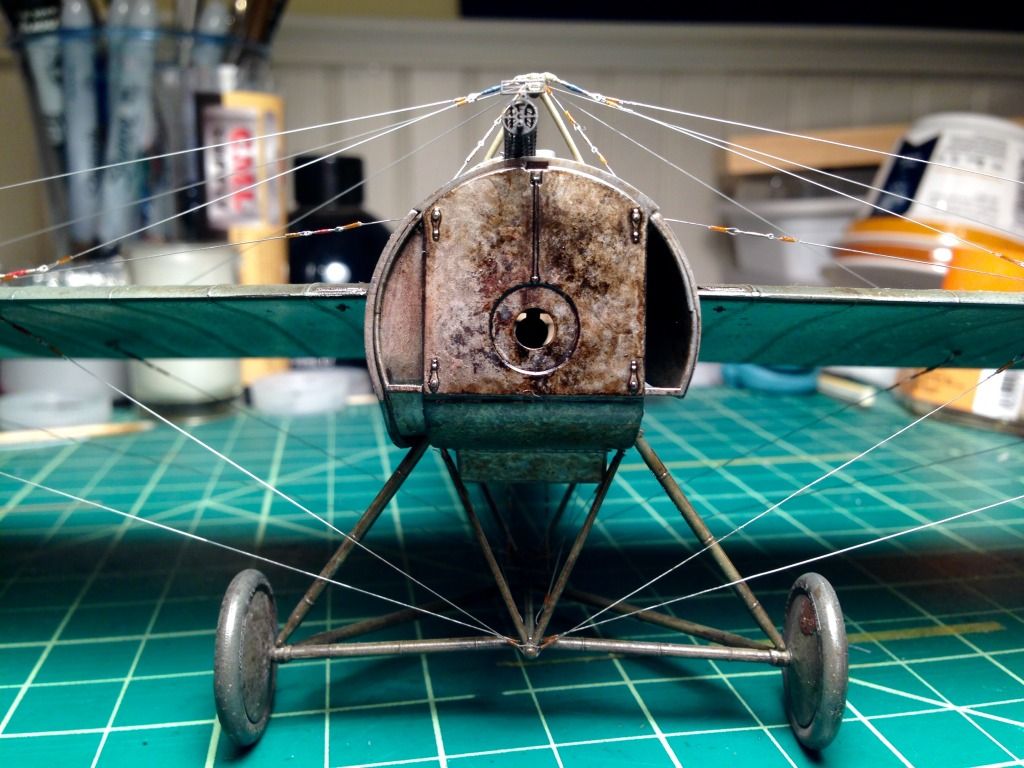
Resulting in:
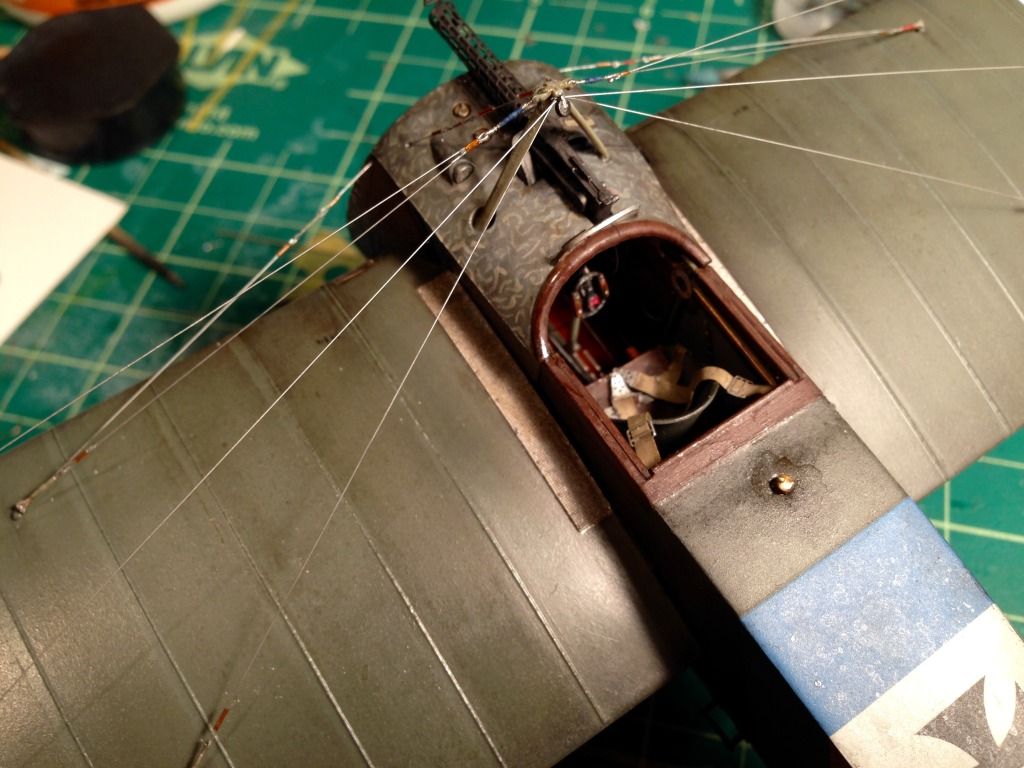
When I was ready to tighten everything up, I supported the aircraft by placing a pair of empty yogurt containers under the wing tips, lifting the wheels off the ground and ensuring the wings would be (if anything) flexed upwards a bit.  I then tightened the upper lines one by one, trying to work symmetrically by wing, and making sure not to introduce slack in the already finished "wires".  Once the upper lines were set and trimmed, I removed the cups and tightened the bottom rigging.

All that was left at that point was mounting the motor, cowling and prop... or so I thought.  Within an hour of my taking those pictures, the back fuselage seam which had mysteriously appeared half way through my build decided to pay me another visit!  Same deal as last time, a divot appeared right behind the fuel filler cap and a straight line ran straight back through the blue and white markings.  All said, it delayed my finish by two or three days while I waited for various fillers, clear coats and paints to dry.  

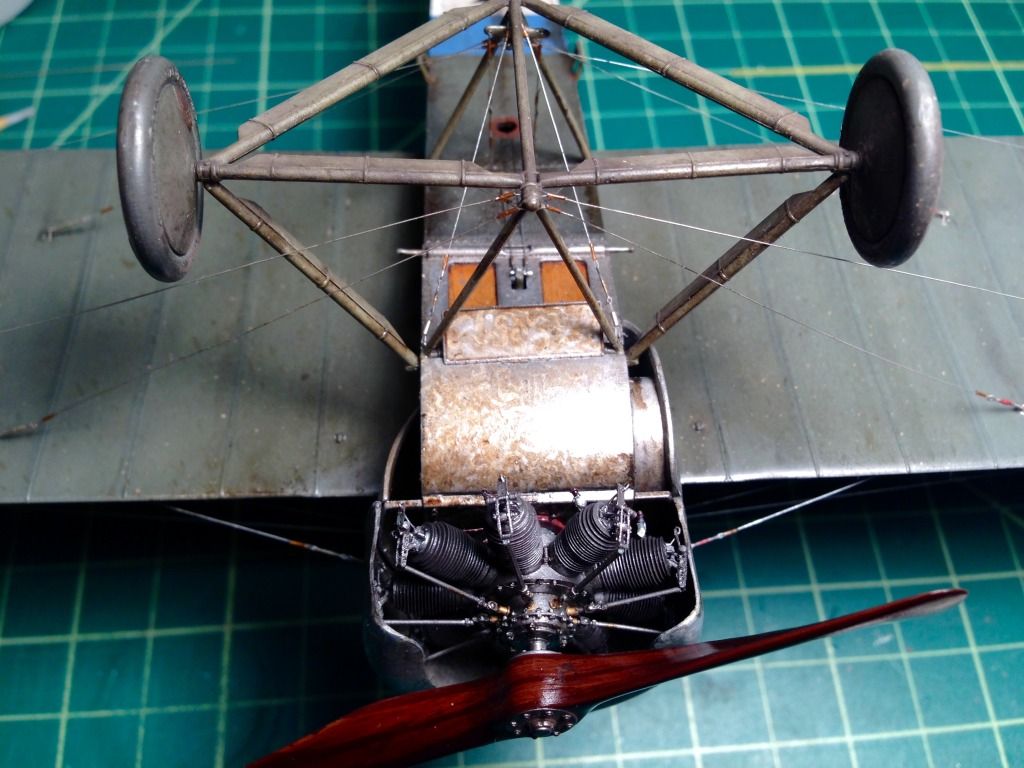
Once I had that issue sorted out to my satisfaction, I attached the engine and cowling with CA (since they are both resin).  Due to my lack of quality control in building the engine, it was a tight fit to get the cowling over the cylinder heads, but it wasn't too difficult.  A few drops of CA on the shaft, and the propeller was attached, bringing the build to a close.
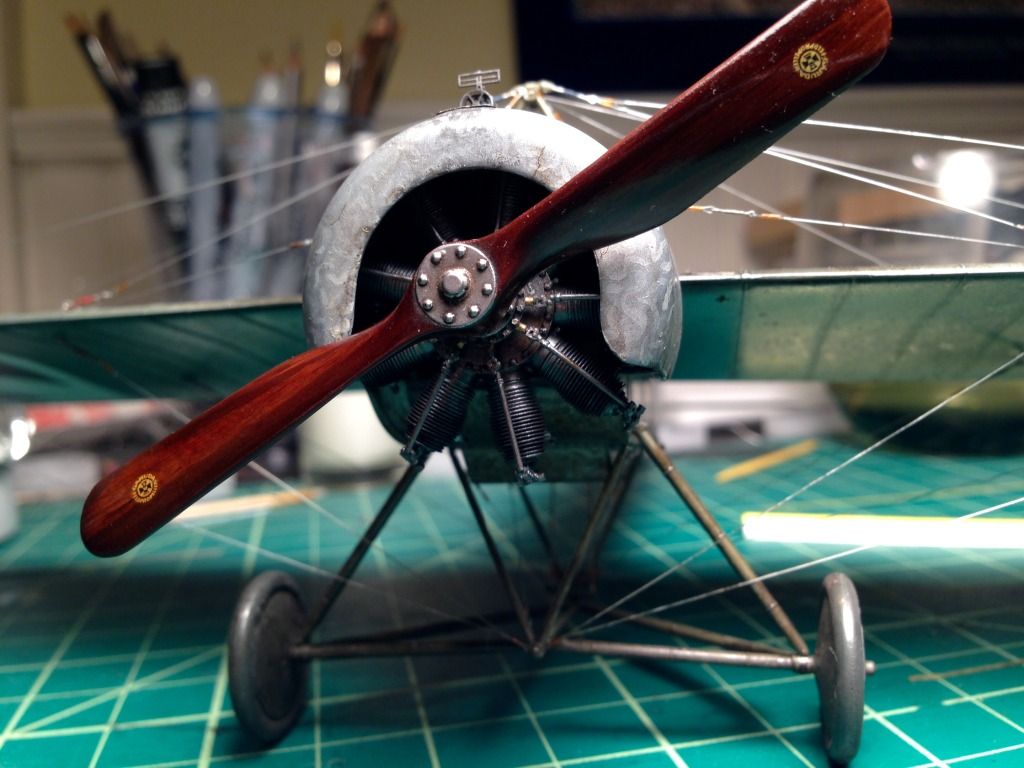
And that is a wrap for this build.  Aside from the troublesome seam, it was a very enjoyable build, and I'd recommend it to anyone interested.  

As this post is quite long and picture heavy, I'll put the final pictures up separately.  Thanks to Mike, Bish and Snake (and whomever else I missed!) for organizing this, it was very fun.  Thanks also to everyone for the supportive comments along the way.  There is some very lovely work being shown here, and it has been a treat to be part of it.

Blue

  • Member since
    October 2013
Posted by Big Blue on Saturday, November 1, 2014 10:48 PM

And here are the final pictures:

That's probably more than enough!

I'm looking forward to seeing the updates on this group build.  Thanks again to all.

Blue

  • Member since
    September 2013
  • From: San Antonio, Texas
Posted by Marcus McBean on Saturday, November 1, 2014 10:53 PM

Blue,

That is one fantastic build.  It looks like it is ready to take off and do battle or just came back from the battlefield.

Marcus

  • Member since
    October 2013
Posted by Big Blue on Saturday, November 1, 2014 11:33 PM

Thanks Marcus!  Smile

  • Member since
    April 2006
  • From: ON, Canada
Posted by jgeratic on Sunday, November 2, 2014 1:02 AM

Blue - cracking job on the Eindecker! Yes

I'll have to remember your method for painting the turned aluminum surfaces, that really turned out quite successful, as is the whole build.

regards,

Jack

  • Member since
    December 2002
  • From: Bury St Edmunds, Suffolk, England
Posted by Bish on Sunday, November 2, 2014 3:04 AM

Blue, that is absolutely stunning. The look of the metal, the wood, paint scheme, weathering, everything is just beautiful. I am defiantly getting that kit next year, I just hope I can come close to the results you, Mike, marc and others are able to achieve. I will certainly be taking some notes from your build.

You mentioned fighting up the lines. How exactly do you do that.

And thanks for the compliment, but unfortunately the running of this GB is not down to me. But don't worry, even I struggle to keep up with my GB's.

I am a Norfolk man and i glory in being so


On the bench: Airfix 1/72nd Harrier GR.3/Fujimi 1/72nd Ju 87D-3

  • Member since
    October 2013
Posted by Big Blue on Sunday, November 2, 2014 8:55 AM

Thanks very much, Jack & Bish.  Lol, Bish, I got on a roll and spread the credit around!  Well thanks anyway then!  And thanks to whomever I missed for running this GB.

Tightening the rigging was very straightforward: I left the tag ends of the mono long enough to be able to reach them easily (this is not a time to cut costs by skimping on materials... leave yourself plenty of working room), and when the time comes, pull the loose end gently against the eyelet or turnbuckle to tighten.  When you have the line roughly where you want it, slide the tubing down towards the eye, leaving a small loop so that the line can move freely.  Keeping tension on the tag end in the direction of the running line, add a small drop of CA to the end of the tubing that is away from the eye.  Capillary action sucks the cement into the tube, and it sets virtually instantly.  Now you can pull the tag end away and cut it off.  The tricky part with mono (as opposed to an elastic material like EZ Line) is not over tightening any line and introducing slack in the work that you have already finished.

When I rigged the upper tackle, I placed the cups under the wing tips to flex the wings upward.  That way when the aircraft is back to standing on its wheels, any tendency for the wings to sag should be somewhat offset by the taught mono (like real rigging).  Since any sag would work to slacken the lower rigging, I let the wings settle into their natural position before tightening the underside.

Once it was all set, I tightened one or two lines that didn't look quite right using a paper match.  Light the match, get a red glow on the head, blow it out, and carefully pass the recently extinguished head under the loose mono.  The mono will contract near the heat, and the line will tighten up.  Use care as it is easy to over tighten or snap the line.

I hope that helps,

Blue

  • Member since
    December 2002
  • From: Bury St Edmunds, Suffolk, England
Posted by Bish on Sunday, November 2, 2014 9:23 AM

That helps a lot Blue. I think I will need to go through the thread and make some note's so I don't have to dig it out later.

Thanks, its all going to be very useful.

I am a Norfolk man and i glory in being so


On the bench: Airfix 1/72nd Harrier GR.3/Fujimi 1/72nd Ju 87D-3

  • Member since
    April 2005
  • From: Piscataway, NJ!
Posted by wing_nut on Sunday, November 2, 2014 10:15 AM

Looking good 65

Wow Blue, crossed that finish line with some style. A beauty.


Speaking of that finish line...Except of a ring sight on a strut that I noticed is missing I am calling this one done. Thanks to all that followed along.

Marc  

  • Member since
    December 2002
  • From: Bury St Edmunds, Suffolk, England
Posted by Bish on Sunday, November 2, 2014 10:21 AM

WOW indeed Marc. The beauties just keep rolling out. I love the look of that and another that's its been a joy to follow. That plane must have been real tricky to fly, it looks as though the pilot has no forward view.

And one thing I just noticed. I saw the hole in the wing where it joins the fuselage earlier and thought it must be for the empty ammo cases from the MG. But seeing that grid device, am I right in thinking that's a bomb site.

I am a Norfolk man and i glory in being so


On the bench: Airfix 1/72nd Harrier GR.3/Fujimi 1/72nd Ju 87D-3

  • Member since
    April 2005
  • From: Piscataway, NJ!
Posted by wing_nut on Sunday, November 2, 2014 10:51 AM

Thanks Bish.  A bomb sight is my guess too.  But I fail to see what good that would be in any way effective.  If the pilots looks straight down and lines up his target the bombs will be well passed the spot by the time they hit the ground.  Unless the guy in the back seat does the lining up.  He would be looking down with a decent angle forward.

Marc  

  • Member since
    January 2014
  • From: Toronto
Posted by Rob S. on Sunday, November 2, 2014 10:57 AM

Marc and Blue, just absolute beauties. I can't say enough praise. The extreme level of perfection achieved is stunning. Many thanks for sharing your builds and I am going to absorb as much as possible from you two master builders. YesYes

______________________________________________________________________________


On the Bench: Nothing on the go ATM

  • Member since
    December 2002
  • From: Bury St Edmunds, Suffolk, England
Posted by Bish on Sunday, November 2, 2014 11:14 AM

I was thinking that as well Marc, I wasn't sure if it was directly below the pilot or further forward. I guess it was all trial and error at this stage.

I just had to do some digging though and found a site that shows the building of a replica of an RE.8 and they call it a bomb site.

thevintageaviator.co.nz/.../vintage-aviator-re8

Great build again Marc.

I am a Norfolk man and i glory in being so


On the bench: Airfix 1/72nd Harrier GR.3/Fujimi 1/72nd Ju 87D-3

  • Member since
    December 2002
  • From: Northern California
Posted by jeaton01 on Sunday, November 2, 2014 11:23 AM

Marc and Blue, these are just outstanding builds, I am suitably intimidated!

As to the bomb sight, at the low speeds and altitudes involved it can work.  I used to use the strut on my Cub as the "cross hairs" in flower bombing contests and that worked well.

John

To see build logs for my models:  http://goldeneramodel.com/mymodels/mymodels.html


  • Member since
    October 2013
Posted by Big Blue on Sunday, November 2, 2014 12:49 PM

Marc, Rob and John: many thanks for your kind words.  It was a fun build, and being part of this only made it better.  I think you all know how I feel about the work being shown here, so it is an honor to receive your praise.

Marc, she is a real beauty... surely this is what the folks at Wingnut Wings had envisioned when they introduced that kit.  Congratulations.

Blue

  • Member since
    April 2006
  • From: ON, Canada
Posted by jgeratic on Sunday, November 2, 2014 12:53 PM

Marc - just stunning, impeccable finish! Yes

Love how you added depth to the wing ribbing, it really sets it apart.  This really is a very fine portrait of the Tate.

regards,

Jack

  • Member since
    April 2005
  • From: Piscataway, NJ!
Posted by wing_nut on Sunday, November 2, 2014 3:43 PM

Thanks so much fellas for all the very nice things you guys have said.

Bish, great link.  Bet tat was a fun "model" to build.  Love the photo of the rear gunner's seat.  did you notice the giant boot print?

John I had to stop thinking in terms of Norden bombsight altitude.  Speeds of barely 100 mph and an altitude of just a couple hundred feet I guess that would work after all.

Marc  

  • Member since
    December 2002
  • From: Bury St Edmunds, Suffolk, England
Posted by Bish on Sunday, November 2, 2014 3:50 PM

John, very good point.

Marc, no, I didn't spot that before. I hope it was made with a 1914-18 replica boot.

I am a Norfolk man and i glory in being so


On the bench: Airfix 1/72nd Harrier GR.3/Fujimi 1/72nd Ju 87D-3

  • Member since
    February 2005
  • From: Proctor. MN
Posted by 65ss on Sunday, November 2, 2014 5:30 PM

Marc, & Blue those are two stunning works of art!

Dale

  • Member since
    June 2010
  • From: Rochester, New York USA
Posted by rocker286 on Sunday, November 2, 2014 10:05 PM

Marc & Blue, WOW. Excellent and inspiring work!

4badges

  • Member since
    October 2013
Posted by Big Blue on Monday, November 3, 2014 7:57 AM

Jack, Dale & Rocker, thank you all very much.

Blue

  • Member since
    April 2005
  • From: Piscataway, NJ!
Posted by wing_nut on Tuesday, November 11, 2014 10:40 AM

Where'd everyone go?

Marc  

  • Member since
    December 2002
  • From: Bury St Edmunds, Suffolk, England
Posted by Bish on Tuesday, November 11, 2014 1:12 PM

Things seem to have slowed down on the forum in general the last few days.

I am a Norfolk man and i glory in being so


On the bench: Airfix 1/72nd Harrier GR.3/Fujimi 1/72nd Ju 87D-3

  • Member since
    September 2013
  • From: San Antonio, Texas
Posted by Marcus McBean on Tuesday, November 11, 2014 6:15 PM

Finishing up another ship now and will start on my project for this forum later this week, promise.

  • Member since
    February 2010
  • From: Berkeley CA/St. Paul MN
Posted by EBergerud on Sunday, November 16, 2014 3:52 PM

OK: time to start a new plane/tank/ship cycle. The plan is to do WWI subjects. I've got 1/32 Roden Morane Saulnier and the new Tamiya MK IV on hand so they're in. The ship will be either the Flyhawk 1/700 Derfflinger or 1/700 Trumpie Queen Elizabeth 1918 depending upon PE outlook. Lots of rigging and even an electric motor to look forward to. Wish me luck.

Eric


A model boat is much cheaper than a real one and won't sink with you in it.

JOIN OUR COMMUNITY!

Our community is FREE to join. To participate you must either login or register for an account.

SEARCH FORUMS
FREE NEWSLETTER
By signing up you may also receive reader surveys and occasional special offers. We do not sell, rent or trade our email lists. View our Privacy Policy.