SEARCH FINESCALE.COM

Enter keywords or a search phrase below:

Ju 87 Stuka GB

174083 views
2599 replies
1 rating 2 rating 3 rating 4 rating 5 rating
  • Member since
    December 2002
  • From: Bury St Edmunds, Suffolk, England
Posted by Bish on Saturday, October 4, 2014 4:12 PM

Indeed, it is important to get the balance right. You want to enhance the model, not detract from it. Most of mine have between 3 and 5 figures and one, at a push 2 vehicles. But it also depends on the size of the aircraft. For my He 111Z I added 2 vehicles and 9 figures. But the size of the aircraft and the scene I was depicting justified that.

There are a few 'rules' to building dio's that someone came up with. The 3 main ones are not to have lots of empty space, this is when viewing from the front rather than above. Balance but not symmetry. And the last one is nothing should be parallel to the base. Now I don't 100% agree with the last one, I have done this in the past and it works. But since I started doing dio's at an angle, they do look better.

I always have an image in my head and that's the main thing I work off. They are not often exactly how I pictured it because sometimes its not practical, but it is nice seeing that idea coming to life in front of you.

I am a Norfolk man and i glory in being so


On the bench: Airfix 1/72nd Harrier GR.3/Fujimi 1/72nd Ju 87D-3

  • Member since
    December 2004
  • From: Houston, Texas
Posted by panzerpilot on Saturday, October 4, 2014 3:58 PM

Bish

The key is in the planning. The best built model in the world can be ruined by a poorly thought out scene. I always draw out my dio's as a rough sketch to give me an idea of base size, orientation of the primary subject and placement of everything else. But as I go from 2D to 3D it evolves along the way.

I plan on doing my 32nd aircraft on a simple base, but I couldn't imagine doing a 72nd aircraft or 35th armour build that isn't in a dio.

Good advice. I am working out ideas in my head on how to do it. It does seem a dio could add greatly to a built or, conversely, take away from it. Rough sketch is a good idea. There seems a fine balance between too much detail, ie cluttered, and not enough.

-Tom

  • Member since
    December 2002
  • From: Bury St Edmunds, Suffolk, England
Posted by Bish on Saturday, October 4, 2014 3:35 PM

The key is in the planning. The best built model in the world can be ruined by a poorly thought out scene. I always draw out my dio's as a rough sketch to give me an idea of base size, orientation of the primary subject and placement of everything else. But as I go from 2D to 3D it evolves along the way.

I plan on doing my 32nd aircraft on a simple base, but I couldn't imagine doing a 72nd aircraft or 35th armour build that isn't in a dio.

I am a Norfolk man and i glory in being so


On the bench: Airfix 1/72nd Harrier GR.3/Fujimi 1/72nd Ju 87D-3

  • Member since
    December 2004
  • From: Houston, Texas
Posted by panzerpilot on Saturday, October 4, 2014 3:17 PM

Bish

I'm looking forward to seeing it. have you ever done a dio before.

Thanks. No, I've never done one before. It's something I've always wanted to do though. I'd like to do one for next years 109 GB as well. So, may as well get at it!

-Tom

  • Member since
    December 2002
  • From: Bury St Edmunds, Suffolk, England
Posted by Bish on Saturday, October 4, 2014 3:02 PM

I'm looking forward to seeing it. have you ever done a dio before.

I am a Norfolk man and i glory in being so


On the bench: Airfix 1/72nd Harrier GR.3/Fujimi 1/72nd Ju 87D-3

  • Member since
    December 2004
  • From: Houston, Texas
Posted by panzerpilot on Saturday, October 4, 2014 3:00 PM

Bish

Sounds good. One thing I like about 72nd is the wide range of ground equipment for doing dio's which seem limited in the larger scales. So will be nice to see a big scale aircraft dio.

Yeah. You and the 1/48 guys do have quite a selection. It is fairly limited for 1/32, but I think I'm on to something.

-Tom

  • Member since
    December 2002
  • From: Bury St Edmunds, Suffolk, England
Posted by Bish on Saturday, October 4, 2014 2:53 PM

Sounds good. One thing I like about 72nd is the wide range of ground equipment for doing dio's which seem limited in the larger scales. So will be nice to see a big scale aircraft dio.

I am a Norfolk man and i glory in being so


On the bench: Airfix 1/72nd Harrier GR.3/Fujimi 1/72nd Ju 87D-3

  • Member since
    December 2004
  • From: Houston, Texas
Posted by panzerpilot on Saturday, October 4, 2014 2:51 PM

Bish

O, nice. What sort of scene are you planning.

I'm planning on late fall/early winter or perhaps, full winter scheme, on a muddy forward strip. Sort of what some of the pics have depicted. 3 or four figures and a vehicle or two, getting ready for a mission.

-Tom

  • Member since
    December 2002
  • From: Bury St Edmunds, Suffolk, England
Posted by Bish on Saturday, October 4, 2014 2:45 PM

O, nice. What sort of scene are you planning.

I am a Norfolk man and i glory in being so


On the bench: Airfix 1/72nd Harrier GR.3/Fujimi 1/72nd Ju 87D-3

  • Member since
    December 2004
  • From: Houston, Texas
Posted by panzerpilot on Saturday, October 4, 2014 2:35 PM

Nice handiwork there, Thunderbolt!

I have decided to do my build as part of a diorama. Something I've never done before. There, I said it. Now I've really done it! Confused

-Tom

  • Member since
    December 2002
  • From: Bury St Edmunds, Suffolk, England
Posted by Bish on Saturday, October 4, 2014 1:58 PM

That's some Stuka production line you got going there, nice work.

I am a Norfolk man and i glory in being so


On the bench: Airfix 1/72nd Harrier GR.3/Fujimi 1/72nd Ju 87D-3

  • Member since
    February 2010
  • From: New Jersey
Posted by 68GT on Saturday, October 4, 2014 1:57 PM
Still plugging away when time allows Bish.    Even got some 65 on the bottom of one.

On Ed's bench, ???


  • Member since
    January 2013
  • From: Athens, Greece
Posted by Zvezda1980 on Saturday, October 4, 2014 1:23 PM

Mike you are quick!

Very nice built. I think you might live with the gap, since the cowling is all yellow. I also like your landing light.

I just messed up mine Embarrassed and will have to fix it somehow.

  • Member since
    March 2012
  • From: Corpus Christi, Tx
Posted by mustang1989 on Saturday, October 4, 2014 6:42 AM

Thunderbolt379
I'm not a fan of the engineering here, it's wobbly and imprecise

Man do you ever have that right Mike! I spent a LOOOONG time on the engine cowling area lining all the parts up and sanding away some ridiculous seam lines caused by all the imperfections.

 Great progress on this thing! She's looking good


 Forum | Modelers Social Club Forum (proboards.com) 

  • Member since
    December 2002
  • From: Bury St Edmunds, Suffolk, England
Posted by Bish on Saturday, October 4, 2014 3:11 AM

Nice to see her on her legs Mike.

I am a Norfolk man and i glory in being so


On the bench: Airfix 1/72nd Harrier GR.3/Fujimi 1/72nd Ju 87D-3

  • Member since
    April 2005
Posted by Thunderbolt379 on Saturday, October 4, 2014 2:33 AM

Thanks Bish, Clemens and Greg! Okay, progress since last night -- I filed the mating surfaces and mounted the tailplanes. Here she is with them in place and the wing tape removed, but the brace struts are not glued in, they just helped set the angle:

Then I mounted the prop back plate to the engine -- I'm not a fan of the engineering here, it's wobbly and imprecise and obliges you to fit the prop before overall painting, never a good arrangement. As it happens, the lock part that fixes the prop stub inside the cowling fused solid to the interior so the prop won't turn anyway. In the next shot the landing gear has been filed and press-fitted. The tailgear has been masked and painted, but is not yet installed:

My next challenge is the fitting of the engine; the upper and lower parts on the fuselage are a close, tight fit, but the sidewalls in between have about a .010" gap. I could fill it with strip styrene, the question is, should I bother, or live with the gap?

Also done today, the exhaust bays were masked, and the exhausts themselves undercoated in tire black, which will be a good base for the rusty steel effect later.

Target for tomorrow -- finish improving the propeller blades, install the flap actuators under the wing, assemble the bombs -- possibly get to the canopy and/or spray the spinner cone RLM 24.

Cheers, M/TB379


http://worldinminiature.blogspot.com/

  • Member since
    May 2013
  • From: Indiana, USA
Posted by Greg on Friday, October 3, 2014 9:57 PM

Scott, I think I see that panel you are referring to. Don't let it keep you up fussing, mate!

Mike, I really like that landing light and thanks for the IP pics how you did it.

  • Member since
    April 2013
Posted by SchattenSpartan on Friday, October 3, 2014 6:07 PM

Teddz: Your Stuka looks really good! I nice, clean build!

Mike: You're making really fast progress! And it's looking most excellent too! I love the cockpit work and that scratchbuilt landing light!

Zvezda: Looking good there! Nice idea with the 2-tone pre-shading!

Scott: Now that's one big a** Stuka you got there! Looking very nice!

Tom: It's great to see someone else using that Aires cockpit! My set has been lying in my AM stash for quite a while now, but didn't have proper saws to cut all those casting blocks off the parts.

Well, I got all the tools i need today so I'm good to go! Should be able to start cutting resin this Saturday!

  • Member since
    December 2002
  • From: Bury St Edmunds, Suffolk, England
Posted by Bish on Friday, October 3, 2014 2:17 PM

That coming along really nicely Mike, great work.

I am a Norfolk man and i glory in being so


On the bench: Airfix 1/72nd Harrier GR.3/Fujimi 1/72nd Ju 87D-3

  • Member since
    April 2005
Posted by Thunderbolt379 on Friday, October 3, 2014 8:19 AM

Thanks, Nathan! Well, final assembly is underway. I painted the vision "chute" under the cockpit 65 as it'll be nigh impossible to mask the clear window later. The wing is installed and drying overnight, using the tape tensioning method to pinch the root joints tight. Tail surfaces are underway, there's a lick of filler needed around the end caps, then they can mount, using the braces to fix the angle, then the braces will come off and be reinstalled after painting to ease masking.

At this pace, I'm hoping to be painting in a few days.

M/TB379

http://worldinminiature.blogspot.com/

  • Member since
    March 2010
  • From: MN
Posted by Nathan T on Friday, October 3, 2014 8:13 AM

Nice fabricating Mike. I like your attention to details.


  • Member since
    April 2005
Posted by Thunderbolt379 on Friday, October 3, 2014 1:46 AM

Hi guys, progress today has seen the landing light fabricated. Here's the assembly with the light lens added (it's made from a dome-ended piece of sprue, cut off flush to create a hemisphere, and everything filed down to fit):

The bay was painted RLM 02, the light chrome silver and finished with a drop of Future, not that it shows here:

Thanks to my sister for the macro close-ups!

Now, attach the transparency, and press on with construction.

M/TB379

http://worldinminiature.blogspot.com/

  • Member since
    October 2006
  • From: Tucson, AZ
Posted by Archangel Shooter on Thursday, October 2, 2014 10:57 PM

mikeymize
Scott, I was wondering the color used on the prop. It looks like something other than flat black. Almost a greenish hue. Either way it looks great as do all the other bits. Great job!

Mikey.. for the prop blade color I used Model Master Acrylic #4780   Schwarzgrun (Black Green) RLM 70   I have read that is the color of choice by Luftwaffe modelers to do the props in.

Greg...if you take a look at the latest pic I posted, you will see the window panel just aft of the gunner area 2/3rd up the fuselage. I know the panel is access to the First Aid kit but I though it was metal, Airfix is depicting it as glass. Confused

 Your image is loading...

 On the bench: So many hanger queens.


  • Member since
    December 2002
  • From: Bury St Edmunds, Suffolk, England
Posted by Bish on Thursday, October 2, 2014 11:30 AM

Zvezda1980

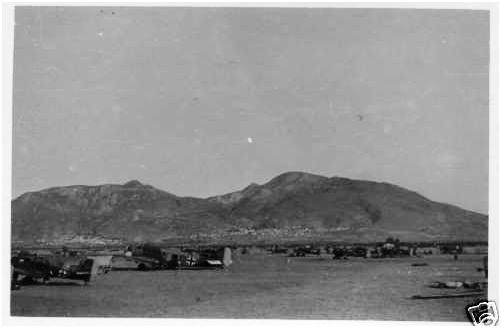
Bish, yet, despite all  those difficulties, the Germans managed to construct, set up and fully equip/supply the southern airfield at Molaoi before the start of the attack. Me-109's and Ju-87's operated from there hammering Crete. Testimonies reveal that the airfield was a hive of activity during the battle.

The photos below are from that airfield during the battle (mostly Me-109's shown). In the first picture one can spot a Stuka taking off.

I remember that, according to his own book,  H.U Rudel was also assigned to Molaoi for the battle, at the beginning of his combat career.

These are some nice ideas for dioramas by the way, with Stukas and Me-109's and maybe a captured British vehicle carrying bombs and fuel...

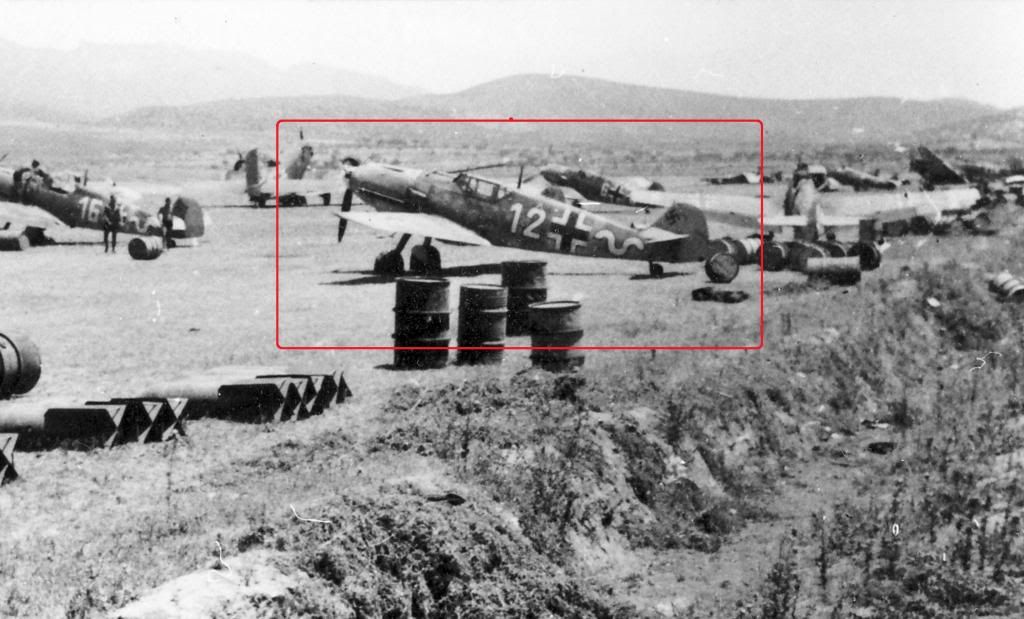
Molaoi would have defiantly been an option. In my last post, I was mainly referring to the island airfield just off Crete, I can't recall its name now. No doubt the Germans were moving lots of supplies forward throughout the invasion of Greece and the Germans had a god 3 weeks to build up supplies prior to Mercury. I like your idea for a dio, I imagine there would have been plenty of captured equipment to use.

I am a Norfolk man and i glory in being so


On the bench: Airfix 1/72nd Harrier GR.3/Fujimi 1/72nd Ju 87D-3

  • Member since
    September 2010
  • From: California
Posted by mikeymize on Thursday, October 2, 2014 9:13 AM

Scott, I was wondering the color used on the prop. It looks like something other than flat black. Almost a greenish hue. Either way it looks great as do all the other bits. Great job!

"Time you enjoy wasting is not wasted time".


  • Member since
    March 2012
  • From: Corpus Christi, Tx
Posted by mustang1989 on Thursday, October 2, 2014 9:10 AM

That's a cool idea for a landing light. I added one as well. I just couldn't stand a lens over an empty hole.


 Forum | Modelers Social Club Forum (proboards.com) 

  • Member since
    April 2005
Posted by Thunderbolt379 on Thursday, October 2, 2014 8:57 AM

Not a lot of action on the Stuka today, I filed back the landing light bay and plated it with .010" plasticard, that was it... Landing light to fabricate tomorrow, then add the clear part. (Apologies, not a great photo.)

M/TB379

http://worldinminiature.blogspot.com/

  • Member since
    January 2013
  • From: Athens, Greece
Posted by Zvezda1980 on Thursday, October 2, 2014 6:10 AM

Bish, yet, despite all  those difficulties, the Germans managed to construct, set up and fully equip/supply the southern airfield at Molaoi before the start of the attack. Me-109's and Ju-87's operated from there hammering Crete. Testimonies reveal that the airfield was a hive of activity during the battle.

The photos below are from that airfield during the battle (mostly Me-109's shown). In the first picture one can spot a Stuka taking off.

I remember that, according to his own book,  H.U Rudel was also assigned to Molaoi for the battle, at the beginning of his combat career.

These are some nice ideas for dioramas by the way, with Stukas and Me-109's and maybe a captured British vehicle carrying bombs and fuel...
  • Member since
    May 2013
  • From: Indiana, USA
Posted by Greg on Thursday, October 2, 2014 12:50 AM

Scott, those reference pics are AWESOME! Thanks, Man! Wow, those Luftwaffe pilots didn't have much foot room. Lots of junk to maneuver past just to get the toesies in the stirrups.

The rudders are further aft (or nearer to directly under the IP face) than I would have thought possible. But the pics don't lie. I also notice the rudders are spaced quite a bit more apart than my kit pedals. I had suspected that.

That's the best pic of the floor window I've seen. My Eduard PE assy sits too high, and I had suspected that too. Hmmm, do I have it in me to carve a hole in the floor of my otherwise complete cockpit? Thinking not at the moment. :)

Wish could help you with the LH fuselage window. Not quite sure what you are referring to.

Thanks again!

Bish, thanks for your input. It isn't depicted at all on my stock Italeri. I had to do some digging to figure out what the PE part was depicting. At least I learned something. :)

  • Member since
    December 2002
  • From: Bury St Edmunds, Suffolk, England
Posted by Bish on Thursday, October 2, 2014 12:32 AM

Now that is one sweet looking Stuka Shooter, she is coming along wonderfully.

Greg, on most kits I have seen, the window is replicated by engrave lines usually just being the engine cowling.

I am a Norfolk man and i glory in being so


On the bench: Airfix 1/72nd Harrier GR.3/Fujimi 1/72nd Ju 87D-3

JOIN OUR COMMUNITY!

Our community is FREE to join. To participate you must either login or register for an account.

SEARCH FORUMS
FREE NEWSLETTER
By signing up you may also receive reader surveys and occasional special offers. We do not sell, rent or trade our email lists. View our Privacy Policy.