SEARCH FINESCALE.COM

Enter keywords or a search phrase below:

The 2015 /16 Red Hot and Rollin Automotive Group Build--Ended

121084 views
2225 replies
1 rating 2 rating 3 rating 4 rating 5 rating
  • Member since
    January 2015
Posted by MOPAR - D on Thursday, May 14, 2015 8:02 PM

Misty - Wow the detail it's so real looking.

Tim - glad to see you pushing your limits it is proving out on this build. Your trunk looks very clean.

  • Member since
    January 2015
Posted by MOPAR - D on Thursday, May 14, 2015 8:29 PM

I've been working some details on the bed added a hydraulic tank, control panel, brackets for the storage boxes and made some fuel tanks from my parts box. I'm looking for details on how to run the hydraulic hoses.

  • Member since
    October 2008
  • From: Georgia
Posted by Rigidrider on Thursday, May 14, 2015 8:31 PM

Misty... Incredible! That is amazingly detailed!

Raven and Seabe... Yup, door came out fine, just took a lot more work then planned on but all in all... that's what its about I guess Improvise , adapt, over come, move forward! lol... Pics to follow soon. Thanks all!

Doug

When Life Hands You A Bucket Of Lemons...

Make Lemonade!

Then Sell It Back At $2 Bucks A Glass...

  • Member since
    October 2008
  • From: Georgia
Posted by Rigidrider on Thursday, May 14, 2015 8:45 PM

Hey Mopar... I work with Hydraulics for a living, on your main cylinder the most common way to plumb is a flex line to the base of the cyl and a steel line running up the barrel to just under the gland of the barrel with a 90 deg ftg to attach both to the cyl. The lift gate if equipped and the control valve are usually flex lines with all hyd lines running either along the frame or in a channel down the center. Not sure if that's what you were needing but if I can help, I'll try. I can get all kinds of schematics if need be.

Doug

When Life Hands You A Bucket Of Lemons...

Make Lemonade!

Then Sell It Back At $2 Bucks A Glass...

  • Member since
    March 2012
  • From: Corpus Christi, Tx
Posted by mustang1989 on Friday, May 15, 2015 3:47 AM

Misty: What tha??? Holeee Smokes man!!! You've got yourself a definite award winner with that one man!!!! The attention to detail and skills to carry out these results are staggering. Awesome job man!

Dan: Looks like that rollback is coming right along man. Plan, engineer and fabricate is the name of that game. Looks great! Say did you say that show in Houston is on the 1st of August?


 Forum | Modelers Social Club Forum (proboards.com) 

  • Member since
    January 2015
Posted by MOPAR - D on Friday, May 15, 2015 6:12 AM

Joe - The H.A.M.S show is the on Saturday August 1st same day as Houston Coffee & Cars that's about 5 miles apart.

Doug - any schematics or pictures would be greatly appreachated!

  • Member since
    October 2008
  • From: Georgia
Posted by Rigidrider on Friday, May 15, 2015 11:16 AM

Mopar... let me see what I can come up with, I won't have an exact match, but I can get you something to go by. Like if I get a single run system, just duplicate it for another cyl.  

Doug

When Life Hands You A Bucket Of Lemons...

Make Lemonade!

Then Sell It Back At $2 Bucks A Glass...

  • Member since
    January 2014
Posted by Seabe on Friday, May 15, 2015 11:59 AM

Noo man Misty, that thing looks like a pile of junk... Haha, sorry, you "know me" be now, just saying something different to everybody else! Awesome job - I build in that genre and I know how hard it is to just get all four wheels to touch ground at times. An absolute stunner, can't wait for the shots!

  • Member since
    September 2013
Posted by Raven728 on Friday, May 15, 2015 7:46 PM

So close to the end, and I hit a major fit issue putting the body and chassis together. I think there's some kind of warp between the two parts of the engine bay. I don't think I have glue strong enough to hold it with the amount of tension it's under, but we'll see tomorrow.

Sad

- Steve

  • Member since
    March 2012
  • From: Corpus Christi, Tx
Posted by mustang1989 on Friday, May 15, 2015 7:54 PM

Oh man!!   Hope it holds there Steve!! Will be watching tomorrow and rooting for you!!


 Forum | Modelers Social Club Forum (proboards.com) 

  • Member since
    September 2013
Posted by Raven728 on Friday, May 15, 2015 8:46 PM

Thanks. If it doesn't hold, I'll have to yank it apart and try to shave down the offending plastic. At least you get to see the Brembo decal on the brake caliper. Stick out tongue  Such a great kit up until this point, too. It's a shame.

- Steve

  • Member since
    March 2012
  • From: Corpus Christi, Tx
Posted by mustang1989 on Friday, May 15, 2015 9:10 PM

It aint over yet there yet lil' buddy! Wink


 Forum | Modelers Social Club Forum (proboards.com) 

  • Member since
    January 2012
  • From: Hatfield
Posted by Misty on Saturday, May 16, 2015 1:50 AM

Raven728

Thanks. If it doesn't hold, I'll have to yank it apart and try to shave down the offending plastic. At least you get to see the Brembo decal on the brake caliper. Stick out tongue  Such a great kit up until this point, too. It's a shame.

Ouch,, thats a nasty surprise Surprise hope it holds mate. Yes

  • Member since
    March 2012
  • From: Corpus Christi, Tx
Posted by mustang1989 on Saturday, May 16, 2015 7:51 AM

 I'll tell you guys, I've spent the last couple of days ironing the hood and body blemishes out from all of the ejector pin marks and sink holes. There are tons of these things present all over the body and hood!!  This kit is not one of Revell's more stellar kits but the molds are pretty old so I have to remember that when I want to complain.

 I removed the badging from the front of the hood and have completed all the body work on it. My next two plans for it are to cut out the rectangle in the hood for the carburetors and now that the bottom of the hood is all nice and smooth I'll probably shoot some chrome Spaz Stix on the undersides for a show truck style effect. Hopefully it'll turn out good enough to give a nice reflection of the engine off of it after I polish it up.

  I've re-worked the newer firewall/ forward cab area both inside and out starting with the removal of , you guessed it, ejector pin marks on the cab side of the floor area. I moved next to the firewall and removed all of the molded in wiring and component detail so I could install separate components and use real wire instead of the molded detail for a more realistic approach under the hood. I've still gotta fabricate brake and clutch pedals to make all that stuff work underneath.


 Firewall with molded detail:

RSCN0175_zps90zqheu6.jpg


and the newer piece without the molded detail:


FSCN0177_zps5n67u2al.jpg


 Forum | Modelers Social Club Forum (proboards.com) 

  • Member since
    September 2013
Posted by Raven728 on Saturday, May 16, 2015 9:34 AM

It held. Yes Good ol' Testors liquid cement, how could I ever have doubted you? Ended up with some gaps between the front end and body, but too late to do anything about that now. I'm putting the.finishing touches on and should have pics up later.

- Steve

  • Member since
    October 2008
  • From: Georgia
Posted by Rigidrider on Saturday, May 16, 2015 7:41 PM

Evening all!   A bit more on the car... The door took some work but it finally came out fine and I was able to start on the paint.

Well 1 picture is out of sequence. but all in all I'm happy so far with the way the paint is coming out, I'll set it aside now for a week or so to really set up then start on the bare metal foil work. In the mean time theres a lot mort to work on. Thanks all... Have a good evening!

Doug


When Life Hands You A Bucket Of Lemons...

Make Lemonade!

Then Sell It Back At $2 Bucks A Glass...

  • Member since
    April 2015
Posted by Scarecrow Joe on Saturday, May 16, 2015 7:49 PM

Damn fine job!

  • Member since
    January 2015
Posted by taaron76 on Saturday, May 16, 2015 10:29 PM

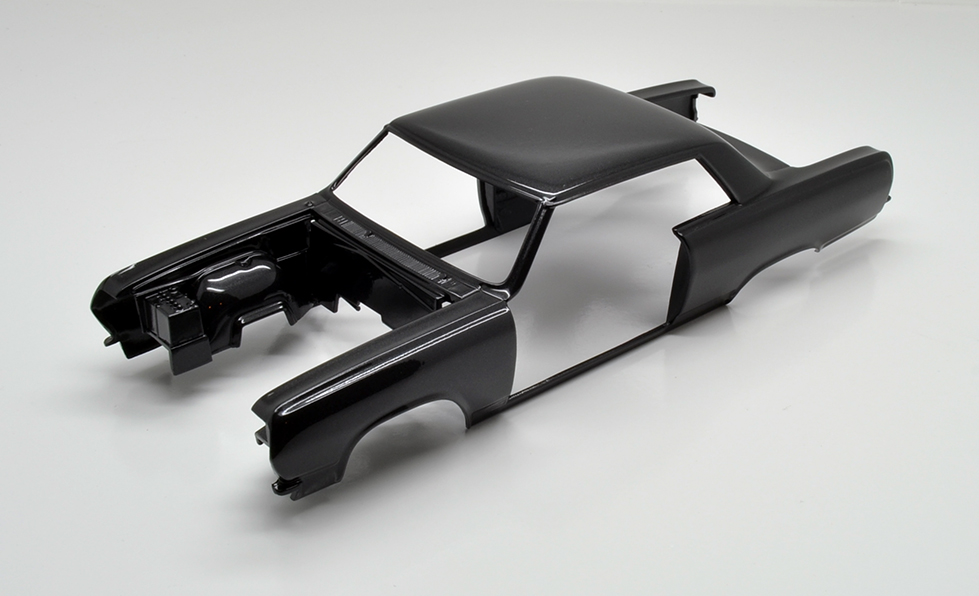
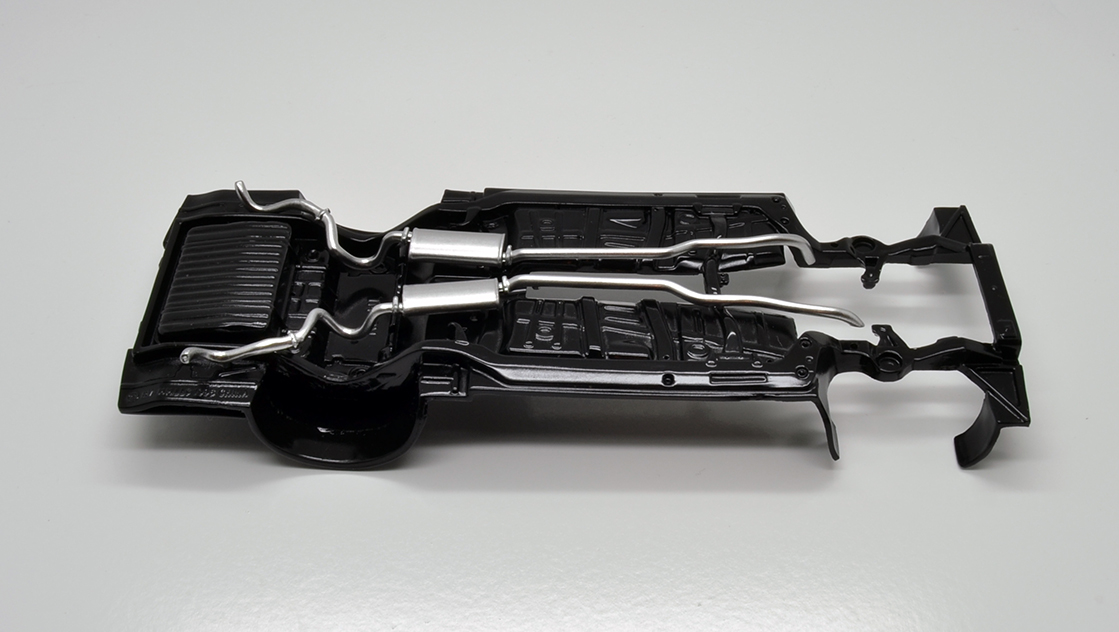
The casting lines and junk in the chrome parts of this kit were pretty bad, so I bought some Spaz Stix gloss back and mirror chrome to rechrome the bumpers and chrome parts.  I primed the parts, then Spaz Stix gloss black, the Spaz Stix mirror chrome.  I didn't have good results at all... the gloss back would gloss up nice, then as it started to dry, it looked like an orange.  I striped the parts and used Tamiya gloss black and then 3 very fine coats of Spax Stix mirror chrome and after the first coat I thought, "YES!!!  This beautiful!"  The first dust coat looked so good, but after 15 minutes I put the second dust coat on and it got duller and duller.  I threw another dust coat on, let it dry and buffed it out a little and it helped, but it is not anywhere near chrome.  If anything, the parts came out like a nice polished stainless steel.  I did the spoon test and get it to turn out really good, but no luck on the parts.

Here are the results of using the Spaz Stix process, followed by a coat of clear.
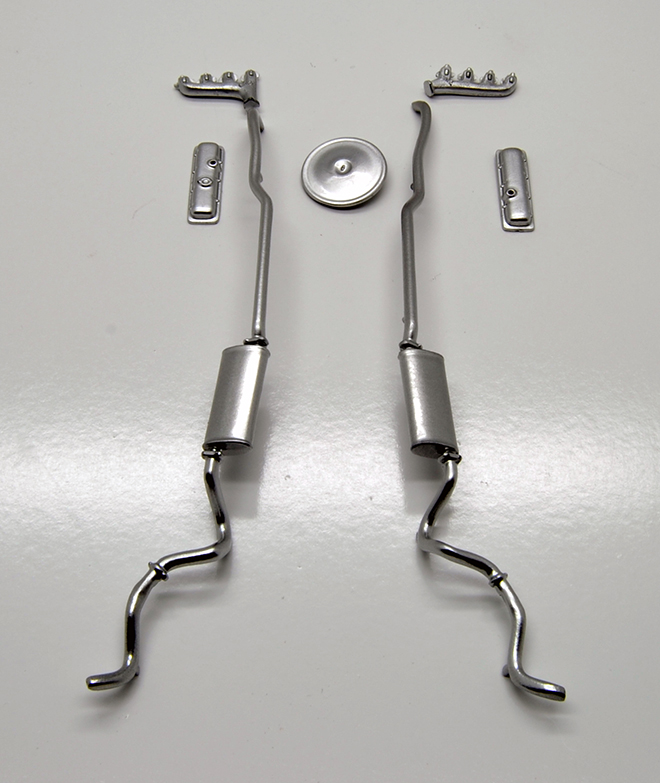
I think the exhaust and exhaust manifolds turned out best and they really do have a nice stainless steel look, but couldn't get the chrome shine I was looking for like what the spoon turned out like.
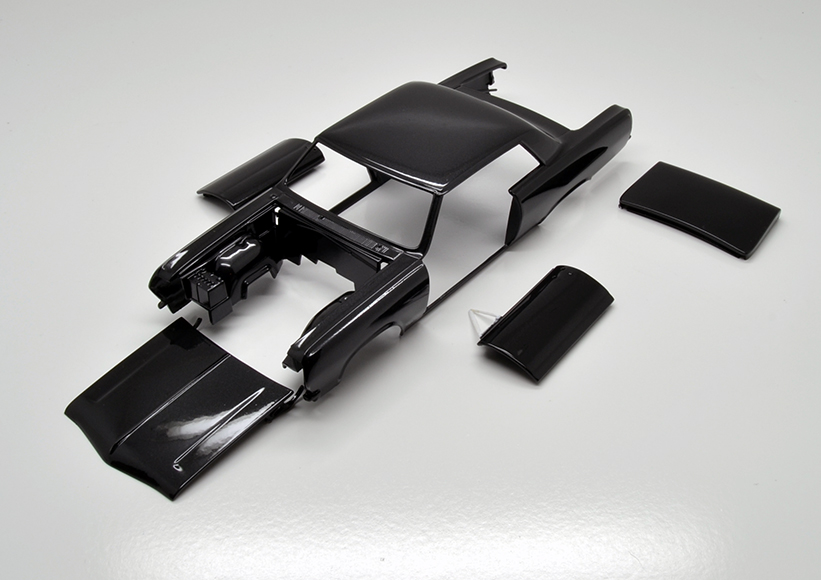
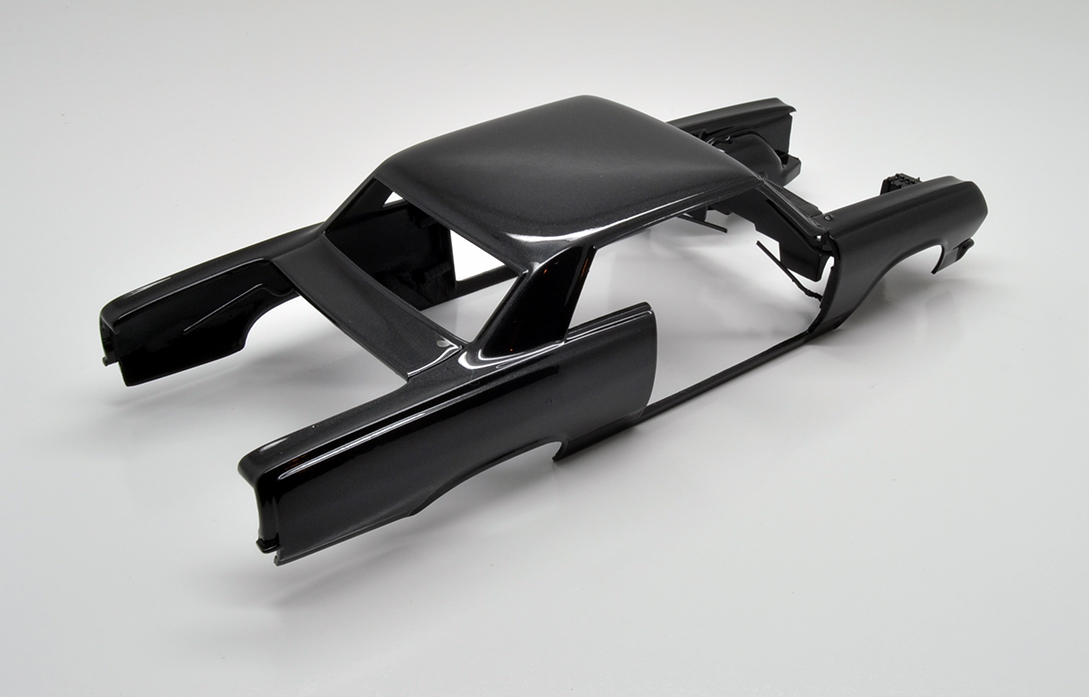
After feeling a little down about how the Spaz Stix was supposed to turn out, I needed a success story for the day, so I decided to lay a few base coats down.  I absolutely love this metallic black and under the lights it look so nice.  This is after two base coats... I will probably clear coat it tomorrow or Monday.
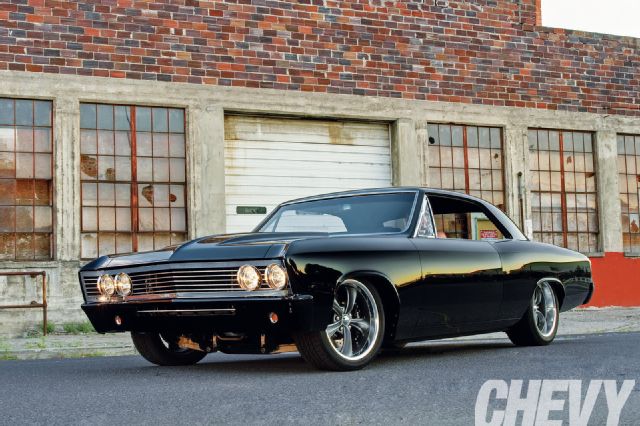
Since I stripped the chrome off of the bumpers, anticipating the Spaz Stix working out, I got some more ideas of going in a little bit different direction that I originally planned.  I was scouring the internet and stumbled upon his beauty and figured out what I want the exterior to look like.  It's bold, but different and I love it!

This is a '67, but I think it will look great on the '65 as well.  I will probably keep the grill and rear piece above the bumper chrome, but the bumpers will be the same color as the car, metallic black.
I'm just waiting for a bunch of parts I ordered to get started on the engine and hopefully next week I will have some more progress.

Tim

  • Member since
    March 2012
  • From: Corpus Christi, Tx
Posted by mustang1989 on Sunday, May 17, 2015 6:38 AM

Man I really hate to hear about the results of the Spaz Stix there Tim. Hopefully it's just a temporary glitch that can be worked out. That paint looks like it made up the difference though.Wink


 Forum | Modelers Social Club Forum (proboards.com) 

  • Member since
    January 2015
Posted by MOPAR - D on Sunday, May 17, 2015 4:24 PM

Doug - nice paint work. Those colors look good on your Ford.

Tim - the exhaust system looks good. I've had problems using Alcad chrome to I think that I put it on to heavy I believe that less is better.

It dose not look like much progress I've been de-chromeing and removing mold lines.

i98.photobucket.com/.../b77ef925225b4496dcfa0b6e6f20c15e.jpg

  • Member since
    March 2012
  • From: Corpus Christi, Tx
Posted by mustang1989 on Sunday, May 17, 2015 8:12 PM

Dan: You're gonna be ok buddy! I just know there is a lot of work going into this.


Folks the motor is NOT done yet. I had to install it to figure out all the electrical ckt , fuel and brake line routing I've gotta do with this build. I've got it in there though! :D


FSCN0206_zpsvw1d6wjj.jpg


 Forum | Modelers Social Club Forum (proboards.com) 

  • Member since
    January 2014
Posted by Seabe on Sunday, May 17, 2015 10:34 PM

Tim, that black looks bad-azz! And super shiny...

Some quick progress snaps from me. None of this looks the way it looked when I took the pics yesterday, which is obviously good! 

Firstly, the P34 -  below the unique front wheel  area.

And all came together... chassis and engine is one.

More progress on Lotus 97T decals. You'll notice near-side rear aero flap missing - broke off during the decal process. Has since been re-added and fully decalled. In fact, 99% of decalling is completed (IRL, not in this shot!) Those nose decals are all separate, a complete nightmare... How they went from covering 1/3 of the body in one decal to having those split up on one decal sheet, I won't understand... it's not as if anything bar the number is different for drivers! 

Still having fun one these, hopefully can make some build progress on esp the Lotus during the coming week.

  • Member since
    January 2012
  • From: Hatfield
Posted by Misty on Monday, May 18, 2015 8:32 AM

Ridgerider - so glad yo sorted the dodgy parts, the finish is now excellent!

taaron - looks shiney enough to me, i can see another cracker is coming.

Seabe - the decals do look the mutts nuts :-)

Well I took some pics of the thing but not that happy with them, mainly due to the glass table and model having too much dust on them.
Ill take some on a different surface another day before i do a RFI post, and give the model a blast with the compressor first too!!
Either of these will do for a cover pic although, even after all the details put into it, i prefer it with the body on Wink

  • Member since
    October 2008
  • From: Georgia
Posted by Rigidrider on Monday, May 18, 2015 6:22 PM

Misty... Thank you... Righteous Milk Producing Bovine! You sir have created a work of art! That sir is BEAUTIFUL!

Doug

When Life Hands You A Bucket Of Lemons...

Make Lemonade!

Then Sell It Back At $2 Bucks A Glass...

  • Member since
    October 2008
  • From: Georgia
Posted by Rigidrider on Monday, May 18, 2015 6:35 PM

Getting ahead of myself here, but I'm working on the frame now, and I had to throw the body on just to get an idea of how she will sit. I like it! I'll get into the frame pics in another post, but I'm going to "Reverse Shackle" the rear springs, and turn the spindles over to raise the suspension just a tad. Again... I like it.

Again, I know I'm getting ahead of myself, ...But I couldn't help it.

Take care...

Doug 

When Life Hands You A Bucket Of Lemons...

Make Lemonade!

Then Sell It Back At $2 Bucks A Glass...

  • Member since
    January 2012
  • From: Hatfield
Posted by Misty on Tuesday, May 19, 2015 6:02 AM

certainly makes a change from the low riders, i like it too!

  • Member since
    October 2008
  • From: Georgia
Posted by Rigidrider on Tuesday, May 19, 2015 8:34 AM

Misty, thanks... truthfully I'm trying to build my dream car. When I was a little boy, my dad bought one of these, well it was actually a "55" but other then the tail lights and the front signal lights they were identical.  Also  56 was the first year that Ford switched over to the 12 volt ign system. Ours was over all gloss black with the full Crown Victoria trim package. 2 door with white and black interior. I thought that was the most beautiful car on the road. My dad , still a young man at the time got with my uncle, and they put a 3, 2brl carb set up on the ole 312 engine and chrome reverse wheels and baby moon hub caps. If I had the money and the car, this will be pretty close to how I would build it.thanks

Doug

When Life Hands You A Bucket Of Lemons...

Make Lemonade!

Then Sell It Back At $2 Bucks A Glass...

  • Member since
    March 2012
  • From: Corpus Christi, Tx
Posted by mustang1989 on Tuesday, May 19, 2015 8:53 AM

Misty: That thing looks beautiful. Really like the work you did on this open wheel beauty! One thing I've noticed about these cars is a modeler really has to be on his toes to build one of these bad boys because there aint nothing hidden on these builds. Good goin' man. Yes

Doug: Goin' for the gasser look are ya? Lookin great so far. I can't help myself either. I've already mocked up the stance several times on mine!! lol


 Forum | Modelers Social Club Forum (proboards.com) 

  • Member since
    January 2012
  • From: Hatfield
Posted by Misty on Tuesday, May 19, 2015 12:39 PM

Doug - being a sad old Brit none of that description means anything to me Dunce but it sounds frickin' awesome Heart

mustang - Cheers! Drinks Left HugRight Hug

  • Member since
    October 2008
  • From: Georgia
Posted by Rigidrider on Tuesday, May 19, 2015 5:13 PM

LOLOL... I'm sorry Misty... The engine was a 312cubic inch displacement engine and the "6 pack" was an arrangement of 3 , 2 bbl carburetors in a row, one behind the other on a single intake manifold. Chrome revers wheels are just chrome plated (slightly deeper ) wheels and baby moons were small round chromed hub caps. And yes , to a 5 year old little boy... It WAS Frickin Awesome! LOLOL...Cheers back at ya my friend!

Doug

When Life Hands You A Bucket Of Lemons...

Make Lemonade!

Then Sell It Back At $2 Bucks A Glass...

JOIN OUR COMMUNITY!

Our community is FREE to join. To participate you must either login or register for an account.

SEARCH FORUMS
FREE NEWSLETTER
By signing up you may also receive reader surveys and occasional special offers. We do not sell, rent or trade our email lists. View our Privacy Policy.