SEARCH FINESCALE.COM

Enter keywords or a search phrase below:

The 2015 /16 Red Hot and Rollin Automotive Group Build--Ended

121085 views
2225 replies
1 rating 2 rating 3 rating 4 rating 5 rating
  • Member since
    April 2005
  • From: Australia
Posted by taxtp on Thursday, June 25, 2015 12:37 AM

I really like your Lotus Seabe. It's come up well and looks like a good little model. I'll stay tuned because  I have to make my 1/43 multi media debut sometime soon. I'll look forward to your RB6, Vettel or Webber ? I built the Williams FW-11 a few years back, have been recently tinkering with the thought of doing the FW-11B. I did mine as Piquet's car, if  I had my time again it would be Mansell's.

Your build is looking awesome again Tim, super sharp

.My current thought on my next build is to convert a 1/20 Tamiya1991 Lotus 102B to a1990 Lotus 102. I need to research the external differences, as it will be effectively a kerbside, and it's a substantial change of livery that  Ialready have decals for. I  told you  I change my mind a lot.

I've finished the  wheels on my Monte Carlo, and started to hollow out the solid exhausts.

Before...

In progress....

Cheers

Tony

I'm just taking it one GB at a time.

  • Member since
    January 2015
Posted by taaron76 on Wednesday, June 24, 2015 9:10 PM

Finished up all of the polishing and BMF.  The pics below are just a mockup, nothing is glued but the windows.  I still have to make a few adjustments here and there.

Tim

  • Member since
    September 2013
Posted by Raven728 on Wednesday, June 24, 2015 7:59 PM

Sorry Seabe, for some reason I was convinced that I had already posted a pic of your Lotus. I have no idea where my mind is this week. Confused Anyway, I posted the first pic, if you want a different one (or if I mucked up the description) let me know and I'll get it changed.

- Steve

  • Member since
    January 2014
Posted by Seabe on Wednesday, June 24, 2015 12:30 PM

Thanks Mustang... I appreciate the kind words! That one was a bit of a challenge - esp in 43rd where everything is exaggerated!

BUT... To be brutally honest, this Tameo superkit scares the living daylights out of me. The instructions looks soooo simple. But half a hair width out on something like the engine assembly - and NOTHING is straight after that! This will be at best an experiment - I really hope it turns out okay. If it doesn't, I'll anyways have learnt a lot - and isn't that what it's about?! So you may all laugh at the result, but I'm prepared to give it a bash. That's the spirit in which I'll be building that one.

Before anything is added to the roster - I have *cough* changed my mind...again - It's the old "pick-up-an-entirely-different-box" trick! The next 20th build will be an FW11 by Tamiya. I will do a Mansell version, since I have the Tameo WCT version of this as well, depicting the World Championship winning car of Piquet (due to Mansell blowing his wheel spectacularly!) Like with the planned RB6 - it'll be straight OTB relaxing build. Just to keep me sane next to the Tameo!

  • Member since
    March 2012
  • From: Corpus Christi, Tx
Posted by mustang1989 on Wednesday, June 24, 2015 3:55 AM

 Seabe: I've had "those kits" on the bench before there Seabe and looks like you did a good job of pulling the bunny out of the hat here. You and other guys that are building these open wheel kits have more guts than I've got as these kits present their own unique challenges. I'd like to thank you for being a part of this GB and am looking forward to your next build.

 Let Steve , aka Raven728 know which pic you'd like to use for the into post and I'll get your next entry jotted down in the introductory post. Don't worry about the end dates on the GB. When that time comes I'll simply close it off to new entries at the end date and those that are building at that time will have the opportunity to finish outside of the build dates. In short, Gotcha covered dude! Cool

Joe : We'll leave the light on for ya pal! Wink


 Forum | Modelers Social Club Forum (proboards.com) 

  • Member since
    April 2015
Posted by Scarecrow Joe on Tuesday, June 23, 2015 2:32 PM

Awesome guys!  I will be taking a non voluntary break from modeling due to work related stuff, but will resume work  as soon as this weekend goes by, possibly by next week.  The final details are usually very time consuming and I dont want to rush them!

  • Member since
    January 2014
Posted by Seabe on Tuesday, June 23, 2015 12:37 PM

Okay, two days of wasting modeling time to try and figure out how to get an image URL out of Google Photos yielded.... NOTHING! Bang Head So I had to opt for create another account - here's to hoping they won't change their ways of working in a couple of months' time as well...

Same comments stand regarding the model - stands high, either the wheels taken from another kit or I screwed up, plus the issues with the pin stripes very visible from side view:

Whoohoo - looks like photo posting is working! 

And the "creative" rear view.

As said previously - it was a good learning curve due to the "raw" nature of the kit! It may not have come out perfect, but I really enjoyed the build! Oh, got past the seat belt absence by using a thin medical tape we have around here. Slightly visible in the side view pic.

Next up will be an even bigger challenge - my first attempt at a 43rd scale "superkit" - the F310B Schumi rode to victory in Japan '97. It may very well not be finished in time for this GB! To keep myself sane, an OTB Tamiya RB6 (20th scale) will be started next to it.

  • Member since
    March 2012
  • From: Corpus Christi, Tx
Posted by mustang1989 on Tuesday, June 23, 2015 6:15 AM

I have the R/H front brake line to go and I think I'm going to go crazy here! icon_sAng_hissyfit_zpswrtdfsd9.gifI have had to start over 3 times now to form this last line to "route" as the others do from the distribution block.icon_sAng_rant_zps60eb0ce9.gif

The L/H front brake line I only had to form one time but took me every bit of 3 days worth of weekday bench time (about 2-3 hours) to get it all finished. It's looking like this one may take double that amount of time. I'm getting there but this is a really slow part of the build.emotion-8.gif

 I know I'll get past this eventually so I'll stop whining and get back to work. :D


 Forum | Modelers Social Club Forum (proboards.com) 

  • Member since
    March 2012
  • From: Corpus Christi, Tx
Posted by mustang1989 on Monday, June 22, 2015 9:49 PM

Awesome stuff Tim!!! Can't wait to see that shine come through on that car body!!


 Forum | Modelers Social Club Forum (proboards.com) 

  • Member since
    January 2015
Posted by taaron76 on Monday, June 22, 2015 9:42 PM

As usual, you guys are coming through with some fantastic work and I'm elated to be a part of this group build.

I sprayed the base coat over a month ago and finally got around to shooting some clear tonight.  5 coats of Tamiya acrylic clear... the usual.  Some dust here and there, but nothing that can't be buffed out.  Now to let it dry for a good 10-14 days, but the first 24 hours it stays in the dehydrator.  Metallic black is the base coat...

Here is the rolling chassis, complete with all the brake lines ran and everything else zipped up.

  • Member since
    March 2012
  • From: Corpus Christi, Tx
Posted by mustang1989 on Monday, June 22, 2015 1:03 PM

Lol! I hope you get it all sorted out there Seabe.

I'm still plugging away on the brake lines fellas. No real progress pictures yet but hope to have the front brake lines finished by this weekend. There aint no way I'm going to have this thing done by August 1st in time for the HAMS show in Houston. Going too many places this summer and too many things going on at the home front in the way of work to be done to devote as much time as it'll take to have it done by then. :mellow: . At this point the new projected completion date is October 1st in time for the Austin show.

  Picked these up this weekend on the way up to San Antonio at Dibbles Hobby shop.

 The mufflers:


2015-06-21%202015-06-21%20001%20001_zpsa


or maybe these...


2015-06-21%202015-06-21%20001%20002_zpsk


and then got this in the mail for the front of the truck. It'll take some fancy foot work here but I think I can pull it all off.


2015-06-21%202015-06-21%20001%20003_zpsw


 Forum | Modelers Social Club Forum (proboards.com) 

  • Member since
    January 2014
Posted by Seabe on Monday, June 22, 2015 12:01 PM

This is where I loose my sense of humour.

  • Member since
    January 2014
Posted by Seabe on Monday, June 22, 2015 12:00 PM

Wait-wait, maybe this will work...

gLfYkdarQh5z1roWA

YsjCMp1LXztHibhC6

  • Member since
    January 2014
Posted by Seabe on Monday, June 22, 2015 11:57 AM

Okay, at last the promised pics of the Lotus 97T. It was one heck of a learning curve, but really enjoyed it. Stands a bit high, but it may be the rain tyres I "borrowed" off a different kit - or maybe I simply screwed up somewhere.

View from the rear:

ff46tKv7Ff gjX8533B3ahUYB7Y25JwMqAGkTKRKU=w544 h350 no

And the side view - you'll see the height issue and the stripe decal issues clearly!

d1o0F0tflRhy6cbtUU0sBhbYY PGo1HOul9SwIbuRbc=w904 h449 no

I see Google has again changed their site... I hope this is visible now, though I'm not overly optimistic.

Lastly... what's a mind if you can't change it? I wanted to do the garage kit F2004, but realised I had another garage Ferrari, so I'm going for the F310B - more willing to experiment on this than the F2004! Also, in 20th I'm picking up the Tamiya RB6 - to at least keep one build simple! Yes, it'll be a straight OTB build.

  • Member since
    January 2012
  • From: Hatfield
Posted by Misty on Monday, June 22, 2015 8:56 AM

like the tip for the wheels!!

  • Member since
    March 2012
  • From: Corpus Christi, Tx
Posted by mustang1989 on Monday, June 22, 2015 3:37 AM

Man you did a freekin' great job on those wheels Tony!!! I also like the "scrubbed" look on the tires! Progress is coming along nicely on this one. Yes

Steve: Forgot to mention this earlier. Hope you feel better man. Being sick sucks!  


 Forum | Modelers Social Club Forum (proboards.com) 

  • Member since
    April 2005
  • From: Australia
Posted by taxtp on Sunday, June 21, 2015 11:52 PM

Tim, Joe and Steve. Great updates, your work is realistic and exact. I love it.

Here is a little update on my NASCAR...

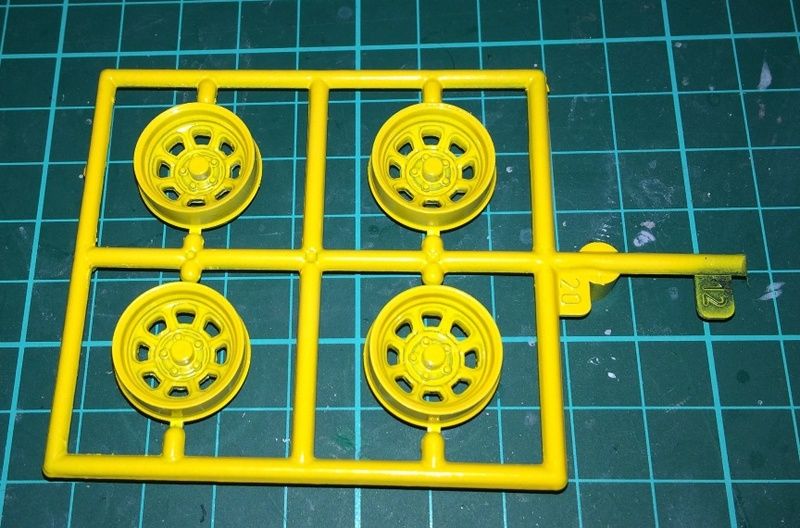
The rims on the real car had a yellow outline, so to replicate that, I sprayed them with white primer then Tamiya TS Chrome Yellow.
I left this to dry for a couple of days then shot some Tamiya acrylic semi gloss black.
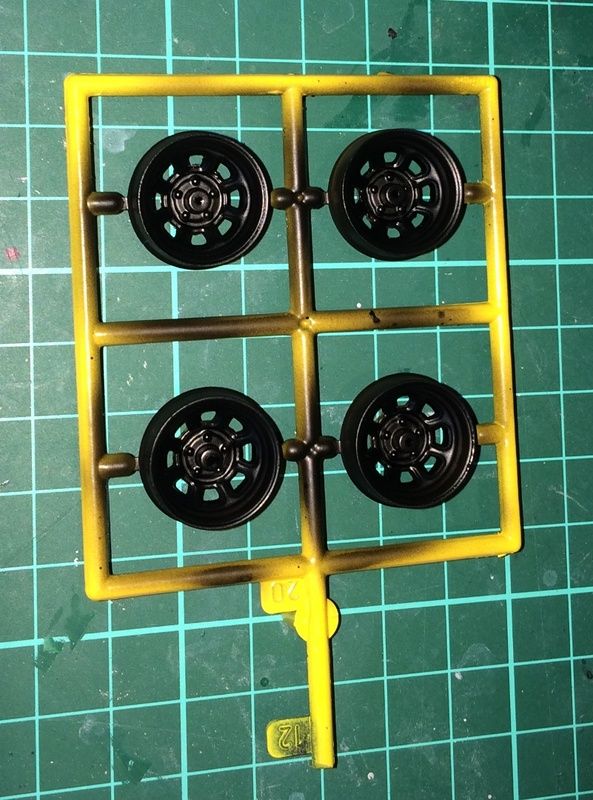
I allowed this to dry for a couple of hours only, then rubbed the black of the rim with a q-tip.
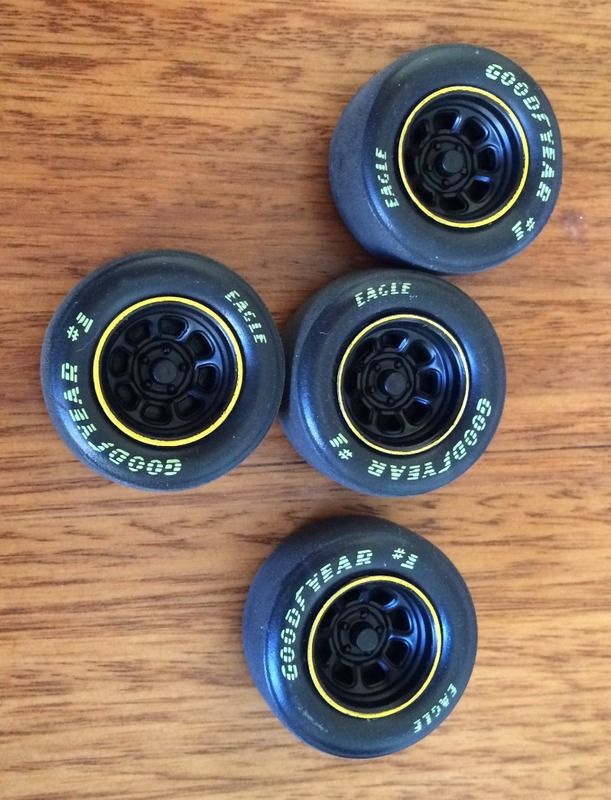
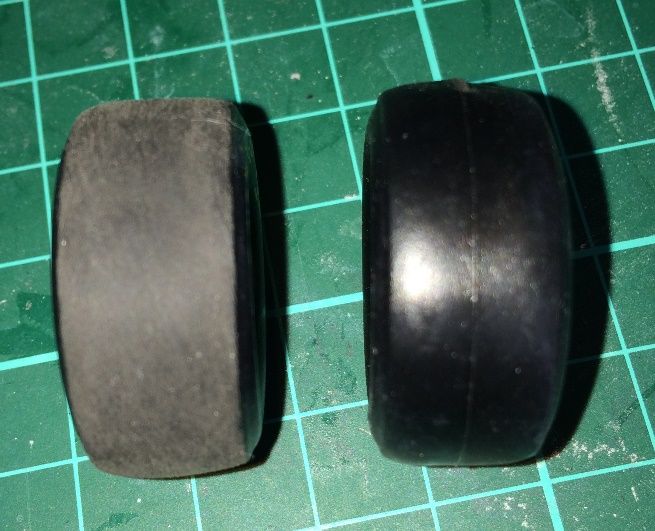
I've still got to paint the details, but whilst I was at it, I also 'scrubbed' the tires.
Here is the body with decals and a coat of gloss to seal it all.
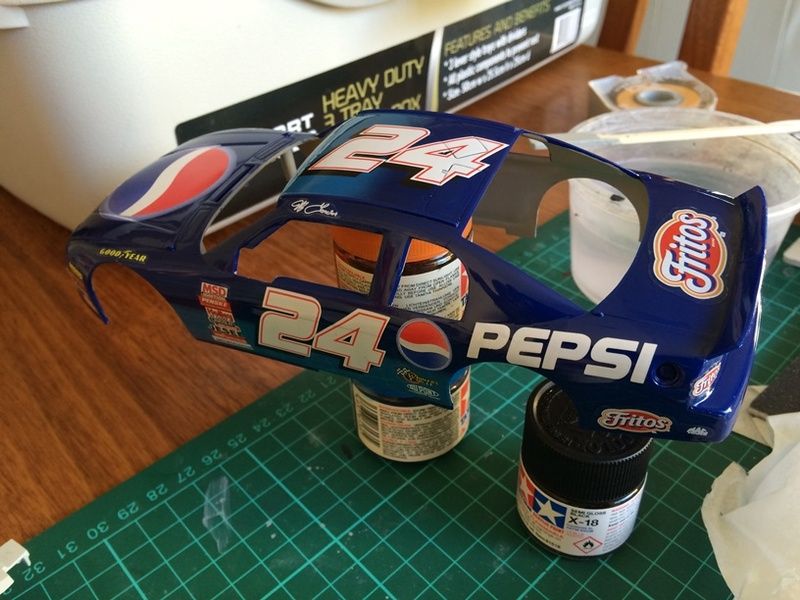
and lastly, some other progress....
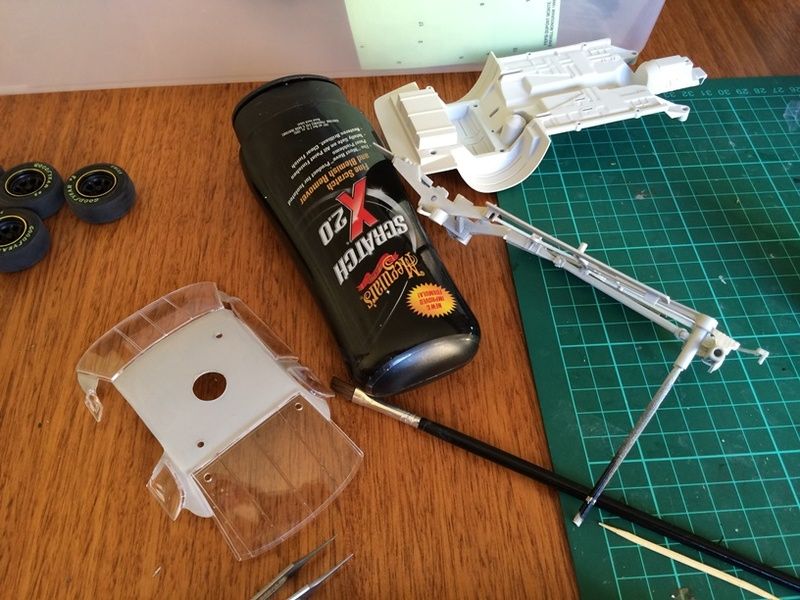
Cheers

Tony

I'm just taking it one GB at a time.

  • Member since
    March 2012
  • From: Corpus Christi, Tx
Posted by mustang1989 on Sunday, June 21, 2015 6:56 AM

Ok folks. Update time.

Tim: What a show on the engine and chassis build ups!!! Those spark plug wire looms look perfect! And man will ya just look at that chassis with all that detail!! Plus the amazing work on the wheel/ tire assys. You've really gotten your "groove" down on these builds I'll tell you that. Looking forward to more bud.

Joe: Glad to see you've got that body onto the flooring. That...........looks like alot of work and patience there to get that going!!!! Wow!

Steve: I'm a sucker for stock interiors as well. The whole car around the interior can be as wild as all get out and I'll go for a stock look almost every time!! Well done bud!


 Forum | Modelers Social Club Forum (proboards.com) 

  • Member since
    March 2012
  • From: Corpus Christi, Tx
Posted by mustang1989 on Saturday, June 20, 2015 8:58 PM

I've been out of town for a couple of days fellas. Will get on here in the morning and catch up.


 Forum | Modelers Social Club Forum (proboards.com) 

  • Member since
    September 2013
Posted by Raven728 on Saturday, June 20, 2015 8:55 PM

I got the interior done tonight - not super detailed, but flocked and with gauge decals. Partway through I stopped and considered ordering a racing seat and competition steering wheel, but I have a soft spot for these old cars with their wood grain & chrome wheels, so I kept it box-stock instead. Interior paint is semigloss black, the camera makes it look shinier than it is in person.

- Steve

  • Member since
    September 2013
Posted by Raven728 on Saturday, June 20, 2015 2:01 PM

Cool, thanks. I've seen that at my LHS but couldn't think of anything to use it for; I'll have to pick up a bottle.

- Steve

  • Member since
    January 2015
Posted by taaron76 on Saturday, June 20, 2015 9:32 AM

Steve - Tamiya acrylic titanium gold is what I found works the best for me, color wise.

Tim

  • Member since
    September 2013
Posted by Raven728 on Saturday, June 20, 2015 8:17 AM

Outstanding work, guys!

I've been sick as a dog all week, so I haven't gotten to the bench at all, but I'm hoping to tonight.

Just wondering what paint you guys ( I.e. taaron)  use for the carb. In the past I've just mixed gold and black till it looked right.

- Steve

  • Member since
    April 2015
Posted by Scarecrow Joe on Friday, June 19, 2015 8:38 PM

Taroon, thats awesome!

Finally had some time to work on this little demon.

Body and interior were at last joined after some intense negotiations!

 20150619_153303 by nenekinkin, on Flickr

 20150619_201326 by nenekinkin, on Flickr

 20150619_201742 by nenekinkin, on Flickr

 20150619_201408 by nenekinkin, on Flickr

 20150619_201423 by nenekinkin, on Flickr

Next...the chassis....

  • Member since
    April 2015
Posted by Scarecrow Joe on Friday, June 19, 2015 8:33 PM

Thanks!!

  • Member since
    January 2015
Posted by taaron76 on Friday, June 19, 2015 8:15 PM

I finished the e-brake cabling and mounted the exhaust.  I still have to run the front brake lines, so hopefully this weekend I'll have that finished.

Tim

Chassis4-vi.jpg

Chassis5-vi.jpg

Chassis6-vi.jpg

Chassis7-vi.jpg

  • Member since
    January 2015
Posted by taaron76 on Friday, June 19, 2015 8:14 PM

Joe - Here ya go.  www.scalereprosplus.com/index.php

  • Member since
    April 2015
Posted by Scarecrow Joe on Friday, June 19, 2015 1:51 PM

DAAMN!!Surprise Is the dealer available through Ebay??

  • Member since
    January 2015
Posted by taaron76 on Friday, June 19, 2015 1:42 PM

Here is the rear-end, minus the e-brake cables.

Rear5-vi.jpg

Here is the chassis with suspension, minus the e-brake cables.  I'll get to those late.

Chassis1-vi.jpg

Chassis2-vi.jpg

Chassis3-vi.jpg

  • Member since
    January 2015
Posted by taaron76 on Friday, June 19, 2015 1:42 PM

Those pulleys are actually aluminum.  lol  I bought them from one of the aftermarket dealers, just can't remember off the top of my head.  Around $7.00 for the set of 3 with belts.

Tim

JOIN OUR COMMUNITY!

Our community is FREE to join. To participate you must either login or register for an account.

SEARCH FORUMS
FREE NEWSLETTER
By signing up you may also receive reader surveys and occasional special offers. We do not sell, rent or trade our email lists. View our Privacy Policy.