SEARCH FINESCALE.COM

Enter keywords or a search phrase below:

The 2015 /16 Red Hot and Rollin Automotive Group Build--Ended

121084 views
2225 replies
1 rating 2 rating 3 rating 4 rating 5 rating
  • Member since
    March 2012
  • From: Corpus Christi, Tx
Posted by mustang1989 on Tuesday, April 14, 2015 9:03 PM

This build is following the "True to Tim" form, which entails a fantastic suspension, excellent planning and preparation and a beautiful paint job. I'm very much looking forward to all the updates you can stand to give Tim!! Cool


 Forum | Modelers Social Club Forum (proboards.com) 

  • Member since
    January 2015
Posted by taaron76 on Tuesday, April 14, 2015 8:46 PM

Thanks Dan!

Just a small update from tonight... This blue is a combination of metallic teal, royal blue and metallic blue, so I'm not real sure what color blue you'd call it.  I wanted something like electric blue with a hint of metallic in it and it seemed to be just that.  I accidentally mixed Tamiya acrylic and Model Master acrylic and didn't realize it until after I put the first coat on.  I kept my fingers crossed that there wouldn't be any adverse or unwanted effects from mixing the two, but it seemed to flow fine and dry nicely.  It's in the dehydrator now and tomorrow I will give it a light wetland and then apply the clear coat.  I thought I had enough clear, but there wasn't enough for the standard 5-7 coats that I usually put on.  Oh well, this will give me the chance to colorsand a little, which I generally never do with the base coat.

I know once the clear coat goes on, it will pull some the metallic out in the paint and make that blue pop a little more.

Tim

BaseCoat3-vi.jpg

BaseCoat2-vi.jpg

  • Member since
    January 2015
Posted by MOPAR - D on Tuesday, April 14, 2015 6:05 AM

Tim - your chassis detail looks super and all the different color really make it pop! Looks like another winner on the way.

Misty - nice detail on the engine

  • Member since
    January 2015
Posted by taaron76 on Monday, April 13, 2015 8:00 PM

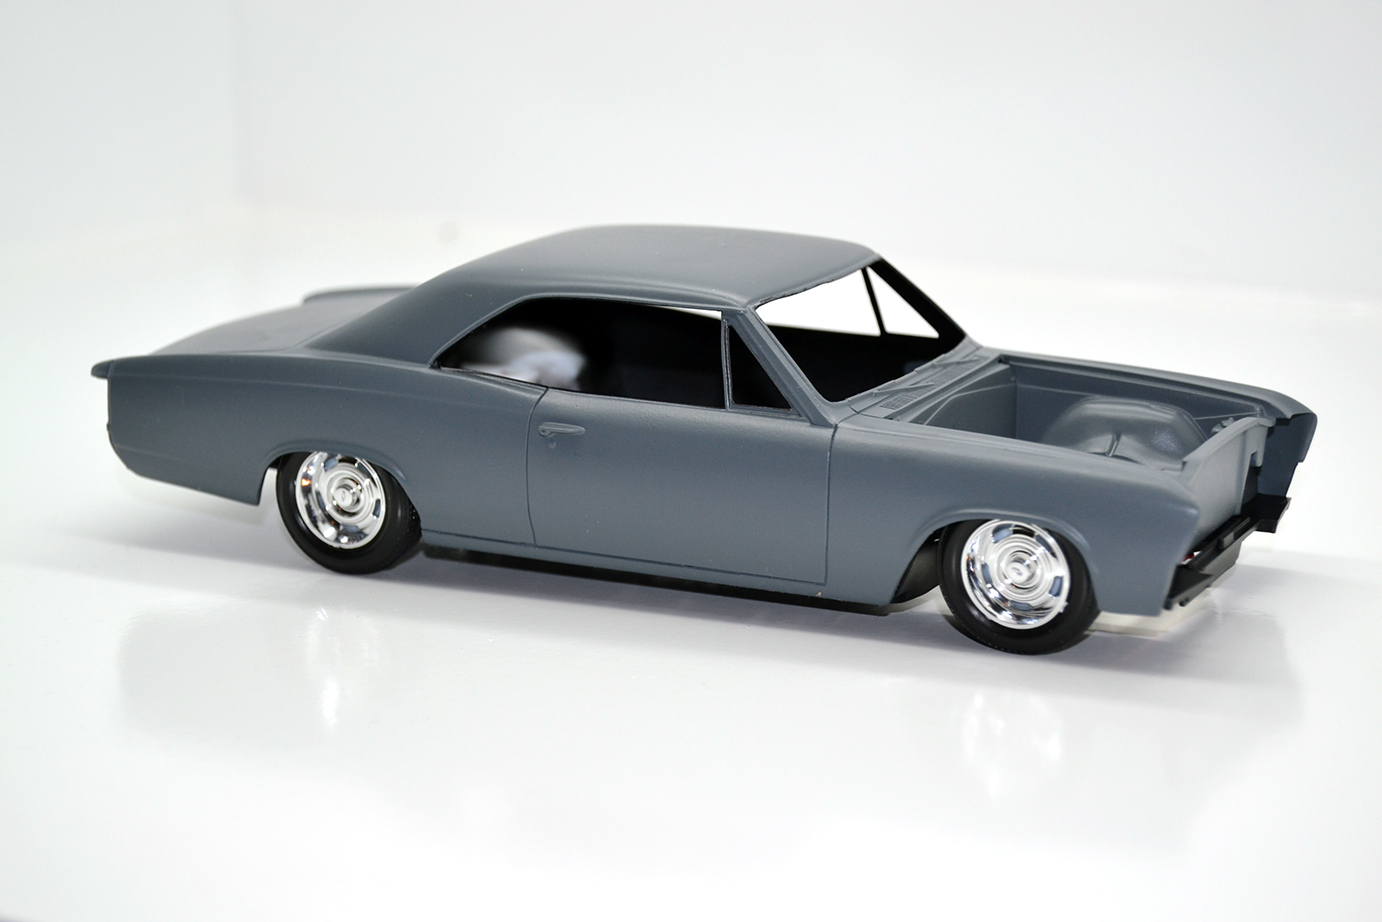
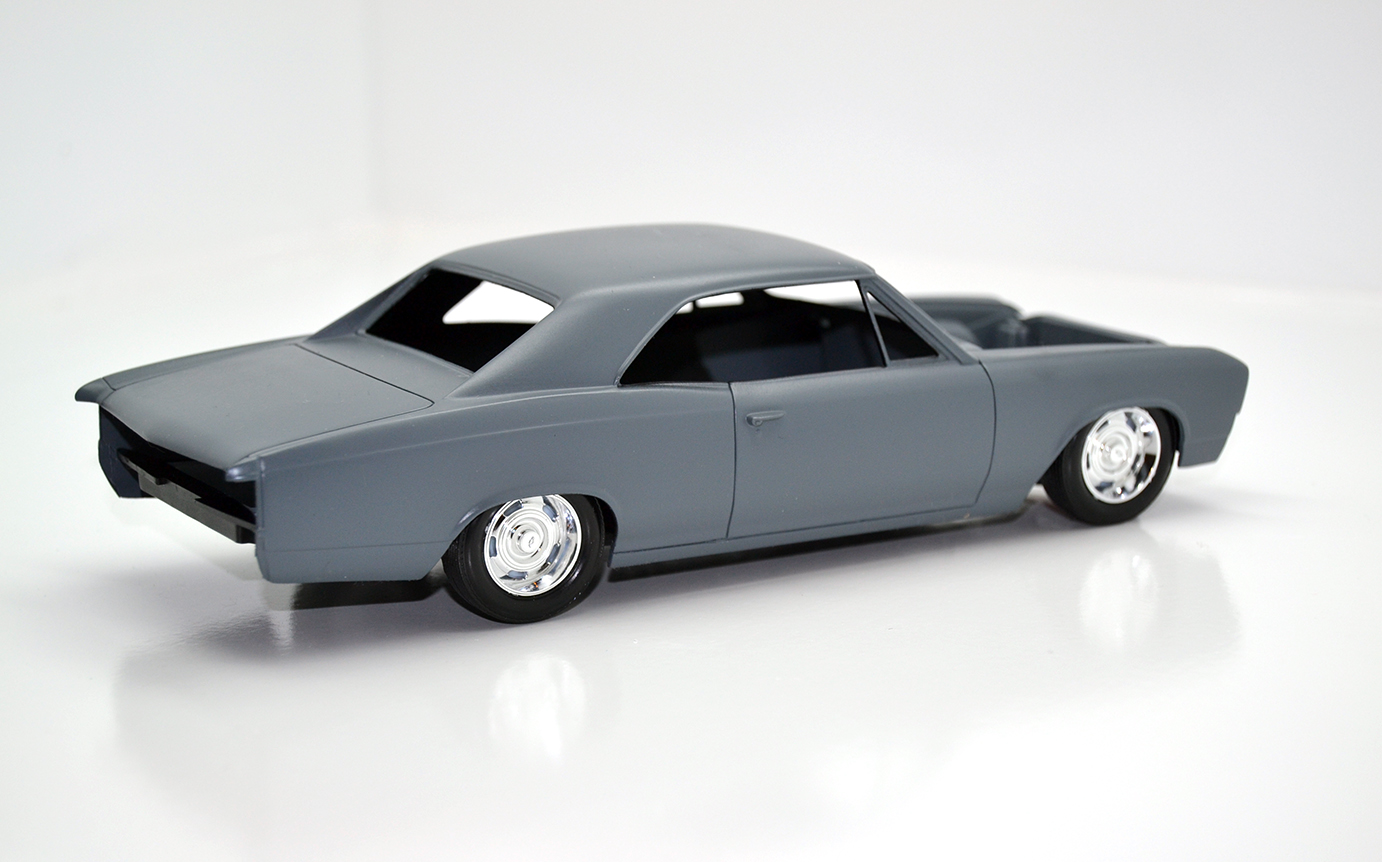
Now that the '53 Ford F100 is complete, I couldn't sit still for too long.  I've been eyeballing more Chevelle's lately and picked up a '66 and '67.  I wanted to keep this one as close to stock "looking" as possible.  I love the factory wheels and everything else that came out of the factory as stock.  The only thing I did was lower it a tad, but other than that, it will be stock.

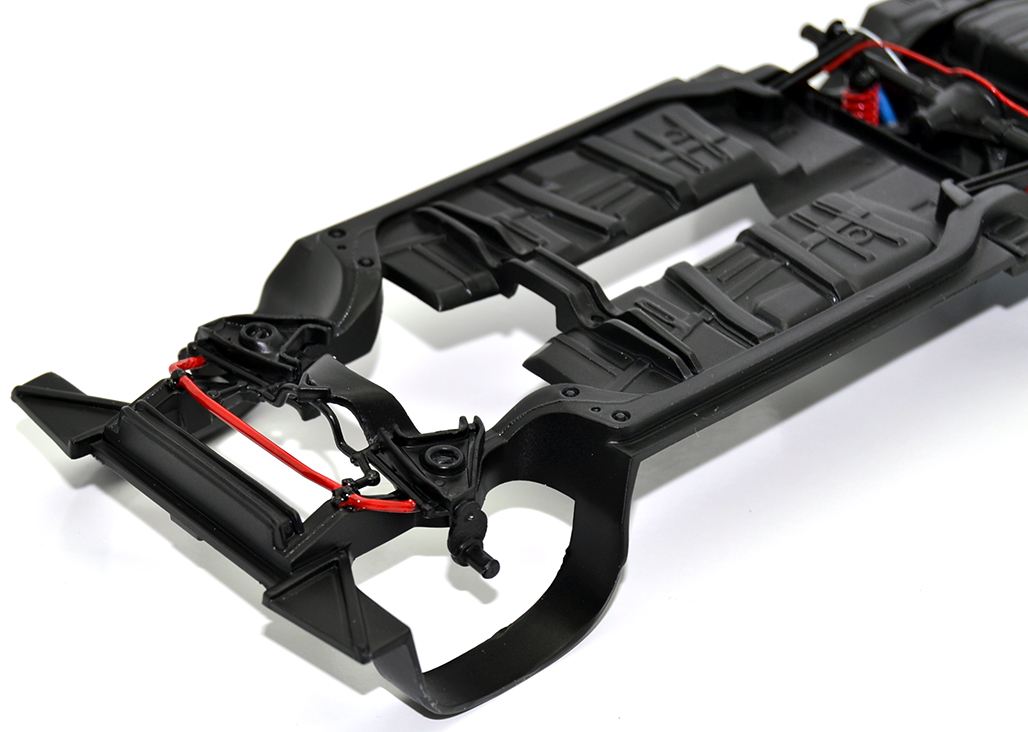
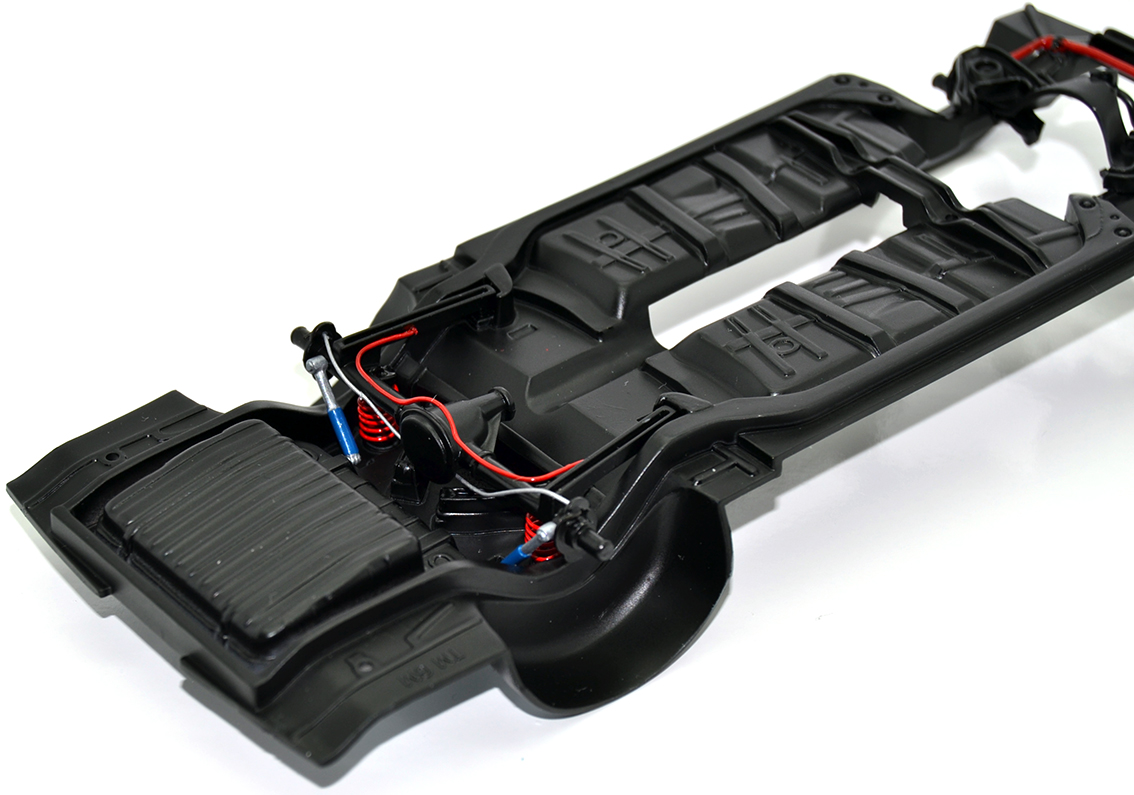
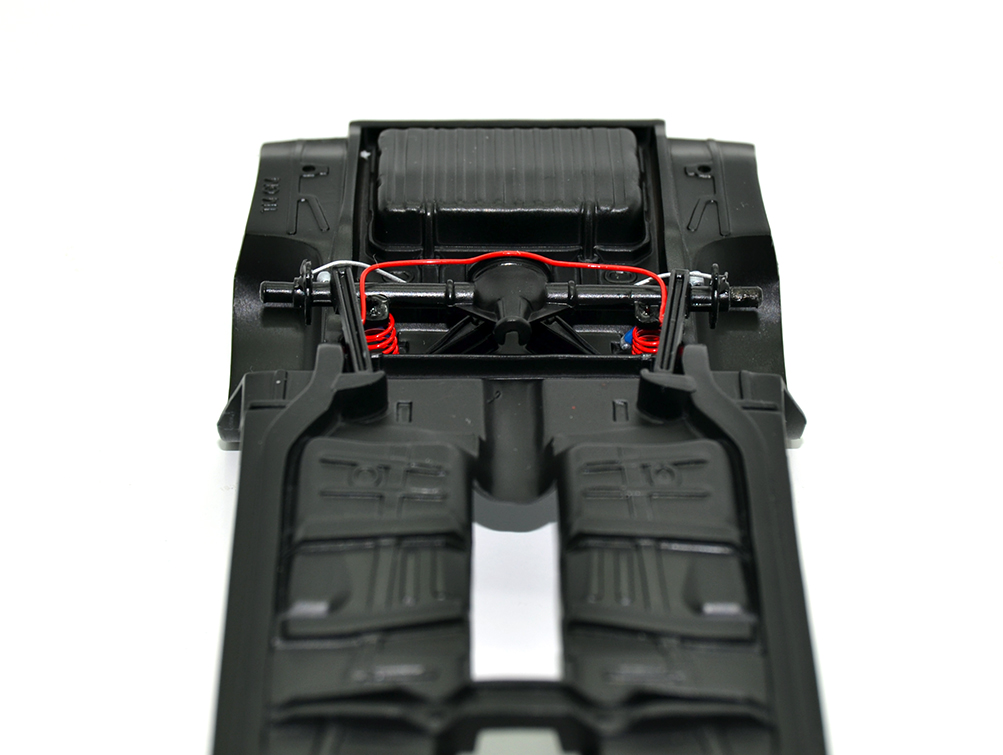
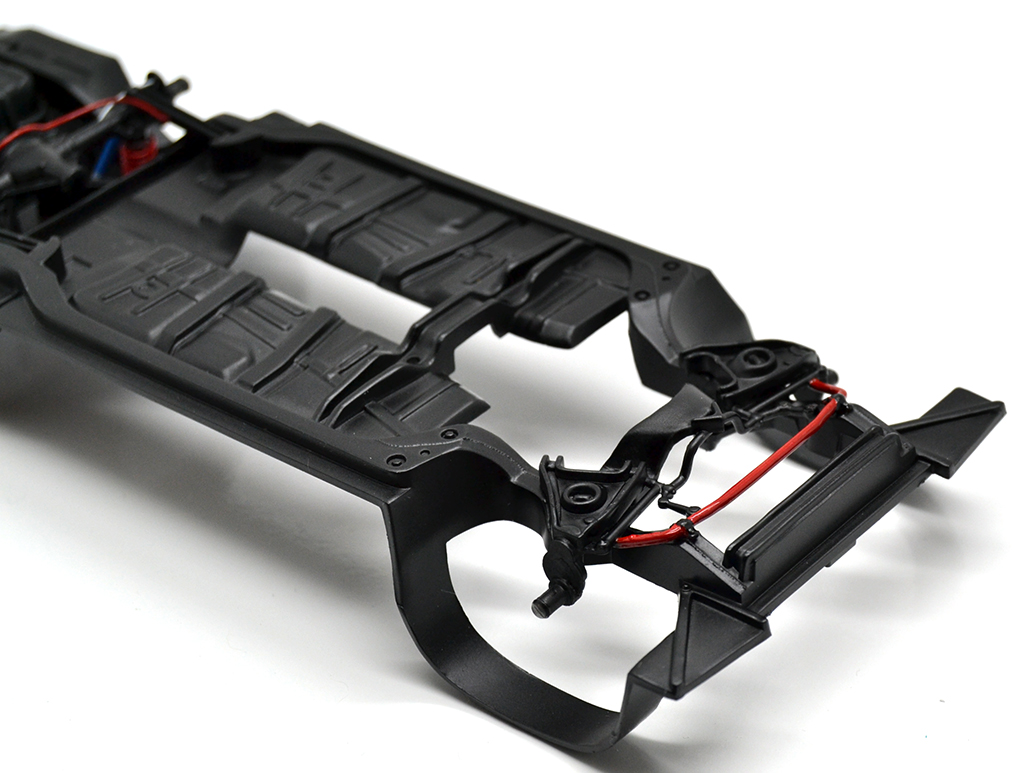
I also wanted to try to be a little more detailed with the chassis since I haven't gone all out on one yet.  This one will have brake lines, emergency brake lines and fuel lines incorporated into the build.  I've never ran any of those lines on any of my other builds, so this one will be a first and hopefully a part of all of my builds.  My weakest link has always been the chassis and interior, so I'm hoping as I move along with builds, I get more creative like some of the pro's on this site.

Exterior color will be a royal-ish metallic blue that I mixed myself using Tamiya acrylics.  Clear coat will be Tamiya as well... I only use acrylics.  Interior will be black.

I cut out the chunks of plastic they called springs and made my own springs and added them to the front suspension.  You can't really see them, but they are there.  I moved the front spindles up to get the ride height I was looking for.  This kit is very easy to modify if you want to lower it a little.
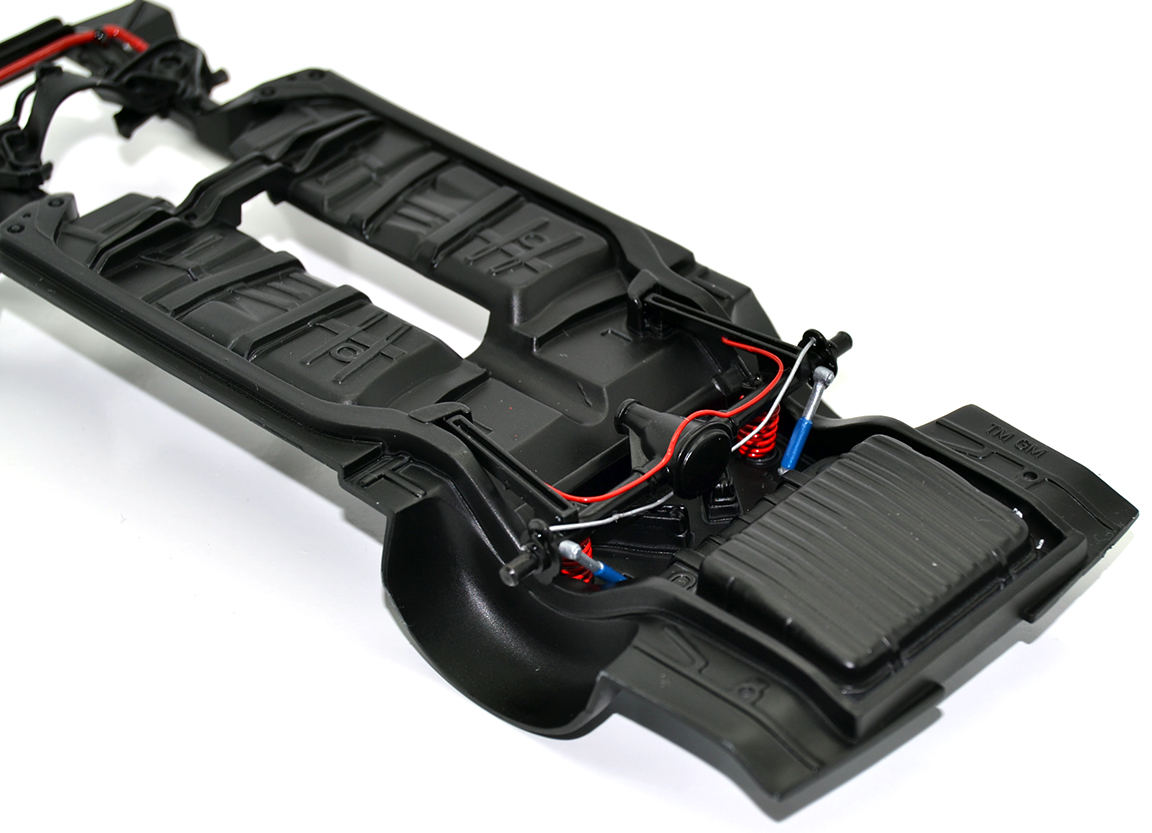
This kit didn't come with a rear sway/torsion bar, so I made one and slapped it in there.  Probably not perfect, but it will do.  I also tossed the plastic chunks of springs and made some to fit the rear with the ride height I was looking for.  If the ride height is too low, I can stretch the springs out a little while they are installed.  If the ride height is too high, I can compress them.  The shocks are painted to match the body color.  Again, this is my first time attempting to run brake lines, so be easy on me.  I will run the remaining line from the rear valve later.
Here is the stance I was looking for.
Thoughts, comments and constructive criticism(s) are always welcome.  This kit is moving a lot WAY faster than I anticipated.  Its a good thing I have a '66 Chevelle in the box.  Thanks!

Tim

  • Member since
    January 2015
Posted by taaron76 on Monday, April 13, 2015 8:00 PM

Dan - Looking great, as usual!

Misty - WOW!!! That is some serious detailing going on there!!!

Joe - I like it!  What color is it going to be?

Tim

  • Member since
    January 2012
  • From: Hatfield
Posted by Misty on Monday, April 13, 2015 11:29 AM

Finally started wiring up the engine. the only wires provided for in the upgrade set are the two silver ones on the side (and two more on the other side). F1 engines are very busy places, wires and connectors everywhere. so I though I should add a few more as it still looked a bit bare. the problem is deciding what to do and what to leave out. If I tried to put too much in it will just look a mess. There are a couple more to go on a bit later but it gives a general idea.

  • Member since
    March 2012
  • From: Corpus Christi, Tx
Posted by mustang1989 on Monday, April 13, 2015 5:20 AM

I spent a lot of the afternoon yesterday (while I was working around the house) daydreaming up ideas to get the wheels mounted up on the axles and finally got it. I have a piece of brass tubing that's going to fit perfect inside the front wheel center hole(after I cut the tubing to fit the width , they'll ride perfectly on the front axle spindles)  and ended up JB welding some washers to the rear brake backing plates to space the rear tires out just enough to clear the springs (took too much off of the rear diff) and not be seen.


 Here's a mock up so far. ( So far I'm happy with it)


FSCN0002_zpse7wtvmy4.jpg


FSCN0001_zpstvbs23vp.jpg


FSCN0004_zpsj0euumzu.jpg


 Forum | Modelers Social Club Forum (proboards.com) 

  • Member since
    March 2012
  • From: Corpus Christi, Tx
Posted by mustang1989 on Monday, April 13, 2015 3:59 AM

It's funny how one little change like that changes the whole look. That's one cool ride is all I've gotta say.............


 Forum | Modelers Social Club Forum (proboards.com) 

  • Member since
    January 2015
Posted by MOPAR - D on Sunday, April 12, 2015 8:01 PM

A little more progress today. Added BMF to the front grill and side steps and installed the head light trim and lenses lights are still just a mock up. Deck and ramps sprayed Aluminum plate and hand rails are still just set in place.

  • Member since
    January 2015
Posted by MOPAR - D on Saturday, April 11, 2015 8:34 PM

Sprayed on the clear coat today and started work on the handrails.

  • Member since
    January 2014
Posted by Seabe on Saturday, April 11, 2015 1:00 PM

Wow guys, superb progress!

Tim, that truck is looking awesome! Job well done!

Mopar - I like the flames, it turned out real well.

Misty - backdating a couple of updates - SUPER job! That macca is going to be a stunner!

Will take a pic tomorrow - I added the engine to the floor. Now busy with the 4 small front wheels section on the P34. At least got that front wing filed to fit.

Sorry about the slow progress, but as a MTB'er, I've started jogging as well due to working out of town, darkness (and family time!) is an issue for training - did my first half marathon over Easter weekend. And over the next long weekend (1 May) I have and half and then also entered for the Red Bull World Run on the 3rd as well. Two (running) races in three days...Think I won't be able to walk for two weeks after that.

  • Member since
    January 2015
Posted by MOPAR - D on Saturday, April 11, 2015 11:00 AM

Looking good Joe

  • Member since
    March 2012
  • From: Corpus Christi, Tx
Posted by mustang1989 on Saturday, April 11, 2015 8:49 AM

Well I chucked up my 12mm deep socket again, mounted the front tires on it one by one and spun 'em up a piece of sandpaper to give the tread that worn look like I did on my Challenger build.


Here's the Challenger tire mounted up on the drill:


Tires001_zpscb939ded.jpg


After that I shot a coat of dull coat on the sidewalls of the tires and mounted my wheels on 'em:


Here's the tires and wheels for this build after all the sandpaper and dull coating:( the funny thing is that you can't see any of the coverage problems on the wheels with the naked eye. If I were going off of these pics I'd start over on the wheels. Believe me, they look a helluva lot better in person)


RSCN1687_zpsgzpttxoe.jpg


Then I started back on the motor a little. I sanded the distributor cap down a little on the top and started drilling holes to put the ignition wires in to:


DSCN1688_zpsb2erkyno.jpg


Hopefully I get a good bench session again tomorrow.


 Forum | Modelers Social Club Forum (proboards.com) 

  • Member since
    March 2012
  • From: Corpus Christi, Tx
Posted by mustang1989 on Saturday, April 11, 2015 6:36 AM

Man Tim! You're really knocking these great builds out! I've really enjoyed this build of yours a lot here. This is my first truck that I'm building here as well and it is a little different.  From the NASCAR suspension to the paint finish to all the detail work,  that truck of yours looks absolutely fabulous bud.Yes

 Let Raven know which picture to post up and he'll get you up and running. BTW.......what's next??


 Forum | Modelers Social Club Forum (proboards.com) 

  • Member since
    January 2012
  • From: Hatfield
Posted by Misty on Saturday, April 11, 2015 2:15 AM

Tim, now that's a proper custom job, beautiful.

  • Member since
    January 2015
Posted by MOPAR - D on Friday, April 10, 2015 7:54 PM

Tim - awesome build

Misty - thanks this was my second time to do flames.

  • Member since
    January 2012
  • From: Hatfield
Posted by Misty on Friday, April 10, 2015 7:22 PM

mopar - wow! burn baby burn!! awesome!!!

  • Member since
    January 2015
Posted by taaron76 on Friday, April 10, 2015 6:19 PM

5311-vi.jpg

5310-vi.jpg

5312-vi.jpg

5313-vi.jpg

  • Member since
    January 2015
Posted by taaron76 on Friday, April 10, 2015 6:19 PM

539-vi.jpg

5316-vi.jpg

5315-vi.jpg

5314-vi.jpg

  • Member since
    January 2015
Posted by taaron76 on Friday, April 10, 2015 6:19 PM

536-vi.jpg

537-vi.jpg

538-vi.jpg

  • Member since
    January 2015
Posted by taaron76 on Friday, April 10, 2015 6:18 PM

I wanted to try something different and the only unfinished model I had spare was a 1984 NASCAR #44 Piedmont Chevy driven by Terry LaBonte.  I transplanted the front clip, motor and suspension and it married up pretty good with the '53 Ford F100.  This was my first truck, but I learned a lot about trucks during this build.  To me, they are much more complicated than cars... at least it felt like that to me.  It was a fun build, thanks for looking.  

Tim

531-vi.jpg

532-vi.jpg

533-vi.jpg

534-vi.jpg

535-vi.jpg

More coming in the next post... Lots of pics.

  • Member since
    January 2015
Posted by taaron76 on Friday, April 10, 2015 6:18 PM

Joe - I like it!  I've thought about using Alclad, too, so I am eagerly watching.

Dan - I'm loving those flames, buddy!

  • Member since
    January 2015
Posted by MOPAR - D on Friday, April 10, 2015 5:06 PM

Joe - your wheels look good. One thing about Alclad is that more is not good you have to stop when it looks right. If it gets to thick you lose the black reflection that makes it shine.

  • Member since
    March 2012
  • From: Corpus Christi, Tx
Posted by mustang1989 on Friday, April 10, 2015 3:50 PM

and tha clock's a tickin' Dan...Time

I think I just found a new partner in the modeling business. This is my first time using Alclad. I may put another coat on this but already this stuff has got my vote just for the fact that it goes on so smoothly.


RSCN1684_zpswdbuvmho.jpg


 Forum | Modelers Social Club Forum (proboards.com) 

  • Member since
    January 2015
Posted by MOPAR - D on Friday, April 10, 2015 12:59 PM

Thanks Joe looks like this will also make the Modelmania show too. Just 15 days and counting......

  • Member since
    March 2012
  • From: Corpus Christi, Tx
Posted by mustang1989 on Friday, April 10, 2015 11:28 AM

That looks great from where I'm sittin'!!! Wow!


 Forum | Modelers Social Club Forum (proboards.com) 

  • Member since
    January 2015
Posted by MOPAR - D on Friday, April 10, 2015 9:53 AM

Joe - Nice progress on the engine

Here's the results of painting  Painted the flames today. Still need to clear coat and add BMF on the trim and front grill.

  • Member since
    March 2012
  • From: Corpus Christi, Tx
Posted by mustang1989 on Friday, April 10, 2015 6:32 AM

I touched up some areas that needed paint and installed the intake manifold today. I've installed many an intake in the real world and use sealer on the "china walls" of the intake so I did the same here.....using automotive sealer on the "china walls". lol


  I stripped the chrome plating off of the carburetors with Easy Off and test fitted those on top as well. A small amount of clean up and these will get the paint treatment. I just need to find a pic regarding throttle linkages and return springs now.

  This is a little cleaner shot than I showed Wednesday being that I cleaned the paint up a little.


FSCN1682_zpstuyoqate.jpg


 Forum | Modelers Social Club Forum (proboards.com) 

  • Member since
    January 2014
  • From: Toronto
Posted by Rob S. on Friday, April 10, 2015 4:34 AM

Man, those flames are quite awesome,eh?

______________________________________________________________________________


On the Bench: Nothing on the go ATM

  • Member since
    March 2012
  • From: Corpus Christi, Tx
Posted by mustang1989 on Friday, April 10, 2015 4:03 AM

Dan: Those flames are really gonna set that thing off dude! Yes


 Forum | Modelers Social Club Forum (proboards.com) 

JOIN OUR COMMUNITY!

Our community is FREE to join. To participate you must either login or register for an account.

SEARCH FORUMS
FREE NEWSLETTER
By signing up you may also receive reader surveys and occasional special offers. We do not sell, rent or trade our email lists. View our Privacy Policy.