SEARCH FINESCALE.COM

Enter keywords or a search phrase below:

Japanese Group Build V

26777 views
745 replies
1 rating 2 rating 3 rating 4 rating 5 rating
  • Member since
    July 2009
  • From: lafayette la
Posted by 40.mm on Tuesday, March 1, 2016 12:28 AM
Thanks all even with the kits draw backs im enjoying this build . I am still having a problem with chemo brain and its frustrating as hell

http://www.vairhead.net/forum/dhg.jpg

  • Member since
    May 2013
  • From: From the Mit, but live in Mason, O high ho
Posted by hogfanfs on Monday, February 29, 2016 7:17 PM

@Steve,

I hate to say it, but, you really can't tell you had any problems with the resin on this build. Excellent job in your recovery! I really like how you weathered this plane! Great job!

@Hunter,

For your first build since being a kid, fantastic job! I can't say how glad I am that you have embraced this hobby! And I l;ook forward to your next builds!

@Freddie,

Great job on the Nick! The weathering look fantastic! Very subtle, yet very effective. Looking forward to seeing this one finished!

@40.mm,

I like your thinking on boring out the vents! I'm going to remeber this for my builds. Great touch!

 Bruce


 On the bench:  1/48 Eduard MiG-21MF

                        1/35 Takom Merkava Mk.I


  • Member since
    November 2009
  • From: SW Virginia
Posted by Gamera on Sunday, February 28, 2016 9:58 PM

Steve: Thanks! One day, one day, I'm going to have to try that.

Freddie: Looking very good! Like the paint and the decals look perfect. Don't ask me about PhotoBucket, I've been fighting it for a couple hours today.

40.mm: Vents look good, I know what you mean about assembly steps- I have a big habit of doing stuff back***wards.

Hunter: Just posted you to the front page, I think... PhotoBucket is being a butthead....

"I dream in fire but work in clay." -Arthur Machen


  • Member since
    January 2016
  • From: A Galaxy Far, Far Away
Posted by Hunter on Sunday, February 28, 2016 8:56 PM

Freddie - 

It is looking awesome so far...can't wait to see it complete.

Hunter 


  • Member since
    July 2009
  • From: lafayette la
Posted by 40.mm on Sunday, February 28, 2016 8:47 PM
Filed out the landing light bay and inserted some tubing

http://www.vairhead.net/forum/dhg.jpg

  • Member since
    July 2009
  • From: lafayette la
Posted by 40.mm on Sunday, February 28, 2016 8:43 PM
The molded vents look o.k. but i wanted them really open so i marked then and scraped them down, drilled and touched them up with a round file should have done it before i joined the fuselage halves together

http://www.vairhead.net/forum/dhg.jpg

  • Member since
    August 2005
  • From: Long Island, New York, USA
Posted by fjs3 on Sunday, February 28, 2016 8:54 AM

Hello Everyone,

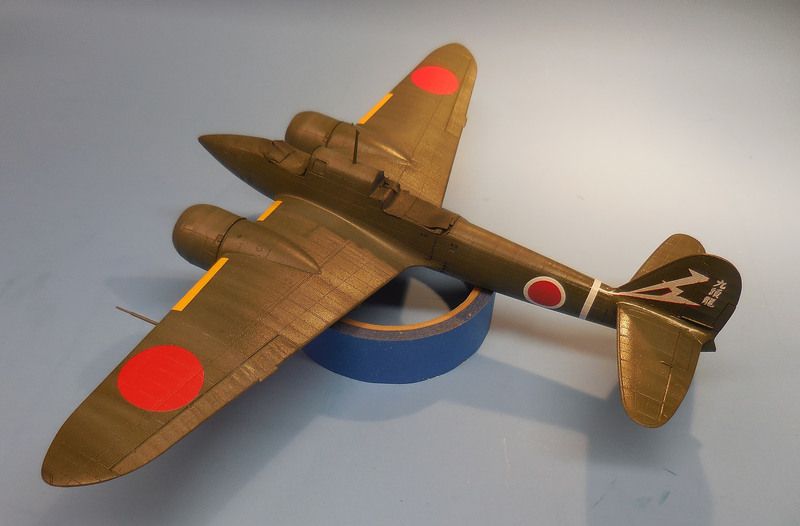
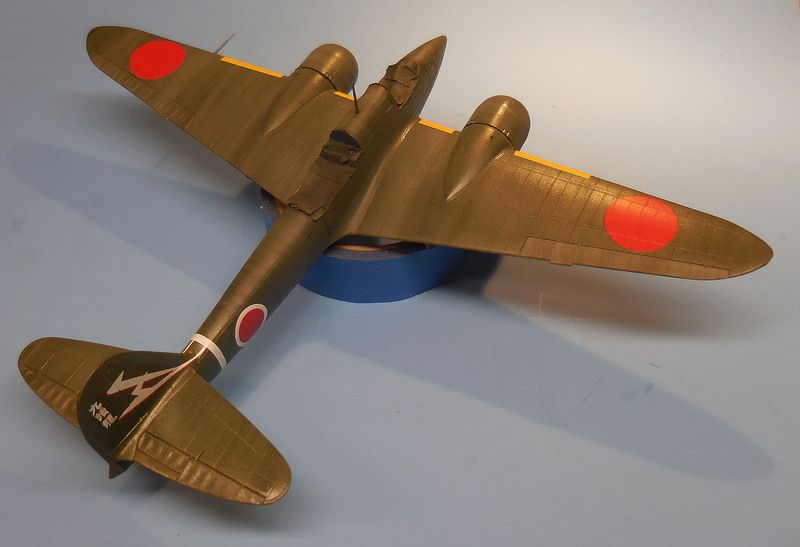
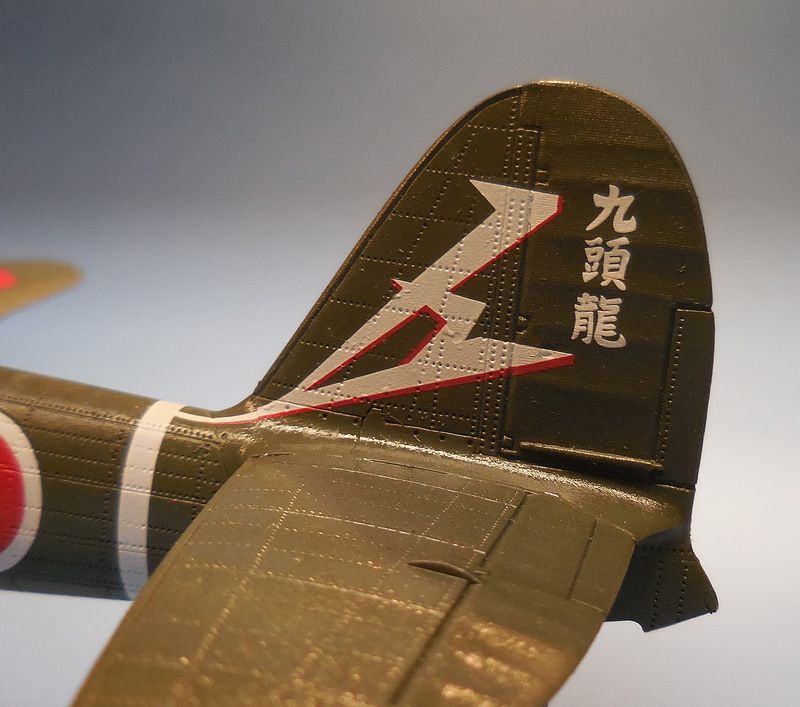
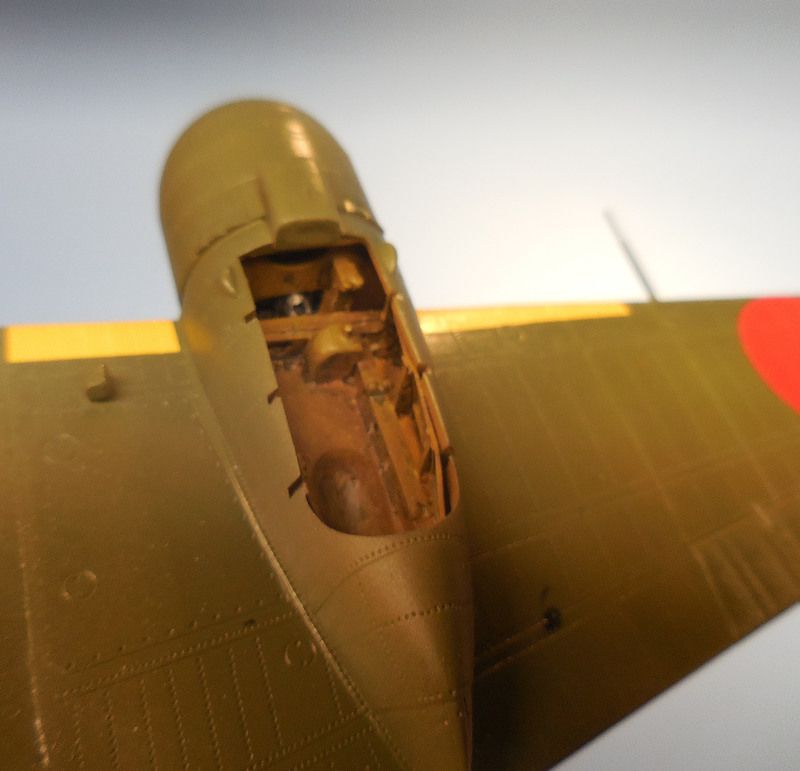
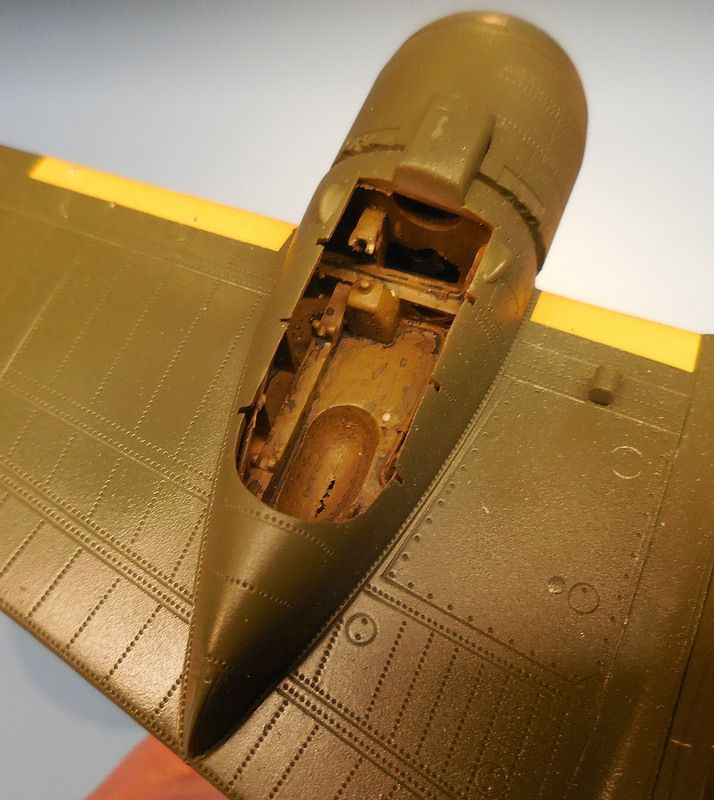
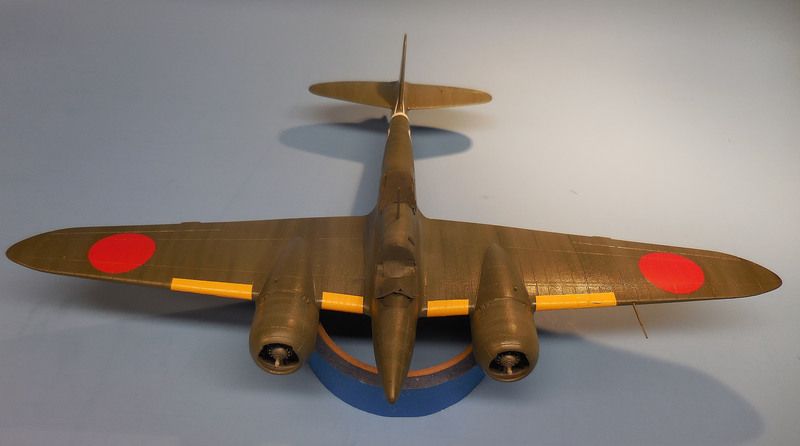
I have been able to get paint and decals onto the "Nick".  Here are some update photographs of where I am now.  I need a few touch ups here and there, and a final gloss coat before I apply the flat finish.  Then I am onto the "fidley bits" and those dreaded landing gear!  I have a good idea of where I'm going with those, but it's going to be "fun"...

Anyhow here are the pictures, and as always, comments or questons are always welcome.
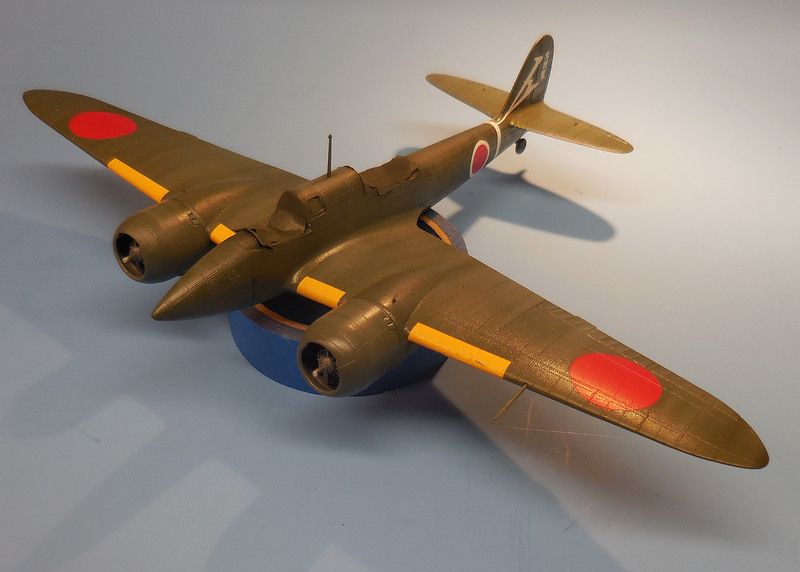
I see, the overall color of this model seems to be a dark olive or brown, it actually is a deep green.  I guess my lighting stinks!  Thanks again for reading my post, and I'll post more pictures as I go. 

Regards

Freddie from LI

PS-Can anyone tell me WTF is going on with Photobucket?  What a pain in the ass!


"I'm gonna build all these models one kit at a time!

  • Member since
    July 2014
Posted by modelcrazy on Saturday, February 27, 2016 9:06 PM

Gamera
Steve, if I may ask, can you elaborate a little more on how you made the waves?

Sure Gam,


The on the last layer, if you use a resin with a hardener, Add twice the amount of hardener that is suggested and pour a thin layer after you mix it thoroughly. Let it dry until it becomes mostly stiff but will move it you tip the base. At this point I used a heat gun set to cool to blow the waves into swells. This process took some time and noticed that once I had it where I wanted I had to keep working it or the resin would smooth back out. Once the resin hardened enough I set the base at an angle so the any unhardened resin would drip and build up the swells. The whitecaps and foam were created by pulling apart cotton and attaching it with Liquitex High Gloss Acrylic Varnish. I would let one layer dry and applied another until it looked right to my eye.

Steve

Building a kit from your stash is like cutting a head off a Hydra, two more take it's place.


http://www.spamodeler.com/forum/

  • Member since
    November 2009
  • From: SW Virginia
Posted by Gamera on Saturday, February 27, 2016 6:41 PM

Hey Hunter she looks great, and fantastic for your first model since you were a youngster. When you get your paint and the front canopy painted I'll get you posted to the front page.

Gee whiz I need to get that badge done, three people already done or almost there!

Steve: Got you posted, or I think so- PhotoBucket is acting whacky again.

"I dream in fire but work in clay." -Arthur Machen


  • Member since
    January 2016
  • From: A Galaxy Far, Far Away
Posted by Hunter on Saturday, February 27, 2016 6:25 PM

Hello everyone - 

Well, I finally completed this great kit. I found that the build itself was great do to the fact of a well designed and instructed kit from Tamiya. As I got to the final stages that is were I found I need to work on my approach and technique. I found that it is hard to hand paint certain things if not done right (LOL). Well, here she is so please don't hesitate to point out any defects or suggestions to better improve my skills. THANK YOU SO MUCH FOR LOOKING IN ON MY BUILD AND FOR ALL THE KIND WORDS, TIPS, SUGGESTIONS AND SUPPORT I HAVE RECEIVED.

I ran out of paint so I ordered a new can today so I can finish the canopy. Newbie lol Big Smile

Thank you again

Hunter 


  • Member since
    November 2009
  • From: SW Virginia
Posted by Gamera on Saturday, February 27, 2016 6:25 PM

Steve, if I may ask, can you elaborate a little more on how you made the waves?

And I've got a couple IJN and USN floatplanes in the stash, now I want to build one with a guy sitting on the wing with a fishing rod!

Going to update the front page now- congrads again!

"I dream in fire but work in clay." -Arthur Machen


  • Member since
    July 2014
Posted by modelcrazy on Saturday, February 27, 2016 11:51 AM

Thanks guys, I really want to try this method again.

lonemoose
my eye isn't comfortable with - keeps getting snagged on - the clean shiny silver of the prop and spinner...

The prop blades face and spinner are bare aluminum while the back was painted flat black. The pictures don’t show it well, but the flat black on the back of the prop blades are chipped.

Steve

Steve

Building a kit from your stash is like cutting a head off a Hydra, two more take it's place.


http://www.spamodeler.com/forum/

  • Member since
    September 2014
  • From: Massachusetts - now Maine
Posted by lonemoose on Saturday, February 27, 2016 5:38 AM

wow! Spectacular! Well done Steve - especially with the sh-- hitting the fan with Amazing Cast (gotta go buy some of that!LOL) i got nothing even close to this work of art. criticism - my eye isn't comfortable with - keeps getting snagged on - the clean shiny silver of the prop and spinner...

it is awesome brother. my favorite part is the water breaking/foaming gently on the sandy beach...

Sibonius

Many Bothans died to bring us this information... I wish it had been Ewoks... but no... it was Bothans...

Sibz,

Rock Star, Brain Surgeon

  • Member since
    January 2016
  • From: A Galaxy Far, Far Away
Posted by Hunter on Friday, February 26, 2016 10:56 PM

Steve - 

You'd the man Steve....Pure Perfection....Great looking build sir.

Hunter 


  • Member since
    June 2014
Posted by BrandonK on Friday, February 26, 2016 10:10 PM

Dang man, that is simply killer.

BK

On the bench:

A lot !! And I mean A LOT!!

2024 Kits on deck / in process / completed   

                         14 / 5 / 2  

                              Tongue Tied

  • Member since
    November 2008
  • From: Far Northern CA
Posted by mrmike on Friday, February 26, 2016 9:50 PM

So it fought you all the way and you won! I've been following your build all the way and it's been an instructive journey and an inspiration. Way to go!


  • Member since
    July 2009
  • From: lafayette la
Posted by 40.mm on Friday, February 26, 2016 8:57 PM

Outstanding build !

http://www.vairhead.net/forum/dhg.jpg

  • Member since
    November 2009
  • From: SW Virginia
Posted by Gamera on Friday, February 26, 2016 8:45 PM

Looks great Steve!!! Rufe looks terrific and I love those waves!!!

"I dream in fire but work in clay." -Arthur Machen


  • Member since
    July 2014
Posted by modelcrazy on Friday, February 26, 2016 8:24 PM

OK all, I'm done messin with this and I'm calling it done.
Like I said earlier, the resin technique will work well as long as you don't use "Amazing Cast" two part resin. I used the "Clear Cast Polyester Resin" as the last pour and was happy with the results. The only thing I'm not happy with is that I had to remove the amazing cast because it didn't dry and that caused some blemishes under the top layer. I will try it again with the lessons learned under my belt.

The Tamiya Rufe was a simple nice build. I sprayed aluminum as a base and then went over that with a spray of AK Interactive Worn Effects which sprayed straight from the bottle without any problems. I finished that up with the exterior color and it was a simple matter of "washing" the exterior paint off and in some instances I used tape to pull it off.


I hope you enjoy it and as usual comments and critiques are welcome.

Steve


Steve

Building a kit from your stash is like cutting a head off a Hydra, two more take it's place.


http://www.spamodeler.com/forum/

  • Member since
    November 2009
  • From: SW Virginia
Posted by Gamera on Friday, February 26, 2016 7:58 PM

Paint looks very good there Hunter!

"I dream in fire but work in clay." -Arthur Machen


  • Member since
    January 2016
  • From: A Galaxy Far, Far Away
Posted by Hunter on Friday, February 26, 2016 4:34 PM

40.mm - 

Looking very nice sir....she is coming along nicely.

Hunter 


  • Member since
    January 2016
  • From: A Galaxy Far, Far Away
Posted by Hunter on Friday, February 26, 2016 4:33 PM

Wow....Finally back in after that little issue. 

As you can see I am at the finally leg of my build. Tonight I should have the decals on and be finished. This has been a great build and I look forward too many more. As always, thank you for looking in on my build.

Any and all suggestions, tips and techniques are greatly wecolmed

Hunter 


  • Member since
    November 2009
  • From: SW Virginia
Posted by Gamera on Friday, February 26, 2016 7:49 AM

Nice work, you're moving right along! 


"I dream in fire but work in clay." -Arthur Machen


  • Member since
    July 2009
  • From: lafayette la
Posted by 40.mm on Thursday, February 25, 2016 9:37 PM

Fuselage together taped and putted with white out .


http://www.vairhead.net/forum/dhg.jpg

  • Member since
    July 2009
  • From: lafayette la
Posted by 40.mm on Thursday, February 25, 2016 3:56 PM

http://www.vairhead.net/forum/dhg.jpg

  • Member since
    November 2009
  • From: SW Virginia
Posted by Gamera on Wednesday, February 24, 2016 11:41 AM

Ah ok, I just assumed you'd used tape there. Looks good and I know what you mean about very little being visible down inside the cockpit hole there. 

"I dream in fire but work in clay." -Arthur Machen


  • Member since
    July 2009
  • From: lafayette la
Posted by 40.mm on Wednesday, February 24, 2016 10:58 AM

all they are is some old glue tube cut and painted just to have something to see if you look down in the pit. Im just doing an oob nothing fancy no heavy mod,s or scrachbuilding, something basic to get back into the swing of things .

http://www.vairhead.net/forum/dhg.jpg

  • Member since
    November 2009
  • From: SW Virginia
Posted by Gamera on Wednesday, February 24, 2016 7:18 AM

Nice lookin' seat belts. I've been using the pre-painted PE ones from Eduard but tape lie much more like real cloth. 

"I dream in fire but work in clay." -Arthur Machen


  • Member since
    January 2016
  • From: A Galaxy Far, Far Away
Posted by Hunter on Wednesday, February 24, 2016 6:29 AM

40.mm - 

Very cool kit you chose to build. I will be watching you on this. Very curious to see this Japanese fighter. Enjoy the build

Hunter 


  • Member since
    July 2009
  • From: lafayette la
Posted by 40.mm on Wednesday, February 24, 2016 1:34 AM
Sanded the sides of the seat down and added some harness

http://www.vairhead.net/forum/dhg.jpg

JOIN OUR COMMUNITY!

Our community is FREE to join. To participate you must either login or register for an account.

SEARCH FORUMS
FREE NEWSLETTER
By signing up you may also receive reader surveys and occasional special offers. We do not sell, rent or trade our email lists. View our Privacy Policy.