SEARCH FINESCALE.COM

Enter keywords or a search phrase below:

Russian Armor Group Build November 2017 - November 2018

37792 views
940 replies
1 rating 2 rating 3 rating 4 rating 5 rating
  • Member since
    November 2009
  • From: SW Virginia
Posted by Gamera on Monday, August 13, 2018 11:22 AM

LA: She's lookin' good! Again, kudos to you for taking a rough kit and building a gem out of her. 

Zvezda: Beautiful! She looks a slightly worn dusty vetern of many battles! 


BTW: Got to meet Sailing Dutchman at our club show Sat. and look at some of his cool stuff. We both won an award! 

"I dream in fire but work in clay." -Arthur Machen


  • Member since
    November 2009
  • From: SW Virginia
Posted by Gamera on Tuesday, August 14, 2018 4:35 PM

BTW: My apologies for not posting anything for the better part of forever. Melting down the kit's ammo threw me for a loop and I've been working with the brass turned shells making replacement buckles and straps.

Most of the ammo in the turret won't be very visible so I decided to cheat and just make some fake shells out of sprue to put behind the brass ones.

"I dream in fire but work in clay." -Arthur Machen


  • Member since
    May 2015
Posted by Griffin25 on Wednesday, August 15, 2018 8:55 AM

Finally we get a pic! Jeez. Lol. That looks great Gamera. I really like the weathering. Just enough. What did you use for the pin wash around the rivets? Looks good 


Griffin

  • Member since
    November 2009
  • From: SW Virginia
Posted by Gamera on Wednesday, August 15, 2018 11:35 AM

Griffin: Thanks! It's just Flory dark dirt wash. You put it on and then wipe the excess off with a damp cotton swab. The more you scrub the more you take off, if you take off too much you can just put down another wash. 

"I dream in fire but work in clay." -Arthur Machen


  • Member since
    September 2016
  • From: Albany, New York
Posted by ManCityFan on Wednesday, August 15, 2018 1:44 PM

Geez Gamera, your "cheat" shells look better than the "best" I could pull off.  LOL.

Seriously, I don't think anyone would give you a hard time for that short-cut, and if it helps to get you back to working on the kit, so much the better!  I totally get how the shell issue could cause you to want to put this kit on the back burner for a while.

I forgot how detailed that kit is.  From what I see in the pics you just posted, you are doing a fantastic job!

Dwayne or Dman or just D.  All comments are welcome on my builds. 

  • Member since
    November 2009
  • From: SW Virginia
Posted by Gamera on Wednesday, August 15, 2018 2:23 PM

Thanks Dwayne! This has been the easy part, wait till I get to the engine and the zillion teeny PE parts on the hull and fenders... Bang Head

Personally I think the sprue shells look horrible but there's no way to see them though the commander's hatch with the turret together. With a flashlight you can see the shadows so I did want to put something in there!

Hopefully with those out of the way I can get back in gear. I can't believe we're down to two and a half months left to go. IndifferentTime

"I dream in fire but work in clay." -Arthur Machen


  • Member since
    September 2017
  • From: Netherlands
Posted by Sailing_Dutchman on Wednesday, August 15, 2018 6:08 PM

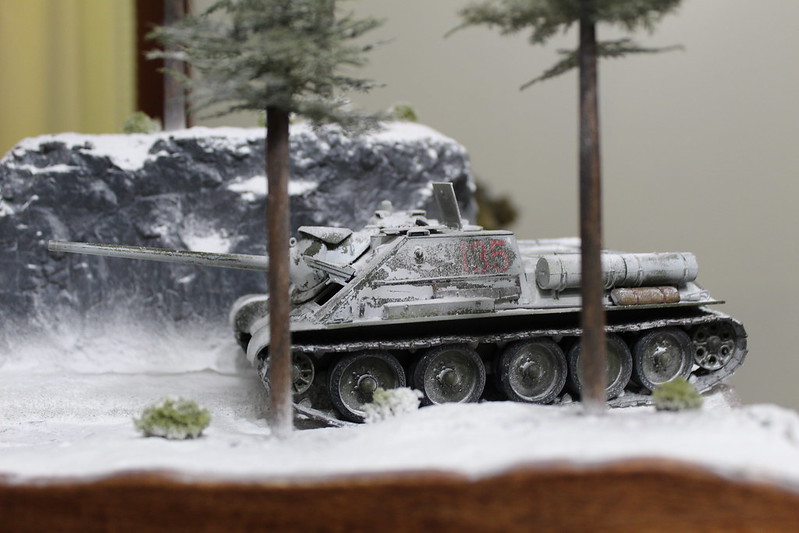
Товарищи, новый штурмовик готов служить Сталину и родине!

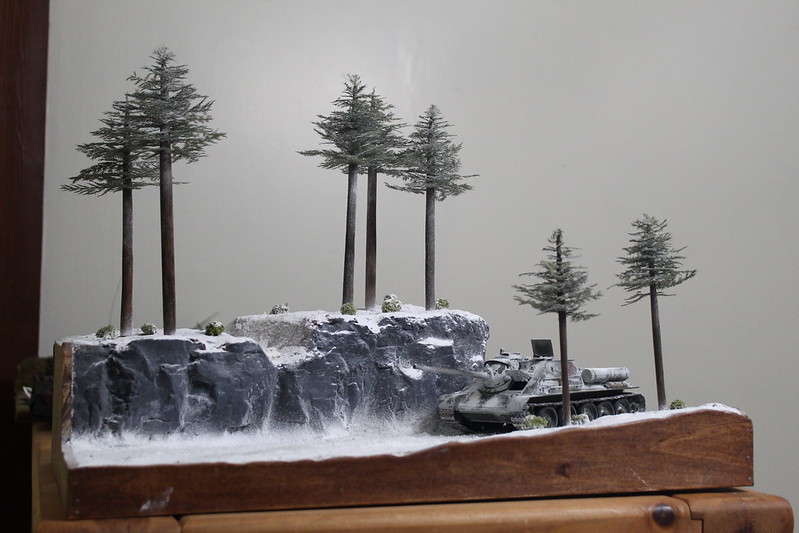
I have finished my diorama. Following is my progress over the past week in preparation for the IPMS show.

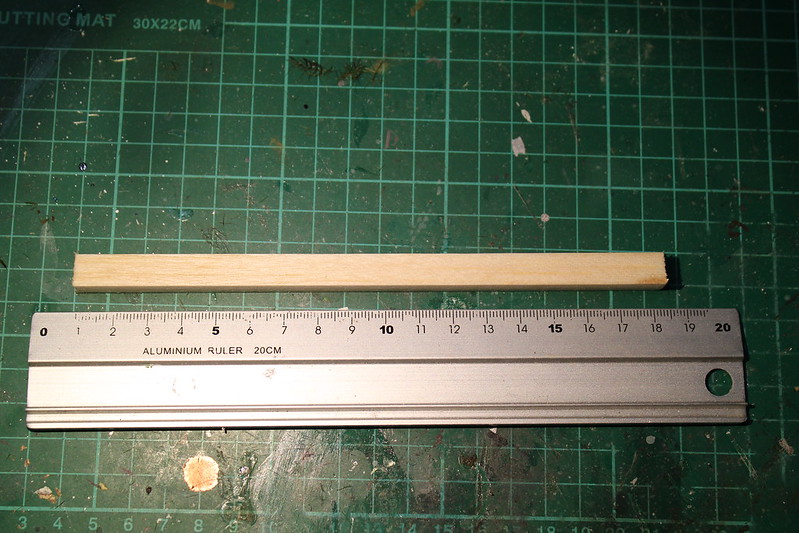
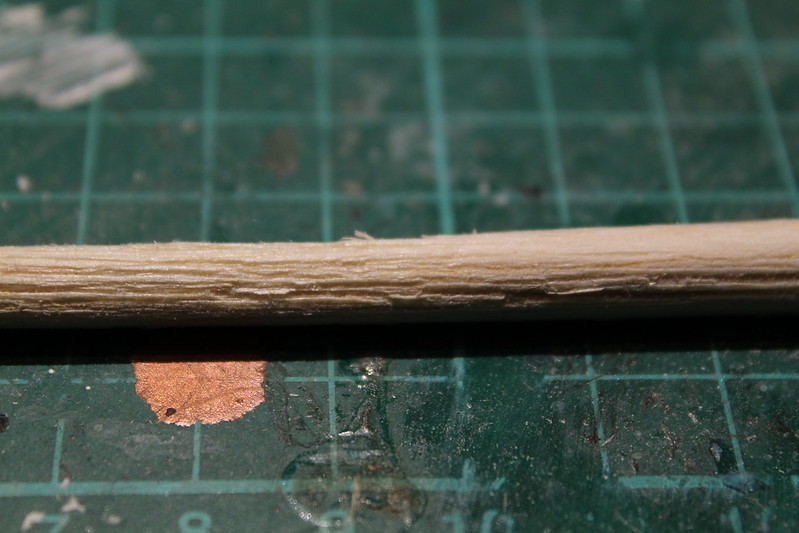
To build the trees I cut a piece of 3/8"x3/8" balsa 6"-9" long:

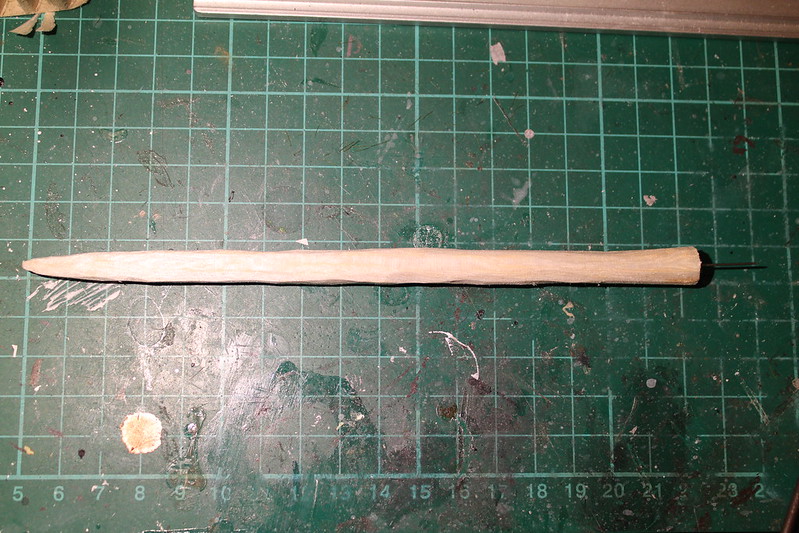
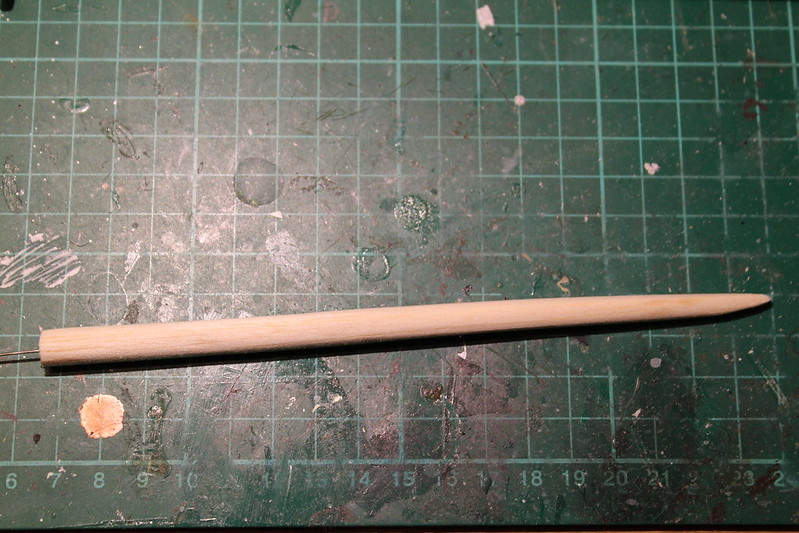
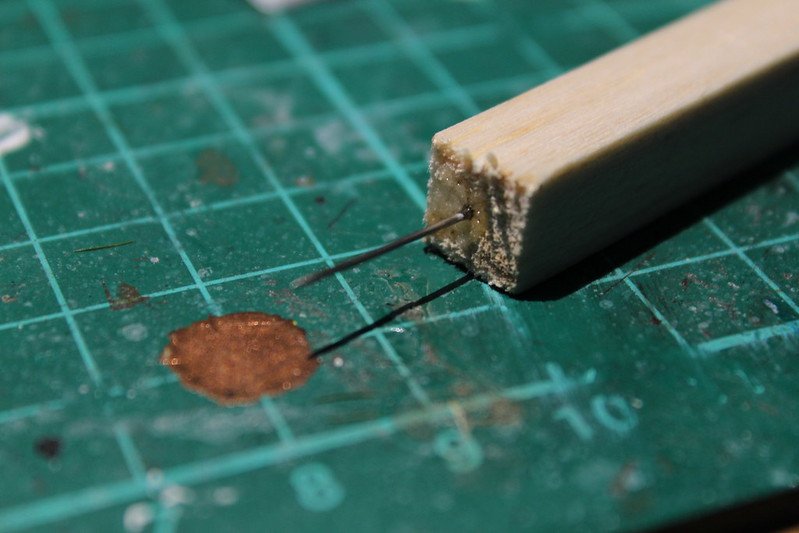
Then carved and sanded them down to shape and inserted a pin:

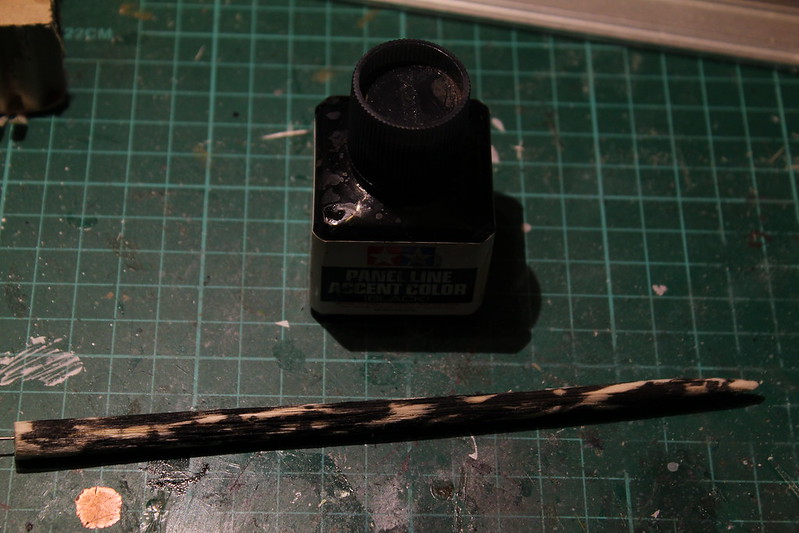
After that, I used a wire brush to scribe the bark, and use Tamiya black and brown panel liner to color it.

Holes were made with a pin, and plumosa fern fronds were glued in.

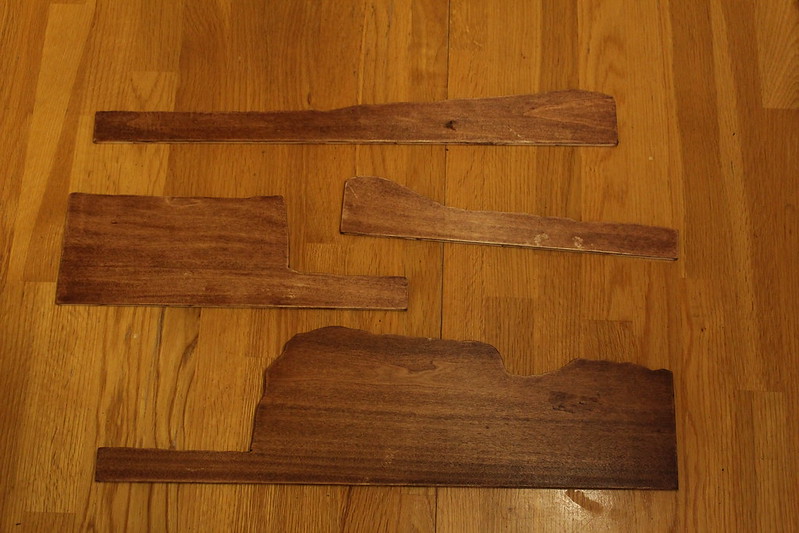
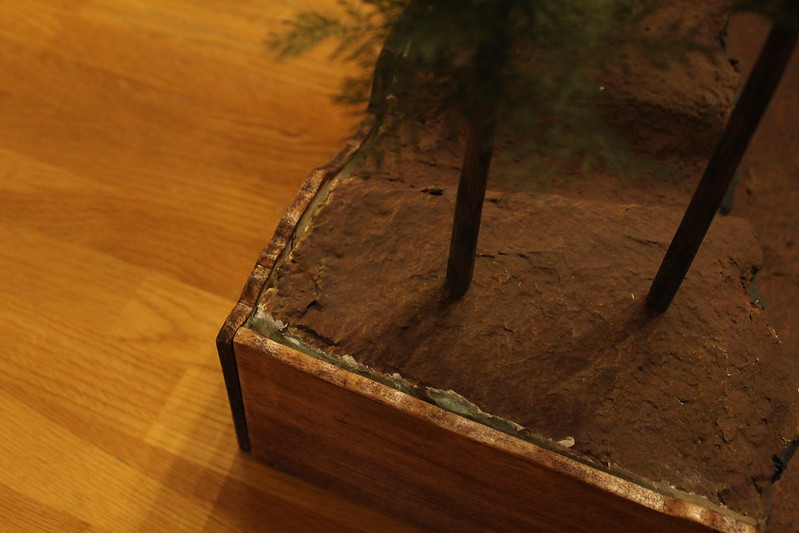
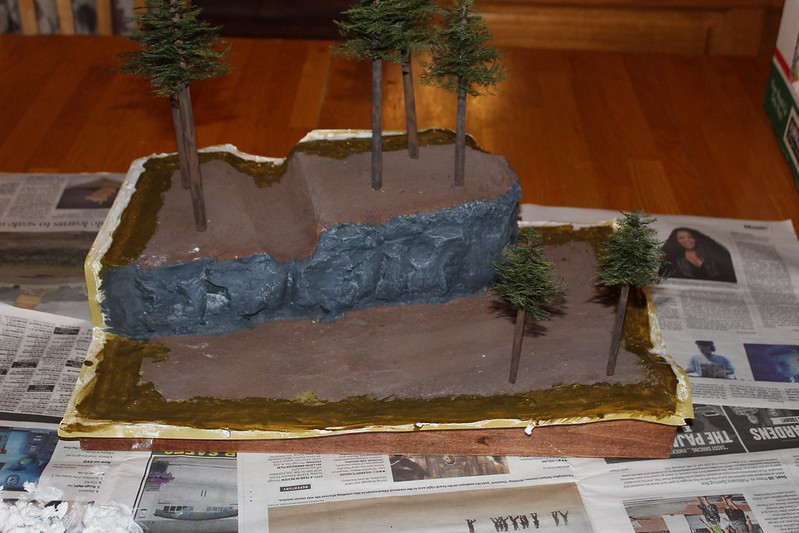
I then cut and stained pieces from 1/4"x6"x36" popler for the border:

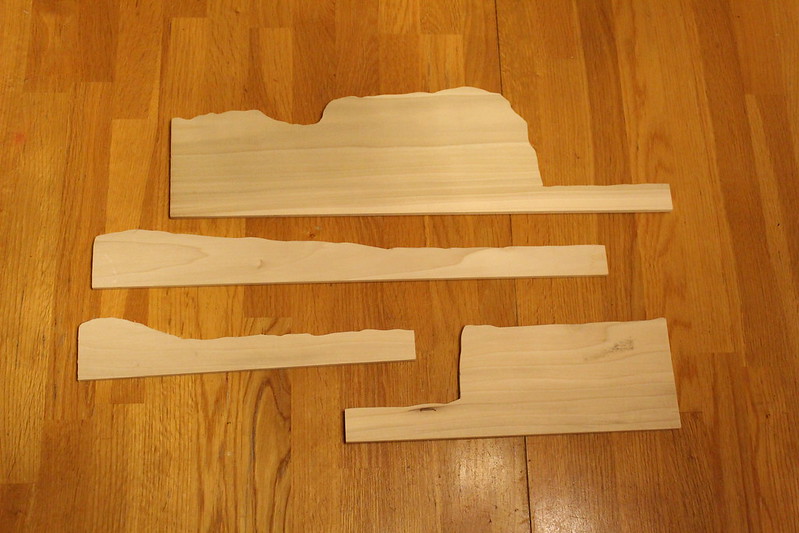
After sanding I found they were a little small, so I removed 1/4" from the front of the base:

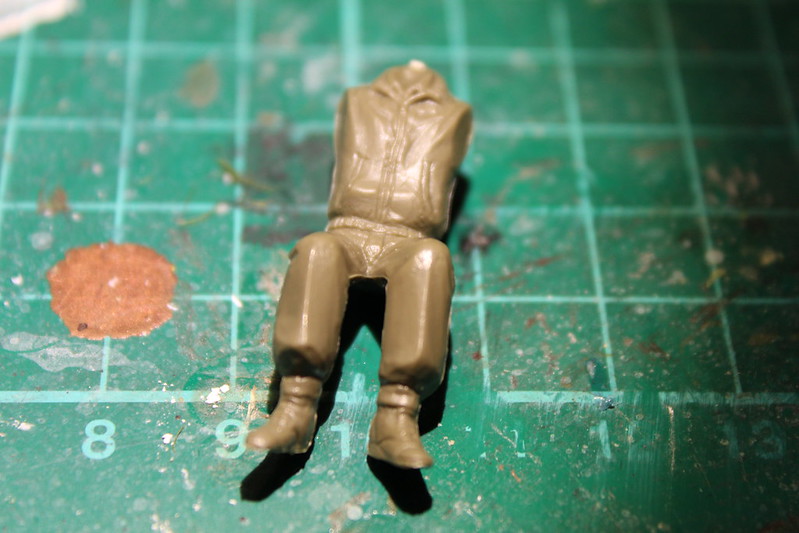
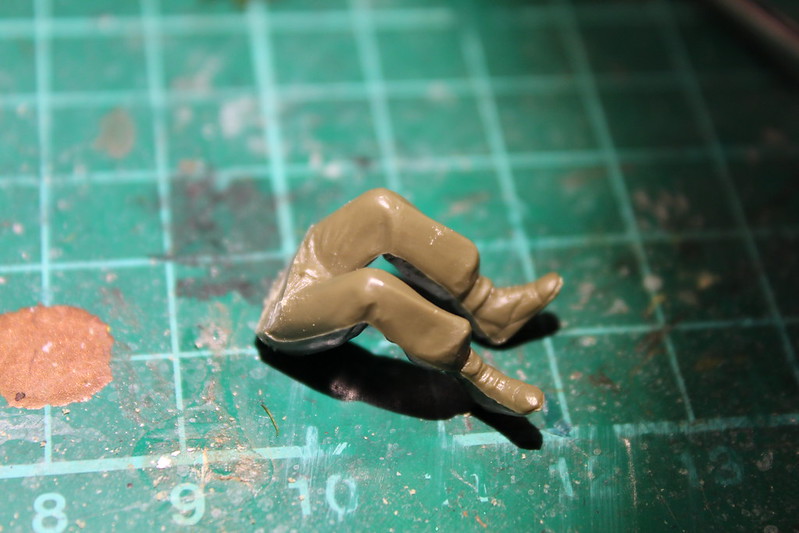
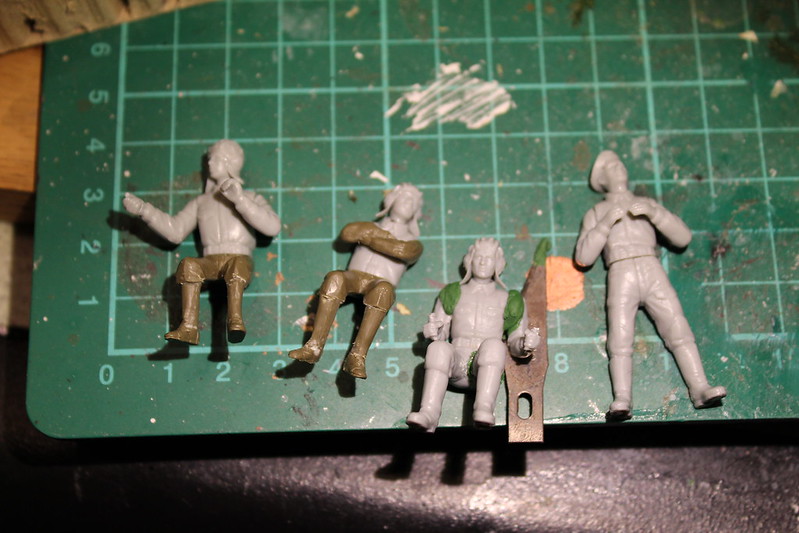
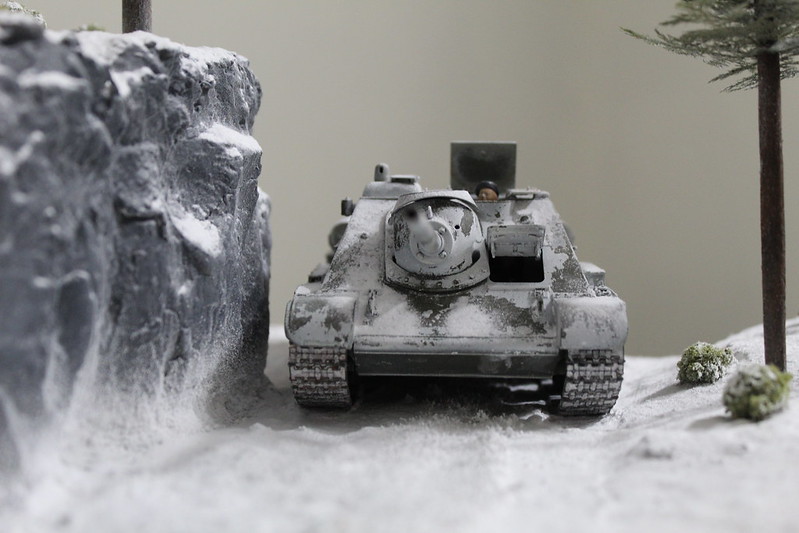
I then went on to build the crew from the Dragon Russian Tank Crew kit. The kit had only two full figures, so I used the legs from two Tamiya american crewmen. The americans however used a different boot so I carved the legs down to replicate this:

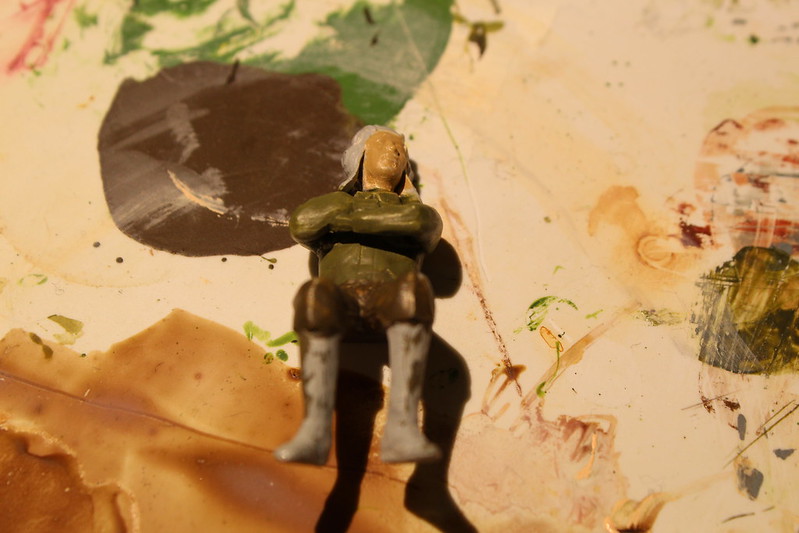
Unfortunatly, I forgot to take pictures of the painted crew, but I used the article in the Kursk edition as reference. I will atempt to open the top and get some pictures, but this may take awhile.

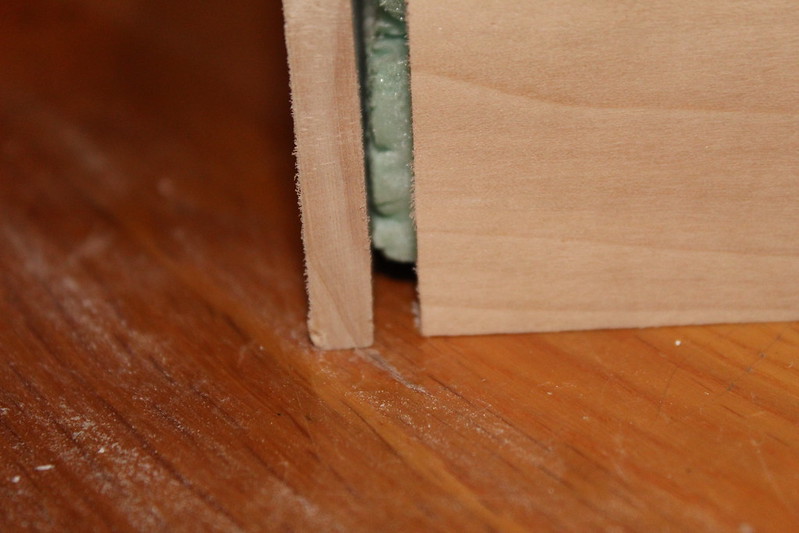
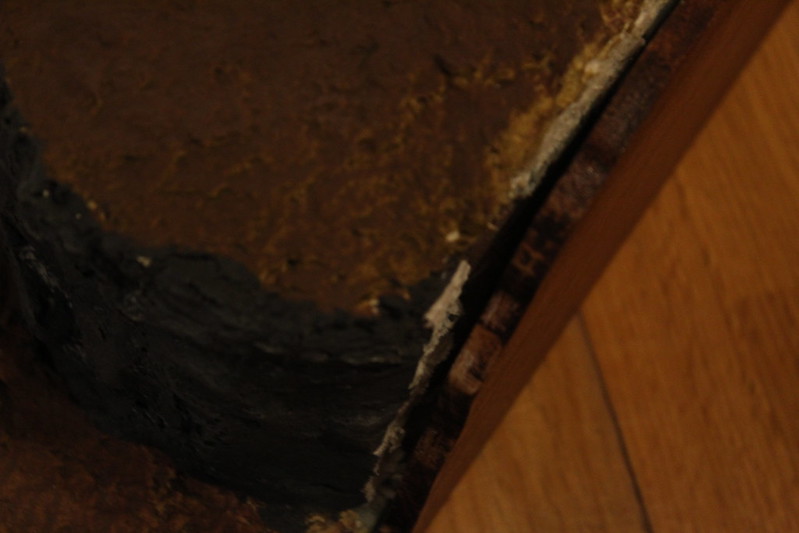
After the wood was nailed around the foam, there was a gap which I filled with sculptamold:

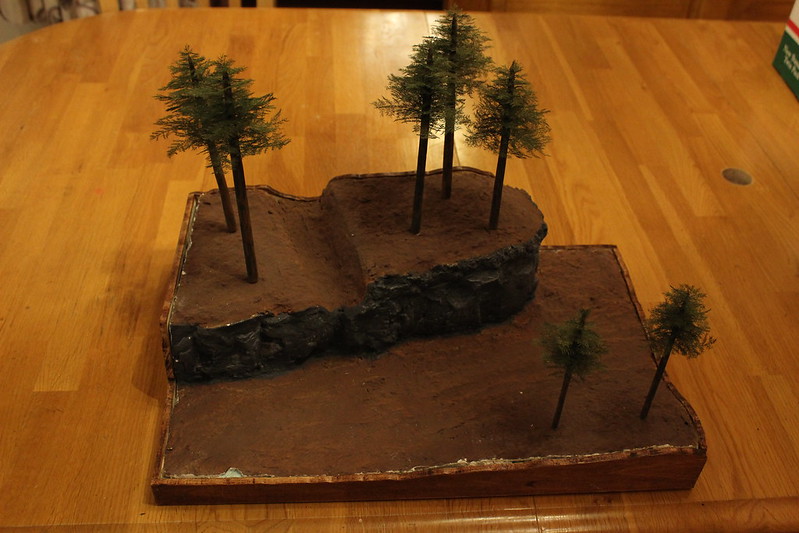
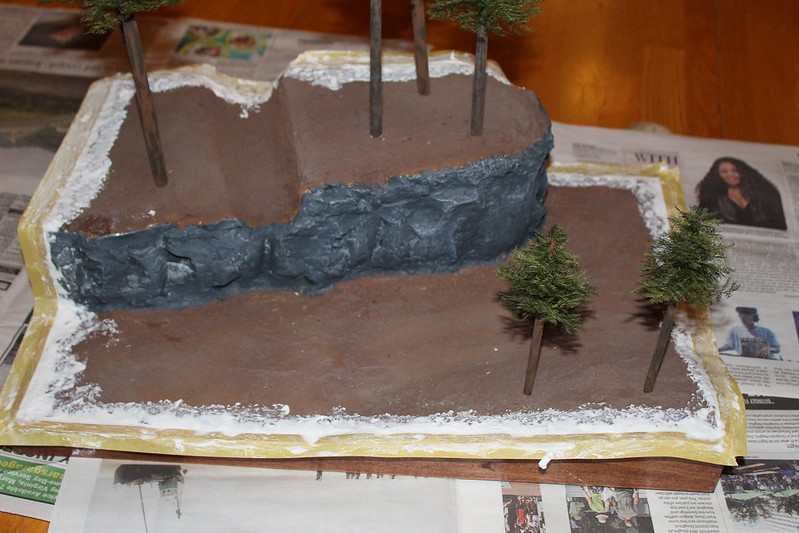
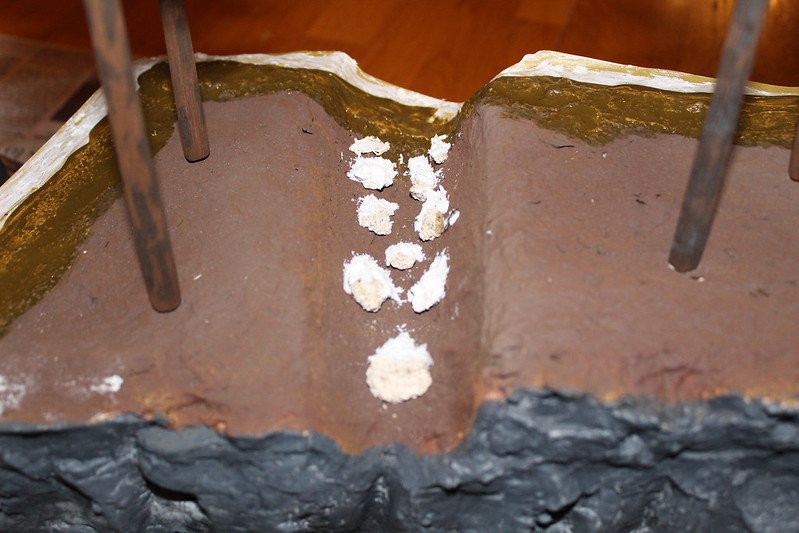
Next, I used Woodland Scenics earth undercoat to paint the plaster brown to mostly match the base, and glued some pieces of plaster in the ditch for rocks:

I added some static grass and bushes made from a glob of scenic glue rolled in corse foliage and cated in hairspay to get it to stick together:

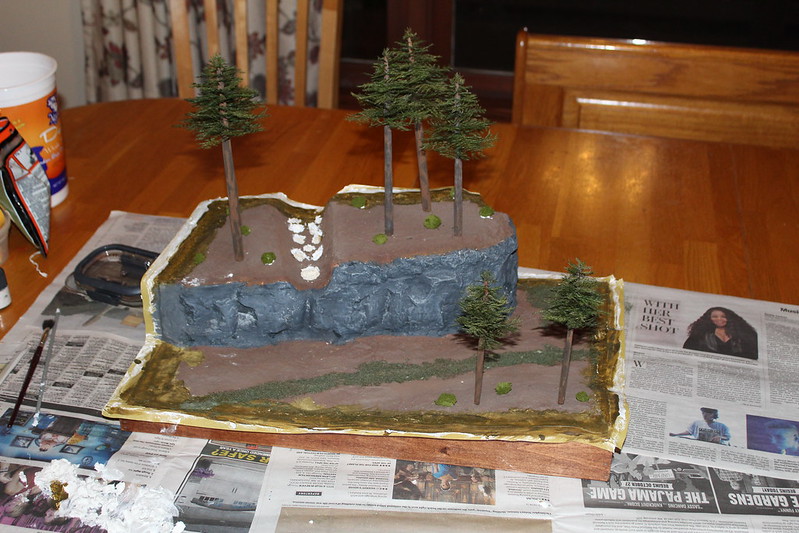
I then covered everything in a 1/2 mm coat of Krycell extra and airbrushed their adhesive from 12"-18". The tank was given a similar treatment and put on the base.

Sorry for the missing pictures and the poor quality, but I was in a rush and most of the work was done in th wee hours of the morning. If there is anything you would like to see that I missed I will gladly post pictures of it.


  • Member since
    May 2015
Posted by Griffin25 on Wednesday, August 15, 2018 7:30 PM

I was wondering where you were going with that base Dutch but now I get it! That looks terrific! The snow / ice effects came out great. 


Griffin

  • Member since
    November 2009
  • From: SW Virginia
Posted by Gamera on Thursday, August 16, 2018 6:56 AM

Thanks for walking us though your diorama Dutchman. Again, the snow and ice looks fantastic!!! 

"I dream in fire but work in clay." -Arthur Machen


  • Member since
    September 2016
  • From: Albany, New York
Posted by ManCityFan on Thursday, August 16, 2018 8:39 AM

Hey Dutch, that diorama looks excellent!!  Thanks for the walk through.  Very helpful for those of us who have yet to try doing a dio.  Snow effects came out really well.  Good luck at the show.

Let me know which picture you would like for the completed kit post on the GB front page.  Thanks for being part of the GB! 

Dwayne or Dman or just D.  All comments are welcome on my builds. 

  • Member since
    September 2017
  • From: Netherlands
Posted by Sailing_Dutchman on Thursday, August 16, 2018 3:53 PM

I would like the last picture.


  • Member since
    September 2016
  • From: Albany, New York
Posted by ManCityFan on Thursday, August 16, 2018 9:30 PM

Sailing_Dutchman

I would like the last picture.


Front page updated.  Thanks again for being part of the GB.

Dwayne or Dman or just D.  All comments are welcome on my builds. 

  • Member since
    April 2014
  • From: Australia
Posted by lostagain on Friday, August 17, 2018 8:51 PM

Zvezda,
Top job on the T-34. Good colour modulation, nice restrained weathering and a good base. Like the photoshop effects too!
The 1/48 version has got the same wooden boxes as the 1/35 version from 30 years ago!
 
Cliff, great detail work on the shells there, the straps look great. The fake shells are better than the Alan shells in the SU76…
Sailor, Super work on the diorama. And thanks for the build photo essay too, it helps to see all the steps of the process. The finish you achieved with the snow is great, the trees have come up really well and the rock face looks great. Just looking at it makes me feel cold…

  • Member since
    March 2017
Posted by Armor_Aficionado on Saturday, August 18, 2018 5:40 PM

Su-122 again

Alright, calling the Su-122 DONE!  I decided to forego adding a figure, and just added some weathering instead.  I realize I may have gone a little overboard on the red clay look, but overall I’m pleased with it.


Su-122 #2

 Su-122 #4

  • Member since
    May 2015
Posted by Griffin25 on Sunday, August 19, 2018 9:56 AM

That looks great. I love the clay look. What a brute of a machine. Really well done. 


Griffin

  • Member since
    November 2009
  • From: SW Virginia
Posted by Gamera on Sunday, August 19, 2018 2:46 PM

AA: Cool! Nice work there!!!

"I dream in fire but work in clay." -Arthur Machen


  • Member since
    March 2017
Posted by Armor_Aficionado on Sunday, August 19, 2018 4:45 PM
So since we’re all building Russian armor, here’s a question for you all. What do you think of the quality of Zvezda’s kits? I’ve never owned one, so I don”t know. But I was just in the local hobby store yesterday, and they had just gotten a brand new Zvezda 1/35 scale kit of the T-14 Armata. The box was massive, so I’m wondering what the part count would be, and also just generally how is the quality? The price woas certainly right, only €18.99.

  • Member since
    September 2016
  • From: Albany, New York
Posted by ManCityFan on Sunday, August 19, 2018 6:20 PM

AA, really nice job on that SU-122.  Looks the brute that they were, and I don't think you overdid the clay look. 

Let me know which photo you would like on the completed kit post on the front page.

Have not tried a Zvezda kit, so can't comment.  Thanks for being part of the GB!!

Dwayne or Dman or just D.  All comments are welcome on my builds. 

  • Member since
    March 2017
Posted by Armor_Aficionado on Sunday, August 19, 2018 8:07 PM
ManCity, use the middle photo, the right front quarter view. Thanks!

  • Member since
    September 2016
  • From: Albany, New York
Posted by ManCityFan on Monday, August 20, 2018 8:26 AM

Armor_Aficionado
ManCity, use the middle photo, the right front quarter view. Thanks!
 

Front page updated.  Thanks again for participating in the GB.

Dwayne or Dman or just D.  All comments are welcome on my builds. 

  • Member since
    April 2014
  • From: Australia
Posted by lostagain on Wednesday, August 22, 2018 7:28 AM

AA, great job on the Su 122 there. The weathering suits the build, looks seriously mean and like it has been through a bit of action.

And I haven't got any Zvezda kits either, but FSM did a review of the Armata in September 2017: http://www.finescale.com/product-info/kit-reviews/2017/07/zvezda-t-14-armata-build-review

I have been working on the SU 122's baby brother, just haven't posted for a bit.

I started the weathering behind the running gear before putting it on. I used a mix of plaster, dirt, pigment and some static 'dead grass' and slathered it on:

Added a few different colours to get a bit of variation, but it sort of all blended in together:

Then the wheels went on and the top run of tracks were put on:

Next the fenders went on, I managed to knock off one of the brass panels, I can't get brass and plastic to bond particularly well...

And did a bit of weathering in the fighting compartment too:

So it moves slowly and surely along....

  • Member since
    November 2009
  • From: SW Virginia
Posted by Gamera on Wednesday, August 22, 2018 10:00 AM

LA: She's looking great, love the mud and dirt in the fighting compartment. 


AA: I've build a few of Zvezda's really old kits and they were kinda on the rough side. From what I've heard their new stuff is really good though, don't own any so this is all second-hand. 

"I dream in fire but work in clay." -Arthur Machen


  • Member since
    September 2016
  • From: Albany, New York
Posted by ManCityFan on Wednesday, August 22, 2018 10:57 AM

LA, the weathering is looking good.  The fight compartment really looks good with the dirt.  That kit is coming along nicely.

Dwayne or Dman or just D.  All comments are welcome on my builds. 

  • Member since
    April 2005
  • From: Australia
Posted by taxtp on Thursday, August 23, 2018 8:34 PM

Nice job on the Su 122 A_A. It does look good.

Your weathering looks good Piers, I particularly like the mud on the hull. Do you have any issues with plaster sticking to plastic ?

Cheers

Tony

I'm just taking it one GB at a time.

  • Member since
    April 2014
  • From: Australia
Posted by lostagain on Tuesday, August 28, 2018 6:48 AM

Thanks Guys

Tony, the plaster mix is applied over the paint and seems to bond pretty well. There has been a coat of clear over it since then keeping it a bit stable. More mud to go on once it is all together.

Next job was to paint the rounds, the Alan casting is so off they do not bear close scrutiny, fortunately they will be a bit hard to see past everything in there. I tried to do the brass in gold and silver, but I reckon it is a bit dark.

Then they were stuck in with white glue:

Next the gun was glued on, using the shield as a locating guide:

Turned out I didn't do it too well, because afterwards the shield was off by a whole millimetre, looked rubbish. So rip it off and hack the crap out of the mounting area to shift it across...

  • Member since
    November 2009
  • From: SW Virginia
Posted by Gamera on Tuesday, August 28, 2018 7:20 AM

LA: Super nice job there on the ammo. Mine I painted (before I melted them) looked horrible. Kudos sir!!! 

Hope you got the shield in shape. Gosh I hate having to pull something apart and rebuild it like that... 

"I dream in fire but work in clay." -Arthur Machen


  • Member since
    September 2016
  • From: Albany, New York
Posted by ManCityFan on Tuesday, August 28, 2018 1:42 PM

I think the ammo looks pretty good.

Hope you get the shield and gun sorted out.  You have done some really good work on this kit!

Dwayne or Dman or just D.  All comments are welcome on my builds. 

  • Member since
    April 2014
  • From: Australia
Posted by lostagain on Thursday, August 30, 2018 6:50 AM

So I stuck the gun back on after carving off a bit of the body so it fitted in the right place. I added in a bit of stowage.

Then I glued on the shields, using rubber bands and tape to hold it in place. it fitted really well and all seemed good until I tried to take the tape off and half the number came off too...

So two steps forward one step back...


  • Member since
    November 2009
  • From: SW Virginia
Posted by Gamera on Thursday, August 30, 2018 7:38 AM

Great to see everything lined up and in place LA! 


As to the ripped decal: 


Lemme tell you a secret...... 


Just hang a stowed tarp or camo net over the rail in the back covering it up. Problem solved and anyone looking at it will be like 'wow, look at the added detail there.' 

"I dream in fire but work in clay." -Arthur Machen


  • Member since
    September 2016
  • From: Albany, New York
Posted by ManCityFan on Thursday, August 30, 2018 9:26 AM

Good to see the shield and gun in place.  The kit is looking really good.

I like Gamera's suggestion.   Kind of like using mud to hide a nasty seam that you can't fix.  (not that I would ever do that Whistling)

Dwayne or Dman or just D.  All comments are welcome on my builds. 

JOIN OUR COMMUNITY!

Our community is FREE to join. To participate you must either login or register for an account.

SEARCH FORUMS
FREE NEWSLETTER
By signing up you may also receive reader surveys and occasional special offers. We do not sell, rent or trade our email lists. View our Privacy Policy.