SEARCH FINESCALE.COM

Enter keywords or a search phrase below:

Rolling Shelf of Doom GB

39661 views
520 replies
1 rating 2 rating 3 rating 4 rating 5 rating
  • Member since
    June 2008
Posted by lewbud on Sunday, May 10, 2020 1:17 PM

Nice job Nick!

Buddy- Those who say there are no stupid questions have never worked in customer service.

  • Member since
    August 2015
  • From: the redlands Fl
Posted by crown r n7 on Monday, May 11, 2020 9:49 AM

Thank you 68GT & Lewbud. I,m waiting for the rain to stop to get finished pics.

I've forgotten how much fun and hassel these monogram kits can be..LOL!


 Nick.

  • Member since
    February 2010
  • From: New Jersey
Posted by 68GT on Tuesday, May 12, 2020 10:48 AM

I've always loved the Monogram kits!  Not so much the P-47N but the others are great!

On Ed's bench, ???


  • Member since
    August 2015
  • From: the redlands Fl
Posted by crown r n7 on Tuesday, May 12, 2020 11:11 AM

Yes they are nice still have plenty of oldies in my stash..

The Mongram AV-8B is done. I used Vajello paints only on this kit. The decals are Super Scale # 481228 the HMM 163 USS. Peleliu Samalia 1994.

weathering with Masters Touch oil paint and no chalk this time. Sealed it wit Vajello matt varnish- bazzar stuff....

Thank you 68GT for hosting this GB and for all you guy's comments and watching this old 1987 monogram kit that untill now is done.


 Nick.

  • Member since
    February 2010
  • From: New Jersey
Posted by 68GT on Tuesday, May 12, 2020 2:47 PM
Excellent, which photo would you like on the front page?

On Ed's bench, ???


  • Member since
    August 2015
  • From: the redlands Fl
Posted by crown r n7 on Tuesday, May 12, 2020 2:56 PM

The last one.


 Nick.

  • Member since
    February 2010
  • From: New Jersey
Posted by 68GT on Tuesday, May 12, 2020 3:28 PM
Great choice, thats the one I was thinking of also.

On Ed's bench, ???


  • Member since
    March 2017
Posted by Armor_Aficionado on Saturday, May 16, 2020 6:48 AM

Update on the F-5F: various external beacons have been painted, gloss coat applied, decals are being applied.


  • Member since
    March 2017
Posted by Armor_Aficionado on Monday, June 1, 2020 2:01 AM

Almost done now, just have to add the pilots and the nose pitot tube:


  • Member since
    August 2015
  • From: the redlands Fl
Posted by crown r n7 on Monday, June 1, 2020 7:03 AM

Very well done and awesome paint!!


 Nick.

  • Member since
    June 2008
Posted by lewbud on Thursday, June 4, 2020 12:54 AM

Nick,

Nice job on the Harrier!

AA,

Excellent job on the F-5!  Not familiar with that paint scheme, but it looks great.

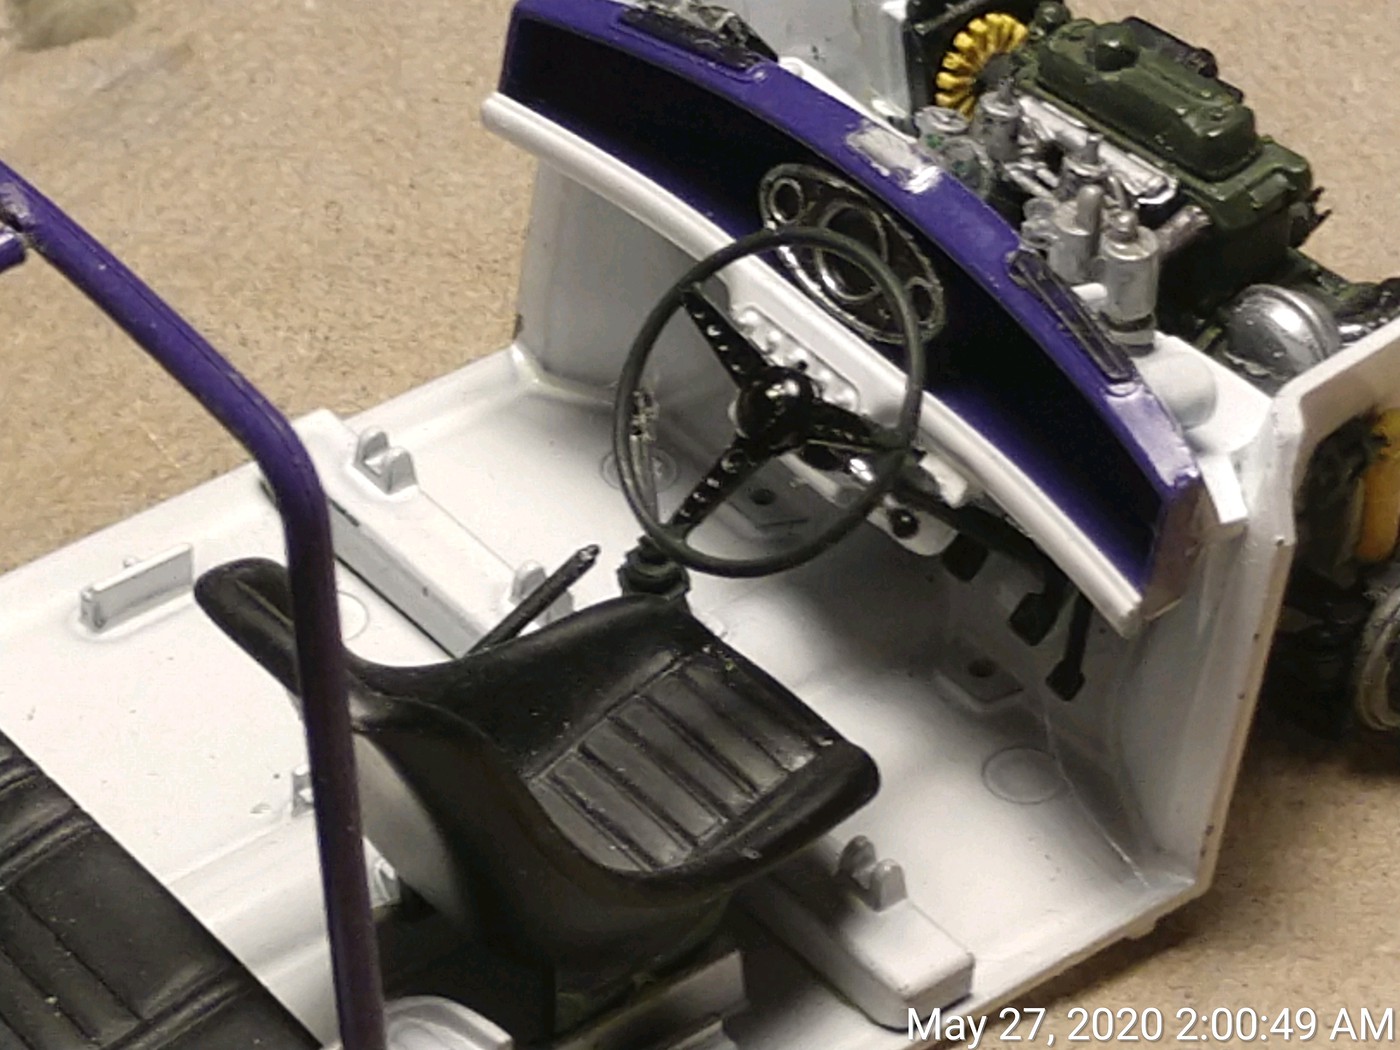
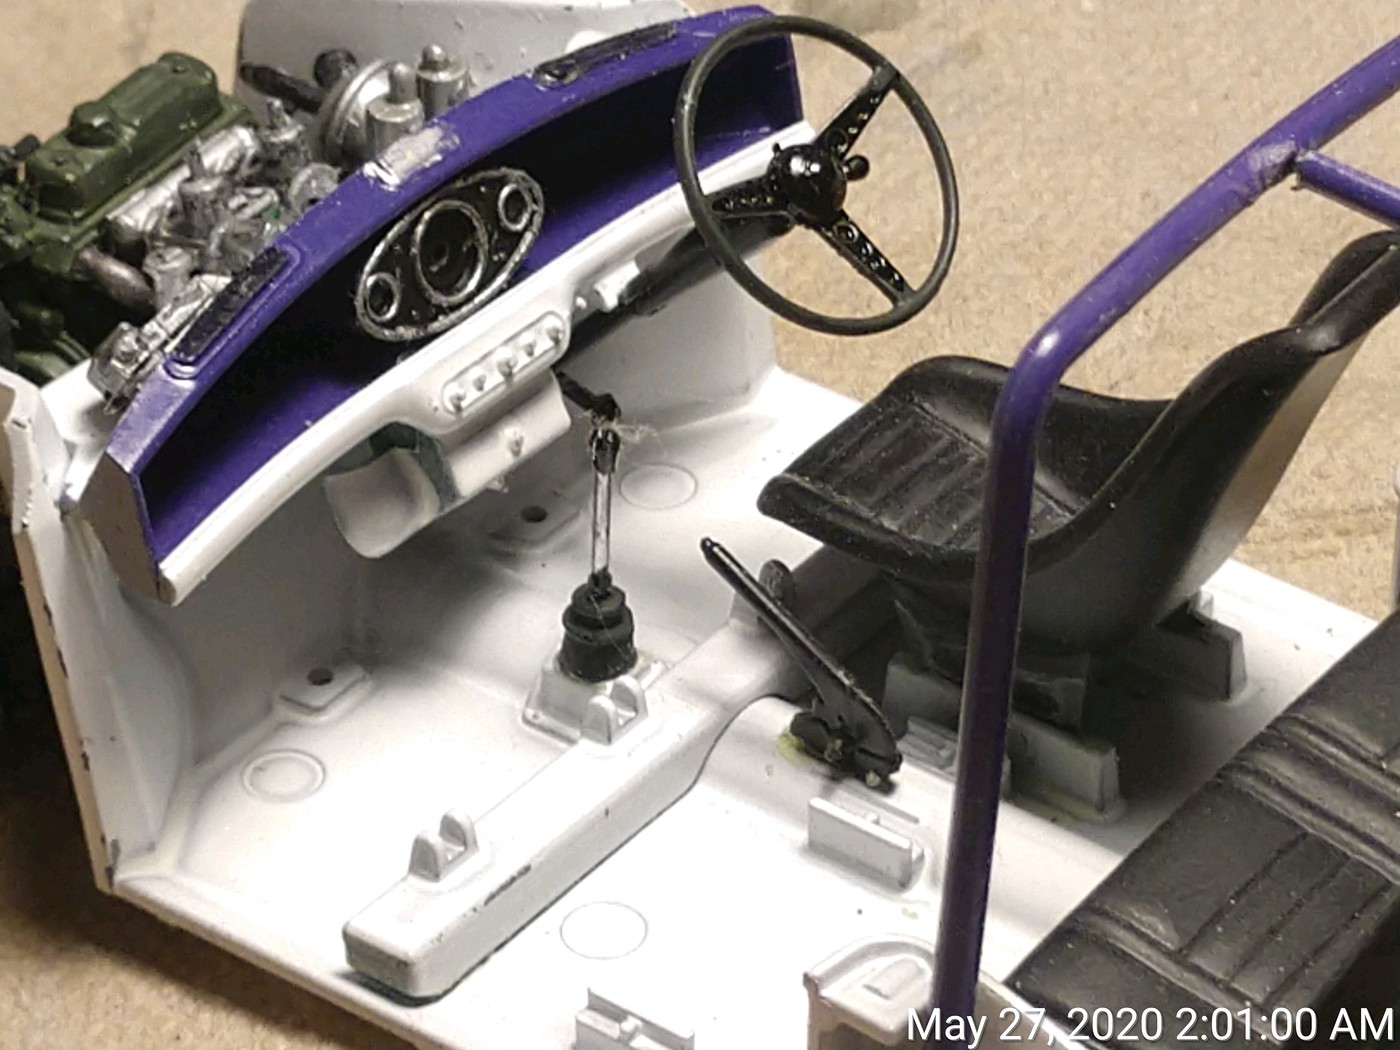
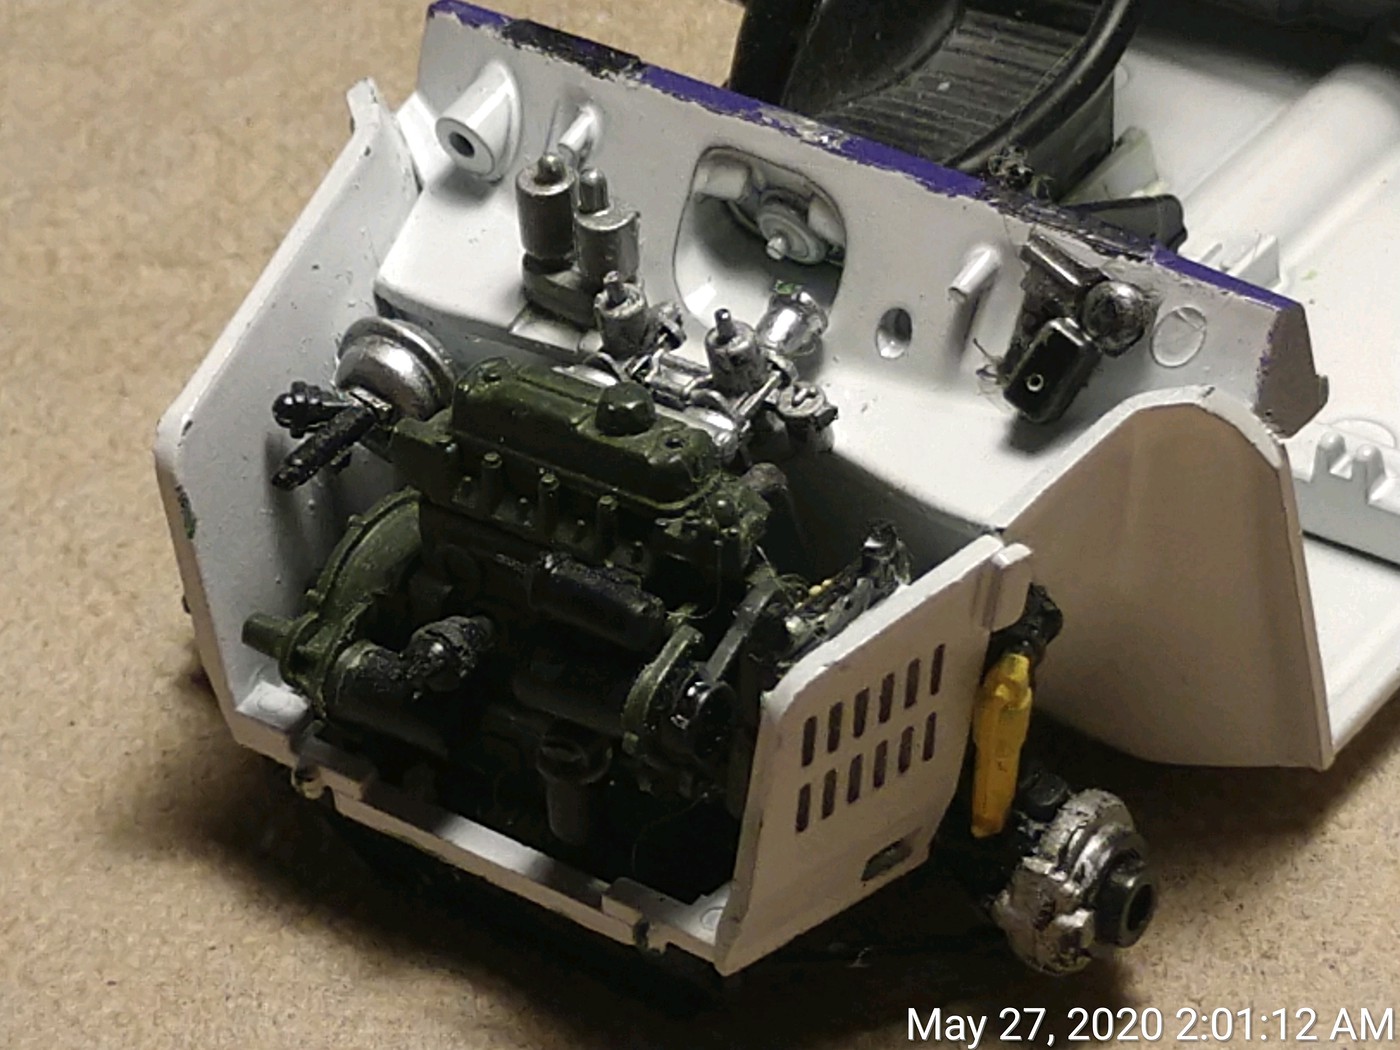
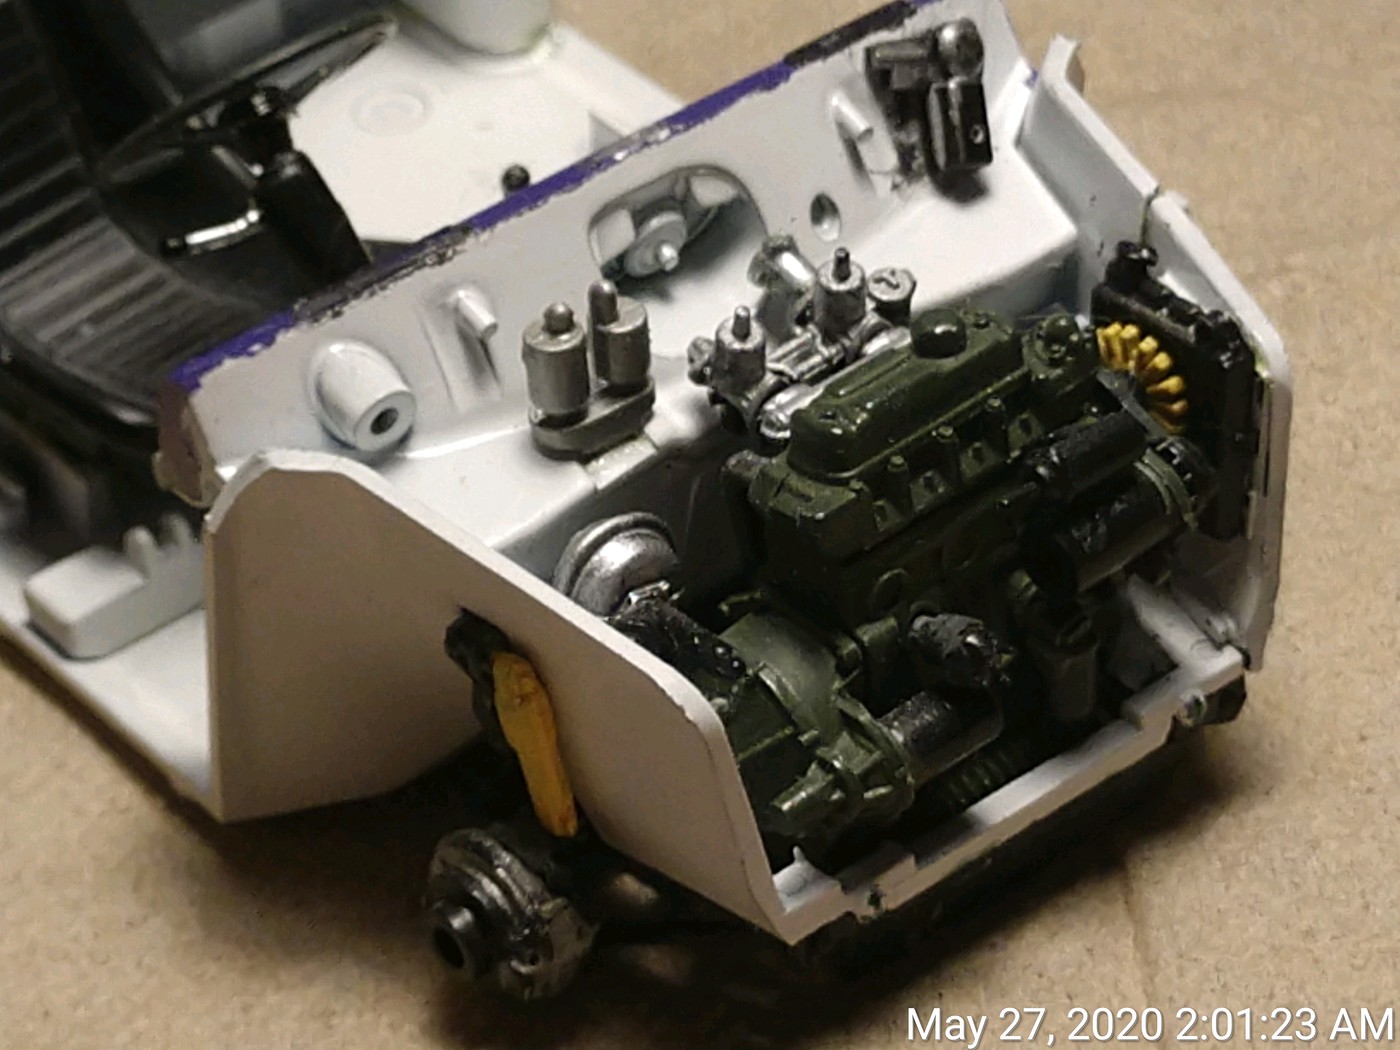
Now for an update on the Mini.  In our last episode, our intrepid hero had just finished up the engine compartment and was waiting for the interior to be finished so he could install the dash and the remaining parts on the firewall for the engine compartment.  That has been done.  Unfortunately, the decals were so old that they wouldn't release from the backing paper.
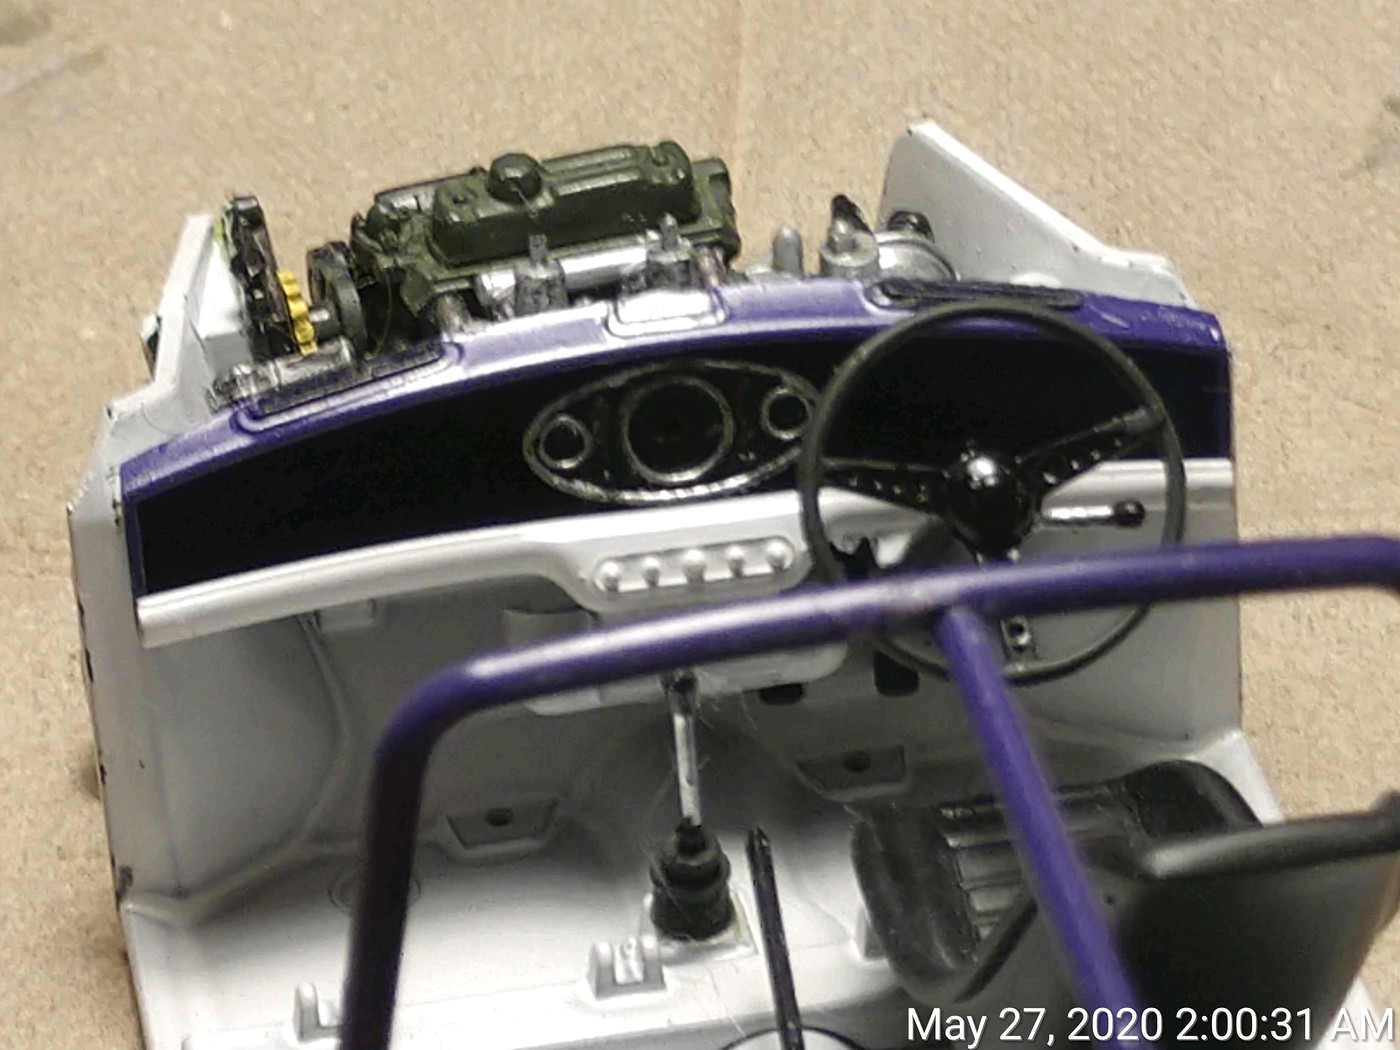
Last weekend, I decided to finish this puppy up and finally get it off my table.  When I went to fit the body to the chassis, I had a problem on the left side.  Turned out that I had installed the front glass slightly crooked and that was causing the fit issues. I popped out the glass, problem solved.  I wasn't originally going to paint the window and body trim, but since I had the glass out, I figured what the heck and went for it.  I masked off the interior and body except for the pieces of trim.  I used an almost dead rattle can of Tamiya Gloss Black and it went on heavier than I expected and seeped under the masking in a few spots.
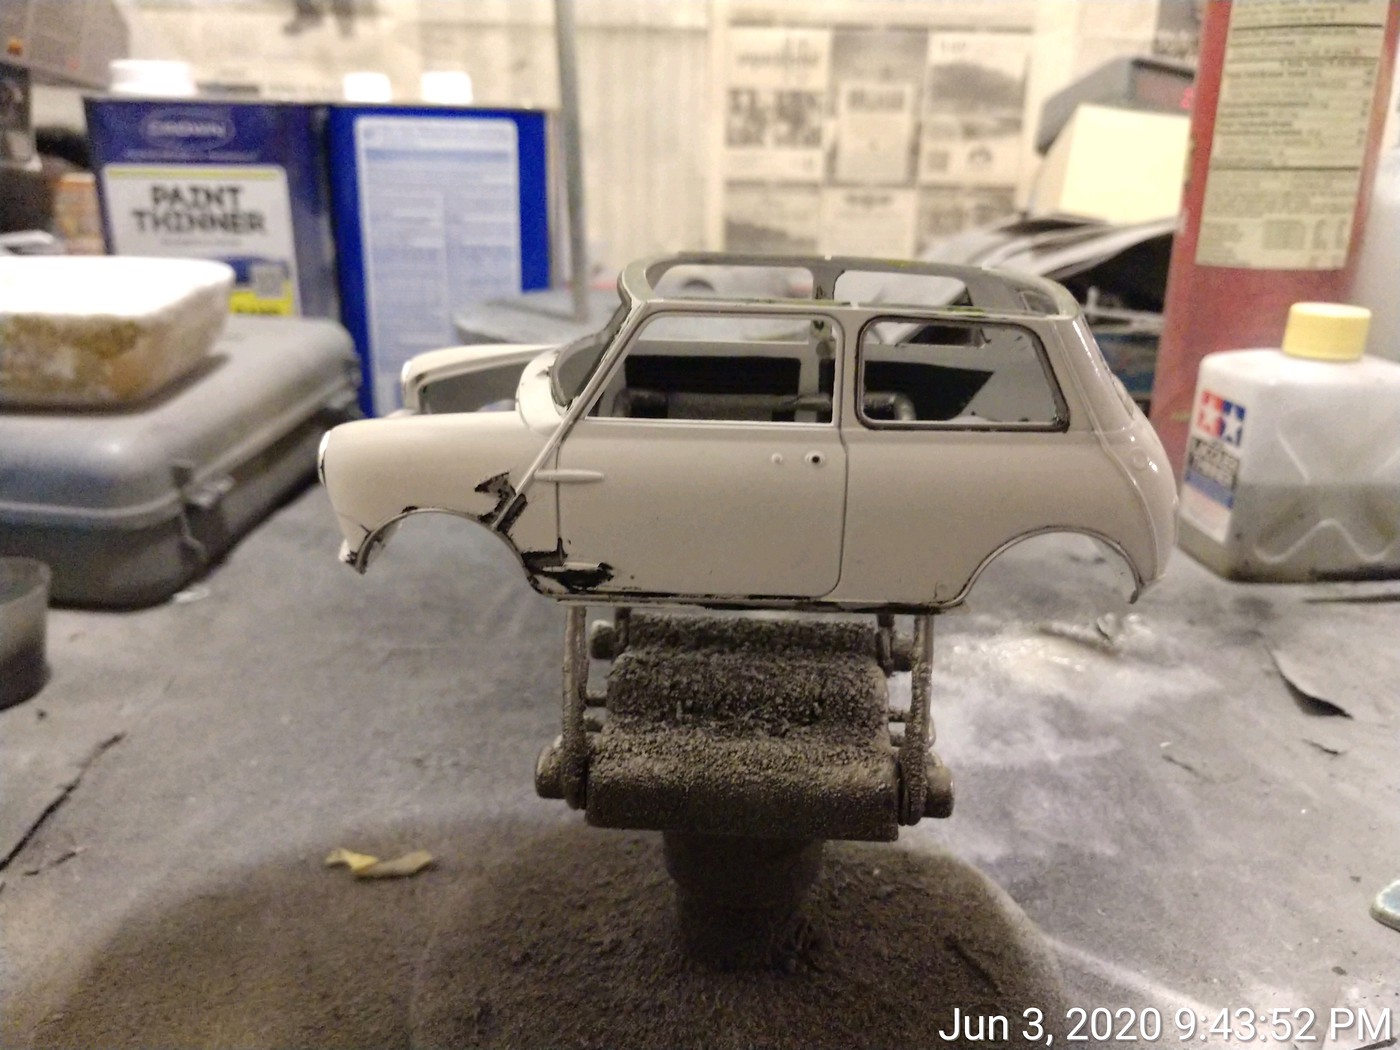
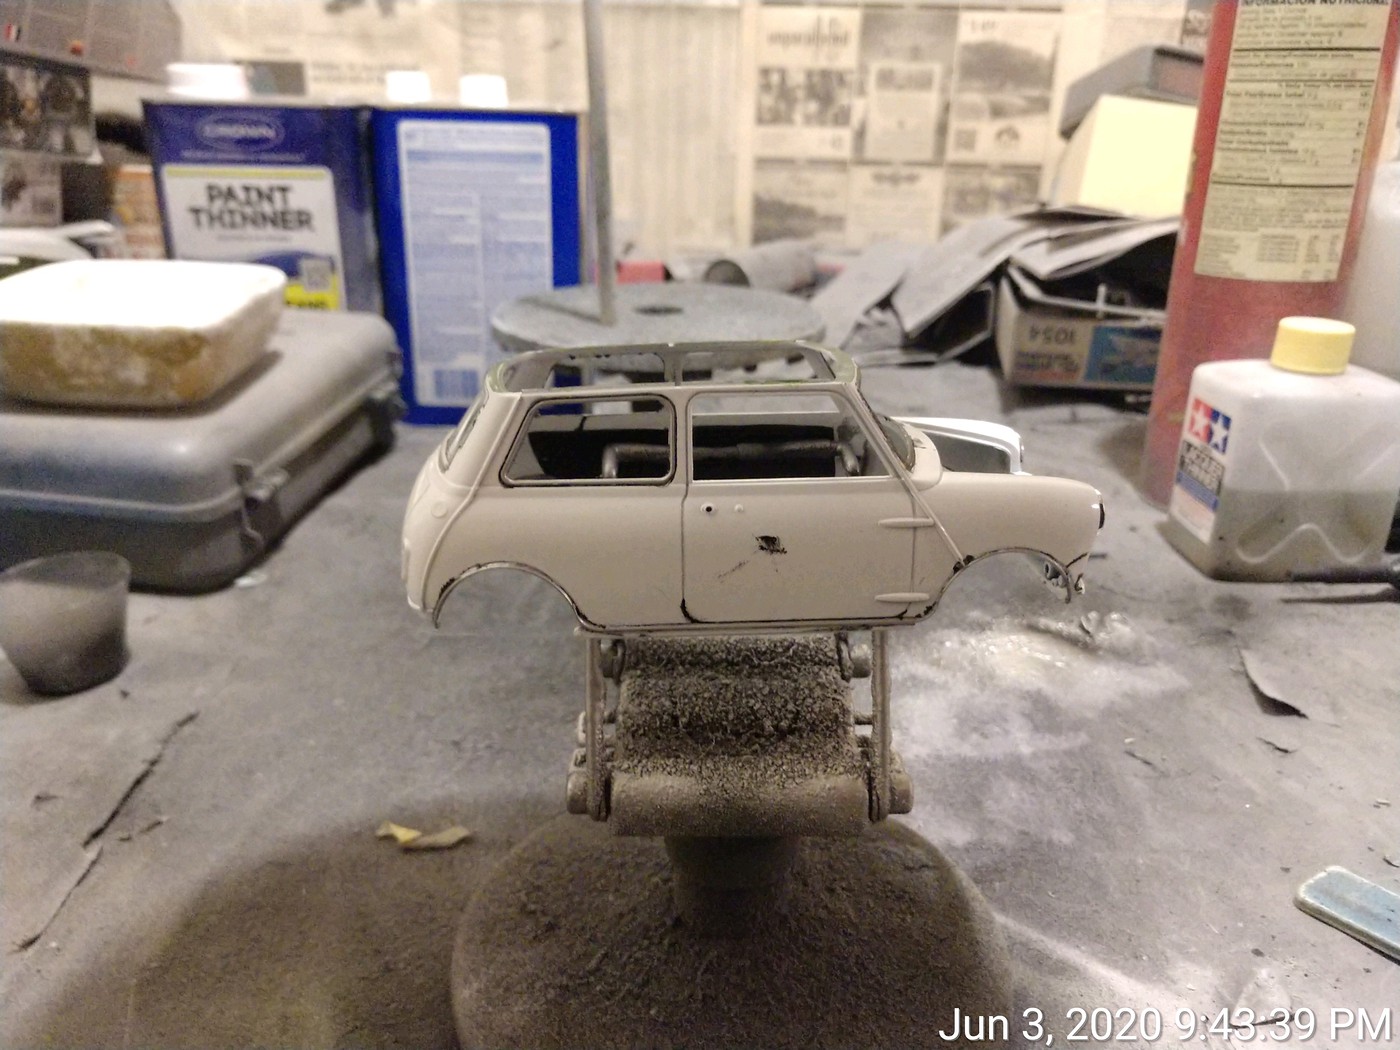
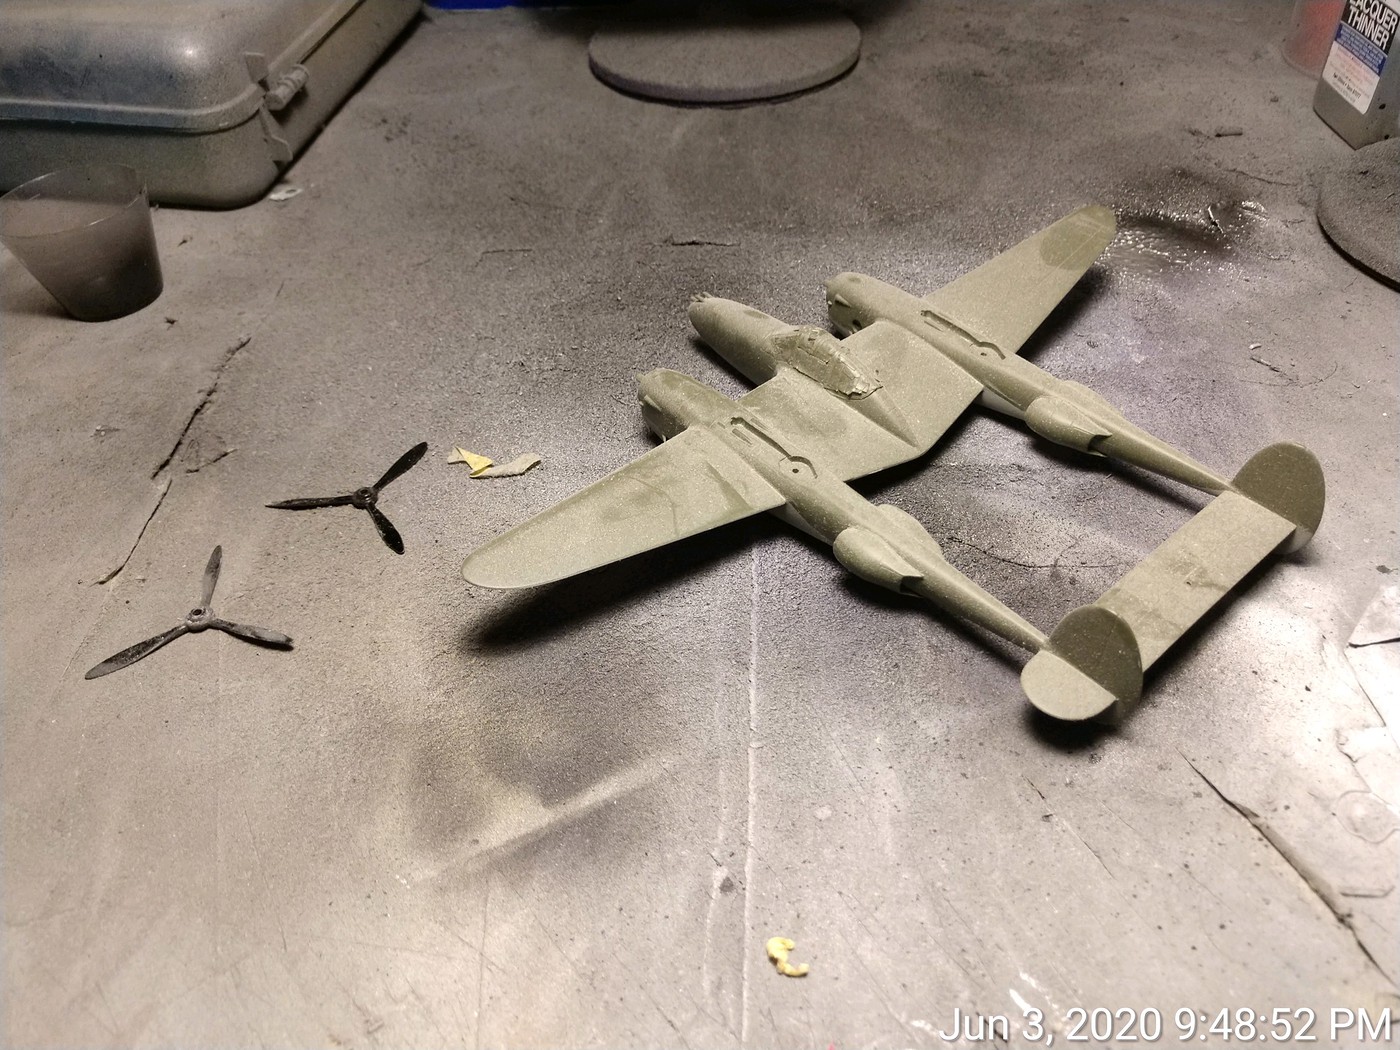
I think I can save it, but I've got to put in an order to Scale Motorsports to do so.  If I can't, I'll have to repaint.  So while I'm waiting on my order from Scale Motorsports, I offer up this HobbyBoss 1/72 P-38 for your viewing pleasure.  I know I was building this for a group build on here, but I can't remember which one or how long ago it was. Best guess, at least five years ago, and I think it was for an Aces themed group build.  Here she is in all her dusty glory.
 

Buddy- Those who say there are no stupid questions have never worked in customer service.

  • Member since
    June 2008
Posted by lewbud on Thursday, June 4, 2020 3:54 AM

Before retiring for the evening, I thought I would get a little work in.  First I put some rubbing alcohol on a napkin and wiped her down to remove the dust.

Then I attached the doors for the main landing gear bays in the booms.  They are one piece, making this relatively easy.  Unfortunately, the instructions aren't too clear on how they go in, but I think I got it right.

Next step, getting her legs underneath her.  As I was handling her for the first time in years, my Spidey sense was telling me that I didn't add enough weight to the nose so I have a feeling she'll be a tail sitter.  Any ideas on how to do the paint the turbos on top of the booms?

Buddy- Those who say there are no stupid questions have never worked in customer service.

  • Member since
    August 2015
  • From: the redlands Fl
Posted by crown r n7 on Friday, June 5, 2020 8:15 AM

that mini is looking alright! what color you said the body is going?

I'll go with burnt iron on those super chargers.


 Nick.

  • Member since
    June 2008
Posted by lewbud on Friday, June 5, 2020 7:46 PM

Nick,

If I have to repaint, the body will still be white. The colors are from the Silk Cut Jaguars from the mid to late 80's, white body with a purple roof.  Thanks for the suggestion on the superchargers, I was thinking some burnt metal mixed with rust as they appear to be brownish in pictures.

Buddy- Those who say there are no stupid questions have never worked in customer service.

  • Member since
    June 2008
Posted by lewbud on Saturday, June 6, 2020 6:12 PM

Made some progress last night.  Got the turbo superchargers painted and installed.  Used a mix of Model Master Rust and Burnt Metal, but they still look a little too brown.  Put a coat of gloss for the decals.  Got the spinners and props assembled as well.

Started the decals, left side is done.

Will put the right side on after dinner.  All that's left to paint are the wheels, pitot tube, mass balances for the horizontal stabilizer, and then a flat coat to tie it all together.

Buddy- Those who say there are no stupid questions have never worked in customer service.

  • Member since
    February 2010
  • From: New Jersey
Posted by 68GT on Monday, June 8, 2020 7:49 PM

Maybe some burnt metal lightly hand brushed on top would work for you.  A lot of times I'll just use a brown paint instead of thr rust colored stuff and either drybrush or use the thin metalizer over the top.

On Ed's bench, ???


  • Member since
    June 2008
Posted by lewbud on Wednesday, June 10, 2020 2:59 AM

Ed,

Something to think about.  Got the flat coat on and the darnedest thing happened.  I was looking over the aircraft and noticed that the O on the left boom intercooler scoop was missing.  I could have sworn that it was on there when I put a gloss coat down to seal the decals (actually I meant to put a flat coat on, but I wasn't paying attention and mixed up a gloss coat on by mistake, but that's my story and I'm sticking to it).  I'm guessing that when I shot the second coat, it didn't adhere properly and got blown off.  All that's left is to put her on her gear and then she'll be done.

Buddy- Those who say there are no stupid questions have never worked in customer service.

  • Member since
    February 2010
  • From: New Jersey
Posted by 68GT on Thursday, June 11, 2020 6:00 PM
Maybe mask and paint the O on if you cant locate a replacement? I don't have any white letters but I know Aeromasters white 45* letters are still out there.

On Ed's bench, ???


  • Member since
    June 2008
Posted by lewbud on Thursday, June 11, 2020 11:45 PM

Ed,

I looked for some white lettering, but none of them match so I'm not going to worry about it. Thanks for the suggestion though.  I'm calling this one done.  I present to you for your viewing pleasure, Hobby Boss's 1/72 P-38L.  Markings are for Capt. Joseph Myers of the 38th FS/55th FG.

A few words about the kit.  If you're looking for a relatively easy P-38 build, this is the kit to get.  The fuselage and booms are split along the horizontal axis, making alignment very easy.  If I were to build it again, I would do the following. The first would be a canopy mask because I hate masking canopies.  Two, get an Eduard Zoom PE set.  A basic pe set would make the cockpit area pop.  Get some resin wheels and tires.  The engraving on the kit tires is very uneven and is off center relative to the mounting holes.  If I were to build another Lightning, I would choose another color for the turbo superchargers.  Probably just go with a burnt metal and leave it at that.  The goody box from Scale Motorsports should be in the mailbox, so I'll be getting back to the Mini soon.  I may knock out the Airfix 1/72 Me-110C first. We'll see.

Buddy- Those who say there are no stupid questions have never worked in customer service.

  • Member since
    June 2008
Posted by lewbud on Saturday, June 13, 2020 3:08 AM

Started back up on the 110.  Still learning the proper ratio for the Mission Models Clear Gloss as while it dried clear, at a certain angle there was a milkiness to it. I am impressed with it's self leveling though.  Not happy with the kit decals though.  Even on the smooth surface provided by the gloss coat, they still silvered even after an application of Micro-Set/Sol. Hopefully they will survive a second coat of gloss to seal them.

Here she is ready for decals.

The bottom decals are done.

The topside decals are done.

Will get the fuselage and nacelles done after I wake up.  For the P-38, either the fourth or fifth pic would be fine for the front page.

Buddy- Those who say there are no stupid questions have never worked in customer service.

  • Member since
    February 2010
  • From: New Jersey
Posted by 68GT on Saturday, June 13, 2020 8:26 AM
P-38 is loaded up. That to bad with the silvering cause the gloss looks good on the 110.

On Ed's bench, ???


  • Member since
    June 2008
Posted by lewbud on Wednesday, July 1, 2020 11:59 AM

Is anybody out there?  Calling the 110 done.  Built several of the new tool Airfix kits, this is not one of the better ones.  Sparse cockpit details, no positive way to attach the landing gear bay doors, sucky decals, a large gap between the nacelles and exhaust stacks.  Plus I was dealing with decisions made five years ago which complicated things such as thinking I could slide the exhausts in after painting the fuselage.  I did, but I also managed to slide one bank of exhaust stacks into the nacelle, never to be seen again.  Also managed to lose the landing light in the wing to the carpet monster.  However, it's the first aircraft I've weathered and I think it came out okay.  Used Tamiya's Brown Panel Line Accent color.  It was much more noticeable until I put the flat coat on.  Anyways, here's the pics.

The decals did look better after the flat coat and I plan to get some Micro Krystal Klear to see if I can simulate the lost landing light.  I like either the last or next to last pic for the front page.  I know I need to get back to the Mini, but am feeling the need to build something with a round motor..

Buddy- Those who say there are no stupid questions have never worked in customer service.

  • Member since
    February 2010
  • From: New Jersey
Posted by 68GT on Tuesday, July 7, 2020 9:09 AM
Still here, been busy with the real world and now camping with the family. Needed a break anyway I think. 110 looks good are those the kit decals?

On Ed's bench, ???


  • Member since
    June 2008
Posted by lewbud on Tuesday, July 7, 2020 11:34 AM

Ed,

Understand getting caught up in the real world and needing a break.  Yes, they are the kit decals.  They do look better after the dull coat, but they still suck.  Working on a Hasegawa 1/72 Corsair Mk.II in FAA markings that I started several years ago.  I lost one of the wheels, so I'm waiting for a resin replacement and Humbrol's version of Gloss Sea Blue to get here from Sprue Brothers.   Nothing pic worthy yet.

Buddy- Those who say there are no stupid questions have never worked in customer service.

  • Member since
    June 2008
Posted by lewbud on Monday, July 27, 2020 5:50 PM

Instead of finishing the Mini or Corsair, I decided to finish a couple of Mustangs that I started back in 2005 for our club build for the 2005 IPMS Nationals in Atlanta.  The theme of the build was the 357th Fighter Group.  For sure, one will be Nooky Booky IV flown by Leonard Carson.  Not sure if I'll keep to the theme with the other or do another international bird.

It's a good thing I had a spare F-51D kit lying around as one of the kits was missing a prop.  Tamiya makes two versions of their P-51D kit.  The P-51D kit is your standard model D kit.  The F-51D kit includes the uncuffed prop for the K as an option, extra bomb racks for the wings, underwing rockets, and Korean War markings.

Buddy- Those who say there are no stupid questions have never worked in customer service.

  • Member since
    February 2010
  • From: New Jersey
Posted by 68GT on Wednesday, July 29, 2020 6:06 PM

Yeah, I was looking around and noticed 3 unfinished Phantoms. This one is the old mold HasegawaF-4E that I was going to build as a F-4F. I hope the Microscale decals hold up.

On Ed's bench, ???


  • Member since
    June 2008
Posted by lewbud on Monday, August 3, 2020 10:32 AM

Ed,

I've had pretty good look with old Microscale decals.  Looking forward to seeing it come together.

Buddy- Those who say there are no stupid questions have never worked in customer service.

  • Member since
    February 2010
  • From: New Jersey
Posted by 68GT on Monday, August 3, 2020 8:51 PM
I think I'll be okay since I've already built 2 of the 4 subjects on the sheet and this subject has relatively much smaller decals.

On Ed's bench, ???


Wiz
  • Member since
    June 2010
Posted by Wiz on Sunday, August 9, 2020 8:45 PM

I would like to jump in with this, Tamiya's 1/48 Fw-190F8.


I think I started it around the time it first came out, and, well, only got this farTongue Tied

"you better hang on if you're taggin' along"

  • Member since
    June 2008
Posted by lewbud on Thursday, August 13, 2020 9:29 AM

Wiz,

Welcome aboard.  Ed's around here somewhere.  Looking forward to your build.

Buddy- Those who say there are no stupid questions have never worked in customer service.

JOIN OUR COMMUNITY!

Our community is FREE to join. To participate you must either login or register for an account.

SEARCH FORUMS
FREE NEWSLETTER
By signing up you may also receive reader surveys and occasional special offers. We do not sell, rent or trade our email lists. View our Privacy Policy.