SEARCH FINESCALE.COM

Enter keywords or a search phrase below:

The 50 Shades of Gray Group Build!

35159 views
433 replies
1 rating 2 rating 3 rating 4 rating 5 rating
  • Member since
    August 2015
  • From: the redlands Fl
Posted by crown r n7 on Wednesday, May 27, 2020 8:49 AM

Thank you for the tip!


 Nick.

  • Member since
    April 2010
Posted by Theuns on Wednesday, May 27, 2020 1:15 AM

I got the basic airframe assembled. The intakes are going to give me hassles I see it now, the front and rear sections do not line up and I hve to either sand the front down or fill up and sand the rer section to match front, eiterway I will loose rivet and pannel detail so I will have to see what section will rescribe easiest.

 IMG_20200527_071104 by Theunis van Vuuren, on Flickr

 IMG_20200527_072209 by Theunis van Vuuren, on Flickr

The bottom joints also had gaps that I needed to fill with sprue. Hopefully this will result in a nice smooth joint after loads of sanding.


I cant figure out how all the other guys are building this model so easly without anny issues.....must be me that are causing issues then by trying to get the seams to perfect.


Nic I have found a noce idea to give a metal look to exhaust cans. After painting I rub a graphite pencil over it , it gives a nice worn metal tone to it.

Here it is on my f15

 Academy 1/48 F15 IDF by Theunis van Vuuren, on Flickr


Theuns


  • Member since
    August 2015
  • From: the redlands Fl
Posted by crown r n7 on Tuesday, May 26, 2020 7:27 PM


Tomcat. You give it your best shot and you fix the issues in the long run.

lostagain. many thanks, I dont know about fast.

I did some pratice on the engine nosel.

removed seam from canopy..


 Nick.

  • Member since
    April 2014
  • From: Australia
Posted by lostagain on Tuesday, May 26, 2020 8:51 AM


Hi Stik, a lot of work going into the X-35 there. Nice detail additions in the cockpit.


68, Phar out, two F4s at once, good work. The cockpits are phull of detail.


Theuns, great start on your cockpit. Those seats have come up well with your added harness.


Nick, the F-16 is off to a great and fast start.
Tomcat, looking forward to the Spark Vark. Don't be intimidated by the skills on show, I'll bring the standard down for you!


HMAS Melbourne is a conversion of the USS Oliver Hazard Perry Academy kit. I am modelling it as late in its life, so there are quite a few modifications. The kit comes with PE railings all over. So the first thing is to fill in all the holes in the kit for the plastic railings. I got pretty good at stretching sprue by the end of this part.


  • Member since
    April 2019
  • From: South west, PA
Posted by Tomcat on Sunday, May 24, 2020 8:20 PM

I have been following this thread with a lot of interest. The talent level and attention to detail is nothing short of outstanding. I will be starting on my "Spark Vark" in a few weeks and I have to say I'm just a little bit intimidated by the all the great work shown here. None the less I will trudge on with my build and only hope to turn in something respectible. I guess time will tell.

Mark aka Tomcat

On the workbench: Monogram 1/24 '69 Pontiac GTO and a Monogram 1/67 (box scale) B-26 Invader

  • Member since
    July 2004
  • From: Sonora Desert
Posted by stikpusher on Sunday, May 24, 2020 12:38 PM

Thanks Nick. Your F-16 cockpit is coming along very nicely! I’m surprised to see that the wings are molded separate from the fuselage, as in most F-16 kits.


F is for FIRE, That burns down the whole town!

U is for URANIUM... BOMBS!

N is for NO SURVIVORS...

       - Plankton

LSM


  • Member since
    August 2015
  • From: the redlands Fl
Posted by crown r n7 on Sunday, May 24, 2020 6:43 AM

latest pics.


 Nick.

  • Member since
    August 2015
  • From: the redlands Fl
Posted by crown r n7 on Saturday, May 23, 2020 12:58 PM

Theuns. the cockpit dose look great.

Stik. Thanks that X-35 looks real good.

Robert. out standing. thank you

lastest pics.


 Nick.

  • Member since
    February 2005
  • From: Nashotah, WI
Posted by Glamdring on Saturday, May 23, 2020 12:54 PM
I finally finished the badge and uploaded to the first post. (Hopefully)

Robert 

"I can't get ahead no matter how hard I try, I'm gettin' really good at barely gettin' by"

  • Member since
    February 2005
  • From: Nashotah, WI
Posted by Glamdring on Saturday, May 23, 2020 11:53 AM

Theuns and Crown, absolutely!  Welcome abord.  I have added you to the list.

Robert 

"I can't get ahead no matter how hard I try, I'm gettin' really good at barely gettin' by"

  • Member since
    July 2004
  • From: Sonora Desert
Posted by stikpusher on Saturday, May 23, 2020 12:46 AM

Theuns

Would the bottom speebrake just behnd the wheelwell on the F4b generally be in the open position? 


Theuns


I think that when they were parked on the ground and hydraulic pressure bled out of the system, those would drop down a bit


F is for FIRE, That burns down the whole town!

U is for URANIUM... BOMBS!

N is for NO SURVIVORS...

       - Plankton

LSM


  • Member since
    April 2010
Posted by Theuns on Saturday, May 23, 2020 12:35 AM

Would the bottom speebrake just behnd the wheelwell on the F4b generally be in the open position? 


Theuns

  • Member since
    July 2004
  • From: Sonora Desert
Posted by stikpusher on Saturday, May 23, 2020 12:28 AM

Glamdring
Cockpit is looking great!

Thanks Glam, I just need to get some paint in there now!

Nick, I can’t wait to see that F-16 get going here.

68 and Theuns, your Phantoms are both shaping up very nicely!


Today I skipped ahead a few steps to do something simple 


First up I added the weapons bays and wheel wells to the lower fuselage, as these are molded as separate parts


And then I added the weapons bays doors in the closed position. The X-35 had no weapons bays, so I need to fill and smooth the door lines to fair them into the airframe.


F is for FIRE, That burns down the whole town!

U is for URANIUM... BOMBS!

N is for NO SURVIVORS...

       - Plankton

LSM


  • Member since
    April 2010
Posted by Theuns on Friday, May 22, 2020 8:05 AM

This kit has nice detail but I dont like the tri-colour plastic. There are also some fiddly assembly in the wheelwells.


I dont kno why academy dint mold in throttles or suply a decal for the IP but in this size I think the painting wil be busy enough to look OK.

The seats are nice but I added the belts and chute harnass.

 IMG_20200522_115557 by Theunis van Vuuren, on Flickr

 IMG_20200522_115715 by Theunis van Vuuren, on Flickr


Theuns

  • Member since
    August 2015
  • From: the redlands Fl
Posted by crown r n7 on Wednesday, May 20, 2020 10:56 AM

Hi lotts of good builds. I'm in with a haseawa F-16C in 1/48.


 Nick.

  • Member since
    April 2010
Posted by Theuns on Tuesday, May 19, 2020 11:47 PM

Can I come play? I have a 1/48 Academy F-4b in USN scheme I started last night.


Theuns

  • Member since
    February 2005
  • From: Nashotah, WI
Posted by Glamdring on Tuesday, May 19, 2020 8:41 PM
Cockpit is looking great!

Robert 

"I can't get ahead no matter how hard I try, I'm gettin' really good at barely gettin' by"

  • Member since
    July 2004
  • From: Sonora Desert
Posted by stikpusher on Tuesday, May 19, 2020 10:11 AM

tempestjohnny
Nice use of gizmology Stik
 

Thanks! If you cant make it, fake it Wink


F is for FIRE, That burns down the whole town!

U is for URANIUM... BOMBS!

N is for NO SURVIVORS...

       - Plankton

LSM


  • Member since
    November 2003
  • From: Naples, FL
Posted by tempestjohnny on Tuesday, May 19, 2020 5:55 AM
Nice use of gizmology Stik


  • Member since
    July 2004
  • From: Sonora Desert
Posted by stikpusher on Monday, May 18, 2020 6:48 PM

That’s a good question Glam... it doesn’t worry me either way though...


Today’s update:

I added the last bit of detail to the cockpit rear wall that I was wanting put in, a noticeable pipe or conduit. That was made from an item in my spares bin.


Then I went to work on the IP. Now it at least resembles the real thing. I won’t claim that it replicates the IP...


And test fitting it all together


From the front


From the rear


All ready for paint now... and a harness that I am salvaging from my spares bin...


F is for FIRE, That burns down the whole town!

U is for URANIUM... BOMBS!

N is for NO SURVIVORS...

       - Plankton

LSM


  • Member since
    February 2005
  • From: Nashotah, WI
Posted by Glamdring on Saturday, May 16, 2020 7:17 PM

Very nice guys!  Thanks for keeping up with the build.  The question is, which will get done first, you buildsor the GB badge!?!

I hope the badge!

Robert 

"I can't get ahead no matter how hard I try, I'm gettin' really good at barely gettin' by"

  • Member since
    July 2004
  • From: Sonora Desert
Posted by stikpusher on Saturday, May 16, 2020 3:23 PM

So my afternoon session at the bench yesterday was spent improving the kit ejection seat and cockpit rear shelf. I was able to track down the actual seat type used on the X-35, a variant of the SJU family, and based my updates to the seat on photos of those. I had to change the shape of the sidewalls, the head rest, and add quite a few little details.


I just need to add a harness now... I also added the prominent “black boxes” visible on the cockpit rear shelf along with some wiring...


And a test fit...


 some adjustments needed, one more item to add, then on to the IP...


F is for FIRE, That burns down the whole town!

U is for URANIUM... BOMBS!

N is for NO SURVIVORS...

       - Plankton

LSM


  • Member since
    July 2004
  • From: Sonora Desert
Posted by stikpusher on Wednesday, May 13, 2020 11:22 PM

So today I spent a good bit of time starting improvements in the cockpit. I have found a few good reference photos, and while by no means all showing, they do reveal that the kit was bit fanciful in some details of the front office. Particularly on the IP and the ejection seat. They also left a big empty shelf on the area behind the seat which I will be filling up with stuff from my spares bins.


Basic seat


Seat (with fictitious side “horns” cut off) and IP


Beginning corrections to seat and IP


F is for FIRE, That burns down the whole town!

U is for URANIUM... BOMBS!

N is for NO SURVIVORS...

       - Plankton

LSM


  • Member since
    June 2017
Posted by UnwaryPaladin on Tuesday, May 12, 2020 1:06 PM

Nice start on the F-35 and Phantoms, good to see some activity on this GB. 

I haven't started mine yet, an SBD-1 in gray. The pre-war colors are tempting, so I'm thinking about switching projects for the GB. 

joe

  • Member since
    February 2010
  • From: New Jersey
Posted by 68GT on Tuesday, May 12, 2020 10:39 AM

I got started on the Phantom as well and they are box stock Fujimi cockpits.  I figured whats one Phantom is Phantastic then two Phantoms should be Phantabulous!

On Ed's bench, ???


  • Member since
    July 2004
  • From: Sonora Desert
Posted by stikpusher on Sunday, May 10, 2020 2:14 PM

And I’m in!

So I bought this kit long ago while on deployment overseas. It was on clearance at our base PX.
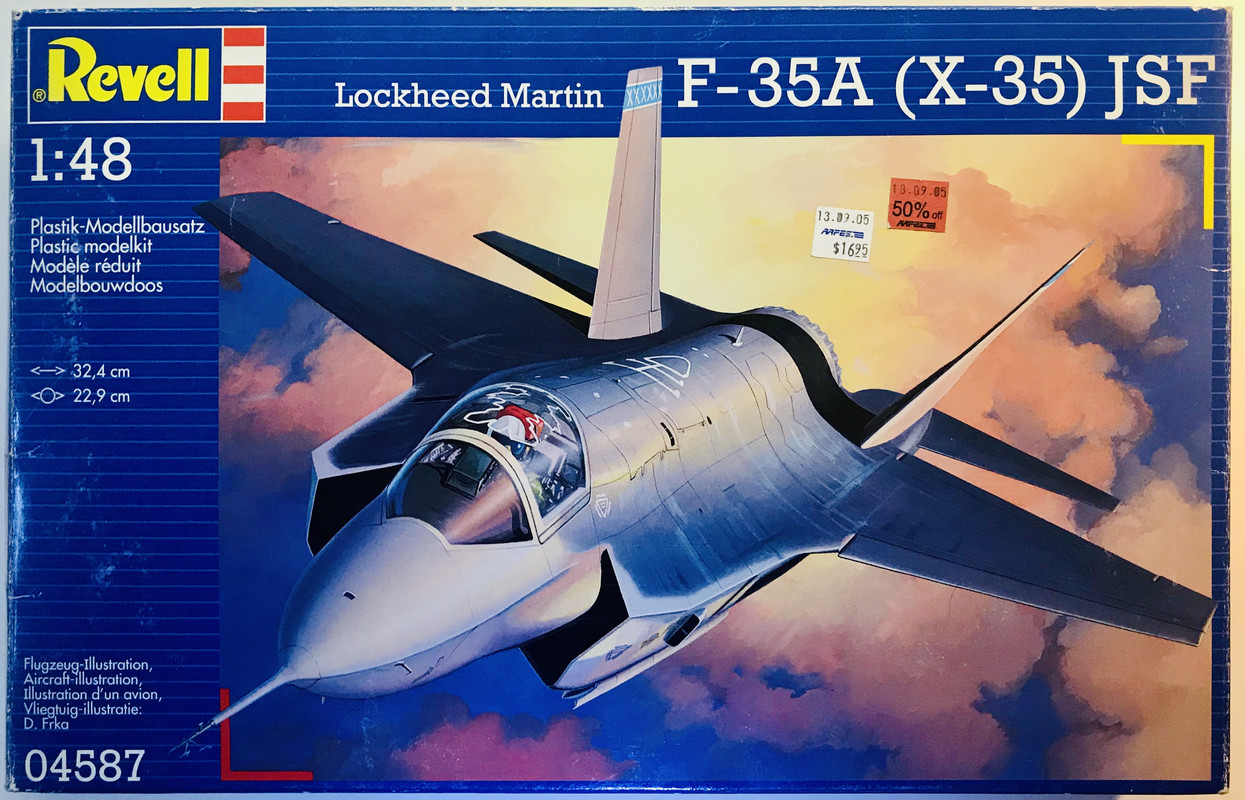


I have held off building it for one reason or another. But with my recent move and seeing F-35s flyover and near my new home nearly every day I have developed a great fondness for this aircraft, and the urge to build one. I researched this kit and saw that it would be a huge project to make it into the production type. But with some minor tweaks, it is easily corrected into the flight test development prototype. So I raided another kit and obtained the long flight test nose instrumentation boom. And being an old So. Cal. native with personal and family connections to the aerospace industry there, as well as multiple visits to Edwards AFB, this project took root...


So I started this build yesterday, with the added impetus of trying out my recently acquired Micro Weld glue. (shameless self plug to read my review here) I started with the basic cockpit assembly yesterday. But I think that I’m going to dress it up a bit based off what little that I can see in photos of the X-35A and X-35B prototypes. Which are actually the same airframe, but after A flight test was complete, the aircraft was sent back to the plant for modification into the B configuration.


Anyways, here are the photos of my basic cockpit construction
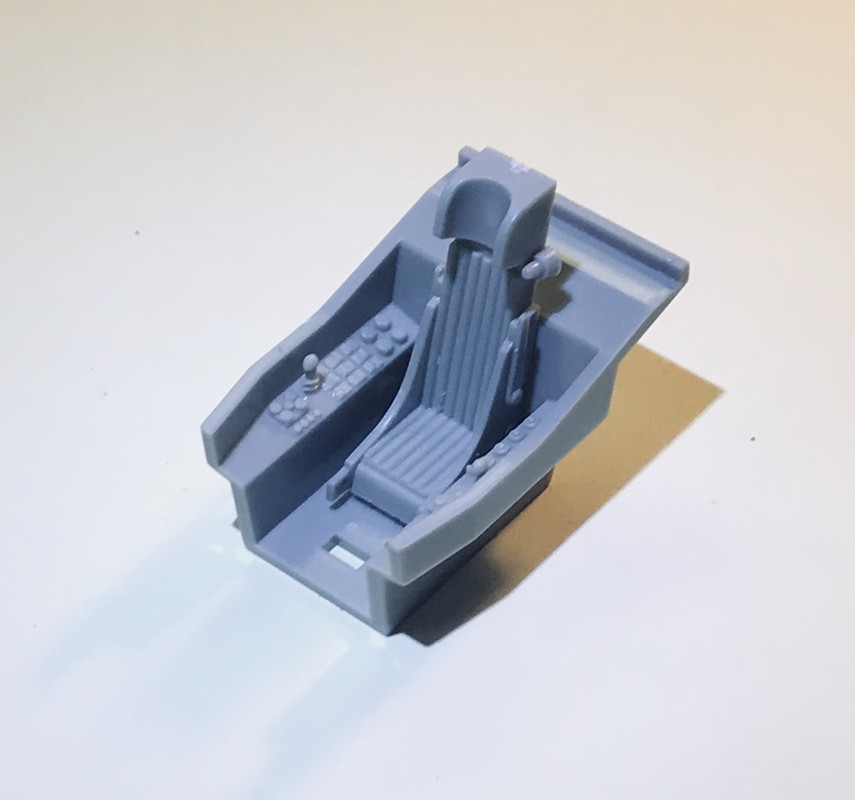


And basic seat, which I’m going to modify


Stay tuned for more eventual updates...


F is for FIRE, That burns down the whole town!

U is for URANIUM... BOMBS!

N is for NO SURVIVORS...

       - Plankton

LSM


  • Member since
    February 2005
  • From: Nashotah, WI
Posted by Glamdring on Wednesday, April 15, 2020 6:55 PM

That is exciting!  I love Phantoms.

Robert 

"I can't get ahead no matter how hard I try, I'm gettin' really good at barely gettin' by"

  • Member since
    February 2010
  • From: New Jersey
Posted by 68GT on Wednesday, April 15, 2020 6:31 PM

I'll probably start this one over the weekend so here is the unstarted kit.

On Ed's bench, ???


  • Member since
    February 2005
  • From: Nashotah, WI
Posted by Glamdring on Wednesday, February 26, 2020 8:03 PM

Got you added, welcome aboard!

Robert 

"I can't get ahead no matter how hard I try, I'm gettin' really good at barely gettin' by"

  • Member since
    February 2010
  • From: New Jersey
Posted by 68GT on Tuesday, February 25, 2020 1:06 PM

I'm in, just have to remember which I was going to start with.

I can start with a Fujimi F-4D in 1/72 scale.  It's the 906TFG, 89 TFS 30th anniversary one.

On Ed's bench, ???


JOIN OUR COMMUNITY!

Our community is FREE to join. To participate you must either login or register for an account.

SEARCH FORUMS
FREE NEWSLETTER
By signing up you may also receive reader surveys and occasional special offers. We do not sell, rent or trade our email lists. View our Privacy Policy.