SEARCH FINESCALE.COM

Enter keywords or a search phrase below:

The 50 Shades of Gray Group Build!

35159 views
433 replies
1 rating 2 rating 3 rating 4 rating 5 rating
  • Member since
    January 2015
Posted by TheMongoose on Saturday, February 20, 2021 8:29 PM

Bob...50 shades of rust! Love it lmao

In the pattern: Scale Shipyard's 1/48 Balao Class Sub! leaning out the list...NOT! Ha, added to it again - Viper MkVii, 1/32 THUD & F-15J plus a weekend madness build!

  • Member since
    February 2005
  • From: Nashotah, WI
Posted by Glamdring on Saturday, February 20, 2021 8:25 PM

That is some sweet action Bob!  I love the two tone, and the rusting!


Robert 

"I can't get ahead no matter how hard I try, I'm gettin' really good at barely gettin' by"

  • Member since
    November 2003
  • From: Nashville, TN area
Posted by bobbaily on Friday, February 19, 2021 2:42 PM

Picked up the Vallejo Rust & Weathering kit @ HobbyLobby-not a bad deal with the 40% coupon that will be discontinued soon...anyway, rusted up the chassis first, then pulled out a test mule from the stash-a kit that I had started several years ago with the intent of extreme weathering.....anyway, I ended up rusting the Chevy a little....think barn find in the process of being restored...or at least taken to the drag strip on weekends...

Probably shoot some Future, decals and then dull coat...maybe with some dot filtering...maybe not...maybe a Fifty Shades of Rust GB...hmmmm

Bob


  • Member since
    November 2003
  • From: Nashville, TN area
Posted by bobbaily on Friday, February 19, 2021 9:16 AM

Thank you Robert...yes this has been a learning experience and continues to be so...

Ok-really wanted to do the Bare Metal Foil but decided that this isn't the time nor kit to do so-and my hand brushing the Golden Air Flow paint didn't work either...however, over in the Auto Forum, I did see NearsightedJohn built a '64 GTO A/FX and airbrushed Alcad on the chrome trim-looked great.  He taped off the trim, primed with gloss black and then Alcad Chrome.  He did a great job.

I don't have any Chrome in the paint supply, but I do have some Vallejo Metal Aluminum-figured it would work.  Didn't take the time to prime gloss black-fingers crossed that it would work...

I'm happy with it. Going to order some Vallejo Air Chrome and save the BMF treatment for later. Taping wasn't really that bad-somewhat relaxing.

Also, decided to weather the Chevy a little, thus the paint fade, especially on the roof.  Thinking about hiding some blemishes with some rust...hopefully get this one put to bed soon...several other Group Builds that I hope to finish before the deadlines....Wink


Bob

Bob


  • Member since
    February 2005
  • From: Nashotah, WI
Posted by Glamdring on Wednesday, February 17, 2021 8:05 PM

Tomcat - I will add you as complete.  A fine recovery from disaster!

Bob - That is a shame about the decals...but it looks to me that you inadvertantly found a way to replicate a race car that has been trading paint out on the track.  Glad you are moving forward though, and learning about Vallejo along the way.  Yes

Robert 

"I can't get ahead no matter how hard I try, I'm gettin' really good at barely gettin' by"

  • Member since
    November 2003
  • From: Nashville, TN area
Posted by bobbaily on Wednesday, February 17, 2021 12:13 PM

TheMongoose

Yep Bob I have tried a few others and created goo myself! seemsEven the acrylics that appear to not contain alcohol actually have a little bit in them. The X-20A has worked very well, I was totally surprised. I use a 50/50 mix with model color and just 80/20 paint to thinner max with model air.

The other side benefit was that I have not had any problems with paint pulling up from the tape since using the Tamiya  thinner.


Mongoose-mixed up some of the Vallejo light grey that I used on the Chevy & some X-20A....found an old test mule to spray on-much better-I will be using the Tamiya moving forward.  Frustrating thing was that the paint itself was older/thicker (although labeled Model Air) so I mixed in some Vallejo Airbrush Thinner-either not enough and/or my skills are a work in progress....but still, the X-20A worked well and I have a full bottle or two lying about.

Again, thank you for sharing the tip.

Bob


  • Member since
    January 2015
Posted by TheMongoose on Wednesday, February 17, 2021 8:13 AM

Yep Bob I have tried a few others and created goo myself! seemsEven the acrylics that appear to not contain alcohol actually have a little bit in them. The X-20A has worked very well, I was totally surprised. I use a 50/50 mix with model color and just 80/20 paint to thinner max with model air.

The other side benefit was that I have not had any problems with paint pulling up from the tape since using the Tamiya  thinner.

In the pattern: Scale Shipyard's 1/48 Balao Class Sub! leaning out the list...NOT! Ha, added to it again - Viper MkVii, 1/32 THUD & F-15J plus a weekend madness build!

  • Member since
    November 2003
  • From: Nashville, TN area
Posted by bobbaily on Wednesday, February 17, 2021 7:01 AM

TheMongoose


bobbaily

Mark-so sorry for your battle with your decal-the Strike Eagle looks great-hopefully you will come across a decal that meets your goal.

Cleaned up the Chevy today-decided to experment a bit.  Tried some of the Badger primer-happy with it-still some learning but I can spray it indoors with no issues-I've always relied on spray cans so this is a good thing.

Came across an older Vallejo weathering kit-got it during one of Squadron's big sales several years ago....German grey...various shades of grey...hmmm...anyway, got the accents on and the lower part of the body painted....will use the darker grey for the roof tomorrow. 

Still learning using Vallejo-not thrilled about the auto paint applications but for this build, I'm good with it.  I have some Golden High Flow grey shading-may use that for the roof.  I've tested the Golden High Flow and it sprays great-but it will require mixing for military applications.


i have found thinning the vallejo with Tamiya X-20A works the best. 1 drop of retarder medium per 20 drops paint and thinner. No graininess anymore and lays down smooth. Anyway hopefully I'm not to presumptuous and that's the kind of info you could use?


Mongoose-thank you and you're not being presumptuous.  I'm always looking for input to improve.  I have some X-20A and I'll give it a try today.  I have been hesitant to use non-Vallejo thinner based on what I've read in the forums about reactions but I'll give it a try.

Again, thank you.

Bob


  • Member since
    January 2015
Posted by TheMongoose on Tuesday, February 16, 2021 9:37 PM

bobbaily

Mark-so sorry for your battle with your decal-the Strike Eagle looks great-hopefully you will come across a decal that meets your goal.

Cleaned up the Chevy today-decided to experment a bit.  Tried some of the Badger primer-happy with it-still some learning but I can spray it indoors with no issues-I've always relied on spray cans so this is a good thing.

Came across an older Vallejo weathering kit-got it during one of Squadron's big sales several years ago....German grey...various shades of grey...hmmm...anyway, got the accents on and the lower part of the body painted....will use the darker grey for the roof tomorrow. 

Still learning using Vallejo-not thrilled about the auto paint applications but for this build, I'm good with it.  I have some Golden High Flow grey shading-may use that for the roof.  I've tested the Golden High Flow and it sprays great-but it will require mixing for military applications.


i have found thinning the vallejo with Tamiya X-20A works the best. 1 drop of retarder medium per 20 drops paint and thinner. No graininess anymore and lays down smooth. Anyway hopefully I'm not to presumptuous and that's the kind of info you could use?

In the pattern: Scale Shipyard's 1/48 Balao Class Sub! leaning out the list...NOT! Ha, added to it again - Viper MkVii, 1/32 THUD & F-15J plus a weekend madness build!

  • Member since
    November 2003
  • From: Nashville, TN area
Posted by bobbaily on Tuesday, February 16, 2021 5:49 PM

Mark-so sorry for your battle with your decal-the Strike Eagle looks great-hopefully you will come across a decal that meets your goal.

Cleaned up the Chevy today-decided to experment a bit.  Tried some of the Badger primer-happy with it-still some learning but I can spray it indoors with no issues-I've always relied on spray cans so this is a good thing.

Came across an older Vallejo weathering kit-got it during one of Squadron's big sales several years ago....German grey...various shades of grey...hmmm...anyway, got the accents on and the lower part of the body painted....will use the darker grey for the roof tomorrow. 

Still learning using Vallejo-not thrilled about the auto paint applications but for this build, I'm good with it.  I have some Golden High Flow grey shading-may use that for the roof.  I've tested the Golden High Flow and it sprays great-but it will require mixing for military applications.


Bob


  • Member since
    April 2019
  • From: South west, PA
Posted by Tomcat on Tuesday, February 16, 2021 5:03 PM

Well here is the final result of my F15E strike eagle with decal, redone....sort of. I was able to locate a picture of the original art:

from this I made a decal to place on the model. I had to reduce the image to be in scale (more or less) and the result yielded a fairly dark image, but i thought it was usable.

Since the image contains "white" I had to print this on white decal paper. Here I prepped the model by caefully scraping, rubbing away the damaged one. I used Solvaset to help soften up the decal...

 Let me tell you that trying to work on a completed model is vary harrowing to say the least. I was pretty sure I'd break something off. To my amazement she weathered the storm with no additonal damage. Before applying the new one, I painted over the general area where the decal was to be placed with white. I had hoped the white beneath the decal would help to lighten it up some and make the other colors a liitle more vibrant. After the white was dry, I brushed on a coat of Future to give the decal something to hold onto. Then I applied to decal, let it dry and then a coat of testors decal setting solution. some of the white protruded the decal edges so I carefully painted on Gunship Grey and blended it into the surrounding paint. After all that dried I brushed on some acrylic flat to even out the finish and here it is...

Pretty awful, don't you think. You win some and you loose some. I'm not going to spend any more time on her, unless of course I do come across a legitimate decal Wink. So call it done and use the last picture if you please. Thanks for hosting this GB and putting up with my ranting. Thanks for looking.

BTW, Bobbaily I love the Chevy and believe me I feel your pain with the decal.


Mark aka Tomcat

On the workbench: Monogram 1/24 '69 Pontiac GTO and a Monogram 1/67 (box scale) B-26 Invader

  • Member since
    November 2003
  • From: Nashville, TN area
Posted by bobbaily on Monday, February 15, 2021 6:12 PM

As always, great work being posted-you guys continue to raise the bar.

Finally got motoviated to get the Chevy finished-started with Bare Metal Foil-discovered real quick that BMF is a skill set that requires time & effort...and skills I don't have.

Masked the trim with Tamiya tape and moved to the Molotow Chrome Pen-2mm-it was ok but I think it was getting a little old-used some Golden Flow silver-I liked it but it is a litte thin for brushing (going to pick up the non Flow version).  Pulled the tape off....along with several decals....really thought that they had enough clear coat to prevent that....live and learn..Thought about doing some touch up-didn't work.  Body is soaking in 'Mean Green'-will try to clean it up and start over tomorrow.  If not, then Plan B....


Bob


  • Member since
    April 2014
  • From: Australia
Posted by lostagain on Sunday, February 14, 2021 4:54 AM

Thanks Mongoose, you are too kind - the helo deck decal was a monster for me too - I am using the Ronin decal set for the Aussie FFGs, and the deck markings are not the same as the USN so they don't line up with the markings etched in the deck.
So that gave me some problems chasing it round the place - so I managed to break off one corner, and it's repaired with a couple of bits of white strip.
Basically, don't look too close....

Tomcat, good luck with the replace/repair effort.

68, love the Thunderbolt painting. I have seen the fake canopy on some Canuck Hornets too.


  • Member since
    January 2015
Posted by TheMongoose on Saturday, February 13, 2021 8:52 AM

Lost again I was finally able to see your pictures. The Melbourne is really looking good. can't wait to see some close-ups as you start adding details. That big decal on the Stern for the Helo landing spot was the bane of my existence. yours looks really great!

In the pattern: Scale Shipyard's 1/48 Balao Class Sub! leaning out the list...NOT! Ha, added to it again - Viper MkVii, 1/32 THUD & F-15J plus a weekend madness build!

  • Member since
    February 2005
  • From: Nashotah, WI
Posted by Glamdring on Friday, February 12, 2021 9:04 PM

Bravo, Lostagain!  Very impressive!


68, nice inclusion of the false canopy.  I didn't even know such a thing existed.  

Robert 

"I can't get ahead no matter how hard I try, I'm gettin' really good at barely gettin' by"

  • Member since
    April 2014
  • From: Australia
Posted by lostagain on Tuesday, February 9, 2021 11:03 PM

Ah yes, started my 2021 build album so I need to set the permissions up correctly.

Same thing last year, but this year I will be smart and record what I need to do to make them visible.

And put those instructions in a safe place...

  • Member since
    February 2010
  • From: New Jersey
Posted by 68GT on Tuesday, February 9, 2021 8:30 PM

Tough to see in the photo but I finished up the grays including a false canopy.

On Ed's bench, ???


  • Member since
    April 2019
  • From: South west, PA
Posted by Tomcat on Tuesday, February 9, 2021 7:19 PM

Hold off on the pic until I give this decal a try. I should have an answer by the weekend. Wish me luck. 

Mark aka Tomcat

On the workbench: Monogram 1/24 '69 Pontiac GTO and a Monogram 1/67 (box scale) B-26 Invader

  • Member since
    February 2005
  • From: Nashotah, WI
Posted by Glamdring on Tuesday, February 9, 2021 6:40 PM

Tomcat - It still turned out great even with the sandstorm event!  Thanks for posting!  Do you want me to put a pic on the roster yet or are you going to try a redo on the decal?

Lostagain - I look forward to seeing your update, bit it seems like there may be a picture display issue.  All those in your post have what looks to be a forbidden symbol.

Robert 

"I can't get ahead no matter how hard I try, I'm gettin' really good at barely gettin' by"

  • Member since
    April 2019
  • From: South west, PA
Posted by Tomcat on Tuesday, February 9, 2021 4:26 PM

Mongoose. Thank you for the generous offer. You know an internet search led me to the actual nose art. I just might be able to produce my own decal from it. Stay tuned we'll see what happens.

Mark aka Tomcat

On the workbench: Monogram 1/24 '69 Pontiac GTO and a Monogram 1/67 (box scale) B-26 Invader

  • Member since
    April 2014
  • From: Australia
Posted by lostagain on Tuesday, February 9, 2021 7:30 AM


TJ, the Gripen looks fantastic – a very slick looking aircraft.


Omar, really great finish on the J. That is one spooky looking helicopter!


Mongoose, the Viper is super and really mean looking, great work there.


Tomcat, spewing about the decal, that is a real pain. Yep I have been there too. The Eagle has come out very well.


68, I always like a Warthog, good stuff.


Rooster, the Eagle is coming together well.


The Melbourne is coming together slowly. Still not happy with the seam on the rear superstructure so that has to be filled again.


Got the decals on which has given me a feeling of progressing on the build.


  • Member since
    January 2015
Posted by TheMongoose on Monday, February 8, 2021 9:52 PM

Tomcat dang you got that together fast. Seems like i was just reading about the painting and now done. Rest assured you're not the only one who has done that to a decal. Love the story. If i come across a set of those decals will send them your way

In the pattern: Scale Shipyard's 1/48 Balao Class Sub! leaning out the list...NOT! Ha, added to it again - Viper MkVii, 1/32 THUD & F-15J plus a weekend madness build!

  • Member since
    April 2019
  • From: South west, PA
Posted by Tomcat on Monday, February 8, 2021 8:45 PM

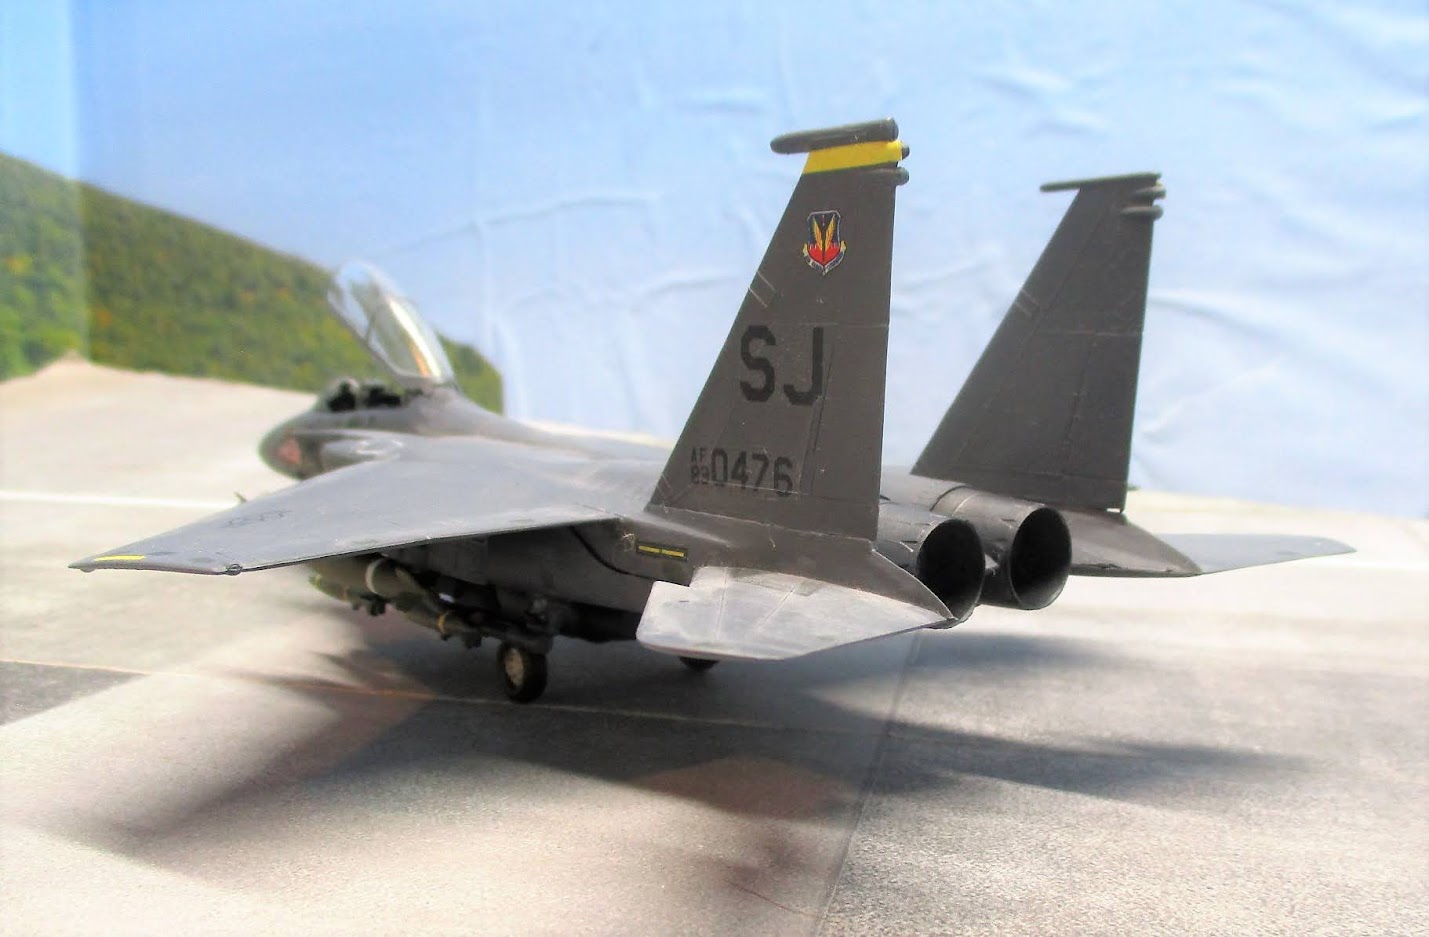
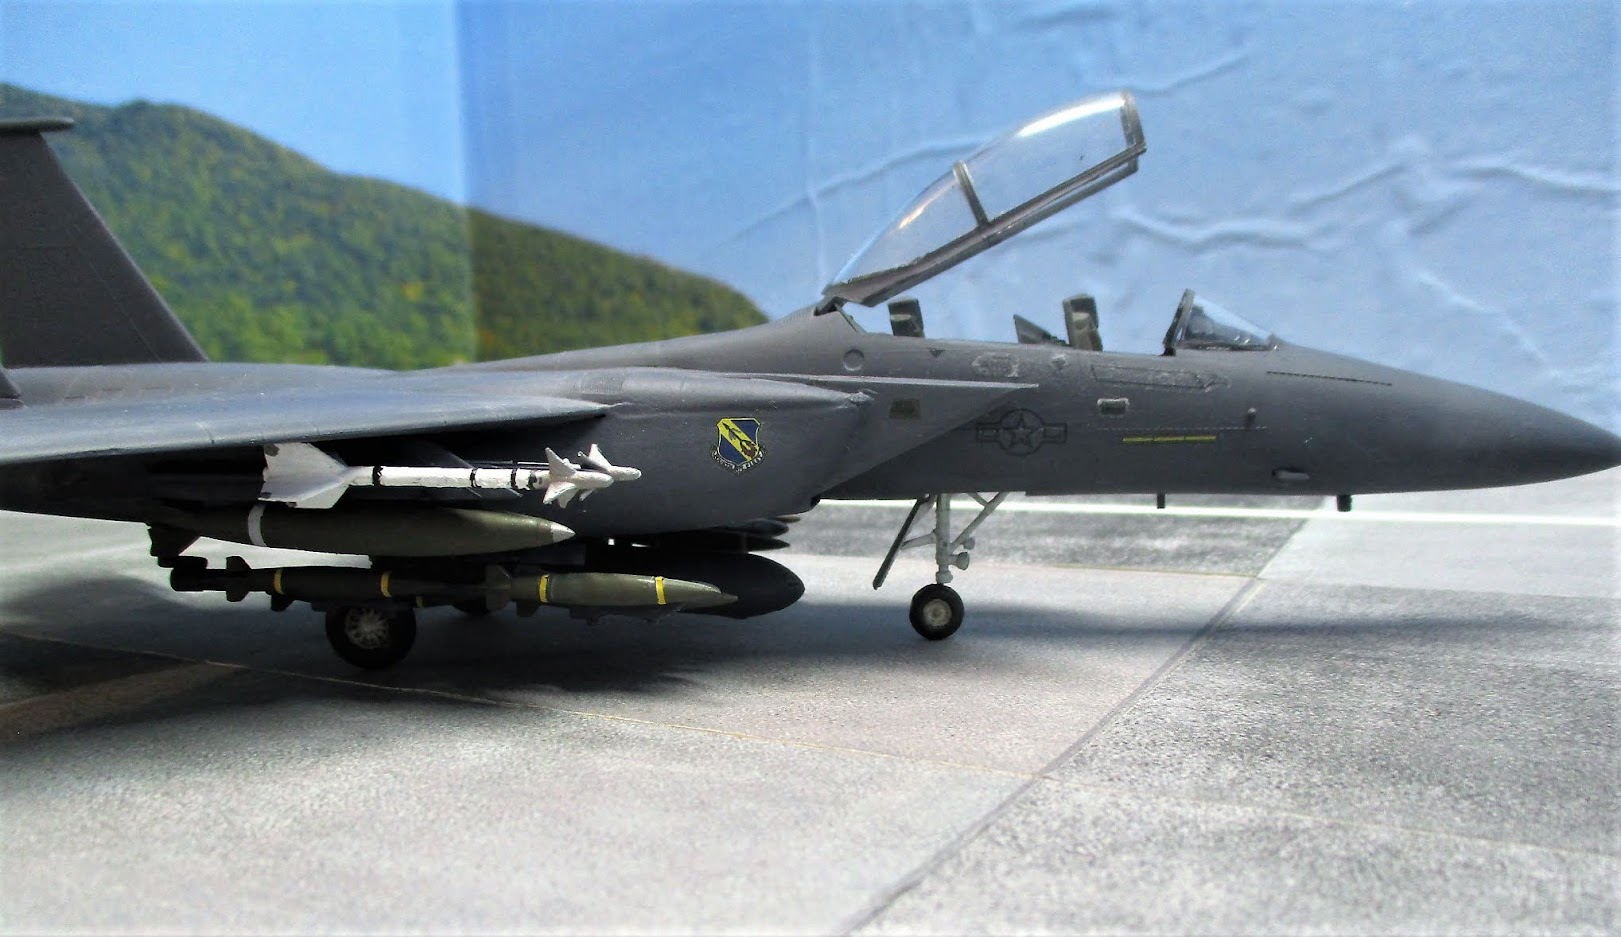
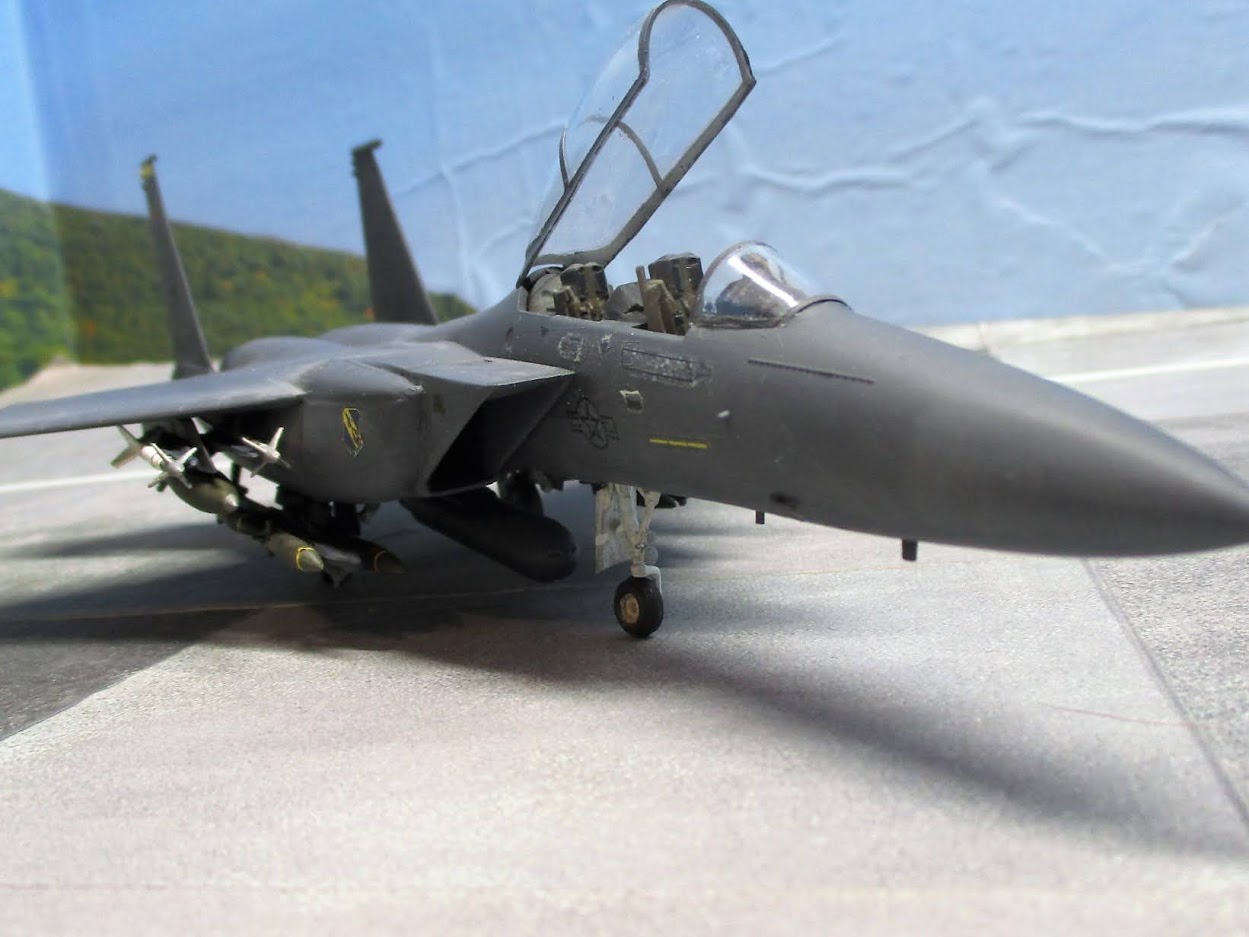
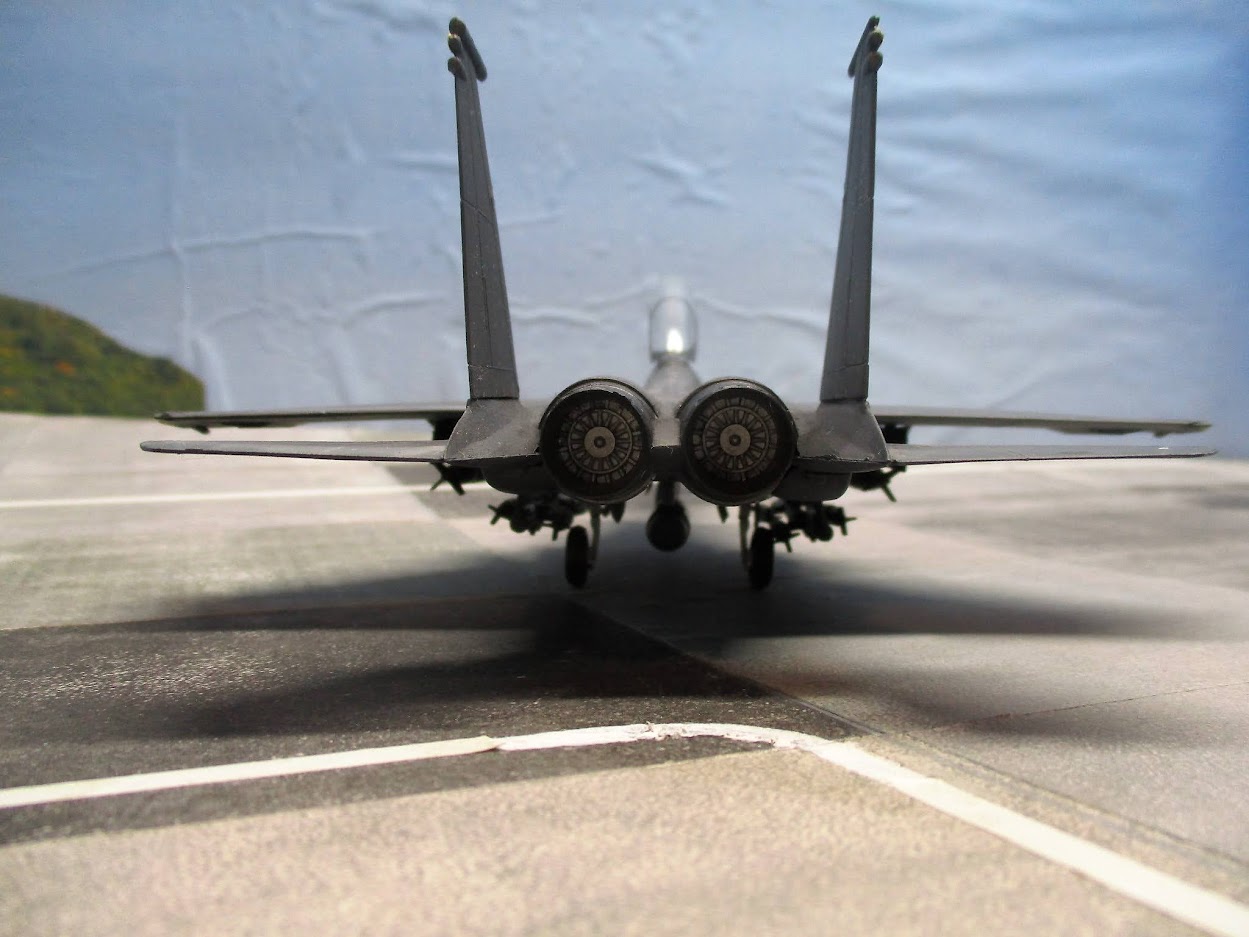
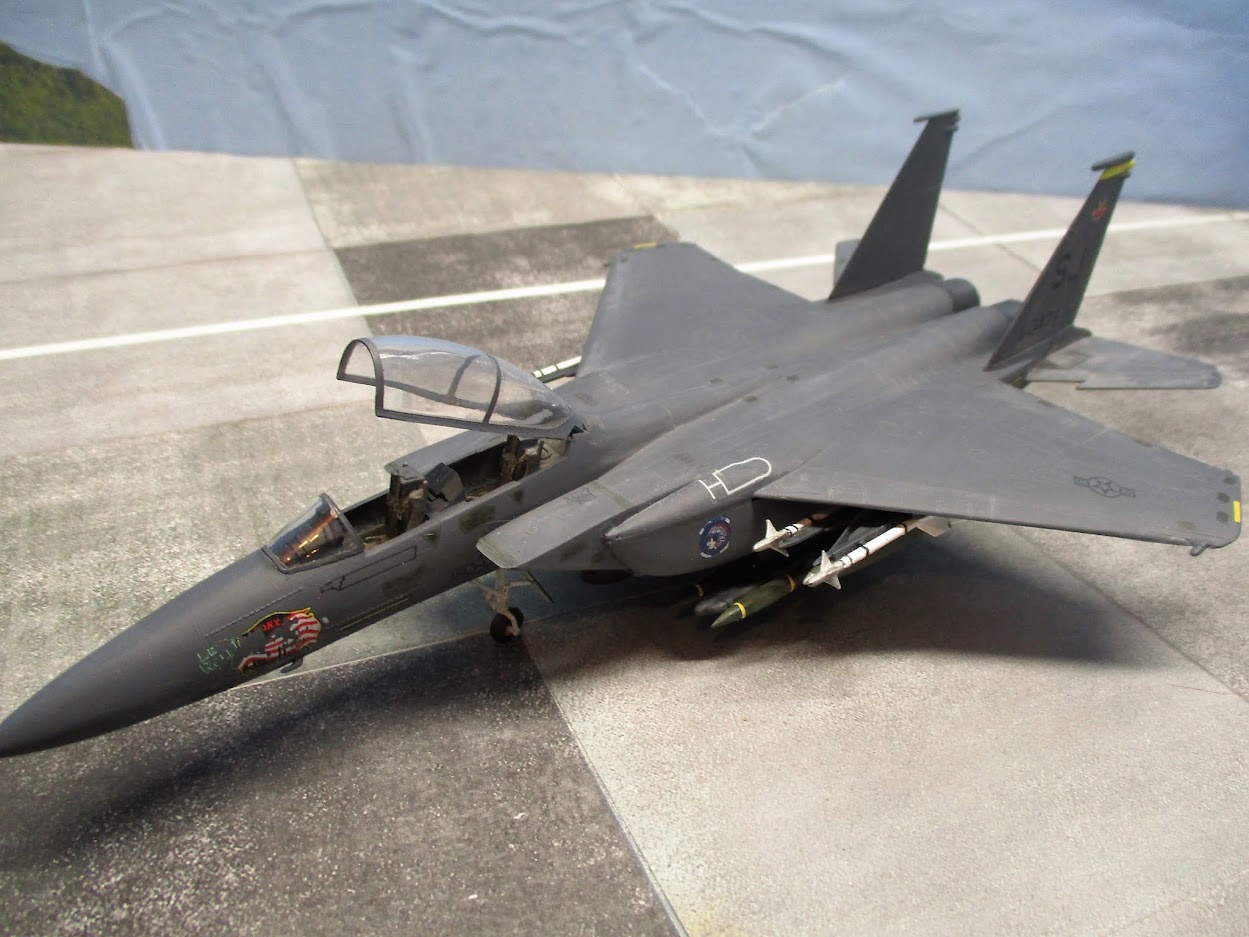
I have finished my F-15E. The last few steps started with some weathering, added the last few details and ended with a catastrophe. Let me elaborate. After getting all the decals applied and giving her a flat finish coat, I brushed on a thin light grey wash to lighten up the bird. My washes are thinned acyrlic craft paint, so no compatibility issues here. So far so good, no problems there. 

So I get this idea to highlight some of the surfaces with various grey pastel chalks to modulate the finish a little. The idea was to simulate fading of the paint on the fuselage here and there. It was an experiment since I haven't tried this before on a broad basis.

Again, not an Earth shattering proposition. Well, on some pics of the Strike Eagle I have seen, the radome is of a noticably different shade of grey. I thought the chalk would serve that pupose well. This is where I got into trouble. All of the pics I've seen show a sharp demarcation line between the two shades of grey. OK, I'll just lay down a small srtip of tape and rub on the chalk. So far, so good. It's when I removed the tape that it happened. Apparently I erroneously applied some tape to the MAIN decal on the side of the craft. This one...
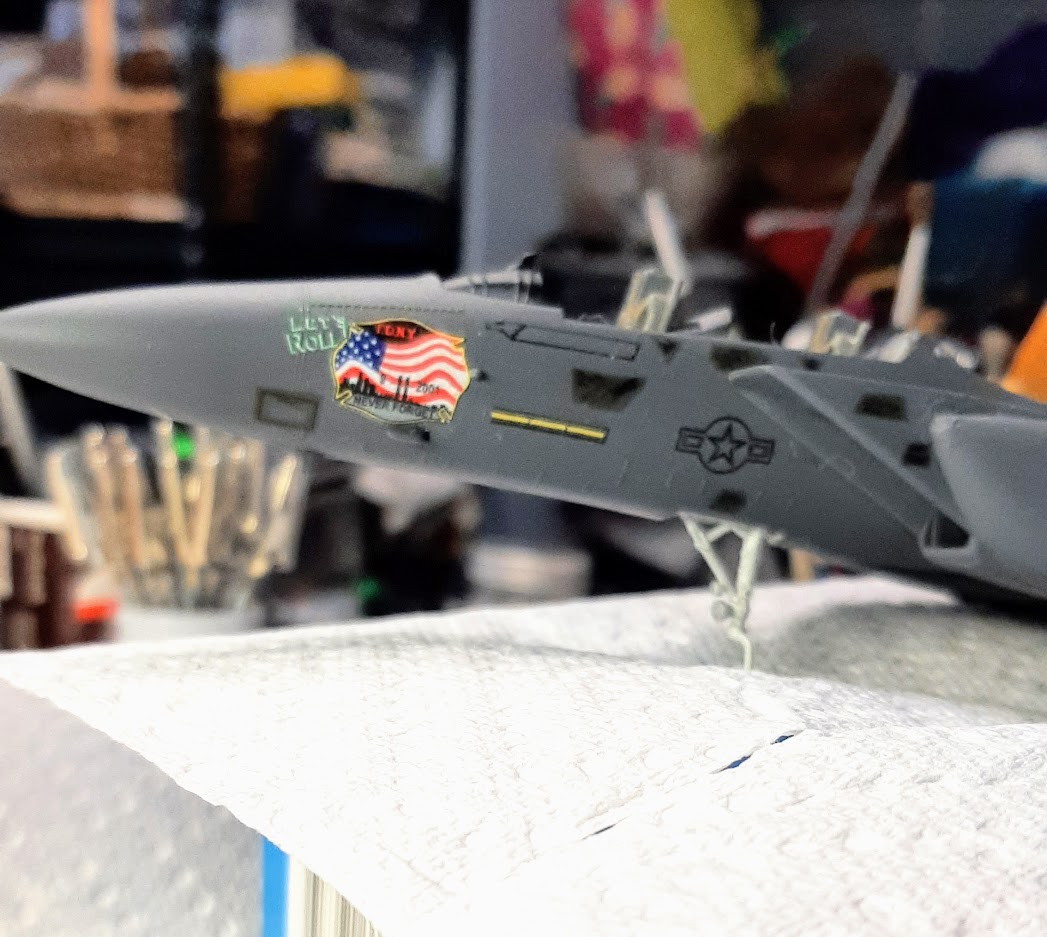
Yeah, that one... The "Lets Roll" one. So, this is emabaracing, when I lifted the tape I also lifted part of the decal. And this is what's left...

CRIPE SAKE!. So close to the end. Well, I pressed on and finished her up. For what its worth, here she is all done, worts, missing decals, and all...

This one fought me pretty much every step of the way. I am not particularly happy with the result. Being the optimist that I am, I'll just chalk, no pun intebded, it up to lessons learned and move on to the next one...wiser. 

I have one idea that could salvage this build, at least psychologically. The narrative will be that this plane while in service in the middle east was subjected to a freak sandstorm that wore away the paint on the mural. That's my story and I'm sticking to it. Stick out tongue

Mark aka Tomcat

On the workbench: Monogram 1/24 '69 Pontiac GTO and a Monogram 1/67 (box scale) B-26 Invader

  • Member since
    February 2005
  • From: Nashotah, WI
Posted by Glamdring on Monday, February 8, 2021 8:42 PM

GT, the hog is moving along nicely.

Rooster, look like there are muliple shades of gray, very fitting!  Really turning out well.

Robert 

"I can't get ahead no matter how hard I try, I'm gettin' really good at barely gettin' by"

  • Member since
    September 2014
Posted by rooster513 on Monday, February 8, 2021 7:00 AM

Mongoose that is a VERY nice looking build! Should be proud of that one.

GT the Hog is coming along nicely!


More progress on the Eagle for me. Got the titanium sprayed and started on the gray for the upper side.

Another session or two should see the bottome finished up. Then I can paint and add the drop tanks as such.

-Andy

  • Member since
    February 2010
  • From: New Jersey
Posted by 68GT on Sunday, February 7, 2021 5:35 PM

Nice jobs on the helicopters guys!

I managed to get some darker gray on this morning. Still have the engines to mask and spray.

On Ed's bench, ???


  • Member since
    February 2003
  • From: Between LA and OC, SoCal
Posted by oortiz10 on Saturday, February 6, 2021 7:41 PM

That's awesomeness right there. I dig it!

-O

-It's Omar, but they call me "O".

  • Member since
    January 2015
Posted by TheMongoose on Saturday, February 6, 2021 7:21 PM

She is all done and looking like she threw down some ordnance!

I used the Flying Leathernecks decals, so many to choose from. I decided on the Red Skeleton Jolly Roger of VMM-163. I picked up the Werner Wings decal for all the stencils. And of course you have to use some of the kit decals as well. I will say they go on swell and were thin and easy to apply. I ended up buying Eduard seatbelts to really match everything else done in the cockpit. Since i was spending money on shipping why not get more right, so i picked up DefModels 20mm gun barrels as well :-) And with my jolly roger choice I needed some full motion video which I got from Shapeways.

The cockpit additions are all scratch built. My favorite add is the tiny wound cable behind the gunner’s seat. Lot’s to see in this one. All the plastic behind the PE vents was cut away and wiring and components were added. Hard to see with my camera skills tho but I did my best to show something ;-)  The 4 sensors(i assume) on the corners are hand painted and filled with testors window maker to try and simulate the glass. The pitot is brass tubing bent and sanded to shape. The seal where the stub wing meets the fuselage was painted and then coated with mask solution so upon final painting it could be uncovered for a little added detail. And lastly some inspiration from a local buddy of mine, goes by Bradley25mm over on the IPMS forum - fine detailing the tail rotor gear assembly with wiring, sensors, and wire clips. His looks awesome and he gave me lots of pointers on this build. 

Paint was my usual mix with 1 addition this time. Thanks to Starfighter(LSP) for the recommendation on color choices for the upper bluish gray on these birds. I ended up with Mission Models as they were available locally. Primer is Citadel Chaos Black (satin). Color coats are Mission Model and MCW acrylic lacquer. Cockpit is all done in Vallejo colors. Weathering is all Flory Models washes. And the final flat clear is MCW to close it out.

I’ve been looking forward to this model for some time and am excited to show these pics. Once I have the base done she’ll make one final flyby.


In the pattern: Scale Shipyard's 1/48 Balao Class Sub! leaning out the list...NOT! Ha, added to it again - Viper MkVii, 1/32 THUD & F-15J plus a weekend madness build!

  • Member since
    January 2015
Posted by TheMongoose on Saturday, February 6, 2021 2:17 PM

-O I love your creativity on these builds. Some super scratch work always going on. At least one idea of which i know will get used, the monofilament whip antenna. Glad you posted the buddy shot. Great to see your collection. As tempted as i was to quote your post so we could browse those photos again i refrained Wink

In the pattern: Scale Shipyard's 1/48 Balao Class Sub! leaning out the list...NOT! Ha, added to it again - Viper MkVii, 1/32 THUD & F-15J plus a weekend madness build!

  • Member since
    February 2005
  • From: Nashotah, WI
Posted by Glamdring on Saturday, February 6, 2021 1:31 PM

Magnificent, O!  Thanks again for posting.  I like the contrast of the OD rocket pods and the red engine covers.   

Robert 

"I can't get ahead no matter how hard I try, I'm gettin' really good at barely gettin' by"

JOIN OUR COMMUNITY!

Our community is FREE to join. To participate you must either login or register for an account.

SEARCH FORUMS
FREE NEWSLETTER
By signing up you may also receive reader surveys and occasional special offers. We do not sell, rent or trade our email lists. View our Privacy Policy.