SEARCH FINESCALE.COM

Enter keywords or a search phrase below:

The 50 Shades of Gray Group Build!

35159 views
433 replies
1 rating 2 rating 3 rating 4 rating 5 rating
  • Member since
    February 2005
  • From: Nashotah, WI
Posted by Glamdring on Sunday, December 13, 2020 8:07 PM

I agree, the brass does make the kit pop.  It would look ridiculous without it, or with molded on rails like the kits of yesteryear.

As promised, here are the PE and deck fitting updates:

The end is near!  Just have a handful more parts to go and a paint touch up on the brass.

And I have only knocked off 2 rails so far.  Stick out tongue

Robert 

"I can't get ahead no matter how hard I try, I'm gettin' really good at barely gettin' by"

  • Member since
    July 2004
  • From: Sonora Desert
Posted by stikpusher on Sunday, December 13, 2020 10:37 AM

TheMongoose

I'm with ya glamdring. PE does up the stress BUT IT LOOKS SO GOOD when you're done :-)


Ditto


F is for FIRE, That burns down the whole town!

U is for URANIUM... BOMBS!

N is for NO SURVIVORS...

       - Plankton

LSM


  • Member since
    January 2015
Posted by TheMongoose on Sunday, December 13, 2020 7:42 AM

I'm with ya glamdring. PE does up the stress BUT IT LOOKS SO GOOD when you're done :-)

In the pattern: Scale Shipyard's 1/48 Balao Class Sub! leaning out the list...NOT! Ha, added to it again - Viper MkVii, 1/32 THUD & F-15J plus a weekend madness build!

  • Member since
    February 2005
  • From: Nashotah, WI
Posted by Glamdring on Saturday, December 12, 2020 8:55 PM

I have more or less resolved the gap issue, but am left with an ugly seam issue instead.

Since this isn't going into any shows, I am calling it good enough for my done shelf.

I also broke out the guard rails for the deck and started gluing them on last night.

Some others that are bent into shape.

Today was spent affixing PE. No updates on that, but they will be posted tomorrow.  The stress level has definitely increased now with each piece!


Robert 

"I can't get ahead no matter how hard I try, I'm gettin' really good at barely gettin' by"

  • Member since
    July 2004
  • From: Sonora Desert
Posted by stikpusher on Friday, December 11, 2020 8:59 PM

Thank you Glam. Just a few more things to address before I start painting this one.


F is for FIRE, That burns down the whole town!

U is for URANIUM... BOMBS!

N is for NO SURVIVORS...

       - Plankton

LSM


  • Member since
    February 2005
  • From: Nashotah, WI
Posted by Glamdring on Friday, December 11, 2020 6:23 PM

Nice progress Stik.  The exhaust tube is a good addition.

Robert 

"I can't get ahead no matter how hard I try, I'm gettin' really good at barely gettin' by"

  • Member since
    July 2004
  • From: Sonora Desert
Posted by stikpusher on Thursday, December 10, 2020 4:07 PM

Thanks Bish. It’s a decent kit, but it shows what happens when the kit is made before the design is finalized. It has a mix of prototype and production features that are not quite right for either one, OOB.


So today was another good long session at my work bench on this one. It’s been a rainy day here... yes it rains in Arizona... lol! So perfect modeling weather.


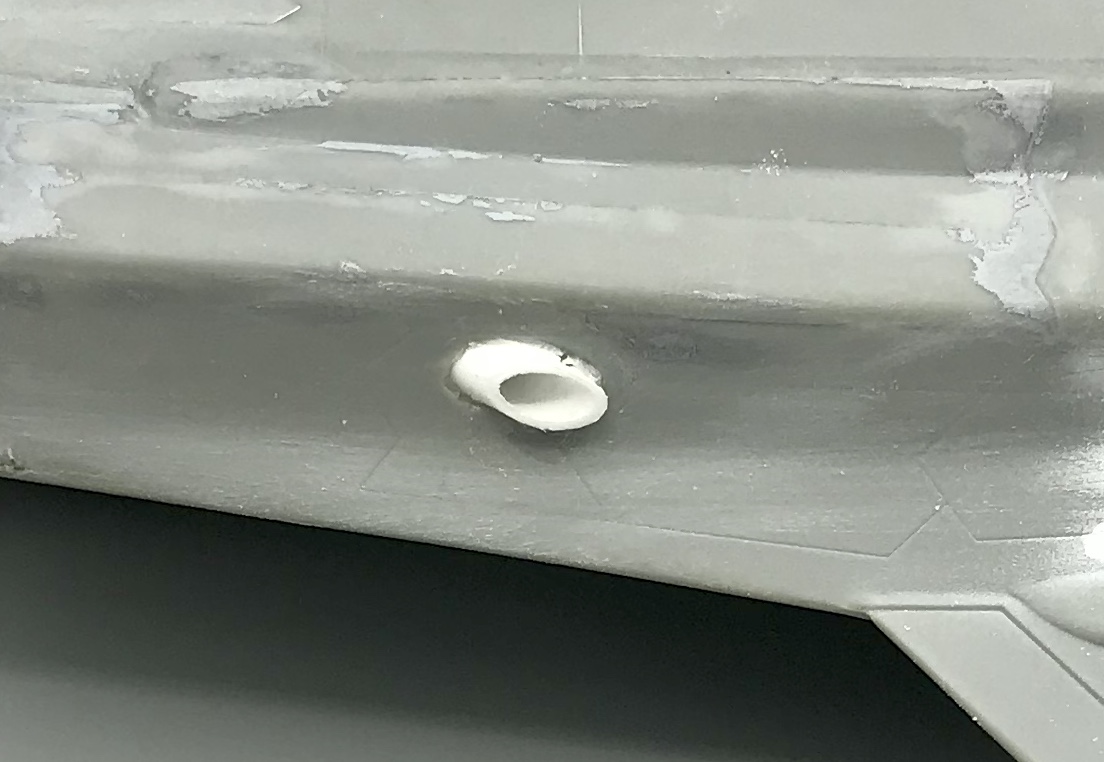
First up, the X-35A has a prominent exhaust on the right side aft of the intake that the kit does not include.
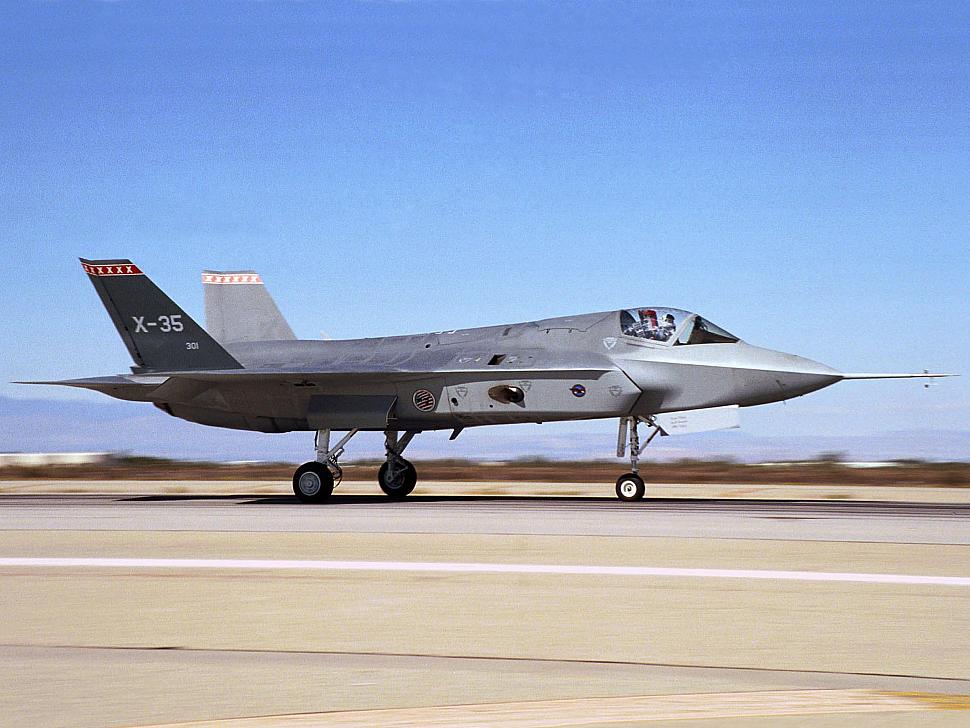


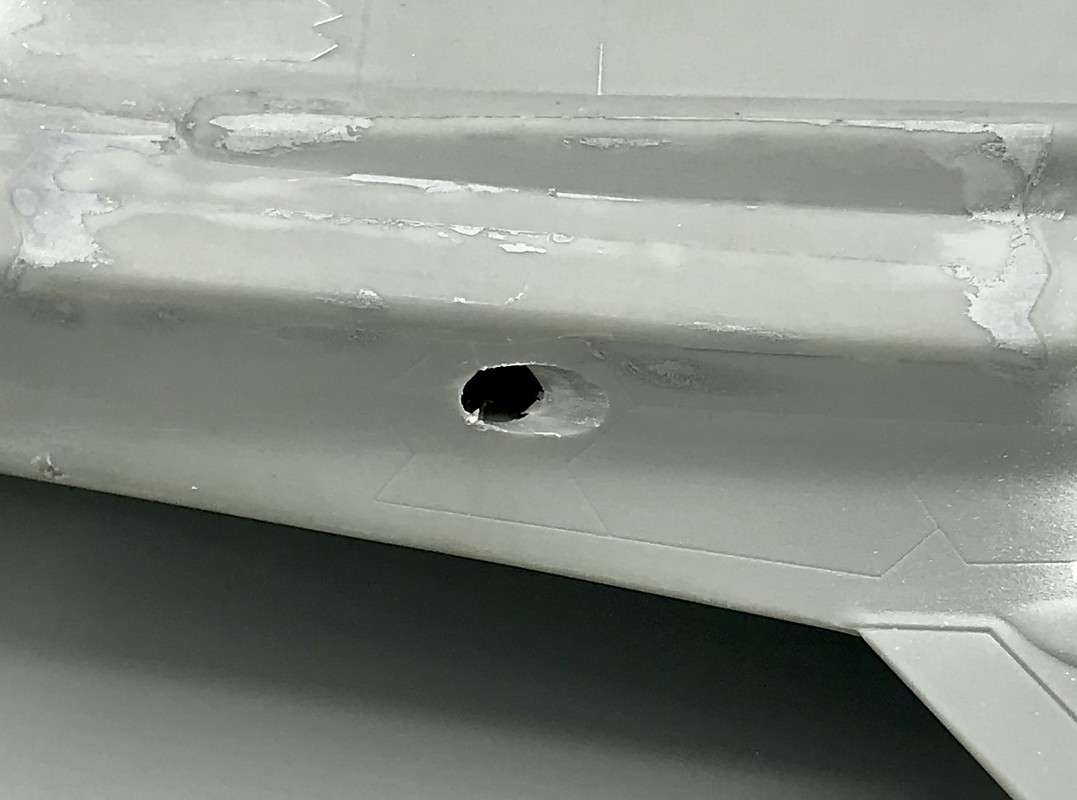
So I went to work drilling a hole, added some tube styrene that looks about the right diameter and glued it into place, then sanded it down to proper profile.


Then I glued the intakes in place, the X-35 has a sawtooth edge there compared to the F-35 having a straight angled edge
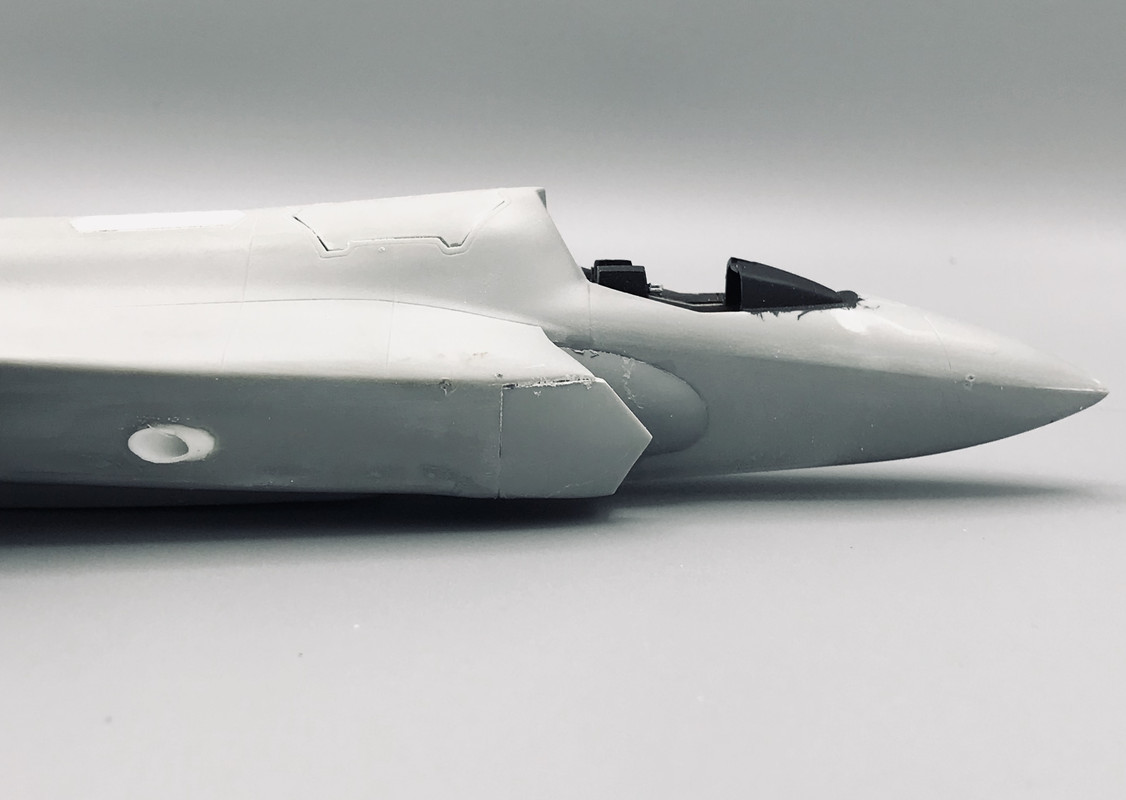


and lastly, I also glued the vertical stabilizers in place


Now that all of the basic airframe is done, it looks like a -35! There are still a few items that the kit is missing that I need to add before I am ready to start painting.


F is for FIRE, That burns down the whole town!

U is for URANIUM... BOMBS!

N is for NO SURVIVORS...

       - Plankton

LSM


  • Member since
    December 2002
  • From: Bury St Edmunds, Suffolk, England
Posted by Bish on Tuesday, December 8, 2020 2:20 PM

Thanks Carlos.

That 35 is coming along well.

I am a Norfolk man and i glory in being so


On the bench: Airfix 1/72nd Harrier GR.3/Fujimi 1/72nd Ju 87D-3

  • Member since
    July 2004
  • From: Sonora Desert
Posted by stikpusher on Monday, December 7, 2020 3:44 PM

Yes Love that Harrier Bish! Great finish on that one!

Glamdring, thanks! I’m doing what I can with this one.

I did seam sanding on the main assembly today, so the only thing really worth taking a photo of was the inlet doors that I addressed. The kit parts sat too low in the openings on the ledges molded, so I created some new ones from thin sheet styrene cut to match the shape and sit on top of the kit parts. A few minutes of sanding after the glue had dried and I had nice flush fitting doors.


F is for FIRE, That burns down the whole town!

U is for URANIUM... BOMBS!

N is for NO SURVIVORS...

       - Plankton

LSM


  • Member since
    December 2002
  • From: Bury St Edmunds, Suffolk, England
Posted by Bish on Sunday, December 6, 2020 3:11 PM

Thanks Robert.

The base is a bit of chipboard with some MDF underneath to give it height and a neater underside. The edging is just balsa wood glued and nailed in place then stained and varnished.

I am a Norfolk man and i glory in being so


On the bench: Airfix 1/72nd Harrier GR.3/Fujimi 1/72nd Ju 87D-3

  • Member since
    February 2005
  • From: Nashotah, WI
Posted by Glamdring on Sunday, December 6, 2020 2:22 PM

Bish - The Harrier did not disappoint!  Thanks again for participating.  For a matter of curiosity, what materials did you use for the base, like the wood frame?

 Stik - Sweet action on the -35!

Robert 

"I can't get ahead no matter how hard I try, I'm gettin' really good at barely gettin' by"

  • Member since
    December 2002
  • From: Bury St Edmunds, Suffolk, England
Posted by Bish on Sunday, December 6, 2020 4:32 AM

Some nice work here guys. Really need to go through the thread and get a proper look at what everyone else is up to.

Time to wrap up the Harrier. Adde some RBF tags as well as a Hasegawa USAF figure painted in UK Desert DPM. The cut of the uniform looked close enough in this scale. Figures are always a let down.

This aircraft was base at Kandahar in 2009.

Thanks for hosting the GB, deffinetly nice to have somthing different. Please feel free to use which ever pic you choose.

I am a Norfolk man and i glory in being so


On the bench: Airfix 1/72nd Harrier GR.3/Fujimi 1/72nd Ju 87D-3

  • Member since
    July 2004
  • From: Sonora Desert
Posted by stikpusher on Saturday, December 5, 2020 11:04 PM

Thanks Mongoose. This will be in the prototype scheme of Gunship Gray 36118 over Neutral Gray 36270.


F is for FIRE, That burns down the whole town!

U is for URANIUM... BOMBS!

N is for NO SURVIVORS...

       - Plankton

LSM


  • Member since
    January 2015
Posted by TheMongoose on Saturday, December 5, 2020 10:09 PM

Yeah that thing takes alot of sanding! It's such a cool plane it's worth it. Looking smart there. Are you doing the HAVE GLASS paint?

In the pattern: Scale Shipyard's 1/48 Balao Class Sub! leaning out the list...NOT! Ha, added to it again - Viper MkVii, 1/32 THUD & F-15J plus a weekend madness build!

  • Member since
    July 2004
  • From: Sonora Desert
Posted by stikpusher on Saturday, December 5, 2020 6:04 PM

And then, just like that, this afternoon it started to take final shape! 


Next up, sanding...


F is for FIRE, That burns down the whole town!

U is for URANIUM... BOMBS!

N is for NO SURVIVORS...

       - Plankton

LSM


  • Member since
    July 2004
  • From: Sonora Desert
Posted by stikpusher on Saturday, December 5, 2020 3:43 PM

Thank you Glamdring. Mongoose, that cockpit looks sharp! I’m really liking the wiring work added!


I forgot to upload these to Postimage yesterday so I could update this last nite.  Ah well, now it’s done....


Vertical and horizontal stabilizers built... actually several days ago...


and the lower swivel engine doors installed after the saw tooth trailing adages were straightened...


 The X-35A was built with the swiveling nozzle engine for the X-35B installed, as well as all the associated doors for the lift fan, but no lift fan. Once the flight test program for the A was completed, it was taken back to the Skunk Works in Palmdale, the lift fan was installed, along with associated controls, and then it was redesignated as the X-35B, and went back out for flight test of the B program. No X-35A exists today, only the B and C remain.


F is for FIRE, That burns down the whole town!

U is for URANIUM... BOMBS!

N is for NO SURVIVORS...

       - Plankton

LSM


  • Member since
    February 2005
  • From: Nashotah, WI
Posted by Glamdring on Friday, December 4, 2020 7:25 PM

Very nice work there on both builds!  I don't have any suggestions to offer on either, my builds are usually limited to ground vehicles.   Whistling

Robert 

"I can't get ahead no matter how hard I try, I'm gettin' really good at barely gettin' by"

  • Member since
    January 2015
Posted by TheMongoose on Thursday, December 3, 2020 10:39 PM

Looking forward to seeing that engine turn into a plane stik!

Here’s my next in-process shot. Take a look around and offer any advice. Now’s the time for me to make additions while i can still take the IP and seats in and out :D The wires for the side of the rear IP aren’t on, too fragile to do till very end. once this is set then the PE for the center consoles, the detailing and weathering can commence. Looking forward to comments :beer4:


In the pattern: Scale Shipyard's 1/48 Balao Class Sub! leaning out the list...NOT! Ha, added to it again - Viper MkVii, 1/32 THUD & F-15J plus a weekend madness build!

  • Member since
    July 2004
  • From: Sonora Desert
Posted by stikpusher on Thursday, December 3, 2020 4:31 PM

Glam, the -35 is unique indeed! And they sure do seem to grow on you once you start seeing them in person. A very powerful machine!

I did the detail painting the engine exterior. Now it’s ready for installation. 


F is for FIRE, That burns down the whole town!

U is for URANIUM... BOMBS!

N is for NO SURVIVORS...

       - Plankton

LSM


  • Member since
    February 2005
  • From: Nashotah, WI
Posted by Glamdring on Tuesday, December 1, 2020 9:10 PM

Interesting stuff there Stik, glad to see your progress on the -35.  Such a unique jet.

Robert 

"I can't get ahead no matter how hard I try, I'm gettin' really good at barely gettin' by"

  • Member since
    July 2004
  • From: Sonora Desert
Posted by stikpusher on Monday, November 30, 2020 9:11 PM

Well, I started getting back to work on this over the past few weeks, and now I have enough photos worth posting.


First up, I modified the exhaust nozzle to backdate it to match the X-35. The kit part had the angled end and faceted nozzle petals of the F-35. I had to sand off those angle facets and ends to match the earlier design


Then I added some fine mesh into the inner surface of the engine to match the grill like texture of the area  between the flame holder and the afterburner nozzle


and lastly I started painting based on photos I found at F16.net and gluing parts in place


Nearly all of that will not be visible once the fuselage halves are glued together.


F is for FIRE, That burns down the whole town!

U is for URANIUM... BOMBS!

N is for NO SURVIVORS...

       - Plankton

LSM


  • Member since
    February 2005
  • From: Nashotah, WI
Posted by Glamdring on Monday, November 30, 2020 8:12 PM

Bish

Thanks Glamdring. It's not quite done yet, need to get it on a base and sort a figure out.Should be finished by the weekend.


Ok then!  Can't wait to see your base, they are always a pleasure to see.

Robert 

"I can't get ahead no matter how hard I try, I'm gettin' really good at barely gettin' by"

  • Member since
    December 2002
  • From: Bury St Edmunds, Suffolk, England
Posted by Bish on Monday, November 30, 2020 10:19 AM

Thanks Glamdring. It's not quite done yet, need to get it on a base and sort a figure out.Should be finished by the weekend.

I am a Norfolk man and i glory in being so


On the bench: Airfix 1/72nd Harrier GR.3/Fujimi 1/72nd Ju 87D-3

  • Member since
    February 2005
  • From: Nashotah, WI
Posted by Glamdring on Monday, November 30, 2020 9:59 AM

Well done, Bish!  Want the first picture used for the completion list?


Robert 

"I can't get ahead no matter how hard I try, I'm gettin' really good at barely gettin' by"

  • Member since
    December 2002
  • From: Bury St Edmunds, Suffolk, England
Posted by Bish on Sunday, November 29, 2020 7:58 AM

Thanks Nick.

I am a Norfolk man and i glory in being so


On the bench: Airfix 1/72nd Harrier GR.3/Fujimi 1/72nd Ju 87D-3

  • Member since
    January 2015
Posted by TheMongoose on Sunday, November 29, 2020 7:53 AM

Glamdring

Very nice detail there Mongoose!  What did you use for the cables?


thx Glamdring. I used .5mm platistrut rod, .010 & .020 lead fishing wire, and some old telephone cable i stripped the insulation off of (the twisted wire on the back deck). I just tried to match up some sizes by eye looking at pics Like this


In the pattern: Scale Shipyard's 1/48 Balao Class Sub! leaning out the list...NOT! Ha, added to it again - Viper MkVii, 1/32 THUD & F-15J plus a weekend madness build!

  • Member since
    August 2015
  • From: the redlands Fl
Posted by crown r n7 on Sunday, November 29, 2020 6:41 AM

Well done, weathering I like ummm yes.


 Nick.

  • Member since
    December 2002
  • From: Bury St Edmunds, Suffolk, England
Posted by Bish on Sunday, November 29, 2020 4:45 AM

A final short update before i wrap this up. Got the GR.9 finished with a flory wash. I have gone for a rather grubby lok which i think match's the pics i found quite well. Stores were adde along with the canopy and other final bits. I used the decal for the Det cord on the canopy as i didn't have a PE set for this kit. I am not as keen on the decal as i am on the PE i used on the Shar.

Just got to add some RBF tags, fit it to the base and sort out a figure.

I am a Norfolk man and i glory in being so


On the bench: Airfix 1/72nd Harrier GR.3/Fujimi 1/72nd Ju 87D-3

  • Member since
    February 2005
  • From: Nashotah, WI
Posted by Glamdring on Saturday, November 28, 2020 9:04 PM

Not really sure where I went wrong here, other than I noticed the superstructure had picked up a warp which was not noticeable until the flexible deck piece was no longer flexible when glued to the hull. This has led to a sizable gap:


Apparently I didn't do enough sanding beforehand.  When I test fitted, there was a slight gap that needed filling, but not this dramatic.   I am filling in with clear cement, I will cut a shim for the very tip, can't wreck that decal!

Robert 

"I can't get ahead no matter how hard I try, I'm gettin' really good at barely gettin' by"

  • Member since
    February 2005
  • From: Nashotah, WI
Posted by Glamdring on Saturday, November 28, 2020 11:29 AM

Very nice detail there Mongoose!  What did you use for the cables?

Robert 

"I can't get ahead no matter how hard I try, I'm gettin' really good at barely gettin' by"

JOIN OUR COMMUNITY!

Our community is FREE to join. To participate you must either login or register for an account.

SEARCH FORUMS
FREE NEWSLETTER
By signing up you may also receive reader surveys and occasional special offers. We do not sell, rent or trade our email lists. View our Privacy Policy.