SEARCH FINESCALE.COM

Enter keywords or a search phrase below:

VACUFORM –Any Aircraft Subject (Starts 2/1/05 Ends 9/30/05)

22936 views
233 replies
1 rating 2 rating 3 rating 4 rating 5 rating
  • Member since
    November 2005
Posted by Anonymous on Monday, May 2, 2005 1:08 PM
QUOTE: Originally posted by I-beam
Nothing beats a homebrew fix that works (pun intended) and you get some good wine too. Big Smile [:D]


hey! I've allways enjoyed a good sip of an old red vintage while airbrushing!!!!Big Smile [:D]

It's the best way to obtain a good camouflage effect!!!!Wink [;)]

For serious, guys: if I only knew building vac's was so enjoyable, I would have started ages ago!!! I allready bought myself some further 4 or 5 models in vac (all german double-seaters from WW1)!!!

All the best,
  • Member since
    November 2005
Posted by Anonymous on Monday, May 2, 2005 12:51 AM
QUOTE: Originally posted by Rafael Pelote
OK, this is much too quiet around here...Sleepy [|)]

LOL!!! Don't worry Rafael your not totally alone. I agree though. Not very vocal in here eh.

Congrats, you got that fuselage glued together. The extension is great. Thanks for explaining your "straightening" technique. I like that alot. Thumbs Up [tup] I like the radiator fix too. Nothing beats a homebrew fix that works (pun intended) and you get some good wine too. Big Smile [:D]

No progress on mine. Waiting on decals. Whistling [:-^]
  • Member since
    July 2003
  • From: Keizer, Oregon
Posted by Model Grandpa on Sunday, May 1, 2005 8:41 PM
Looking good Rafael.

My build time has been limited the last month but I hope I can get back to it very soon. Going to try to build some tomorrow morning.
Regards, Dan Building Scale Models At The Speed Of Dark
  • Member since
    November 2005
Posted by Anonymous on Sunday, May 1, 2005 5:53 PM
OK, this is much too quiet around here...Sleepy [|)]

This sunday I managed to finish the interiors and close the fuselage:
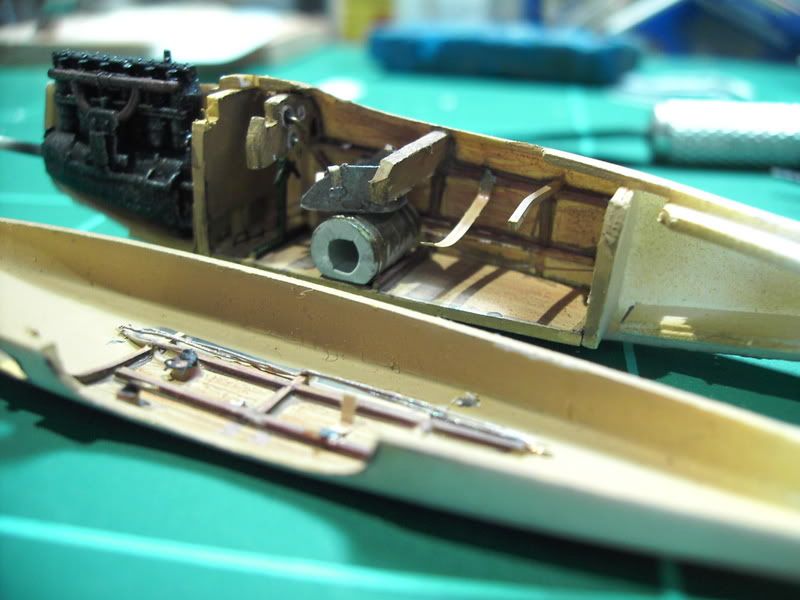


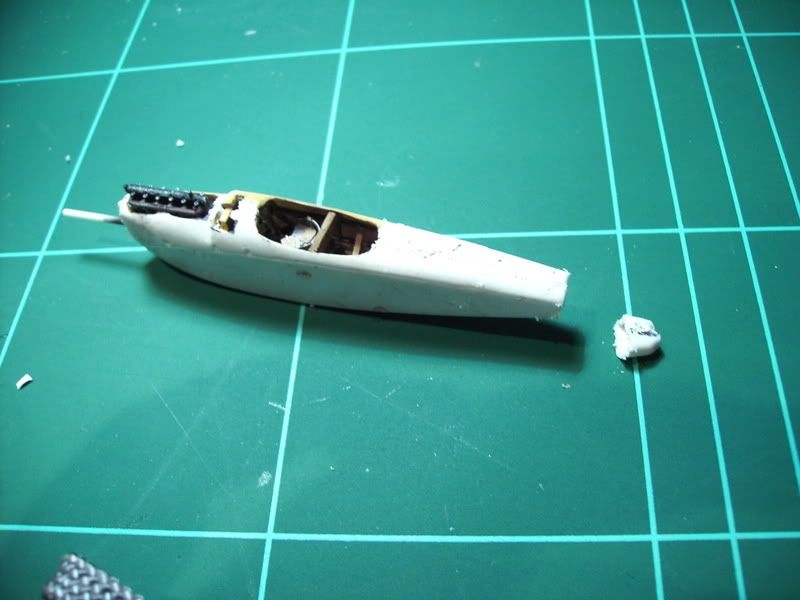
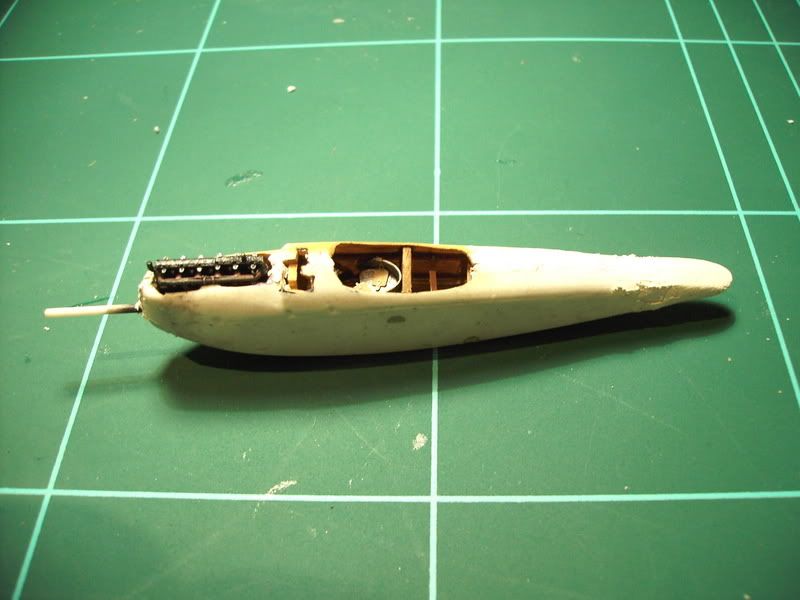
Now for thye extension of the fuselage to conform to Roland built airplanes: simple... just cutted the end of it and added a new one using milliput...


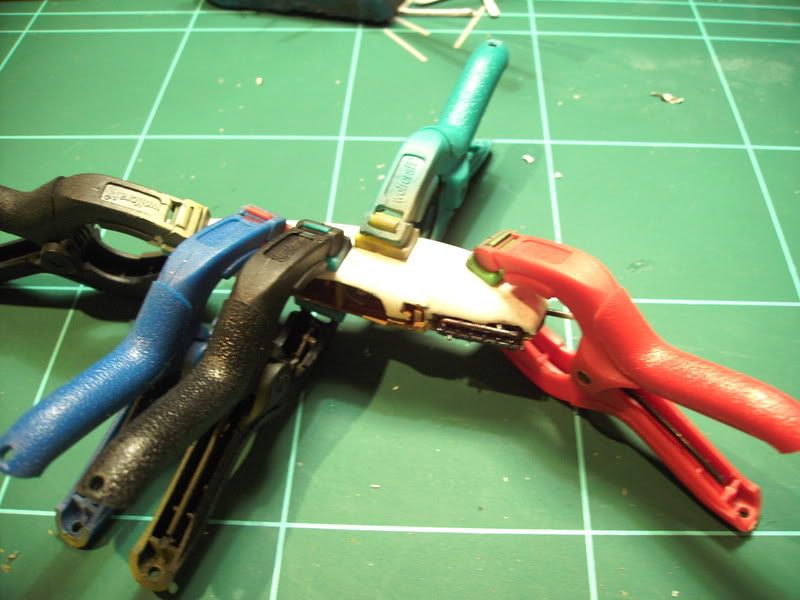
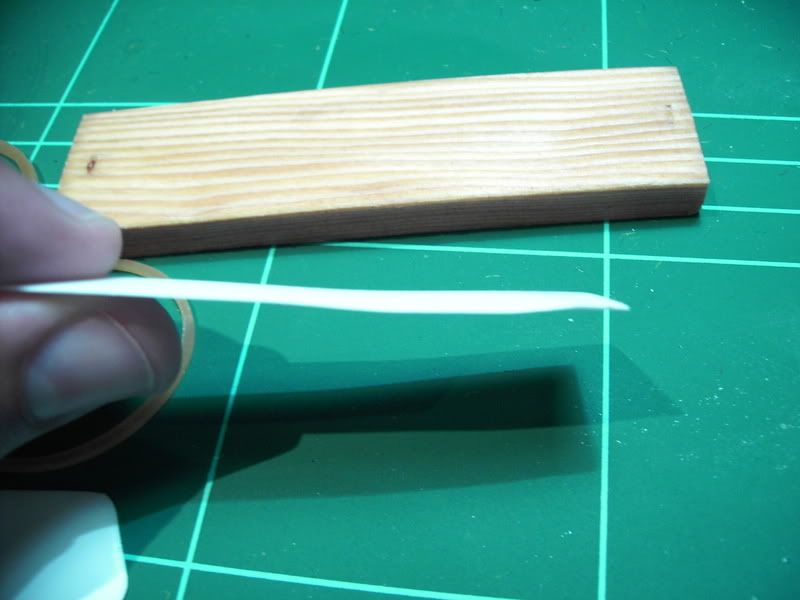
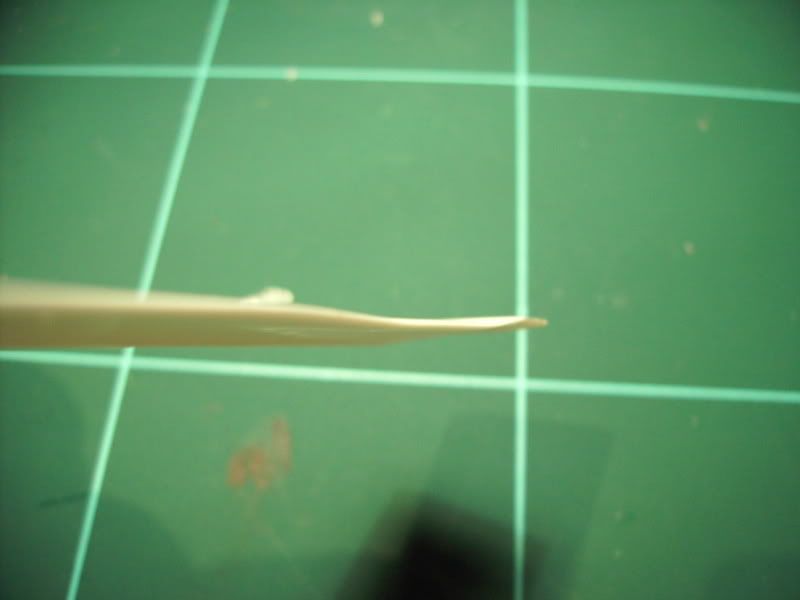
Also, I've started dealing with the warp in the lower wings. What I did was to press the lower wings against a wooden block with rubber bands and conform the warp using a toothpick as a "mould". I dipped the block in very hot water for a few seconds, and: voilá! It actually worked!!!


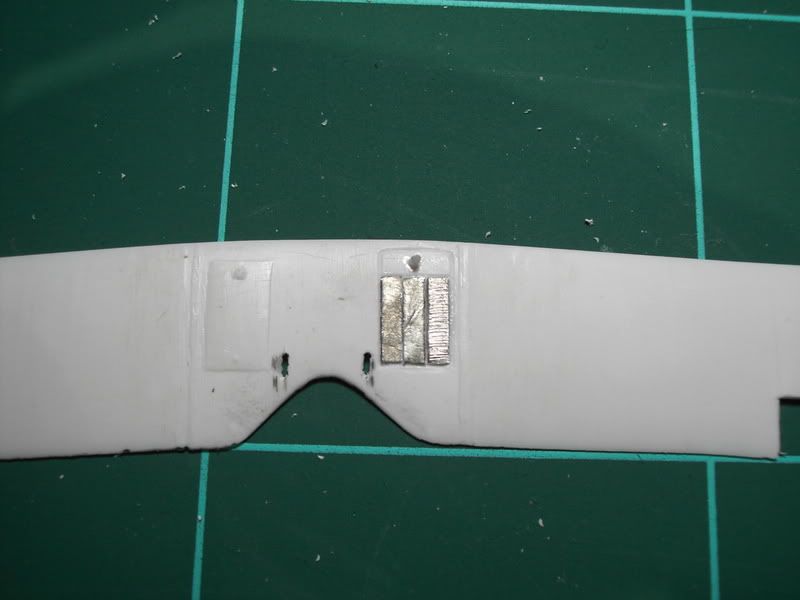
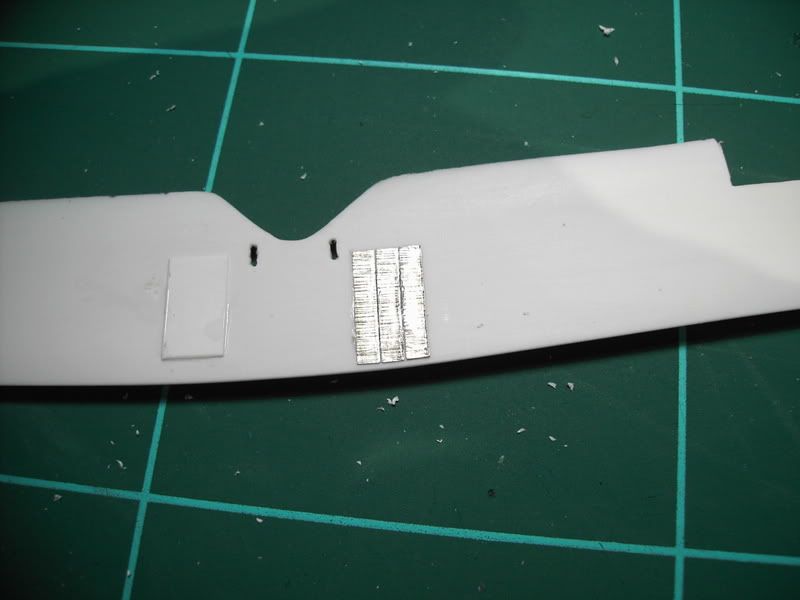
And as for the upper wings, well... I did not liked the radiator, so, here is a new one from metal sheet (the one that comes in good wine bottles protecting the cork):


And this is the end for today!!

All the best,


  • Member since
    September 2004
  • From: Utereg
Posted by Borg R3-MC0 on Monday, April 25, 2005 4:37 AM
A small progress report:
I have started puttying the fuselage.
and...

Well, no "and", real live is catching up at the moment!Sad [:(]

The wings will need a lot of attention before they can be installed, so that's next on my list.
I will keep you posted!

BTW, Rafael, nice work on the cockpit!

  • Member since
    November 2005
Posted by Anonymous on Tuesday, April 19, 2005 1:06 PM
Sorry Guys... the photo is deceiving due to the flash, which enhances the pigment. the base colour is matt black, and on top of that, dried brushed gun metal and aluminium. On some (very small) spots a touch of silver. After that, and to finish, a wash of black glaze from Valejo acrilics. I'll try to take another photo and put it in... Actually, the engine is quite "flat coloured"!

All the best,
  • Member since
    November 2005
Posted by Anonymous on Tuesday, April 19, 2005 1:58 AM
Rafael it seems you used a metallic paint n the engine with pretty large pigments. More like a metallic paint coat for a car. It would seem to me that a more up to scale result would be pssible with the Games WOrkshop metallic paintseries. Then again: revell and humbroll also sell metallics with small pigments.

Is the photo deceiving? Did you do this 'on purpose' (so it's a metter of taste)? If the photo is right, I'd consider a new paint job...
I like the shape of the engine though. As well as the impressively detailed interior.
  • Member since
    November 2005
Posted by Anonymous on Monday, April 11, 2005 6:53 PM
Excellent Rafael. Wow that engine is smaller than a dime. The brown tones in the pit are great.
  • Member since
    November 2005
Posted by Anonymous on Sunday, April 10, 2005 6:00 PM
OK Guys,

Here is a pic of the interior almost ready. At this point all that is missing inside are the tank and seat assembly, and the actuators for the ailerons, which I'll add nearer to the end, once the top wing is assembled.


Also, the engine is ready to put in place (I've used one of Roden from the spares parts... the original white metal one is not even worth mentioning)


All the best!
  • Member since
    November 2005
Posted by Anonymous on Thursday, April 7, 2005 5:30 PM
Don't worry I-bean. It'll look really neat with the covers on.

I've finished painting the interior of my Halbie. I'm dealing with the engine now... Photos somewhere this WE.

All the best
  • Member since
    November 2005
Posted by Anonymous on Thursday, April 7, 2005 12:26 PM
Svankreijl, No engine for this one. I'll have to make some red/orange covers for the intake and exhaust. The kit only had an oval shaped piece for just inside the nose. I know it's kinda lame of me but I did build the wheel wells anyway.
  • Member since
    November 2005
Posted by Anonymous on Thursday, April 7, 2005 10:17 AM
I-beam:
How are you going to construct an engine? Does the kit supply one?
I'm (almost) sure that the original Fury wasn't a real see-through plane.
  • Member since
    March 2004
  • From: British Columbia,Canada
Posted by bstrump on Wednesday, April 6, 2005 9:12 PM
Looking good, I-beam! It's coming along nicely.
As for my own build,the XF-91, some progress has been made. After seperating the fuselage halves and sanding, I sawed off the nose in prepartion for the radar nose which went together nicely. I also "borrowed" the intake splitter/wheel well from the Italeri F-84 to add some quick detail up front rather than trying to scratchbuild a gear well. So far, the fit has been pretty good with no big gaps at all. Hope to have some pics for you this weekend.
  • Member since
    November 2005
Posted by Anonymous on Wednesday, April 6, 2005 4:08 PM
Got the first coats of midnight blue/black on my Fury. The primer really soaked up the paint big time. The pictures here show 2 coats but it will need at least one more and then some gloss even though it's already gloss paint. I don't have any decals. All I really need is the stars/bars placard. The rest can be some Navy lettering dry transfers that I do have.


Oh darn, I forgot the insides [:0]Blush [:I]


landing gear and wheel wells
  • Member since
    November 2005
Posted by Anonymous on Thursday, March 31, 2005 8:59 AM
Nice pit work Rafael. Good work fixing the wing too.
  • Member since
    September 2004
  • From: Utereg
Posted by Borg R3-MC0 on Thursday, March 31, 2005 2:43 AM
oh man! how do you build that fast!
I'm having a few modelling problems, the fuselage of the mig doesn't fit that wel, I will have to do a lott of work to get it right. Because of this I'm losing the momentum of my build. I got of to a quick start, but I will have to do a lott of puttying and sanding......

  • Member since
    July 2003
  • From: Keizer, Oregon
Posted by Model Grandpa on Monday, March 28, 2005 10:37 AM
Looking good Rafeal, coming along nicely.
Regards, Dan Building Scale Models At The Speed Of Dark
  • Member since
    November 2005
Posted by Anonymous on Monday, March 28, 2005 10:08 AM
Finally, an update! Thanks to easter, I managed to get a few moments available and gave a push forward on this project:

1. replicated the new fin and rudder (still needs the final touch)
2. Opened the cockpit and motor holes
3. Scratchbuilded the interior of the cockpit using evergreen, wire and the set from Tom´s modelworks
4. Primed with sand colour in order to replicate the plywood colour:

Here are some photos:


Regards,
  • Member since
    September 2004
  • From: Utereg
Posted by Borg R3-MC0 on Wednesday, March 23, 2005 9:15 AM
I have been busy with some small details and another group build. I hope to take some big steps this weekend.
1) glueing the fuselage
2) getting the wings to fit
Number 1 should be easy, number 2 is a quiet chore!

  • Member since
    November 2005
Posted by Anonymous on Thursday, March 17, 2005 5:54 PM
September 30 it is! Thanks! Maybe I'll be able to finish sooner, but one never knows....

Regards,
  • Member since
    July 2003
  • From: Keizer, Oregon
Posted by Model Grandpa on Thursday, March 17, 2005 2:55 PM
Ok...I have decided to go ahead and post an ending date to this build, It's just to easy for me to push my Fokker aside and work on other projects, so maybe this will motivate me. Smile [:)]

So the official end date is:

September 30, 2005

Hope this works for everyone.
Regards, Dan Building Scale Models At The Speed Of Dark
  • Member since
    September 2004
  • From: Utereg
Posted by Borg R3-MC0 on Thursday, March 17, 2005 1:12 PM
I'm not sure how I'm going to fix it. There also is a problem with fitting the wheel-wells in the wing, so I'm trying to find a two-for-one solution.
Right now, I'm undecided between shimming the edge with styreen or filling the gap with putty.

  • Member since
    November 2005
Posted by Anonymous on Wednesday, March 16, 2005 4:44 PM
Excellent pit RemcoGrob. Wow that dial painting is inspireing. Sorry about the wing gap. How are you gonna fix it?

Model Grandpa, Sept end date is Ok with me. I'm just waiting on some BMF to mask my crappy canopy Dead [xx(]Big Smile [:D]
  • Member since
    September 2004
  • From: Utereg
Posted by Borg R3-MC0 on Wednesday, March 16, 2005 4:17 AM
No, the cockpit is mostly resin. Al the parts came in one big piece of flash and they took a lot of effort cleaning.
I have made these kind of cockpit's before from scratch (for a avia b-35 and a yak-11, both vacforms) using evergreen styreen rod. But this one was easier, I have made some add-one to complete the cockpit using leftover PE, styreen an copper wire.

  • Member since
    March 2004
  • From: Belgium
Posted by DanCooper on Tuesday, March 15, 2005 2:45 PM
Great cockpit, Remco, is that stretched sprue ?

On the bench : Revell's 1/125 RV Calypso

  • Member since
    September 2004
  • From: Utereg
Posted by Borg R3-MC0 on Tuesday, March 15, 2005 9:06 AM
I'm not sure about setting an end date. As I told earlier, my vac's usually take a lot of time. September should be OK.

I have got some images on the net, so without further ado:


the last picture shows the gap between the upper and lower wing, caused by bad sanding!

  • Member since
    July 2003
  • From: Keizer, Oregon
Posted by Model Grandpa on Monday, March 14, 2005 9:54 PM
So as motivation the rest of us to get busy do we need to assign an “end” date to this group build? If so how far out do we want it? If we end at the group build at the end of July that would be 6 months total. We could go thru the end of September, that way there is a time limit without too much pressure. Let me know what you think.
Regards, Dan Building Scale Models At The Speed Of Dark
  • Member since
    November 2005
Posted by Anonymous on Monday, March 14, 2005 3:43 PM
Many thanks - blushing more than a bit. This is done in 33 Sqdn livery - simply because they were at Middleton St George (N England - near Darlington) where an Uncle was stationed in 76 Sqdn in 1942 and did not return from a raid in a Halifax over Essen.

The general fit was OK but a lot of the detail was a bit underdone! I was able to photo an "original" which predictably showed up the differences - like the ailerons - they have a blunt trailing edge to stop flutter - and the hinges are very pronounced. Hence it was really a rebuild! The vortex generators are with the kit (Dynavector) - photo etch - about 1.5mm square and there are about 97 of them. You drill 0.5mm holes in the wing and insert a small "tail" on the PE into it - bit of superglue and that is it!! I only lost one incidentally - they give you a few spares. The instructions are not brillaint - they tell you to put spars in the wing but omit to point out that the location is important because of other fittings. When (many years ago) I saw Javs at West Malling I recalled they were in good condition - quite clean etc. I think the RAF used to look after them because they new they would not get any more!!

This was my first vac form - I did enjoy it - a bit of a challenge - not for the Tamiya fan perhaps - and certainly won't be my last. The decals were good I have to say. Overall then Dynavector kits are OK - a bit pricey I feel; but if you like a good building challenge then can be recommended. If anyone has questions I will attempt to help
  • Member since
    March 2004
  • From: Belgium
Posted by DanCooper on Monday, March 14, 2005 2:13 PM
Congratulatons on a job well done, and then to think that I haven't even started yet... what's the deadline again ??? Propeller [8-]

On the bench : Revell's 1/125 RV Calypso

  • Member since
    November 2005
Posted by Anonymous on Monday, March 14, 2005 12:24 PM
David,

That is a VERY GOOD JOB!!!!! Congratulations. I really love the way it turned out!

All the best,
JOIN OUR COMMUNITY!

Our community is FREE to join. To participate you must either login or register for an account.

SEARCH FORUMS
FREE NEWSLETTER
By signing up you may also receive reader surveys and occasional special offers. We do not sell, rent or trade our email lists. View our Privacy Policy.