SEARCH FINESCALE.COM

Enter keywords or a search phrase below:

Battle For Germany 45 GB Starts Now - 08 May 06

93436 views
2321 replies
1 rating 2 rating 3 rating 4 rating 5 rating
  • Member since
    November 2003
  • From: Nashville, TN area
Posted by bobbaily on Friday, January 27, 2006 8:56 PM

Dave-yes, the 262 is 81/83

Rick-thanks for the info.  'touched-up' the RLM 76 this evening.  not sure if I'm going to make the effort to extend the 81/83 or save it for another build.  I'm starting to lose my patience with this build....now I need to do some touch-up on the RLM 81 where I has some overspray from the RLM 76 touch-up.....

Bob


  • Member since
    November 2003
  • From: Nashville, TN area
Posted by bobbaily on Friday, January 27, 2006 9:09 PM
.....and after surfing the web for a few minutes, I'm sitting here thinking of how best to extent the RLM 81/83 down further.......tomorrow looks like a slow day anyway.....

Bob


  • Member since
    April 2005
  • From: Piscataway, NJ!
Posted by wing_nut on Friday, January 27, 2006 11:30 PM

Bob – The progress looks good but sounds like you are making changes to make better.  Let’s see some new pics.


Jules – the stuff I was talking about is below. They cut down pretty easily to make tiny square of about 3/16” each and cutting out irregular shaped pieces of card stock and holding them up off the surface with the adhesive foam.  Nice consistent height throughout should make for a good effect I think.  A photo of the model with all those little masks all over would make an interesting shot too.


Progress - near zip!  The decals are proving to be very problematic.  This is my 1st try at printing decals and I am beginning to think if the decal isn’t black or close to it… try something else.  I made an extra set and have applied them to tape to cut out masks to spray some a white underlay.


I found a set of 1/24 dry transfer stenciling for 190’s, which was great since the kit decal sheet is nearly devoid of them, made by Hobbydecal.  These things are really great and got here pretty quick considering they came from Korea.  Even came with the burnishing tool that’s in the photo.  Tested them on the drop tank right on the paint… no gloss coat. Metalizer has to be sealed though or the transfers won;t stick.  (gee how did I know thatSad [:(])

Marc  

  • Member since
    July 2003
  • From: Bicester, England
Posted by KJ200 on Saturday, January 28, 2006 3:50 AM
Tom, I went through the losing parts thing, of kits that is not me, a while back. My wife handed me one of her surplus 12x12 paper storage boxes she uses for holding srapbooking papers. These things are about 4 inches deep, and are large enough to hold a 1/48 fighter with ease, or a 1/72 bomber.

I now have three, and each build goes into one of these as it starts. Doesn't stop me pinging parts onto the floor, but I find I now lose far fewer parts.

Karl

Currently on the bench: AZ Models 1/72 Mig 17PF

  • Member since
    February 2003
  • From: Melbourne, Australia
Posted by darson on Saturday, January 28, 2006 6:20 AM
 j.s.harrison wrote:

And as for me well, this 219 is obviously going to take all year so i'm gonna have to make a change...Darren can you please change my build to the 1/48 Tamiya Jagdpanzer 38t Hetzer, i picked it up yesterday and i'm really keen to make a start...

I will still be working on the 219 cause it has to be finished in time for the next QMHE show...

OK HELP NEDED, Im currently working on a Tamiya MKV Spit for the Canadian GB and i've just run out of Tamiya 40mm tape which i use to make the stencils, all 3 of my LHS's are out so if any of you guys have some spare i could really use it.....

Jules I know the feeling, the 262 was just going to take tooooo long so I've got it running as a side project until the IPMS Nationals later in the year.

Also disregard the message I just sent because I've just checked my stocks and I have a spare roll of Tamiya 40mm tape.  I'll make sure it's on its way to you on Monday

Cheers

  • Member since
    February 2003
  • From: Melbourne, Australia
Posted by darson on Saturday, January 28, 2006 6:32 AM

Bob thanks for the kind words, I appreciate it.

As to your camo issue, apart from the double action A/B I agree that your best option would be the index card with holes punched in it.  I've seen this used before and it looks really effective.

Cheers

Darren

  • Member since
    July 2004
  • From: SETX. USA
Posted by tho9900 on Saturday, January 28, 2006 8:11 AM

Jules - I looked around and the only Storch mentioned in 1/48 was an ESCI kit which I think you woud have to look for an ebay or such... I saw a review here awhile back and the person who built it said it was a decent build except for the struts and such (just like the one I built).

The Storch was surprisingly big though, bigger than the FW-190 A8 I was building, so you might find the 1/72 version not hard to handle.  And for the $6 US or so it costs it wouldn't be a big waste if you decided you didn't like 1/72.  I didn't think I would like the scale, till I opened up these two kits...

Of course in 1/32 I think it would look most impressive hanging from the ceiling!

---Tom--- O' brave new world, That has such people in it!
  • Member since
    August 2004
  • From: Nowhere. (Long Island)
Posted by Tankmaster7 on Saturday, January 28, 2006 8:22 AM
I'm about to get the 1/32 hasegawa stuka and fw-190 a8. this is what comes of going to club meetings and being impressed by the builds people bring in... I love fw-190s. especiall the stubby-nosed ones. I'm starting to be obsessed with the darn things.
-Tanky Welcome to the United States of America, a subsidiary of Exxon Mobil Corporation, in partnership with Halliburton. Security for your constitutional rights provided by Blackwater International.
  • Member since
    July 2003
  • From: Bicester, England
Posted by KJ200 on Saturday, January 28, 2006 12:34 PM
Jules, you're a brave man taking on that Uhu, though I can't wait to see it finished.

Tanky, you've just got to love 190s, I know I do. Having said that I've only built a couple of the Revell kits in 1/72 since returning to the hobby. Maybe I'll follow Tom's lead and build the Hasa 1/32 kit.

Marc, nice idea with the foam pads and cardstock. You can buy the foam already cut into small sqaures at most craftshops. I know because my wife uses them for scrapbooking.

Progress Update.


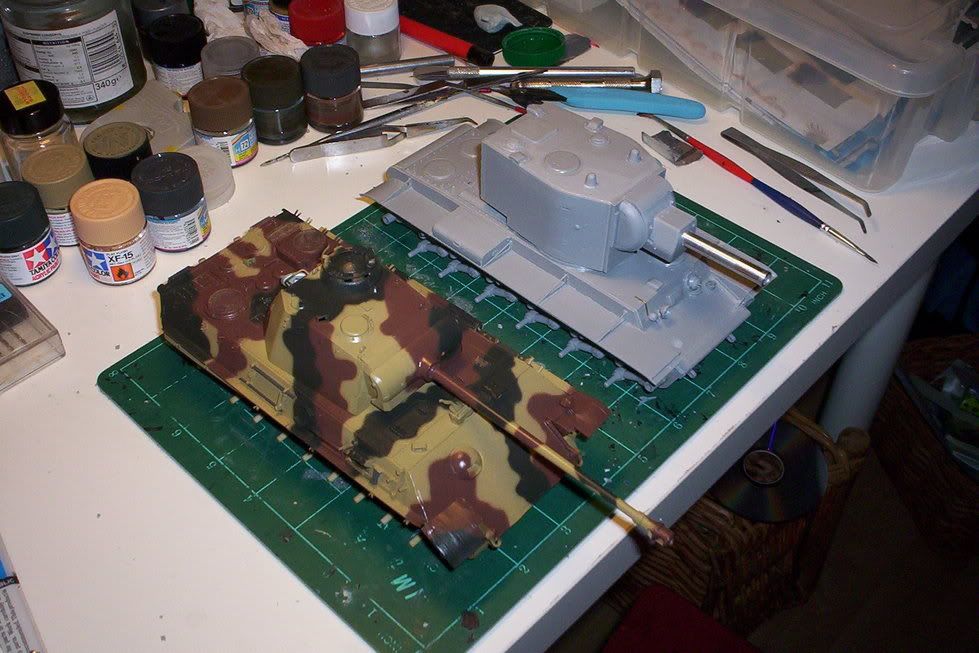
Finally got the camo on the Panther to a position where I'm happy to gloss coat it. Leaving cure overnight, then tomorrow I'll apply the Future.

Then I'll put the turret on and take some pics. I've managed to resist the temptation of putting the turret on for a whole two weeks now, and it's killing meSad [:(].

That is assuming I don't go down with the stomach bug that's taken out my wife and sons in the last few days!Yuck [yuck]

Karl


Currently on the bench: AZ Models 1/72 Mig 17PF

  • Member since
    November 2003
  • From: Nashville, TN area
Posted by bobbaily on Saturday, January 28, 2006 2:07 PM

Marc-you want pictures...you got pictures:

With a little luck, I might mask off and apply (or is that re-apply the 83) late tomorrow.  Used some strip styrene attached by poster putty (kinda like blue tac) to move it away from the surface. Problem I'm having issues with my compressor.  Under 20 psi, it bleeds off 5-10 psi..quickly.  Worse at lower psi.  Did some testing...checked fittings...problem is in the regulator.  No problem, right?  Wrong.  Looks like this unit (Hausfield-Campbell) was manufactured by attaching the regulator to the tank THEN attaching the motor, making it VERY difficult to install a new regulator.  Will figure out something though.

Rick-Thanks again for your input on my camo scheme.  Always appriciated. If you have one available, would you mind posting a pic of your 262 build?  thanks

Karl-looking forward to pics of the Panther. 

Bob


  • Member since
    February 2003
  • From: A Spartan in the Wolverine State
Posted by rjkplasticmod on Saturday, January 28, 2006 3:22 PM

Bob, I don't have pics of my Red 13 on any host site or on my computer, but I do have them on a DVD somewhere.  I'll try & dig em out & post.

Regards,  Rick

RICK At My Age, I've Seen It All, Done It All, But I Don't Remember It All...
  • Member since
    December 2003
  • From: Olympia, WA
Posted by wooverstone8 on Saturday, January 28, 2006 9:33 PM

Finally got the cockpit completed for my 190 D. Here are some pictures:

  • Member since
    June 2005
  • From: San Tan Valley,AZ
Posted by smokinguns3 on Saturday, January 28, 2006 9:45 PM
Holy Cow that is tiny just enough space to teach my pinky finger how to flyBig Smile [:D] It looks keep up the good work.
Rob I think i can I think i can
  • Member since
    February 2003
  • From: A Spartan in the Wolverine State
Posted by rjkplasticmod on Sunday, January 29, 2006 9:07 AM

Bob, here's the pic of Red18 I did a few years ago.  Sorry about the pic quality, this was scanned from a 35mm print before I went digital.  Hope it's helpful.

Regards,  Rick

RICK At My Age, I've Seen It All, Done It All, But I Don't Remember It All...
  • Member since
    July 2003
  • From: Bicester, England
Posted by KJ200 on Sunday, January 29, 2006 4:16 PM
Wooverstone, nice job on the 190 pit.

Rick, great looking Schwalbe.

Progress Update

Future applied to the hull, turret, and all the wheels, of which there are a rather a lot!

Dafur, ein Panzerkampfwagen V mit Turm......
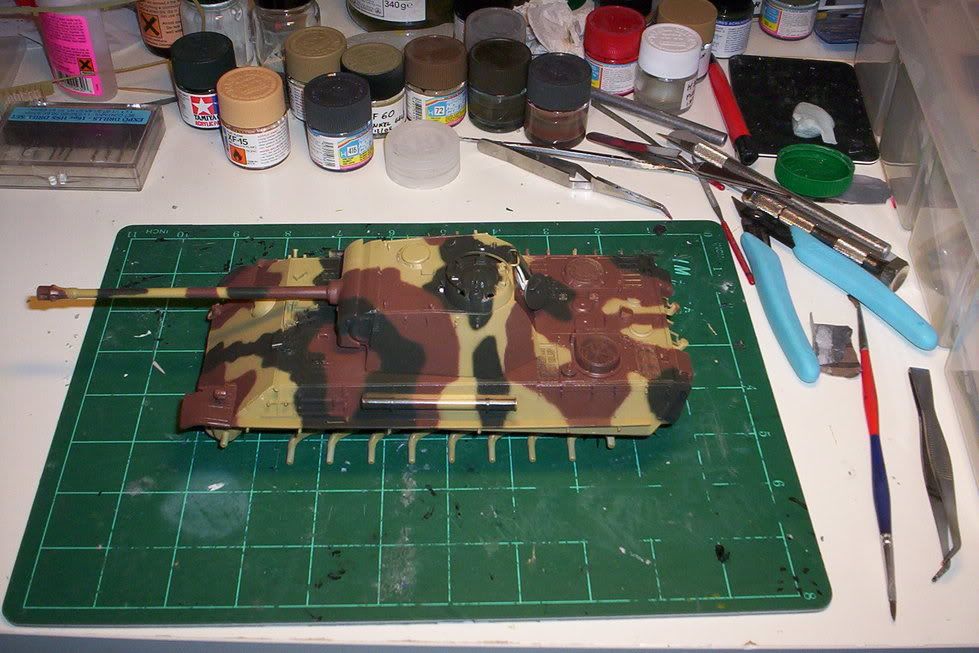


You can just see the open escape hatch...
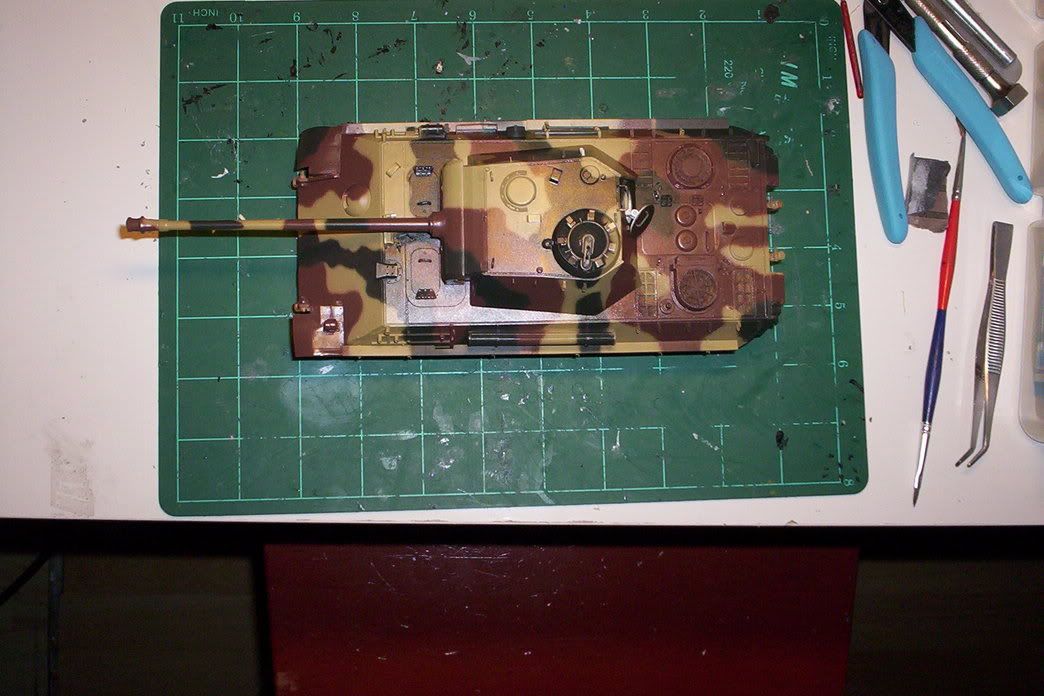


,,,I'll add the machine gun later, because I know I'll just break it off otherwise.
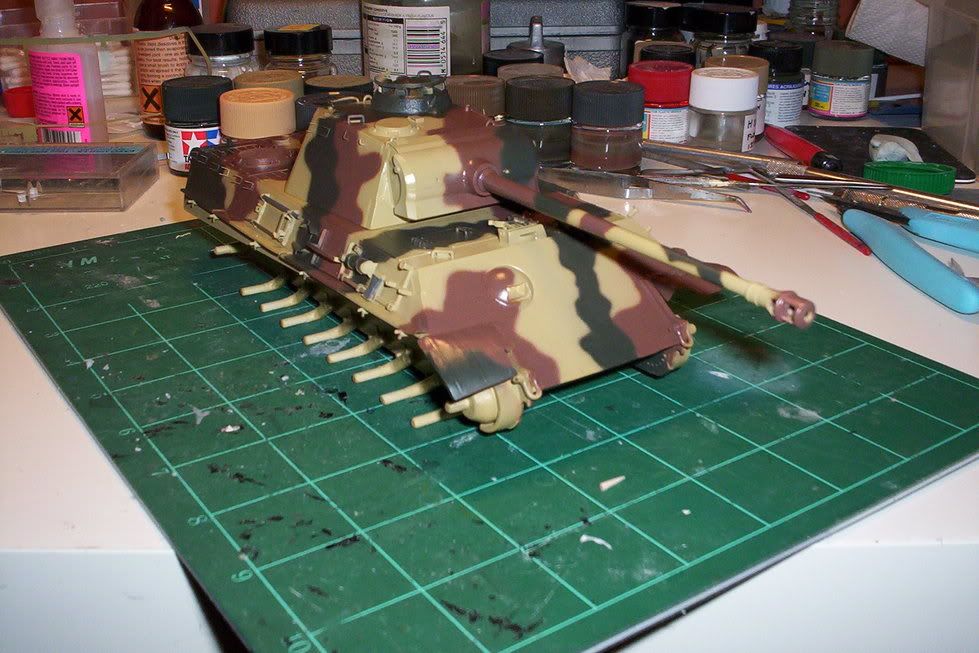


And noe some shots alongside it latest stablemate......
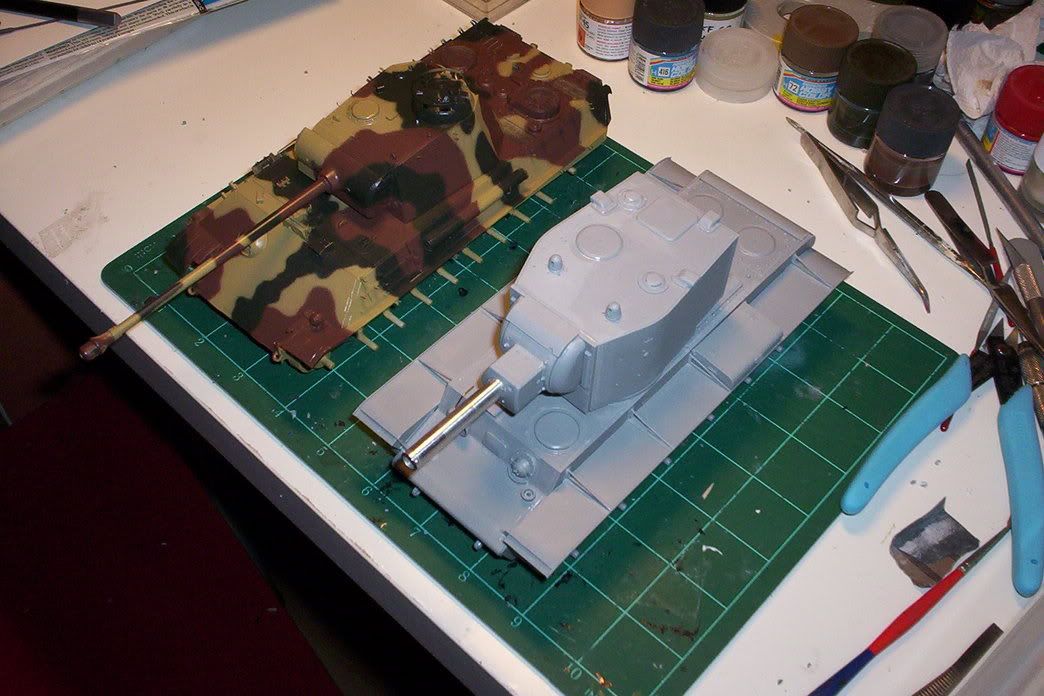


.....I thought the KV would dwarf the Panther, but it doesn't.

I've already started applying a wash to the wheels, and the decals can go on tomorrow night.

Karl

Currently on the bench: AZ Models 1/72 Mig 17PF

  • Member since
    April 2005
  • From: Piscataway, NJ!
Posted by wing_nut on Sunday, January 29, 2006 5:23 PM

Wooverstone – nice looking pit and man is that tiny… about the same size as my gun sightWink [;)]


Rick – great 262 and the pic quality is just fine


Karl – That is looking real nice.  I am going to be watching for your weathering procedure for when I start my 1/16 T-34


I flew out today for a convention in Dallas (just killin’ time here ‘til cocktail hourSmile [:)]) and got a pic of the tail of a jet at La Guardia (no way to post pics from here) that has me rethinking the weathering "pattern".  I starting looking all the jets and noticed the same thing... lots of streaking straight down from when the a/c is idle.  Got to figure there is a large amount of down time for a combat a/c as well and as I look at the weathering on models it seems there is a lot of focus on pulling all the weathering back and not much form when the place is grounded due to bad weather etc.  And to add a note to the “can of worms” and “overdone panels line” threads… I was 100 ft away and the panel line where nice, straight black lines… very prominent.


Marc  

  • Member since
    July 2004
  • From: SETX. USA
Posted by tho9900 on Sunday, January 29, 2006 5:52 PM

Nice work Karl and Wooverstone!!!  (sorry I forgot your name since it isn't on your tag Disapprove [V])

For me... finished the Fi-156, not going to weather it... ok well maybe a little... Pics later.

No progress at all on the Tiger II, unless you count cutting the exhaust tubes from the sprue progress... I think I am going to take a break from it as I have till May to finish.  I think all the down time waiting on the Panzer Green to arrive (still not in yet.. no worry I bought some at the NSLHS and have the pack in the mail Friday with all the Panzer colors I need for later.) helped me lose interest...

I've decided to pick up the A7E Corsair my wife's "foster" family (the people she lived with all through college and her first teaching job) sent me... it's the Italeri 1/72 and it looks halfway decent.  Absolutely no interior detail but a fair amounbt of ordnance to decorate it with.  Thing is they are coming to spend next weekend with us so I thought it would be nice to have it built by then (a simple kit should be no prob)

---Tom--- O' brave new world, That has such people in it!
  • Member since
    February 2003
  • From: A Spartan in the Wolverine State
Posted by rjkplasticmod on Sunday, January 29, 2006 6:59 PM

Karl, very nice work on the Panther.  Should be a winner !

Regards,  Rick

RICK At My Age, I've Seen It All, Done It All, But I Don't Remember It All...
  • Member since
    December 2003
  • From: Olympia, WA
Posted by wooverstone8 on Sunday, January 29, 2006 7:49 PM

Karl: The Panther tank looks superb and it’s also a nice comparison with the KV-2.

Rick: Your Me 262 is nicely done, the picture quality looks good to me.


Progress report: Not much progress. I’ve glued both halves of fuselage for the 190 D. then  I'll install the cockpit once the glue dries. 

Thanks everyone for your nice comments on the cockpitBig Smile [:D].

  • Member since
    November 2003
  • From: Nashville, TN area
Posted by bobbaily on Sunday, January 29, 2006 8:16 PM

Wooverstone-very nice work-'specially in small scale.

Karl-Panther is progressing nicely.  Just can't seem to find time to start on mine.  Busy repainting the 262..

Rick-Very nice work on Red 13.  It provides a good reference for me.

Here is my latest attempt on Red 13.  Pleased with the horizional surfaces (not as nice as yours Rick, but I'm pleased with it).  However, I had peeling issues on the wings again.  Did a little touch-up with a brush.  Weathering should hide the rest.  Might end up airbrushing again...dunno...

Bob


  • Member since
    February 2003
  • From: Melbourne, Australia
Posted by darson on Monday, January 30, 2006 5:57 AM

Bob here you go, I found this on the web today, Rick should be able to tell if it’s accurate or not from his other references.


Sean great looking front office, I can't wait to see the rest of the bird.

Rick absolutely fantastic looking build as usual.  Btw, is that the Tamiya kit?

Karl great looking Panther and I'm looking forward to your weathering process as well because I have three armor kits on the go at the moment (all 1/48th) and I want to try out some of your moves.

Tom I have that Italeri A-7 and it's not a half bad kit at all.  You are right though the interior is a bit sparse so a closed canopy is probable the go.

Progress Update
Well the weather has finally broken here and that damn humidity has gone, so tonight I was able to spray the RLM 76 on the lower parts of the Dora Thumbs Up [tup].  The only issue I has was when I thought my airbrush was just 'not quite right' so I broke it down and discovered that Captain Stupid Blush [:I] Banged Head [banghead]Dunce [D)] has forced the needle too far down into the nozzle which has basically (pardon me) stuffed my nozzle.  Oh well, stuff happens and I've ordered a replacement from Bear Air, in the mean time I'll continue on with the .35mm needle & nozzle.

Cheers
Darren
  • Member since
    July 2004
  • From: SETX. USA
Posted by tho9900 on Monday, January 30, 2006 7:05 AM

Bob - looking good!  actually that looks almost identical to a wartime shot of a 262 I saw the othernight.. I'll see if I can find the shot again and post it for ya.

Darren - tough luck on the airbrush... that's gotta hurt!  And yeah I am doing the A7 with the black foreparts of the canopy frame so I think closed would show that off better...

Gotta go to work!  later!!!

---Tom--- O' brave new world, That has such people in it!
  • Member since
    November 2003
  • From: Nashville, TN area
Posted by bobbaily on Monday, January 30, 2006 8:55 AM

Darren & Tom-thanks for the info.  Darren-that pic is what I'm using for my wallpaper on my pc @ work.  I try to take my project to wallpaper to review during the day and try to come up with plans/ideas.

Tom-I think I know the pic you are referring to-Modeling Madness web site?

I'll be glad to get this one finished.

Bob


  • Member since
    February 2003
  • From: A Spartan in the Wolverine State
Posted by rjkplasticmod on Monday, January 30, 2006 9:30 AM

Bob, your 262 is looking good.  Glad my pic helped a little.

Darren, my 262 is the 1/48 Tamiya kit, built about 3 years ago.  The profile pic of red 13 is not accurate based on my research, but it seems to be the reference Tamiya used for the kit painting guide.  I was quite frustrated trying to find an accurate reference for Red 13, the few pics I could find of the real aircraft were dark & blurry.  I got some help here from Forum members Jeff Herne & Pixelater & one of them, don't remember who, led me to an excellent reference site, which I used as my guide.  Sadly, I lost that link when I changed Computers.

Regards,  Rick

RICK At My Age, I've Seen It All, Done It All, But I Don't Remember It All...
  • Member since
    November 2004
  • From: Salisbury Massachucetts USA
Posted by PanzerWulff on Monday, January 30, 2006 11:19 AM
WOW great looking stuff guys I especially love the Panther. Karl the Panther and thePanzerIV are my favorite german armor from WWII .sorry i haven't been able to post any progress this week my nephew Aaron age 12 was over for a long weekend,so we finished his Monogram P-40 Tigershark his very first model. Then we brought it down to the LHS to show it off the owner (who by the way is the local modeling club president) he was so impressed that the 2 of them talked for over an hour.After that I told Aaron to pick out the next model he wanted to build,he decided to try a tank a Tamiya 1/48 Stug III and the LHS owner told Aaron that "It's ON THE HOUSE" Aaron was estatic so i hope to soon post a pic or 2 of my nephews P-40
ACE??? you were NEVER an ace AN ace HOLE maybe! (Lister to Rimmer on BBC's RED DWARF) Chris"Hey GRAVITY still works"Gray
  • Member since
    December 2002
  • From: Reno, NV
Posted by espins1 on Monday, January 30, 2006 11:37 AM

I'd like to join this build if it's not to late.  Put me down for the Hasegawa 1/48 Fw190 A8. 

I began work 2 weeks ago, it's mostly built, just waiting to have the camo sprayed.  My spraybooth is arriving today or tomorrow, so I should have some pics to post soon.

Scott Espin - IPMS Reno High Rollers  Geeked My Reviews 

  • Member since
    December 2003
  • From: Olympia, WA
Posted by wooverstone8 on Monday, January 30, 2006 5:48 PM

Bob: The Me 262 looks pretty good, can’t wait to see it finish. BTW I have a color profile of red 13 in a reference book if you’re intrested.

  • Member since
    September 2004
  • From: Vernon, BC, Canada
Posted by razordws on Monday, January 30, 2006 7:52 PM
Sean: Nice cockpit! which kit are you doing?

Bob: Red 13 is coming along nicley. The mottle on the tail surfaces turned out great.

Karl; Nice Panther but that KV turret is massive. I need to do one of those some day. Is the KV for this GB as well? I hope to see some more progress pics of it.

Chris: That's a great story and sounds like you have a cool LHS owner. I wish more of them were like that.

Dave

  • Member since
    February 2003
  • From: Melbourne, Australia
Posted by darson on Monday, January 30, 2006 11:01 PM
 espins1 wrote:

I'd like to join this build if it's not to late.  Put me down for the Hasegawa 1/48 Fw190 A8. 

I began work 2 weeks ago, it's mostly built, just waiting to have the camo sprayed.  My spraybooth is arriving today or tomorrow, so I should have some pics to post soon.

Hi Scott and no it's not too late to join up at all so welcome to the build.  I'll add your details to page 1, so now all we need are some photos.

Cheers

  • Member since
    July 2003
  • From: Bicester, England
Posted by KJ200 on Tuesday, January 31, 2006 3:24 AM
Darren, glad you like the Panther. I might have to pick up a few a of those Tamiya 1/48 kits myself.

Dave, the KV2 turret looks like it belongs on a battleship doesn't it, not a tank! The Russians only used the KV2 between 1940 and late 1941, however the KV could be applicable for this GB, as the Germans used one to defend the Krupp works in Essen, see link below:

http://www.missing-lynx.com/gallery/russia/migkv2.htm

Mine's already got fenders, so I'll have to stick to my original plan of a 1941 machine.

Progress Update

I applied the decals yesterday, and then kicked off the wash process. I've applied a mix of Burnt Umber and black watercolour to all the panel lines nooks and crannies, including all the wheels. See pics below:


Since the pics were taken I've started on the dry brushing, but I'm trying to keep this fairly subtle.

Karl


Currently on the bench: AZ Models 1/72 Mig 17PF

JOIN OUR COMMUNITY!

Our community is FREE to join. To participate you must either login or register for an account.

SEARCH FORUMS
FREE NEWSLETTER
By signing up you may also receive reader surveys and occasional special offers. We do not sell, rent or trade our email lists. View our Privacy Policy.